I’m always very happy to feature Chuck Arlund as a guest on Tangents. Anyone who knows Chuck in person will tell you about the crazy energy he has, and how inspiring and innovative he is in his lighting.
Back to basics. When shooting a portrait or any person for that matter it is good to understand some light patterns to help determine what kind of mood you would like to create.
Photography lighting patterns
a guest post by Chuck Arlund, Kansas City photographer
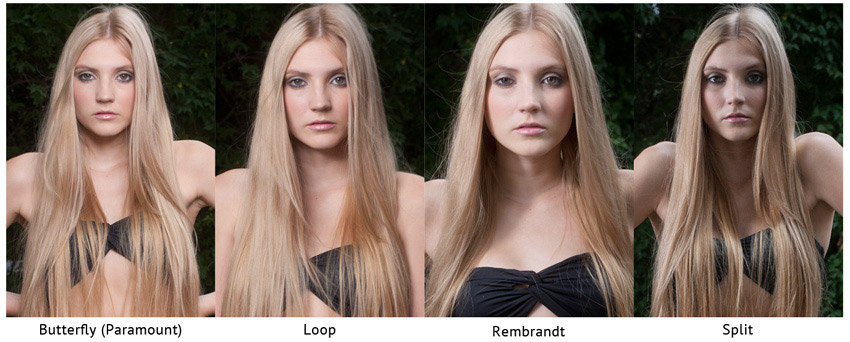
Basically there are 6 light patterns.
- Butterfly / Paramount
- Loop
- Rembrandt
- Split
- Monster
- Profile
So why do I need to know these? It’s not necessarily knowing them but being able to recognize them will help educate yourself on how a photograph was lit if you are trying to learn lighting. It also can help to know exactly what you are looking to create in your own photograph.
“Nice” light is what most of us photographers are searching for, but novice photographers might not know what makes light “nice”.
Well, one thing that makes light nice is the way light strikes a face.
Remember a couple of things. Light travels in a straight line and you can shape it.
One of the reasons I do not love lighting diagrams is they are geared towards that one specific photograph. Every time I tried to recreate a portrait from a book by following the light diagram, I ended up with a flat image. I was once told to “just put a light up where you want it” I thought at the time the photographer was just being a snot but he was correct. If I need to light up some hair, I put a light on it. If I need to put a light on a chair, I turn a light on.
Our job is to figure out how to shape that light.
Is it going to be diffused or harsh?
How narrow or broad is the light?
What color is the light?
Stuff like that.
So lets get down to some light patterns.
Quick Rule ( even though I hate Rulez!)
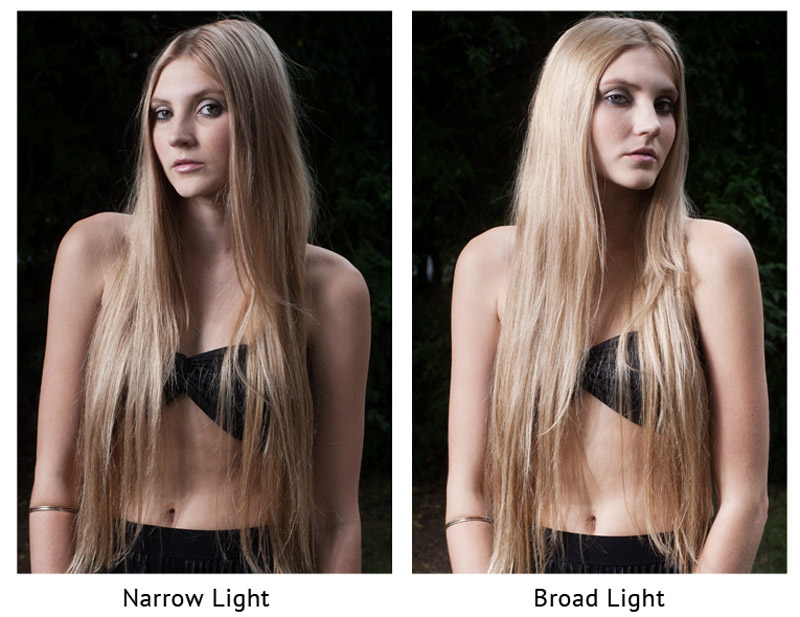
Broad vs Narrow Light
Narrow light or short light will generally make your subject appear thinner. You accomplish this by turning your subject toward the light source so the shadow of the nose is facing the camera.
Broad light is basically the opposite where the subject will appear to be larger. Do this by turning your subject away from the light so you see the lit side of the nose.
What is better? Well, that is up to you and in fashion both styles are used fairly equally even though narrow light is considered to be more flattering.
Part of knowing what you want to do is understanding your light patterns.
Chuck’s favorite: Loop Lighting!
I personally like loop light because it is just a bit off center and gives you some dimension.
Drama I believe comes from the height of the light. Think as the sun rises and sets. Higher light gives a downward shadow and that adds drama and that light is usually harsher. As the sun sets, the direction of the shadow changes and the light will get more diffused. With flash we have the control to make any kind of light we want at any time.
Think about shadows.
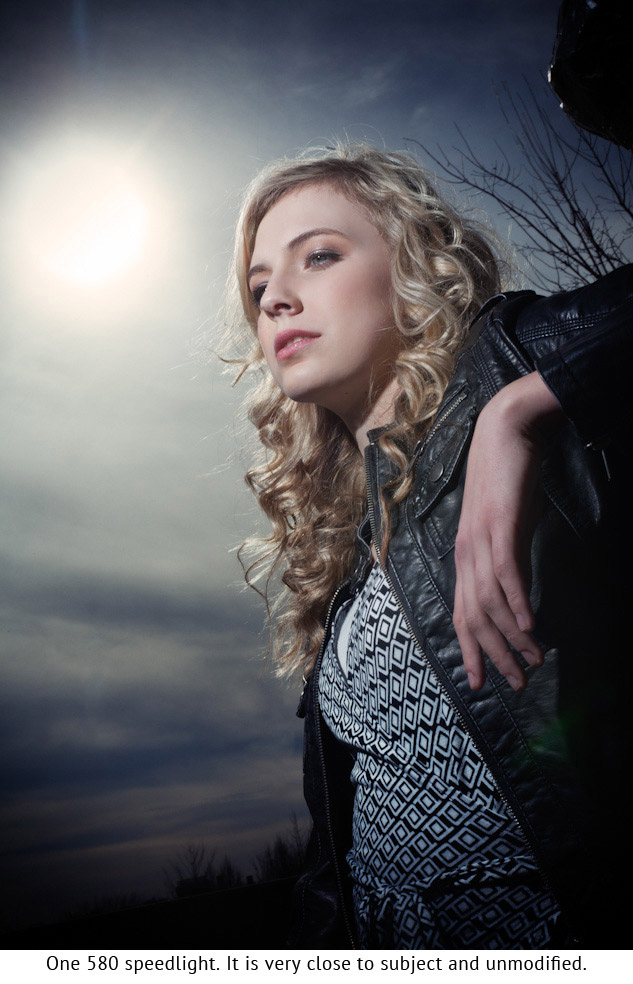
Think about how close the light is. The closer the softer the light will be and you will not need as much power. Close light also concentrates the light more on the subject and less on surroundings allowing more “shape”.
Diffusion:
Diffusion is created by how you modify your flash or any light for that matter. Types of diffusion include Soft box, Umbrella, Beauty Dish, Grids. There are tons of ways to modify light. I use mirrors and a interstate street lamp a lot of times. Soft light is generally more flattering than harsh light. Soft light can have direction, just think about placement and how high you want it.

Think about what kind of look you are going for, an edgy fashion style image or perhaps a more subtle portrait. Test your modifiers. Take a photo with a umbrella and then see what it looks like without any modification. This is the best way to learn what kind of “look” you like. Think outside of the box also. What would happen if you opened the top half of a soft box and let the other side stay diffused?

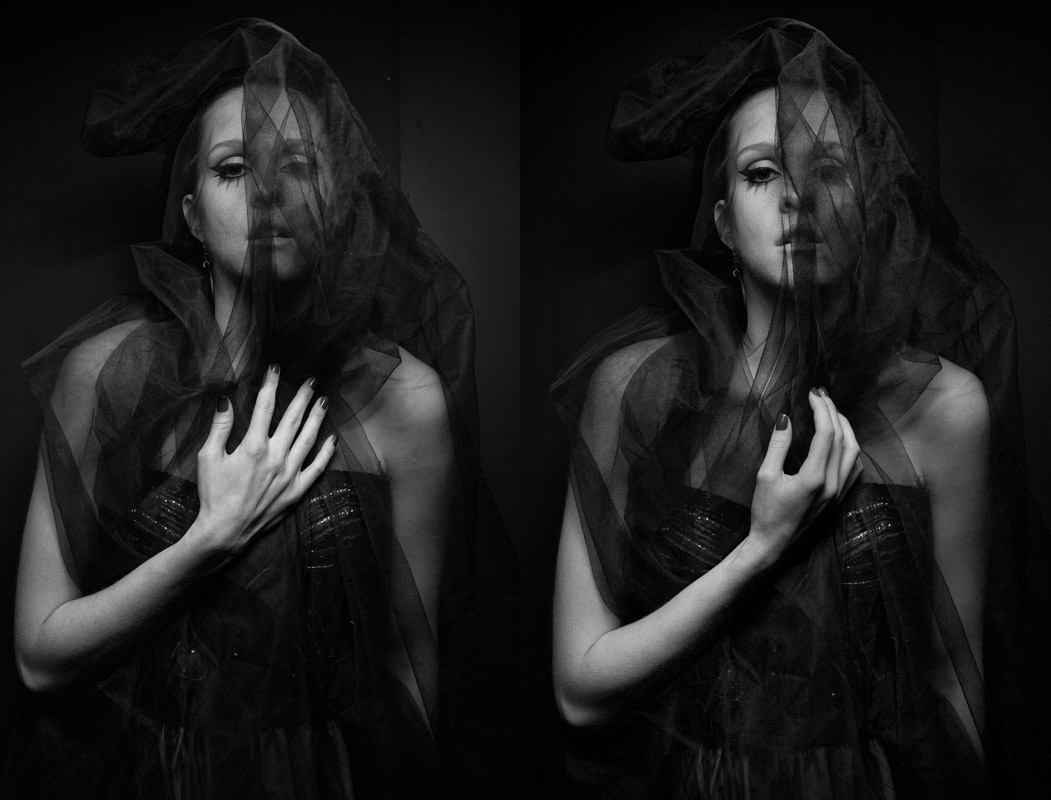
One more little rule about hands.
I just recently shot an image that I loved but her hand looked a little scary. If you ask your subject to roll her hand you will take attention away from it. The back of a hand is basically a giant white spot that draws attention to it, and that in turn could take away attention from where you intended.
other Tangents guest articles by Chuck Arlund
- Fashion photo shoot, using multiple lights
- Inspiration and Homage
- Simple on-location lighting techniques – reflector & flash
wow! this is truly good stuff that I happen to be focusing on right now, just playing around with and experimenting with different types of lighting techniques. Thank you!
Neil, since your workshop I attended at WPPI last month I have been a changed person/photographer. I have been shooting models a few times each week , working with flash, I love your K.I.S.S. approach to flash and the tangents you have been running lately scratch me right where I itch. Thank you sir! Ray
Once again Neil, you hit the nail on the head. The descriptions that are listed in this post are so succinct. These descriptions are easy to understand, especially for someone is just entering the realm of artificial lighting.
Your posts this list week have been particularly informative. I have shared them with quite a few of my friends and all were impressed with your blog.
Keep up the good work.
Robert
Mmm, good article. And that last little tip about the placement of hands is priceless!
Chuck is a super energetic teacher. Thanks for always sharing your experience.
Wow..that one 580 speedlight photo looks amazing. I assumed that it’s on manual, about two feet away? Was the flash head zoomed in?