Photoshop: Adding texture layers to photos
Adding a texture layer to an image is a relatively easy way to enhance an image where there are large tonal areas that are even. That bit of texture can just be the bit of sweetening to make the photo more eye-catching. Of course, the way the texture layer is added, can be subtle or very noticeable. Your choice.
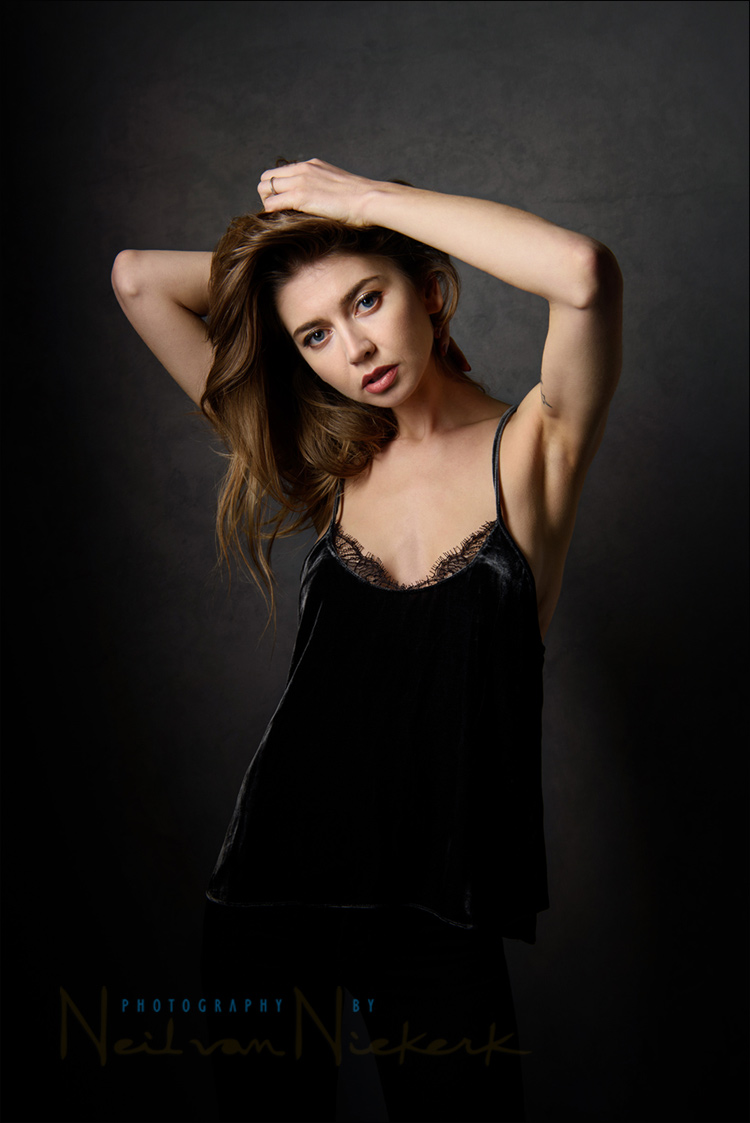
I felt this dramatic photo of Claudia, taken in the studio, could use an extra bit of juice. There are different ways of doing this. Again, your choice. Here is how I (sometimes) add textures to photos:
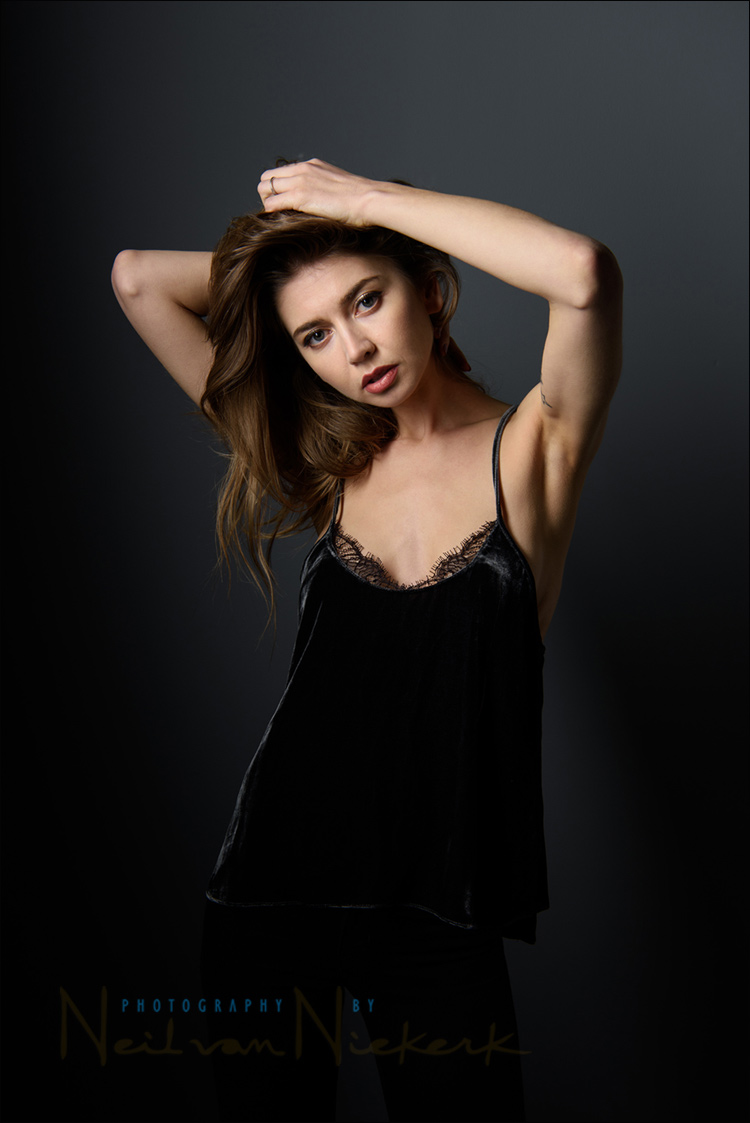
The roll-over image shows the before / after versions. The “Before” image only had a few skin blemishes removed. Very minor retouching. I brightened her face a little bit and enhanced the highlight in her hair a bit.
Using the History Brush (at 10% opacity in Screen Mode), is my usual quick way of lightening parts of an image.
Then I added the texture layers in Photoshop, by dragging the texture image onto the main photograph. Resize the texture images to fit the main photo’s size.
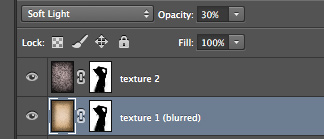
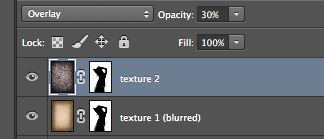
In this example, I added two textures. I also changed their opacity levels, as well as the Blending modes. Again, there is no specific recipe. Your choice.


As you can see in the two screen captures, there is a layer mask for both the texture layers. You don’t have to be super-specific when erasing the areas where you don’t want the texture to appear. (You don’t want texture splotches on your subject.) A few quick sweeps with the Eraser tool should do it. But the overall technique is quite straight-forward: add textures by dragging them onto your main photo, and adjust them until they are to your liking.
Related articles
- More articles on digital imagining / Photoshop
- Using a gridded stripbox as the main light (model: Claudia)
- Lingerie photo session – Lighting, light & textures (model: Melanie)

Did you reduce the texture over Claudia? I am assuming you did. I like the way the profoto box gives some nice lighting on your background too, all from a single source of illumination.
Yes, as you can see in the two screen captures, there is a layer mask for both the texture layers.
You want to mask out the texture so it doesn’t splotch your subject.
(I’ve updated the text now to explain this more clearly.)
Just a side note Neil…I really like that Before/After slider rollover. Is that software that’s commercially available? Great work as always…thanks for sharing your talent and knowledge.
It’s a free WordPress plugin called, Twenty-twenty.
Quick tip: if you put both textures into a group and put a layer mask on the group, its a lot easier to refine the mask for both layers (or all three, or what have you). That also lets you be a little sloppier with any additional per-texture (or what have you) mask you’d want to use on the individual layers.
Great tip! I use it sometimes, but should remember to use it more often.
Love how the textures add this subtle extra.
Great post, thanks for this. Where do you find your textures?
You can find textures via a search on Google.
I’ve also acquired a bunch of them via photography education bundles that I’ve bought.
I just discovered this website which sells lovely delicate textures.
Flypaper textures
Also a fun thing to do – you can shoot your own. Find textures and photograph them – sidewalks, building facades, pretty much anything which has a certain consistent tonality.