review: Litepanels Sola 4 LED Fresnel Light
The dramatic look that video lights lend to photographs, is a regularly explored topic on Tangents. I also cover the use of video light in my book Direction and Quality of Light.
The video lights that I have been favoring, are the Lowel ID-Light (affiliate), but like other halogen video lights, it tends to run hot. LED video lights (affiliate) that are meant to be hand-held or mounted on a camera, also tend to be under-powered for some uses. And since video lights tend to be small light sources, their light is quite contrasty. So there are some limitations.
So when I got to try out the Litepanels Sola 4 LED Fresnel Lights (affiliate), I was quite keen. Especially because the arrival of these lights coincided with one of my favorite models, Ulorin Vex, visiting the East Coast for a few weeks. Ulorin Vex’s dramatic style and clothing would be very well suited to this kind of lighting.
More about the Litepanels Sola 4 Fresnel Light specifications
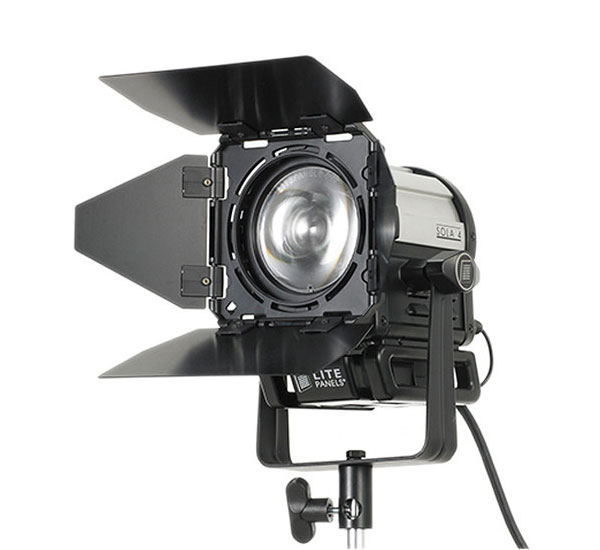
The Litepanels Sola 4 LED Fresnel Lights (B&H / Amazon) is a lightweight 4.0″ Fresnel light that is Daylight balanced at 5,600K.
The beam can be dimmed, (ie, adjusted for brightness). It can also be focused between 72° to 13° which means the area that the light covers, can be adjusted with the one control knob on the back. The light is delivered by heat-free daylight-balanced LEDs.
According to the spec sheet, the Sola 4 uses only a small fraction of the power a conventional fixture would require to produce the same volume of light (39W, equivalent to 300W of HMI light). It definitely doesn’t produce much heat.
The spec sheet also states that the color balance doesn’t shift as the light is dimmed. This is hugely important.
Video clip: behind the scenes of this photo session
A behind-the-scenes video clip of the photo session with Ulorin Vex. We did three different setups with Ulorin Vex – three different outfits, and three different ways of using these lights. Even though I used very specific lights here – the Litepanels Sola 4 LED Fresnel Lights (affiliate) – I hope that the commentary, and the way the photo shoot was directed, will be instructional and perhaps even entertaining. Enjoy!
Photo gear (or equivalents) used during this photo session
- Nikon D4
- Nikon 24-70mm f2.8G AF-S /equivalent Canon 24-70mm f/2.8L II
- Nikon 70-200mm f2.8 AF-S VR II /equivalent Canon EF 70-200mm f/2.8L IS II
- Litepanels Sola 4 LED Fresnel Lights (B&H / Amazon)
- Profoto BatPac portable battery
Photo gear used to create the video clip
- Manfrotto fluid-head Video Monopod
- Manfrotto 458B NeoTec Pro tripod
- Manfrotto 701HDV Fluid-head for Video
- Sennheiser Lavalier microphone
- video clip edited with Final Cut Pro X

The Litepanels Sola 4 Fresnel Light in use
The Sola 4 runs on AC power (110 – 240 VAC). To work with them on location, I used the Profoto BatPac portable battery (affiliate) to effortlessly run these for the three different parts of this photo session.
There is a behind the scenes video clip of this shoot, that will be up in a few days.
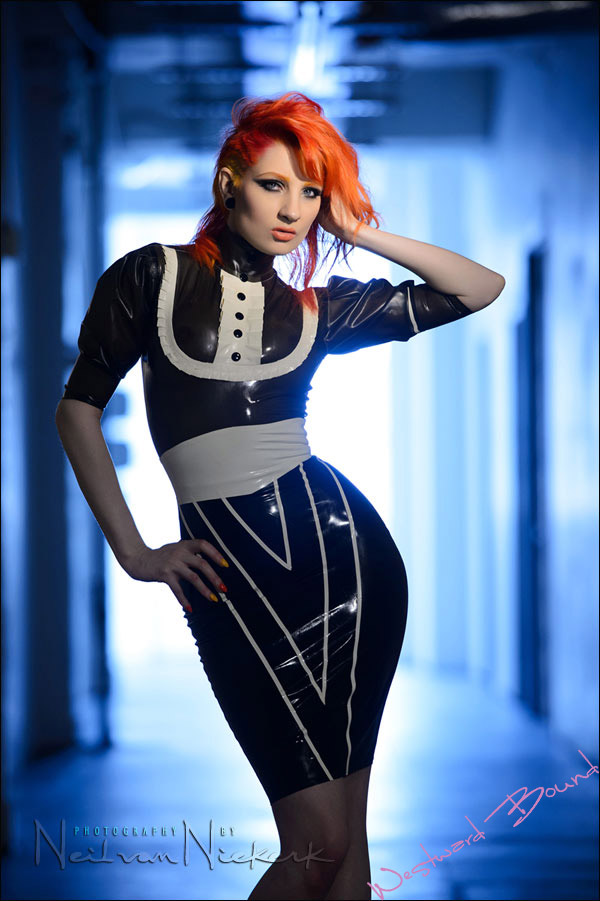
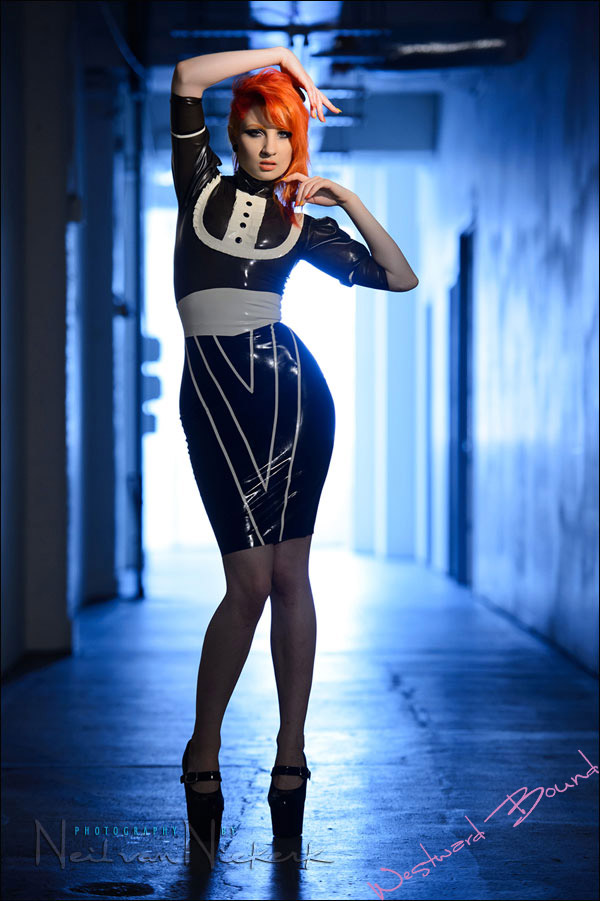
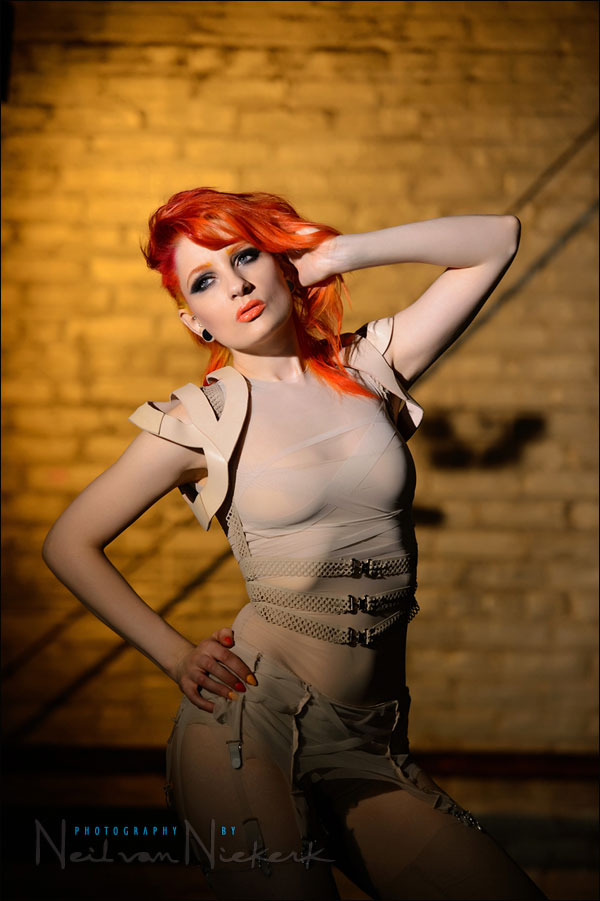
Let’s run through the first setup, and see the thought-process behind the image at the top.
For this first setup, I decided to use the passage outside my studio area. With the strong backlighting, I wanted the background to blow out a bit. The initial test shot showed that we could be onto something here.
- 1/200 @ f/3.2 @ 800 ISO
- Nikon D4; Nikon 70-200mm f2.8 AF-S VR II
For this series of images, I used two Litepanels Sola 4 LED Fresnel Lights (affiliate) on light-stands to camera right. The one beam was set to a wide spread, and with the power down. This would be the fill light so that there was a hint of detail lower down on her body. It also made the main light slightly less contrasty.
The main light was the other Sola 4 focused more tightly on Ulorin Vex’s face.

- 1/200 @ f/3.2 @ 800 ISO
- Nikon D4; Nikon 70-200mm f2.8 AF-S VR II
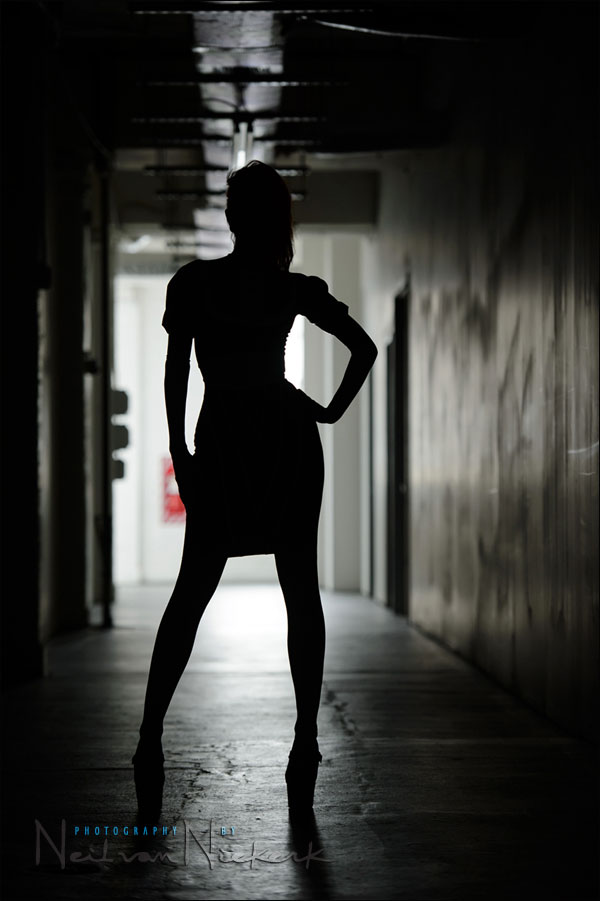
Drama! I love it. But the daylight WB image looked like it could do with something more.
With this in mind, I used two of the gels that come with each head, and gelled the lights for Tungsten / Incandescent. This turned the background blue.
- 1/125 @ f/3.2 @ 1250 ISO
- Nikon D4; Nikon 70-200mm f2.8 AF-S VR II
The gels cut down the amount of light, so I pulled my shutter speed lower, and the ISO a touch higher. This in turn made the background blow out even more – and I think this added an even more ethereal effect to the final image.
The behind-the-scenes video clip will show more of the specific setup.

Teaser images of the other two setups we shot with Ulorin Vex, using the Litepanels Sola 4 LED Fresnel lights. More details to come in follow-up articles.
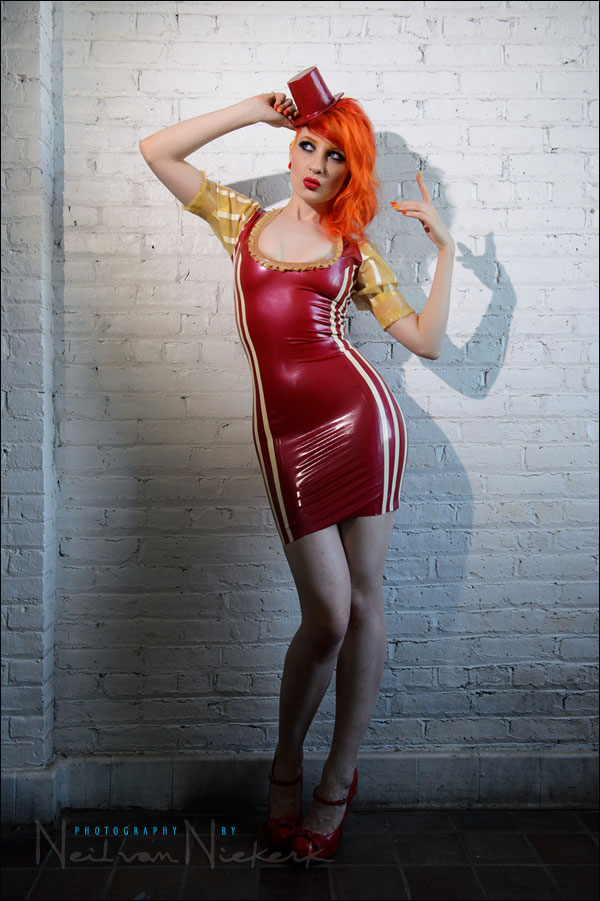
Ulorin Vex’s latex outfits by Westward Bound
Summary
These units are very easy to use – as video lights tend to be. The two control knobs on the back are obvious – dimmer & focus. The way to tilt the light is obvious. The barndoors are easy to clip on once you figured out they have to slide in from the top.
One quibble, when the lights are focused, there is a dull spot in the middle when the light is spread towards the very wide end. Ideally, the light could be more evenly spread then. So we tended to work with the lights focused within a certain range. The beauty of continuous lights though is that you can see the effect. The adjust-to-taste aspect of continuous lights mean that you will generally see exactly what you’re going to record with your camera.
The other disadvantage to the lights is the need for external power. If you work outside of the studio or some convenient indoor place, you’re going to have to run extension cables or bring along an external power pack that can give AC. It takes 14-28V DC (via 4-pin XLR) so you do have options. It need not be the hefty Profoto battery pack! It’s just what I have on hand.
Oh, they are spendy! You’re going to have to figure out ways to make these lights be a benefit for your photography work and business.
If you need a more powerful light with a larger front surface, there is the Litepanels Sola 6 LED Fresnel Daylight Kit (affiliate)
That said, I really do like these lights. They are powerful enough that you can move the lights back and not interfere with the composition. With the smaller LED video lights, you have to bring the light fairly close to your subject, and this can be a limit to how your frame your photos … or alternately, your camera settings. (If you move the light further away, the decrease in light will affect your camera settings.) So having a more powerful set of LED lights make a difference.
Summary – I love these lights!
Powering the Sola 4 units
There are various options to power the Sola 4 (and Sola 6) units, that would keep these lights individually mobile. One example would be Anton Bauer Dionic HC battery, which can be attached to the light-stand with the Anton QRC Gold Mount. This would then directly feed to the XLR mount. But, as I said, there are options.
Photo gear (or equivalents) used in this photo session
- Nikon D4
- Nikon 24-70mm f2.8G AF-S /equivalent Canon 24-70mm f/2.8L II
- Nikon 70-200mm f2.8 AF-S VR II /equivalent Canon EF 70-200mm f/2.8L IS II
- Litepanels Sola 4 LED Fresnel Lights (B&H / Amazon)
- Profoto BatPac portable battery
Related articles
- Hollywood Glamor lighting with video lights (model: Elle)
- Dramatic portraits: Hollywood Portrait Lighting (model: Kimberly Jay)
- Gelling your flash for effect – blue background (model: Anelisa)
- Portrait photography: Dramatic lighting with LED Fresnel lights (Jen R.)
How does the power output of these compare with the Lowell ID?
Steve, your question got me curious, so I set up this test in the studio. I dial the power up and down, and also focus the beams.
You’ll see that the Sola can be focused more tightly (and then the beam is stronger), and it can be de-focused more as well.
The Sola 4 isn’t that much more powerful than the Lowel ID-Light … but right at the end where I take the gel off, you’ll see how strong the Daylight balanced light is then.
Still, this makes the Lowel ID-light pretty good value.
thanks for a brilliant article as always! Don’t know if I’m being dumb because I haven’t tried gels yet, but with the lights camera right and gelled how come there was no colour cast on Ulorin?
… because I change my camera’s WB to match that of my dominant light source.
Hey Neil,
Thanks again for a thorough review. I have been using the Lowell ID light for a few years now with the external battery pack. It’s heavy, hot and of course not daylight balanced, which limits you in certain shooting situations. I also have the Lightpanels Micro and agree with it’s limitations. So, my question is this worth the upgrade to possibly lighten my gear load and give me more flexibility in shooting? If I could get the best of both worlds it would be in my opinion.
Nate
Nate, the limitation with these units is that the external power supply options are pricey. Or you’d have to run a long power cord.
Hi Nate J: Just as a side note with the Lowell ID Lights, you can get the daylight balanced bulbs [100W] for them, I have 2 IDs and I just went to my auto car dealer and asked for the quartz halogen 100W bulbs and they fit perfectly.
It is a pain in the butt getting them out and back in though, so be careful, but certainly doable. I have 1 with the tungsten and the other with the daylight.
It’s not quite a ‘true’ daylight though, you need to run it around the 6000K mark.
Thanks for the video. That’s very helpful.
I’ve bought your book “Direction and Quality of Light”, I am so impressed with this book! It’s an easy read, clearly written. I really enjoyed every aspect covered in this book e.g:
Variety of scenarios
Photographs shown as examples
Explanation of techniques
Once again thanks for 2nd video above, I’ve been thinking to buy “Lowell ID Lights” or maybe “Ranger Quadra RX”, i’d like to know what kind of orange “Gel” did you used for the “litepanels sola 4 led fresnel light” in order to match with Lowell ID Lights?
I used the gels that came with the Sola 4.