recap: Studio photography workshop NJ / NYC
A small group of people met up with Anelisa and myself in my studio for what turned out to be the first Studio Lighting Workshop of the year. On the drive home afterwards, I decided to add another 2nd date this year, for a workshop on Nov 18th. The format of the workshop depends on it being a small group of people – everyone gets time to photograph our model. But more importantly, everyone gets time to hands-on, adjust the studio lights.
In the morning we go through the building blocks of lighting. Short Lighting & Broad Lighting. The main lighting patterns that we’ll end up using – Loop Lighting; Butterfly Lighting; Rembrandt Lighting. We look at large light sources and smaller, harder light sources as we use a variety of studio lighting gear. If you are curious about the range of lighting gear that we can use, here is the listing in the Studio rental page. A huge selection.
In the afternoon, we look at various images that I have compiled from an inspiration folder of work from other photographers – and then we figure out how to reverse-engineer the lighting. Analyzing photographs like this is a great exercise in figuring out what we can do with studio lighting gear.


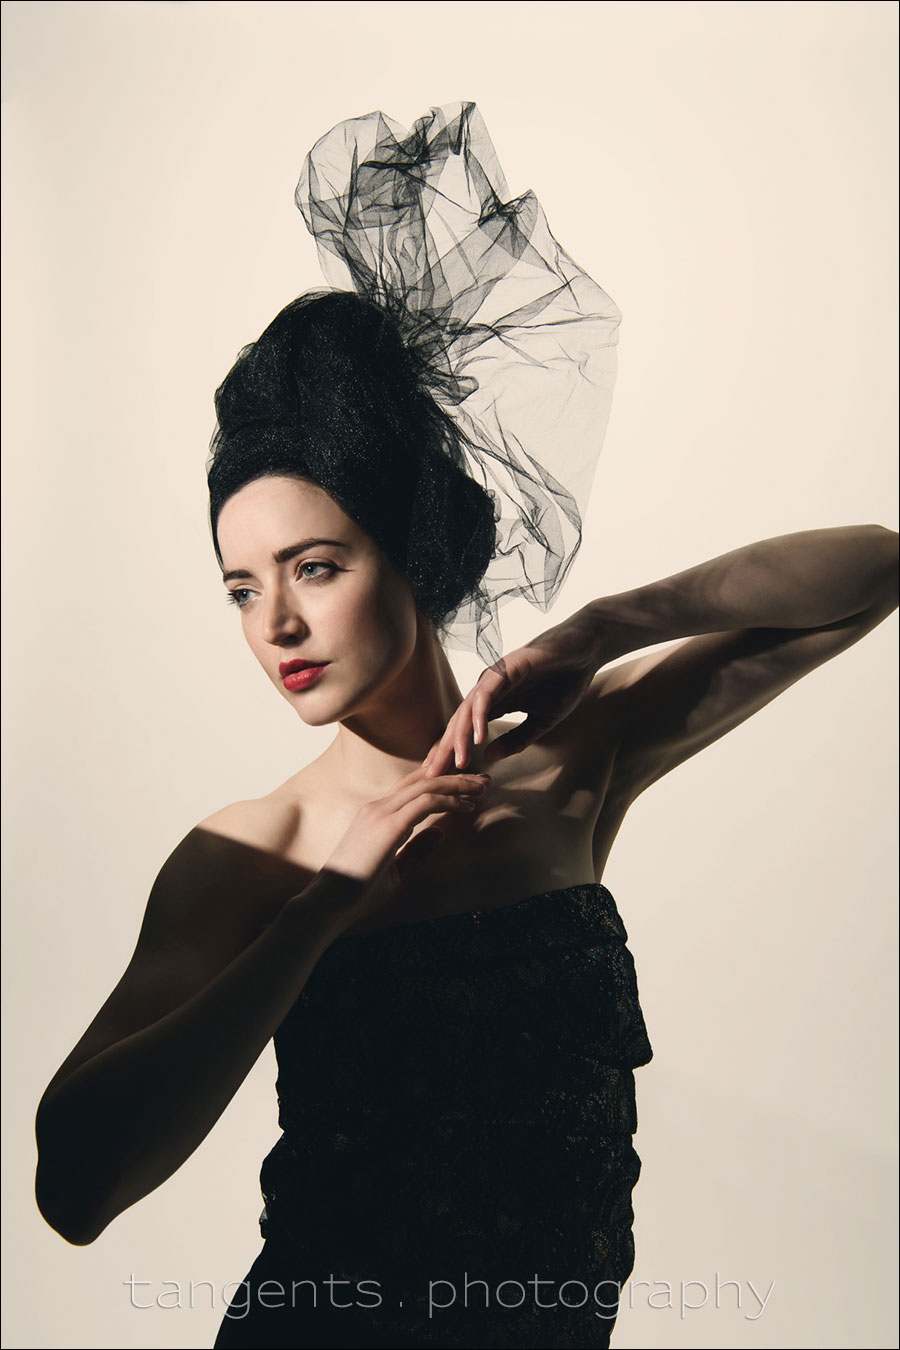
The main photo at the very top is one of the results we came up with, in using a hard light source – a bare studio flash. We flagged this with a black board to create that hard line for effect, splitting the light on our subject into a lit area and a dark area.
Here are the pull-back shots to show the set-up. There is a Profoto B1 flash (B&H / Amazon), that is flagged by two pieces of black paper to make it an even smaller light source. And then we have the hard, dividing line created by the larger black board that is hanging from the C-stands.
There is a Profoto D1 studio light (affiliate) with a large Profoto RFi 3’x4′ softbox (affiliate), that is lighting the white paper backdrop. You can see the bottom part of the softbox in this photo below.


In another segment of the workshop, we played with gelled flash, similar to how it was described in this article – Using gelled flash in the studio.
One aspect I like to accentuate, is how our position as a photographer, also influences the way the light plays on our subject. In these two photographs we go to a Chiaroscuro effect (on the 2nd image), simply by stepping to our left.

Two Profoto B1 flashes (affiliate) were used here. The one on the left was gelled with turquoise gel. The flash on the right had the large Profoto 1’x6’ gridded strip-box (affiliate), which controlled the way the light fell.
Photography workshops
- More info about upcoming photography workshops.
- Recap of previous photography workshops.
- Photo Walks, NYC.
Related articles
- Studio portrait lighting ideas
- Using gelled flash in the studio
- Portrait lighting setup – Chiaroscuro
- More articles about Studio Photography
Leave a Reply