Using video lights for outdoor night-time portrait photography
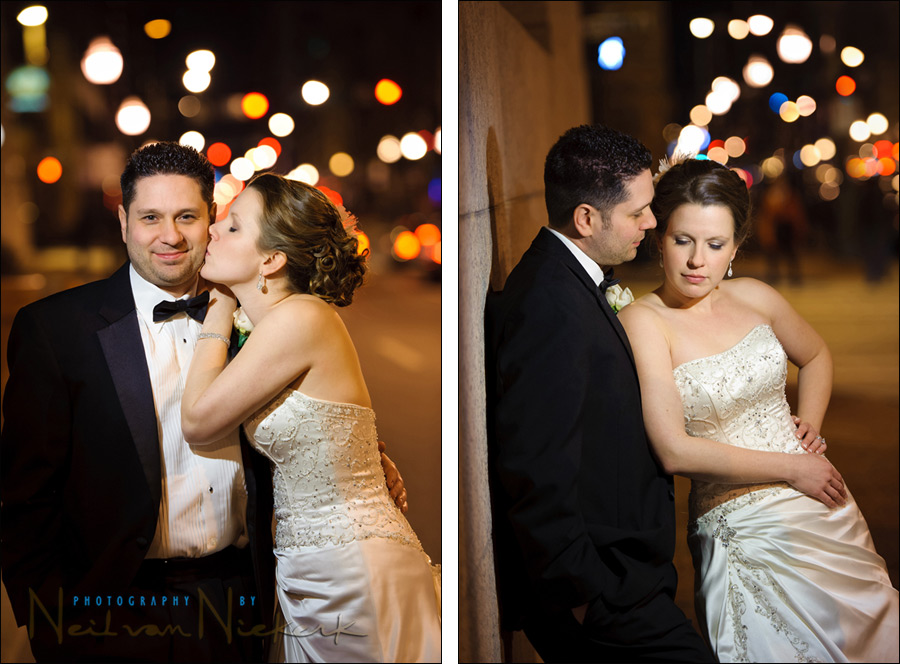
These outdoor night-time portraits of the bide and groom were taken on the streets in Baltimore. We sneaked away briefly from the reception to shoot a few impromptu portraits. With the unpredictable nature of found light out on the streets at night, we had to use additional lighting – and my choice was an LED video light (affiliate). The beauty of these kind of lights is that the White Balance can be changed from Incandescent to Daylight. This helps immeasurably in matching your light to that of the existing ambient light. Of course, you can also control the power to match the video light’s brightness better with the background.
- camera settings: 1/100 @ f3.5 @ 1600 ISO
- LED video light
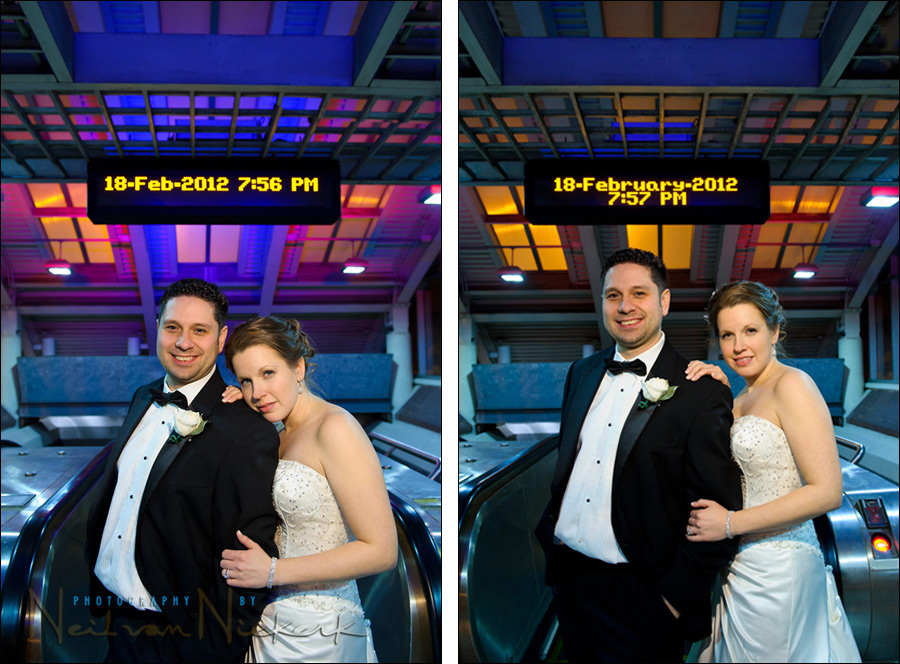
Similarly, these two images were taken in the entrance of a subway station during the romantic portrait session with the couple. With the colored lights here, it was less important to match the existing WB. Changing the WB on the LED light would’ve changed the color of the background (as I change the camera’s WB to match that of the LED video light.) Again, I turned the brightness of the LED light down so that it better matched the available light in the background.
- camera settings: 1/80 @ f2.8 @ 1000 ISO
- LED video light
Summary
This kind of flexibility is what makes an LED video light an essential tool for any wedding photographer. The WYSIWYG nature of continuous lighting also helps in positioning the light better for pleasant light on your subjects. (WYSIWYG = what you see is what you get). Even though a flash is much more powerful than an LED video light, the LED video light might be easier to use because you can immediate see the effectiveness of your light. You can change the WB and power to better match your environment, making it a more seamless way of using additional lighting.
Related articles
- More info on using video lights for photography
- Wedding photography – bride & groom portraits with video light – Allison & Scott
- Use light & lighting to add impact to your photos (Grace & Joseph)
- Video light for the romantic portraits of the bride and groom (Julia & Louis)
- More images: Lindsay & Chris – Wedding photography at the Lord Baltimore hotel, MD
i would think that with continuous lights like this if the subject is looking at the camera or the light itd be hard not to squint, on close examination of the top pic it (i could be wrong) appears the grooms eyes r not fully open as he is trying to look natural, but the brightnes is a bit to much for him, not trying to knock anything just saying had u used flash i think his eyes would be more open with more of a relaxed look and dont forget nice sized pupils with beautiful catch-lights
I’ve been looking at purchasing one for sparkler shots, which are a nightmare to light… for me anyways!
The units look mighty tasty… I always wanted to put a similar one together myself using high powered LEDs I could source quite easily… but for the amount of work involved in making one, I might as well get a P2200 and call it a day. Seriously, their pricing is not altogether bad.
Thanks for sharing this Neil.
Cheers!
Bogdan
Very nice use of video light. I assume you have to first take a reading of the available light, then you dial up or down the LED light to make sure you get the same reading on the subject’s face?
That would be a perfectly valid and methodical way to do it in theory. In practice, you’d know from experience more or less what your settings are, and then you go by your LCD preview on your camera. Simpler and faster.
You used a 3200k model. Is there a particular reason you chose that over a daylight model? Just preference or is it a particular look your aiming for? I’m kind of thinking along the lines of Bogdan and gelling the light in order to have more lighting options.
Most often, (especially as a wedding photographer), we’re dealing with Incandescent lighting when working in low-light situations. It’s a warm spectrum. The 3200K helps me in blending my light better with the existing light than a daylight balanced unit would.
Hi Neil, do you have any experience usng these lights with pure B/W (film)
photography? Will I need a Tungsten correction filter on my lens if I opt for a
3200K source such as the P2200 3220K light from Sabre?
You write that the Sabre is brighter than the Litepanel MicroPro. Did you
compare the difference in brightness between the two of them?
How about diffusion? The Sabre seems to be more of a point source. Did you notice any differences in practical use?
I never tried a video light, but I think it will add a great new dimension to my hobby. A bit in doubt if I would need a 3200k or a variable temperature model,
though.
Arne
Very glad to see this post. I’m in the market for a quality LED setup, and have been looking at the new Manfrotto LED panels, as well as a variety in the $500 range on B&H. What I like here is that the lights are constructed of aluminum and lexan (what’s the deal with LED panels even in the $400 range being very cheap, plastic constructs?) and are rugged for outdoor shoots and traveling.
I’m looking at the P2200vc; I figure that depending on whether I’m doing an indoor shoot (where the light can be quite varied) or if I’m using it as a fill light on outdoor shoots, I feel I’d like the option of varied light temperature.
I guess my question is, do yuo really get that much of a drop in output with the variable setup vice the “only daylight” or “only tungsten” setups? The units don’t look like they have an option for gel filters to go on the front.
Great review and really nice work, I’m impressed! The first shot in the series here is just amazing!
Thanks for the review,
Chris