Using video light for romantic portraits of the bride & groom
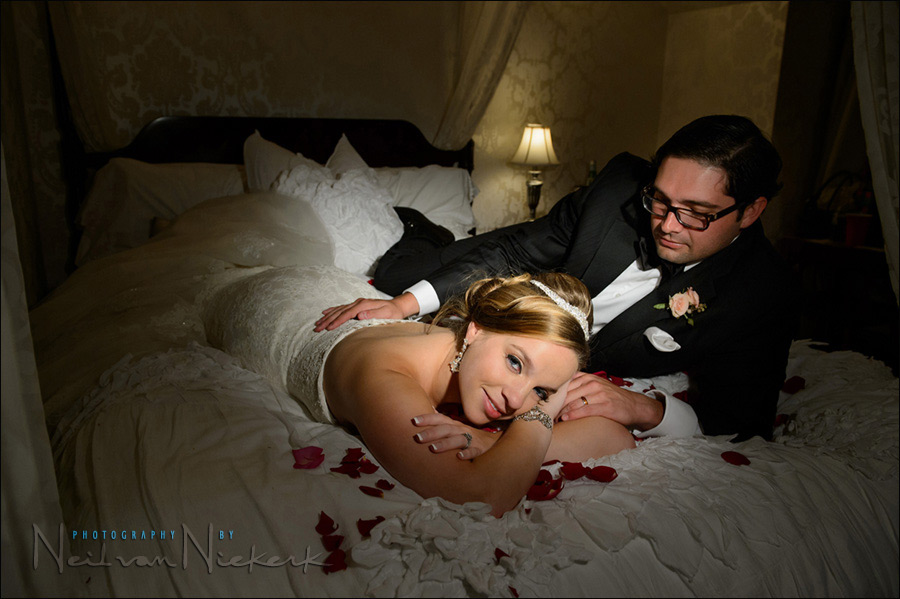
One of my favorite photos of the day. Why can’t wedding portraits of the bride and groom be a little bit sexy? When I went back to the bridal suite during a quieter moment in the wedding reception to fetch some gear I had left there earlier, I had this thought that mmmm, yes! romantic portraits of the bride and groom on the bed in their suite. This might just work! So I called Julia and Louis back to the the bridal suite at the venue, and we did a sequence of images using video light.
I’m a big fan of video light for certain wedding portraits. The harder light and the rapid fall-off in light, lends a certain dramatic quality to images. Also, a video light like the Lowel iD-Light (B&H / Amazon) that I used here, is neatly balanced for the Incandescent lighting found in most places indoors. The color balance is usually easily matched. However, an LED video light (affiliate), makes it even easier to change the color balance to your own intent since they usually have a variable WB setting.

A video light is so easy to use in one sense, and kinda tough in another way. The WYSIWYG nature of video light means you can easily adjust the power and position of the light. But since it is a small light source, you have to be quite particular about how you position the video light in relation to your subject. There’s also a lot more info about this in my book, Direction & Quality of Light.
camera settings for both images: 1/100 @ f/4 @ 1600 ISO
For both those images, I lifted shadow detail in post-processing of the RAW file. I also used the local corrections brush with the RAW image to bring up some more detail in the shadowed areas.
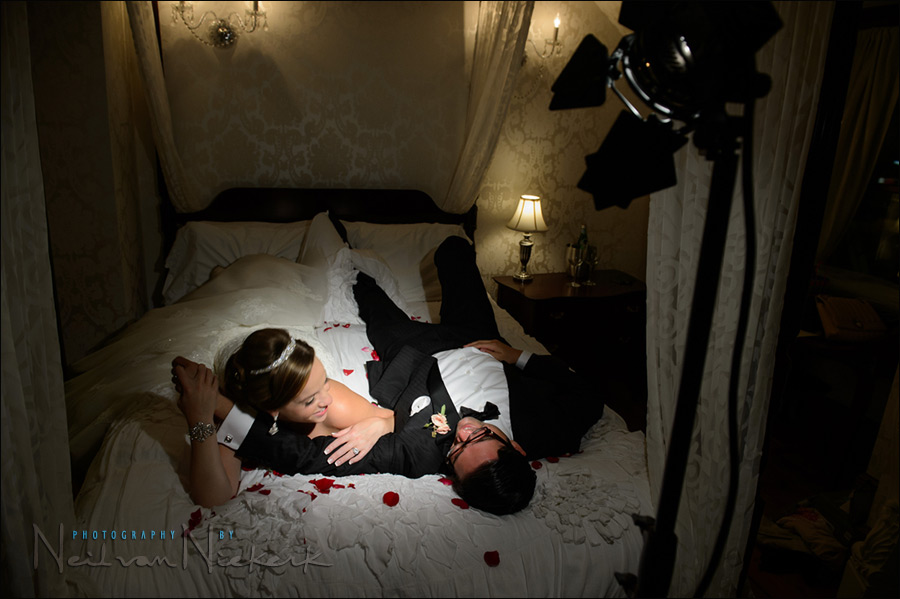
And the pull-back shot …
A little bit of homework
Video light is for me, an essential part of my lighting arsenal when I photograph weddings. So the little bit of homework is … why don’t you have one in your camera bag yet? Okay, okay … the little bit of homework. With my camera settings as: 1/100 @ f/4 @ 1600 ISO, how was I guided to get to those exposure settings? (Keep in mind that the video light has a dimmer dial too.)
But the question really is, why don’t you have a video light yet?
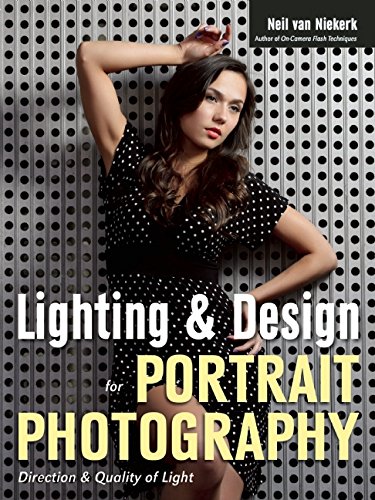
Lighting & Design for Portrait Photography
Lighting & Design is a follow-up of sorts to Direction & Quality of Light. It’s a slightly eclectic mix, discussing the thought-process with various scenarios shooting portraits. The examples use available light, bounce flash, off-camera flash as well as studio lighting.
The idea is that in every one of the 60 sections, there is something to be learnt and applied, regardless of your level as a photographer or where you shoot – all shaped to form a cohesive narrative arc throughout the book.
You can either purchase a copy via Amazon USA or Amazon UK. The book will also available on the Apple iBook Store, and Amazon Kindle.
Related articles
- Bride & groom portraits with video light (Alli & Scott)
- Romantic wedding portraits with video light (Tatiana & Brandon)
- Romantic wedding portrait with video light (Jessica & Michael)
- Bounce flash for bridal portraits (Christine)
- Wedding photography – Using video light for macro detail photos
- more articles on using video light for photography
- Julia & Louis – wedding – The Gables, Beach Haven NJ
Photo gear (or equivalents) used
- Nikon D4
- Nikon 24-70mm f2.8G AF-S / Canon 24-70mm f/2.8L II
- Manfrotto 1004BAC – tall light-stand
- video light: Lowel iD-Light
- or alternately, an LED video light
I just ordered mine yesterday :)
To get those settings: You would want to start with a wide aperture to give some blur to the bg, especially since you are in a confined room necessitating a wide angle lens that will give too much DOF at medium apertures…you would want to use a reasonable shutter speed…less than 1/100 with the non VR 24-70 would likely risk camera shake..then adjust the ISO so the ambient light is a stop or 2 underexposed at that aperture/shutter combo to make the subject pop, and lastly give the proper distance from light to subject to achieve proper subject exposure at those settings.
Keep in mind that the video light has a dimmer dial too.
What battery pack do you suggest? Or what is the best way to power the light?
Which light are you referring to?
LED video lights usually run on AA batteries. But this of course varies with design.
The ID-light uses other batteries such as the Bescor MM-9 XLRNC battery. (There are different options.)
Here goes….A hand holdable shutter speed. An aperture to give just enough dof for both subjects. Crank up the iso for correct subject exposure. Background registers enough to give context.
Thanks Neil! I was referring to the Lowel light.
i would assume that you adjust your video light output according to how much ambience youre looking for. these images are a bit too dark for my liking and the falloff is too rapid. i would try 2 video lights when photographing couples.
I’ll bite – your exposure is based on the existing light fixtures to keep from blowing them out. The dimming capability of the Lowell is set based on the exposure difference you preferred over the light fixtures. F/4 provides enough dept of field to keep both subjects in focus, and maintain background detail. 1/100 is fast enough to prevent camera shake. Finally, ISO 1600 allows these settings without introducing unusable noise.
I received my video light today and even though it was on the lower end cost wise I was surprised at how bright it is…and despite the low cost it does have a dimmer switch as well. Given that fact in the homework assignment I would stick with my original answer for the determining the camera settings, but for the video light I would keep it as close as possible to the subjects while still out of the frame to keep the light as soft as possible, then adjust the dimmer to give the subjects proper exposure at the chosen camera settings.
Hello Tony
You say “but for the video light I would keep it as close as possible to the subjects while still out of the frame to keep the light as soft as possible”
This is correct for a softbox or any a bare bulb hitting a diffusion panel (you have to try to keep it as close as possible to make the light soft)
It does NOT work when you use a focused beam of light. The closer you are, the harder the light. You have to move it away to make the beam softer.
OK, heres my stab at the homework.
Settings – So, you know you need a depth of field to allow for the couples head and shoulders to be in focus and then the sharpness can drop off. You know that the background can be slightly blurred. However, you want to maintain the ambience and warmth of the background lights. F4 gives you the desired depth of field. 1/100 is fast enough to prevent camera shake, this then means that with F4 and 1/100 ISO 1600 suitably underexposes the background. You can then introduce the video light and dim/brighten it to balance the exposure.
Greg
Homework:
I would treat the video light as ambient light.
So I would simply switch the light on, aim it at the subject and then meter off the light (especially as in this instance the light is lighting up the main subject).
Having taken the meter reading, if I found that I didn’t like the shutter speed it was giving me I would simply use the dimmer switch to increase light intensity, or move the light closer, until such time as my meter reading gave me a shutter speed and aperture combo I was comfortable with).
Neil,
which video light is good for amateur ?
Follow the links given in the article: more articles on using video light.
My answer for homework – expose for the background and match video light for the bride and groom with dimmer. Is it correct ?