Colored gels with flash photography
I met Jessica Joy during a photo shoot-out in Las Vegas last year when a group of photographers and models met up. She was there as both a photographer and a model. We had discussed doing a proper photo session some time in the future … and then Jessica got news that her husband will be stationed abroad in a few months from now. So we decided that *now* was the time to do this.
With winter-time in New Jersey and New York just too cold to comfortably do a photo shoot outdoors, we settled on doing it as a studio shoot.
I bought two sets of the Honl gels for speedlights a long while back, to try out sometime, but they remained unused in a drawer. I had the two sets of colored gels – the Honl Photo Filter Kit – Hollywood (affiliate); and the Honl Photo Filter Kit – Autumn (affiliate). What made me curious about them originally, was that they were inexpensive, but seemed like a good option in juicing up flash photos a bit.
The first test image with the lights set up like I wanted, looked good … but a little drab. First I added a gel to a gridded softbox to the left of her (with the blue-green tone), and then I added a filter to the flash on the background … and I was hooked!
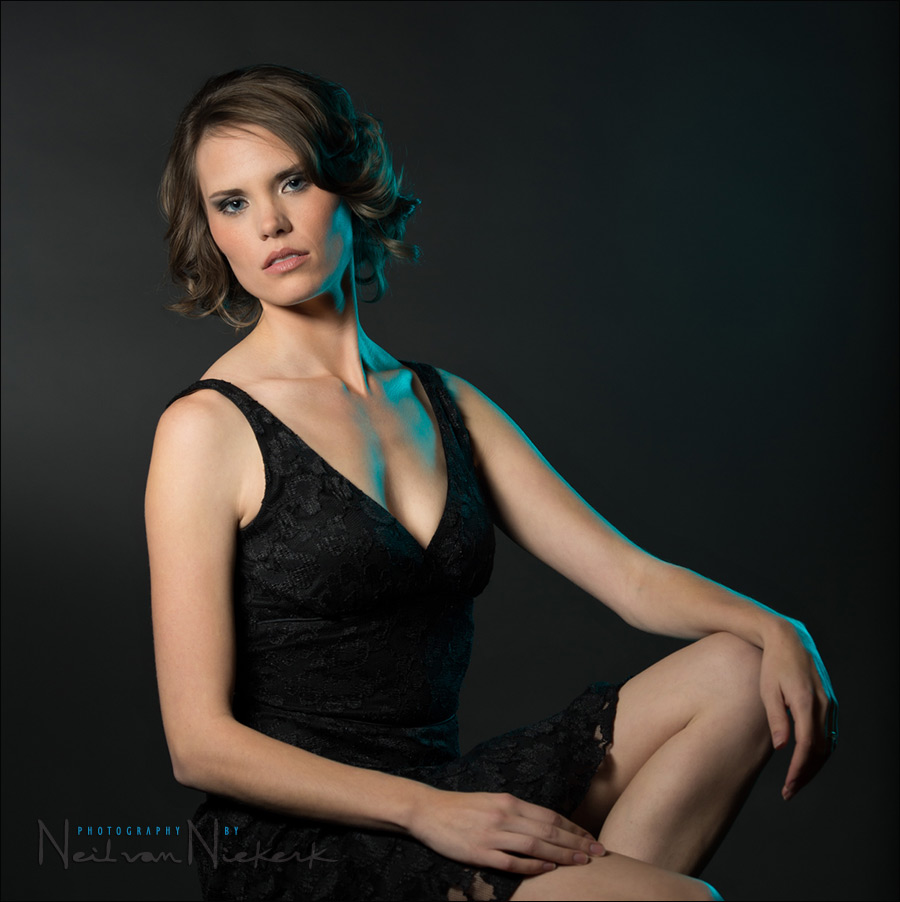
One of the initial photos, done as a test. The blue-green gel helped add a splash of color to the near monochrome image. And then I added a warm gel to the flash on the backdrop .. and the image sprang to life.
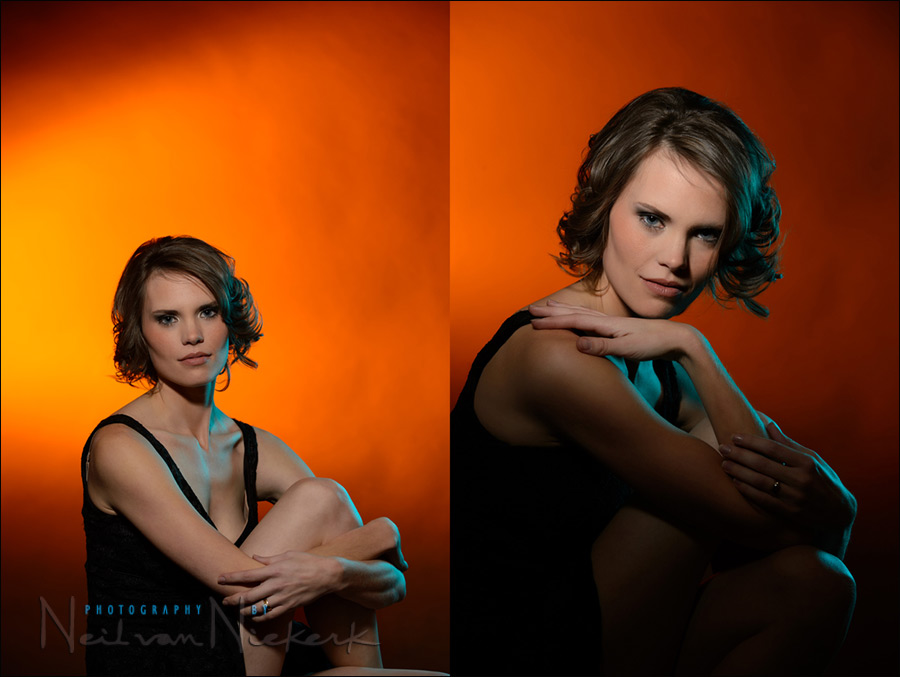
On the left is the very first test image with the warm background. On the right, the final image as shown at the top.
The background was too bright for my liking, so I dropped the flash output on the background by a stop, and upped the main flash’s exposure by a stop. Similarly, the blue-green gelled flash was also upped by a stop to still be at the same level, relative to the main light. The total effect was to drop the background light by two stops, compared to the main light.
Here is the pull-back shot to show the lighting setup:
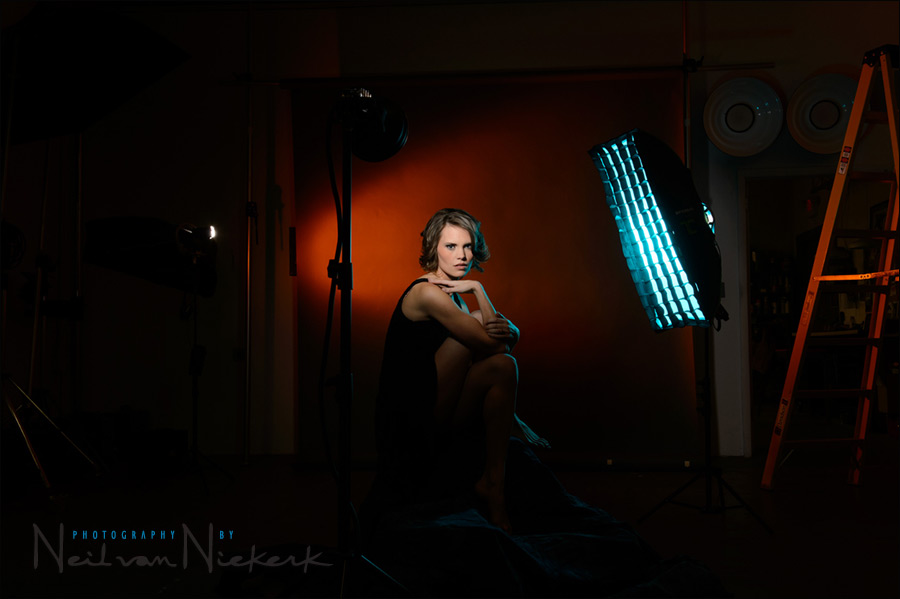
The surrounding areas are very dark in comparison to the lit areas, so the placements of the lights isn’t too clear. So here is a version of the same image, with local adjustments to lighten up the darker areas. (Excuse the uneven brushing in of details in the shadowed areas.)
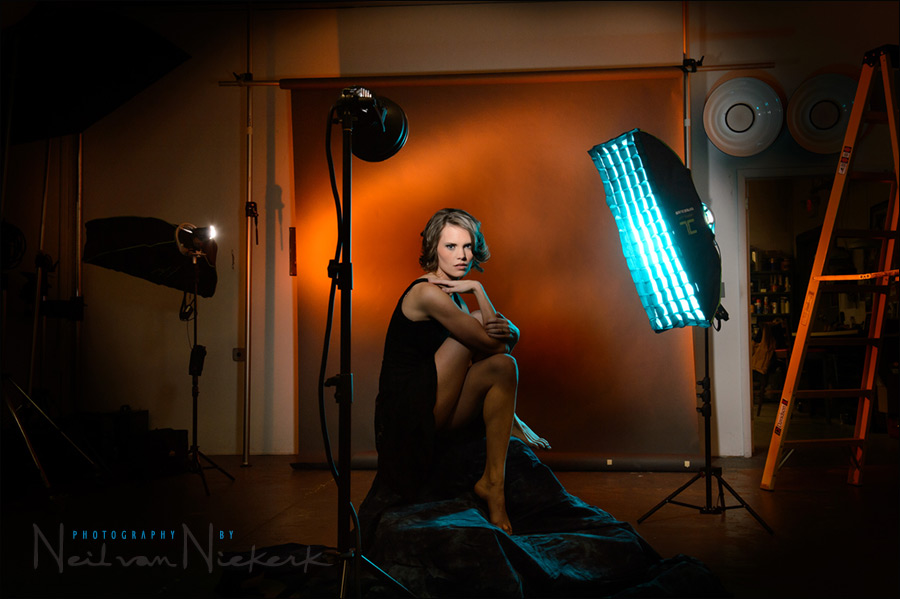
The main light is a Profoto head with a 7″ reflector and 10 degree grid on it. Using it fairly close to her, the light was hard, but not unflattering. Similar to a video light in a way. The grid is there to control the spill of light, so that there is a dramatic fall-off to the edges, and Jessica’s arms and the rest of her body are shrouded in shade.
The flash-head is a Profoto 600R initially, but I later changed it out for a Profoto D1 500 Ws head.
The rim light is via the gelled speedlight in the gridded softbox to the right of our model. The grid really does wonders in controlling the spill of the light.
Background light: On the left-hand side, you can see the bare speed light that is gelled with the warm color. The background itself is a grey paper roll backdrop. Splashing a colored gel onto it gave it that tone. The speedlight is on a lightstand, and was hooked up to another gridded softbox, but I swiveled the head around, so that it is just the bare speedlight on the background.
I metered for the main light, but the others lights were adjusted to taste by looking at the camera’s preview.
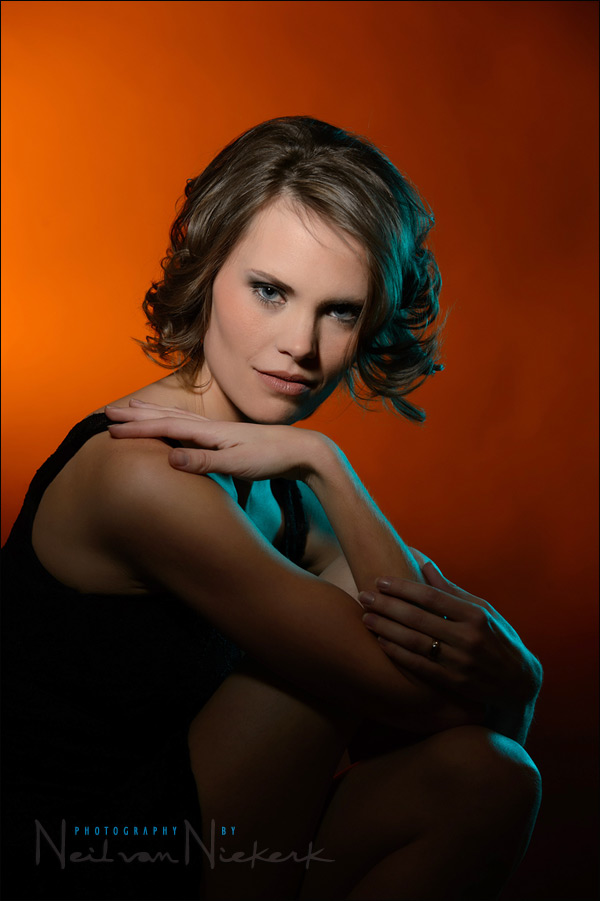
camera settings for the image at the top:
1/200 @ f/8 @ 200 ISO
The final result with the gels impressed me. Even more so in that they were easy to use and added a lot of glitz to the final image. And they are inexpensive. The gels were attached to the flash with a Honl Speed-strap (affiliate) on each speedlight.
Photo gear (or equivalents) used during this photo session
- Nikon D4;
- Nikon 70-200mm f2.8 AF-S VR II used at 135mm
- Profoto D1 Air 500 Ws studio light
- Profoto 10 degree grid; Profoto 7″ reflector
- Profoto RFi 1’×3′ softbox with the Profoto 50 degree 1×3 grid
- (2x) Nikon SB-910 Speedlights in the gridded softbox
- Honl Photo Filter Kit – Hollywood
- Honl Photo Filter Kit – Autumn
- Honl Speed-strap
Related articles
- Studio photo session using colored gels (model: Anita DeBauch)
- Photography – creating foreground bokeh effects (model: Ulorin Vex)
- Guest post – flash photography tips (article by Tilo Gockel)
Stunning. Such subtle edges of color add soo much dimension. Would the camera be on the flash raw settingto keep the main the correct color or is there some other Neil magic here?
Thank you! I had the camera set to Cloudy WB, and I went back to the RAW file now to check … and nope, I didn’t change the WB in post. The WB is as shot.
Hello Neil,
How are the flashes triggered? With PW flex and mini?
Thanks
Great effect, it really adds another creative element to the final result!
I have experimented with a similar effect a little by using the clip on filters that come with Nikon flashes and changing the white balance to suit the filter on the main light while leaving the back (filterless) light a lovely blue. Many ways to skin a cat as they say!
So now I want to try out your method as well and experiment a little more. Oh my, this really is a lot of fun!
Very nice result Neil…particular like the Rembrandt lighting achieved with the grid. For 2013, I plan on emulating some of Greg Gorman’s work and this brings me to my questions: Are you aware of a good 10 degree grid (really a whole set) for the EX and SB series? I only use speedlitees (cost restrictions) and have been looking for some time for a good set. I have looked at the Expoimaging 3-in-1 set and see mixed reviews..same for other sets as well. Any recommendations?
One more thing Neil, I shot my first two weddings last year and received the usual “ooh’s and aah’s” from the wedding party’s family and friends but am looking for…well…a different opinion. I can upload to a Flickr account, prepare a slide show and would like your opinion.(All part of my 2013 plan to improve) How much do you charge assuming about 50-60 photos to view per wedding?
Rudy
details about the tutoring sessions via Skype.
N,
Have any suggestions on mounting gels inside of softboxes if your using mono’s?
K
This is definitely an area I have to work at. Finding oneself at a drab location and no ‘drama’ can be totally demoralizing. Being able to just whip out some intense color just makes such a huge difference.
I usually end up with the mysterious muddy white balance trying to this type of thing…lol
Hi there, Neil,
great shot — and I just loved the color combination.
Sorry, could not help it, gotta steal it :-)
https://www.flickr.com/photos/galllo/8403120052/
cheers
Tilo
Tilo .. that looks awesome! Maaaaan!
whew, thanks, I appreciate it!
Tilo,
I have just spent 40 mins looking through your work.
Simply outstanding. :)
Trev
Hi there, Trev, thanks a bunch for your kind words…
Well, I had the best teachers! :-)
https://fotopraxis.net/2012/09/10/news-121/
Hi Neil
What is the style of backdrop you used above.
Obviously paper, but what is the color code.
Thanks
Angelo
Hi Neil,
Great examples you shared here. Working with gels and flash is a lot of fun. Your blog is always a great resource.
I am in two mind whether to buy grey or black. I have been told that gelling flashes onto black backdrop requires more power usage than with grey. Is this true?
Thanks for your time.
Jubar
I’d suggest the grey background, since you can always make it appear much darker by not lighting it. In the same way, you can make the grey background appear brighter more easily than a black backdrop, and also add some color to it.
Thank you :)
Just a quick question relating to the grey background. I am decided to get a white background and a grey background. But there are so many shades, e.g. storm grey, cloud grey and etc. Will they make a huge difference from one shade to the other, when lights are in place?
Thanks.
Personally, I don’t think it matters much, and is up to personal preference.
Hi,
What color gels were used?
Best,
William
They are mentioned and linked to, in the text.