Boudoir photography: Dealing with mixed light – daylight & incandescent
Boudoir photo sessions can be nerve-wracking – not just for your subject or client who undoutably feels vulnerable, but also for you as the photographer. You have to juggle speed in shooting, with meticulous posing and (hopefully) impeccable lighting …. and still keep the flow of the shoot going, and also keep your subject’s confidence up. With this boudoir photo session in a NYC studio, I photographed my friend, Jessica Joy.
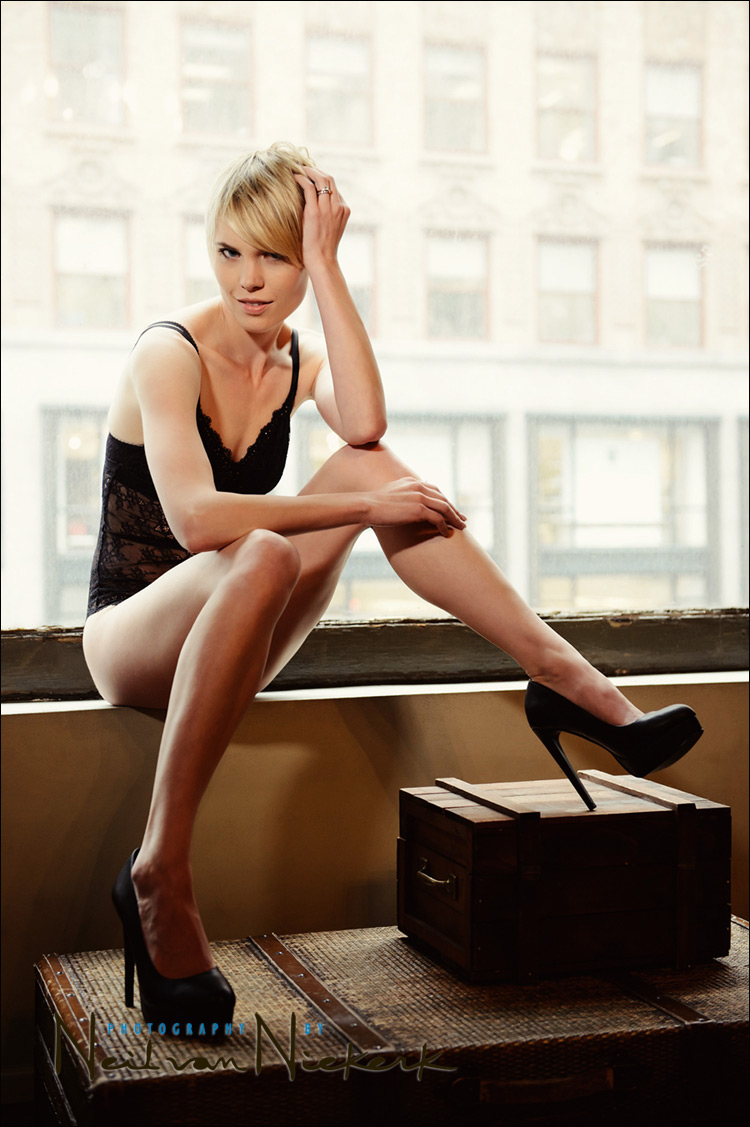
I wanted to use this window of course, and incorporate the boxes. It all just begged to have my friend Jessica J sit on the window sill. The mixed lighting – daylight from outside, and incandescent from inside – seemed like it might be a challenge. One way would be to embrace the different color balance between daylight and incandescent light, or try to even it all out somehow.
I tried a stripbox with speedlights, but the light was too flat. Not bad, but all the nuanced available light was lost, and I wanted to retain the mood of the venue. I put away the flashes and softbox, and grabbed my LED video light (affiliate). This LED video light has adjustable WB, which was a big help here in finding a color balance that best suited the transition from window-light to Incandescent. I did allow the image to go much warmer for the interior and for Jessica, and not let the background go blue.
Here’s the setup, and let’s also look a bit at the pose …
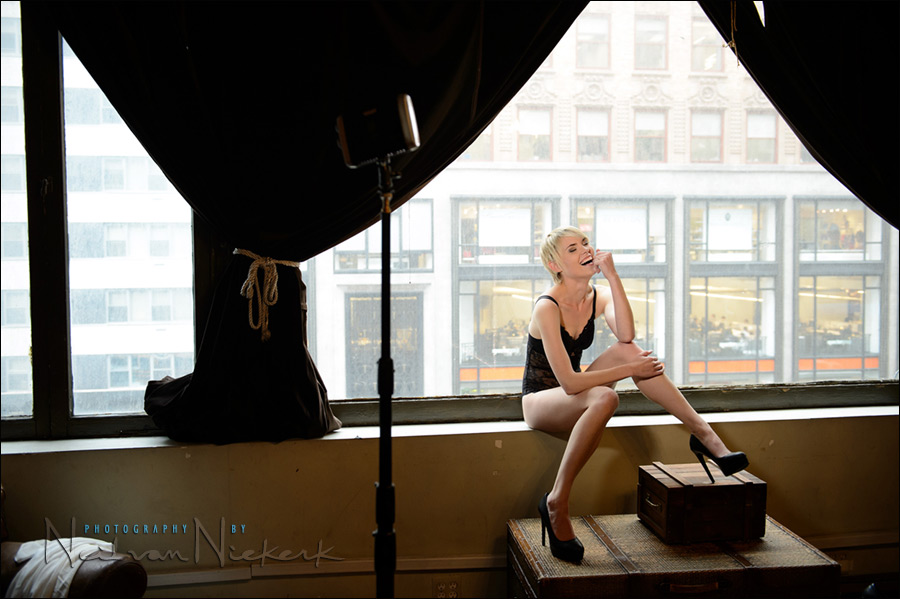
That’s it – the lighting is simplicity itself. A single video light with adjustable WB, on a light-stand.
- camera settings: 1/125 @ f3.2 @ 2000 ISO
- Nikon D4s
- Nikon 24-70mm f2.8G AF-S
- recommended LED video light
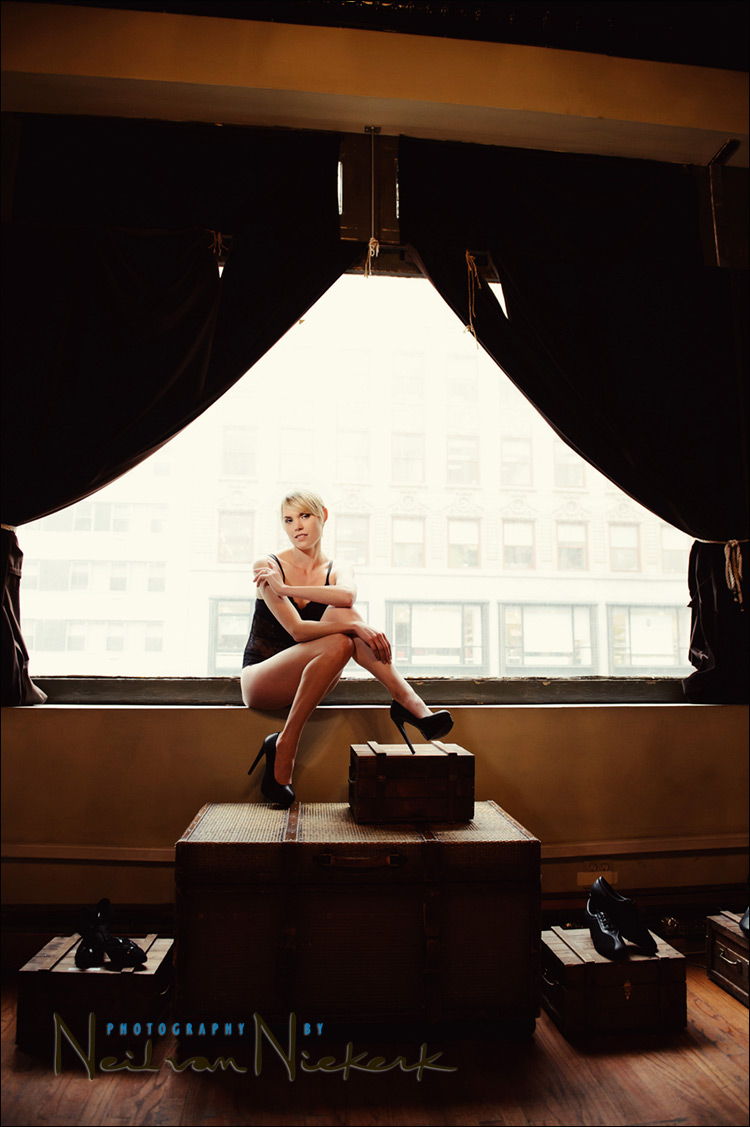
Using the much more of the window, and more of the room, there’s a somewhat epic feel to this photo:

Working deeper in the studio, away from the window. Using the mirrors and lights around the mirrors, and a longer lens to compress the perspective:
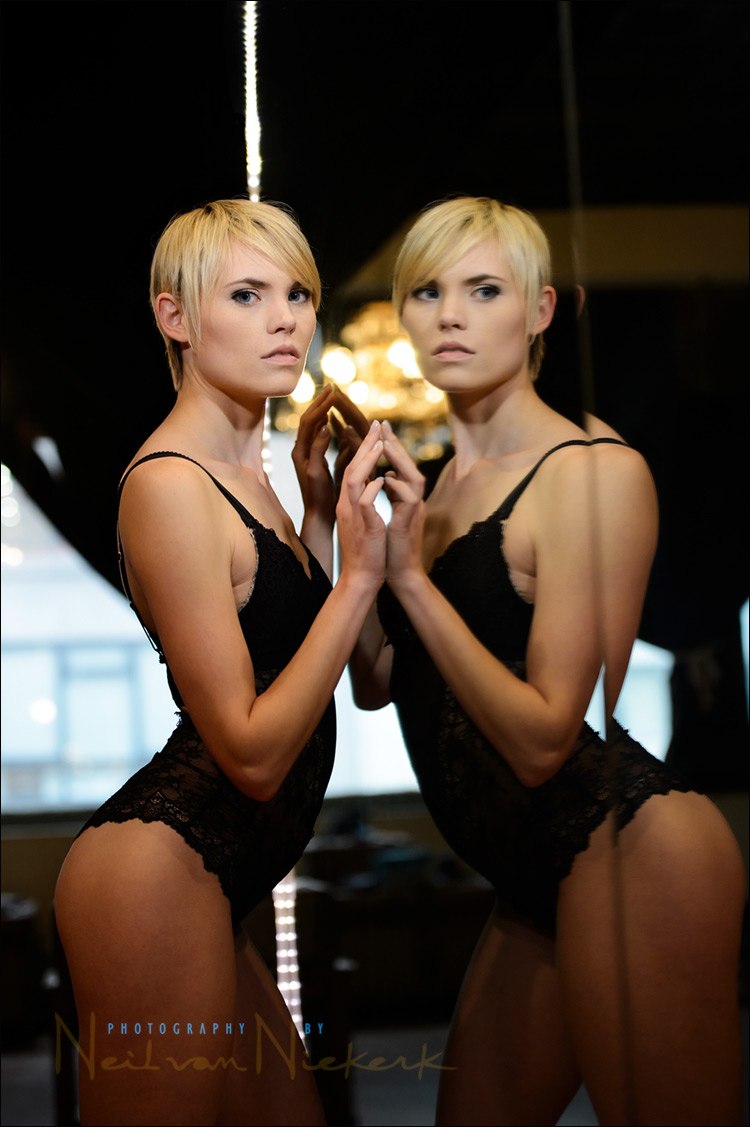
- camera settings: 1/125 @ f2.8 @ 1600 ISO
- Nikon D4s
- Nikon 70-200mm f2.8 AF-S VR II
- recommended LED video light
Tips on the posing – positioning the feet
Posing the hands and feet in any portrait is tough! While I aim for a pose to be “organic”, i.e. natural to my subject, I do often micro-adjust until I’m happy. I micro-adjust by looking at my subject and how the overall image will be balanced, and how the arms and legs would be balanced. The position of the head is also important.
That’s a bunch of stuff to balance, but it’s better to get it right at the time of shooting, than hating yourself a day later when viewing the images.
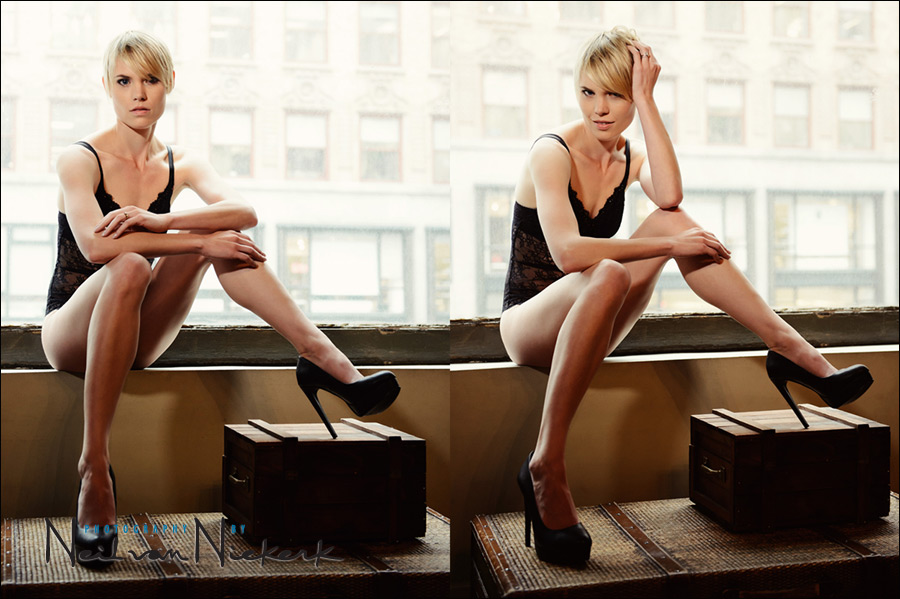
- I set up the initial pose by showing Jessica where to sit on the window sill.
- The next step was to move the smaller box into place – it helped in placing her one foot higher than the other. That asymmetry in posing is often the best way to make a pose dynamic – one foot higher / lower, and one hand higher / the other lower.
- The left-hand photo shows an intermediate step in the sequence – compare her right heel between the two photos. In the left-hand photo it is square-on to the camera. Not bad per se, but in angling her heel even further out, her leg is now more dynamically posed at an angle, and the foot and shoe are better defined with the heel visible.
- The tip here then is to check the feet and shoes, and try for them not to be square-on to the camera. It’s not a hard rule, but it’s a good guideline that helps me in setting up the pose.
Photo gear (or equivalents) used during this photo session
- Nikon D4s
- Nikon 24-70mm f2.8G AF-S / Canon 24-70mm f/2.8L II
- Nikon 70-200mm f2.8 AF-S VR II / Canon EF 70-200mm f/2.8L IS II
- recommended LED video light
- Manfrotto 1004BAC – taller, heavier light-stand
Related articles & links
- Lighting for boudoir photo sessions
- Book review: Boudoir photography, by Critsey Rowe
- Boudoir photography – an intimate photo session (model: Carly Erin)
- Yes, that was shot at the 50mm focal length, but isn’t a close-up head-shot
- Use light & lighting to add impact to your photos
- NJ / NYC boudoir photo session – Jessica J.
Books on Boudoir Photography

Neil,
Can you show us strip box example ?
I could, but I don’t want to. The lighting looks good. It is well lit. But as a test shot, Jessica wasn’t posed specifically and I’d rather not have an imperfect shot out there. Especially not with boudoir photography which is photography field that comes with a certain sensitivity.
The test photos looks exactly like you’d expect it would when lit with a softbox (which doesn’t have a grid).
One of the things that throws me off a bit with led light panels, is how different the falloff is, from strobes. This is the first set of photos I’ve seen, (as long as you can control the white balance… which you did very well), that makes me think they can be used in a professional setting. So, I’m curious… it looks like the panel is about two feet above and six to eight feet away from Jessica? If that’s correct… is the width and falloff of that particular Litepanel similar to say… a 24″ softbox? Or do you have to pull them in closer than you might with a strobe? The whole panel is only about the same size as the D4s body, right?
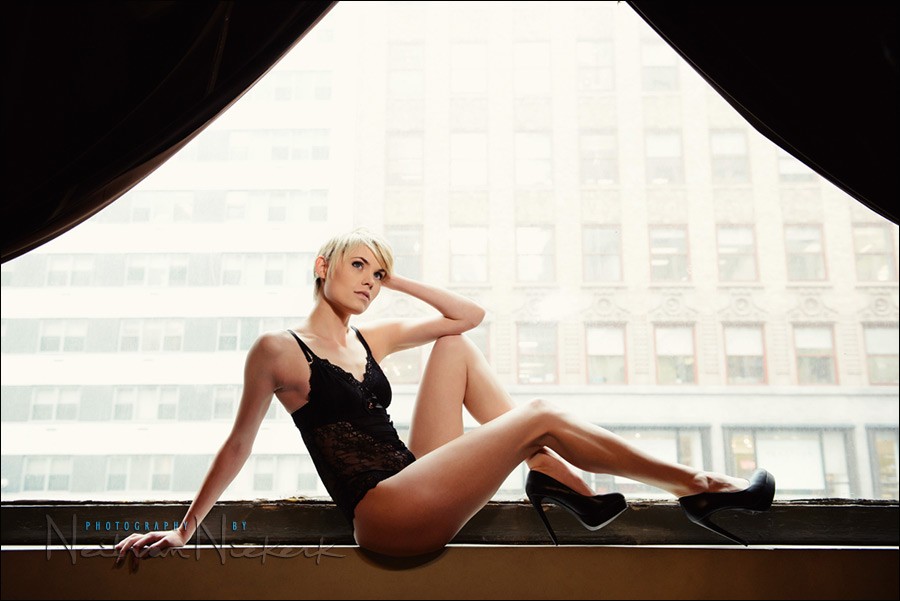
I really dig where you put the ambient for just the right amount of texture of the cityscape.
Photo 4 is the winner for me.
Beautiful pictures! Can you please elaborate on the white balance? I don’t quite get how you got that balance right. If you used a warm setting on the litepanel, and adjusted your camera white balance for this, the window light would have been blue. Also, the white balance changes continuous on the litepanel, so how do you know the amount to set on your camera to compensate? do you guess?
I adjusted the color balance by eye. No science. Just “yeah, this looks good”.