finding (and using) interesting available light
I hope that no one thinks that the flash photography and lighting techniques that I describe on the Tangents blog are only applicable to wedding photography. In a recent post I described where I photographed a model in an alley way when I noticed a splash of sunlight (reflected from a window) falling onto the wall. In recognizing that interesting splash of light, and using it, I got an image which was different than I would’ve had if I had just used the even shaded light in the alley.
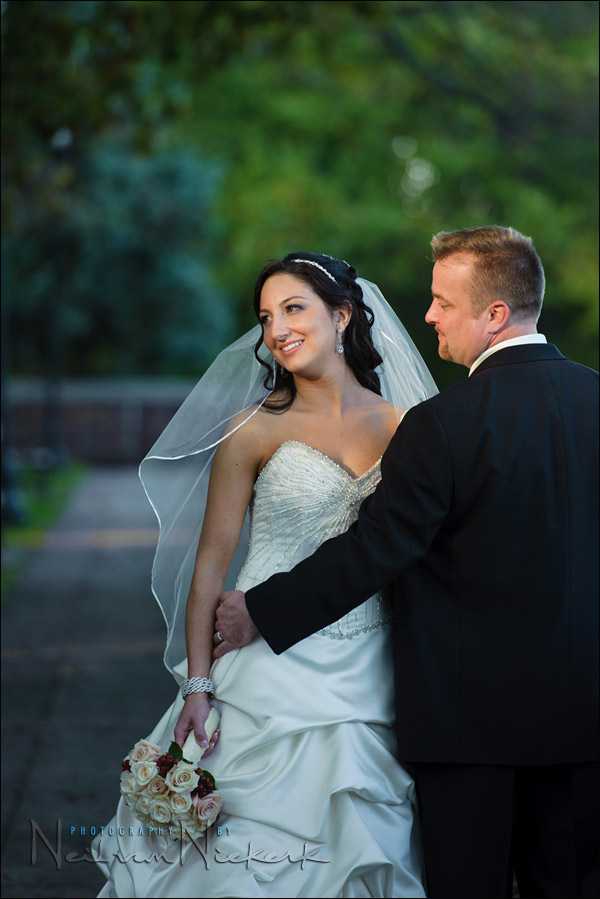
I used this very same idea at a recent wedding in photographing the romantic portraits of the bride and groom. The safer way of working, which is my usual initial approach to make sure I have the essential photographs ‘in my pocket’, is to work in the shade, or have the couple backlit against the sun. In approaching this one area, I noticed the dappled light falling onto the wall. But it was a large area of sunlight sneaking through, not just a messy splotch of sun & shade …

… and I knew I wanted to try at least a few photographs here. I tried for a more dramatic look, even a touch of Fashion thrown in there, to use that spotlight of sun. The rest of the scene (and shadowed areas of the bride and groom), will under-expose to an extent. And that has to happen, for this dramatic light to work.
My exposure is based on the sunlit area .. nothing else. This type of situation is one of those where only Manual Metering mode makes sense. It would be much harder work using an Auto metering mode and dialing in exposure compensation … which will vary depending on your composition. It’s just so much simpler to nail the basic exposure once, and then continue to shoot.
And there is the photograph. I quite like it. Of course, this allowed my 2nd shooter to get this image from a different angle. Which is exactly what I like from a good second photographer at wedding – to work independently from me, but with me. (This image was captured by Steve Akins.)

Back to the image at the top – I want to reiterate the idea that this kind of technique and approach to “seeing the available light” works for every other field of photography. It is all about the light after all. Well, mostly. It’s also about the cool gear.
Equipment used during this shoot:
Nikon D3; Nikon D700
Nikon 70-200mm f2.8 AF-S II (B&H)
(no flash; all available light)
other articles on wedding photography
Neil,
You said: “My exposure is based on the sunlit area .. nothing else”
Based on your recent thread on exposure metering https://neilvn.com/tangents/exposure-metering-bride-and-brides-dress/ , you first composed so that the sunlit area filled your entire camera frame (the upper body of the bride and groom), and then you metered and set your settings. After that, you recomposed the image to take the photo shown at the top of this entry. (You ignored what the camera’s exposure needle was stating at this point, since you set your exposure settings based on the sunlit area). Correct?
I could’ve done that. Or I could’ve metered of an equivalent sunlit area, and then made sure I don’t have blinking highlights on her dress.
Neil,
Thanks for the response. I keep looking for one technique when there are sometimes multiple techniques that reach the same conclusion. It’s quite the mental exercise to determine which technique would best suit the scene, so I second-guess myself sometimes.
Hi Neil.
The way I would have approached metering this scene would have involved taking an initial reading out of the sunlit brick rail (seems to be very neutral tone on the venue photo) tweeking the final exposure from a test shot.
Any thoughts?
Cheers,
C. Arche
Fantastic crisp work Neil. It is often then case where we land up using multiple techniques to get to the end result but wow your explanation is spot on!