Camera settings: Shutter speed, Aperture & ISO
A presentation that I’ve given on several occasions, is called ‘Just Give Me The F-Stop‘. The presentation is based on the perception that many photographers, in trying to get to grips with flash photography, try to break it down into what they think are the understandable elements – the numerical values of the settings used. They want numbers, believing that in knowing a certain image was taken at 1/125th @ f4.5 @ 400 ISO, that they might get closer to understanding lighting. They want the f-stop.
However, the scenarios we encounter as photographers vary so much, that it becomes meaningless for anyone to “give you the f-stop”.
Far more important are the methods we use with on-location lighting, such as how to get to correct exposure, and how to get beautiful light, and how to enhance the existing light with controlled use of flash. It is in this intersection between available light and flash that we get great results in seamlessly blending flash with available light. Of course, this is also true for other additional light, such as video light, or even the use of reflectors.
Regular readers of the Tangents blog will be familiar with this topic, but I’d like to expand on this idea a little more …
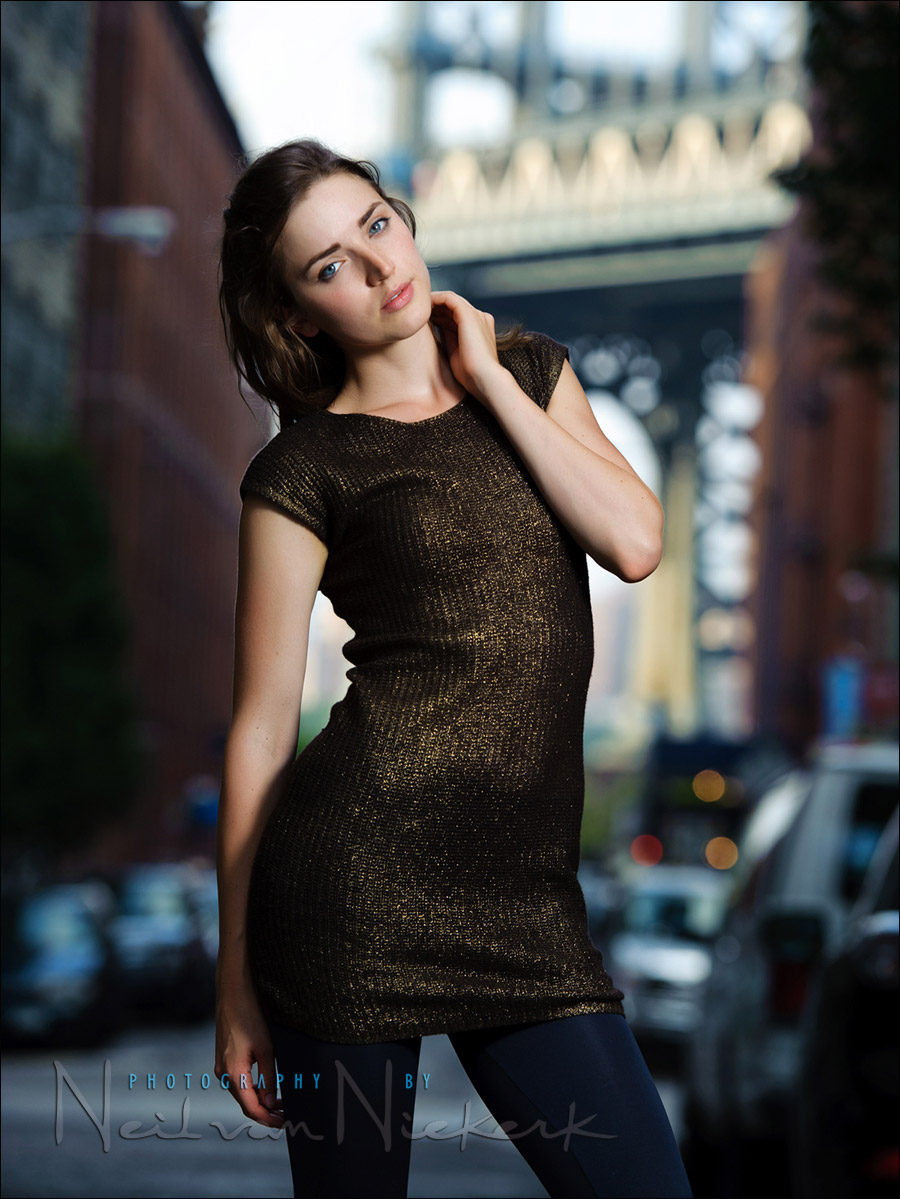
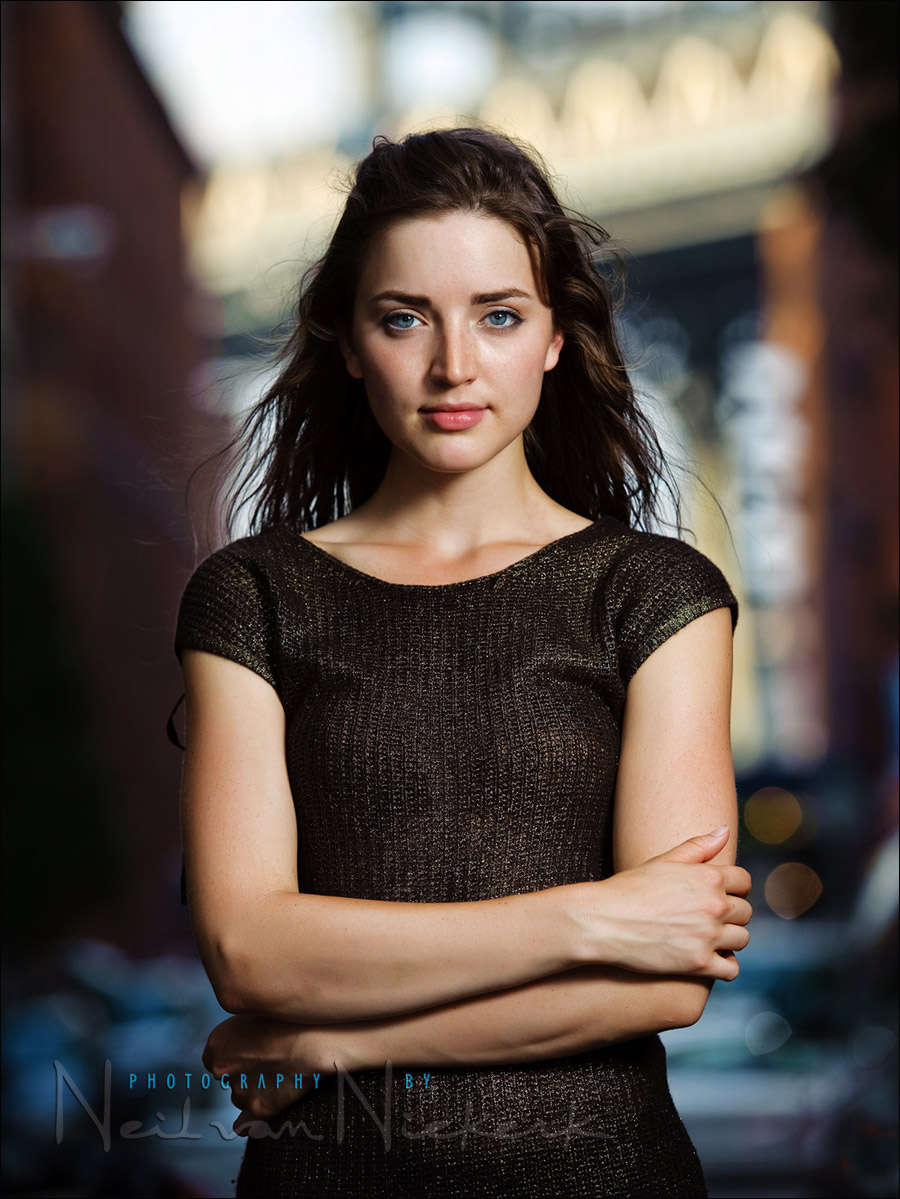
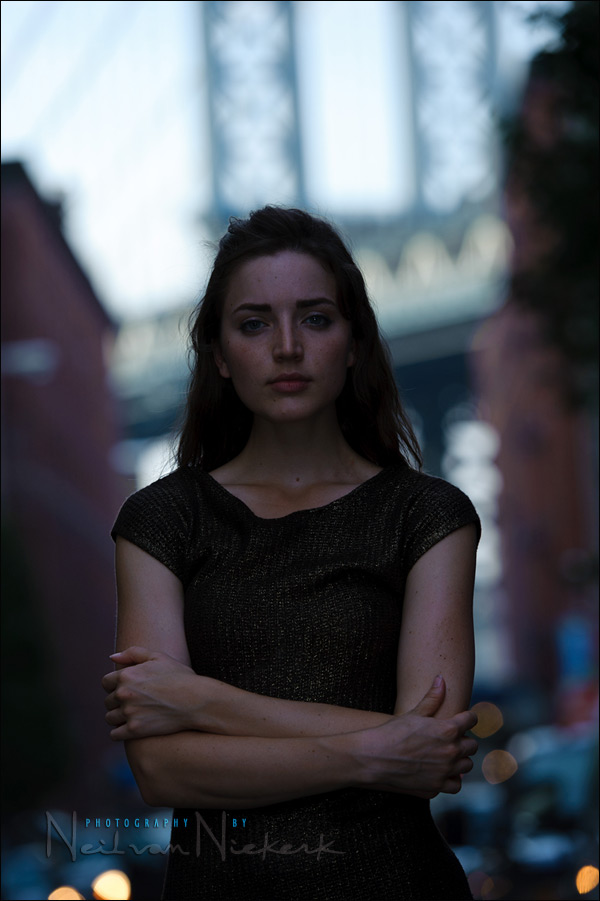
The photographs of Anelisa was taken as part of a sequence to show the difference, if any, between using an umbrella and a softbox. But the ambient light changed too much between setting up the different light modifiers for us to make any observation from this.
But I really like these images – her pose; the light on her; the background; the way her hair moved in the slight wind; the composition and framing; the final choice in the balance between available light and flash.
From the actual photograph, a few elementary things can be deduced already.
– This is a wide-ish aperture, but doesn’t look like f1.4 or such a wide aperture. Most likely in the region of f2.8 to f4 somewhere.
– The separation between her and the background, as well as the perspective and the compression of the image, indicates this was a longer focal length. Most likely a 70-200 range zoom used at the longer end.
– There appears to be a fair amount of available light in the background, so this wasn’t a slow shutter speed, nor a high ISO. Since flash was used, we’re probably in the region of being close to maximum flash sync speed. As for ISO, going by the brightness of the background, we’re most likely in the region of 100-200 ISO.
This isn’t so much reverse engineering, as a common sense analysis of a simple portrait. These are things nearly any photographer should be able to deduce, especially since the photograph isn’t a complex one.
That the specifics of the EXIF tell us that our camera settings were 1/250 @ f3.5 @ 200 ISO isn’t then of particular use. The ball-park ideas about our settings were enough, and could be gleaned from the image at a glance anyway.

What is more important than the EXIF data
The more interesting aspects of this, and nearly any other portrait photograph you’d ever see would be:
- The idea / concept;
- The pre-visualization (if any);
- The circumstance and back-story;
- Working with the subject / posing and positioning your subject;
- Composition / the viewpoint and angle;
- The thought-process behind the lighting;
- The post-processing of the image.
Oh, a host of things would be more useful to know than whether a photograph was f/3.2 or f/4.0
So where am I headed with this train of thought?
Well, the way that shutter speeds, aperture and ISO settings inter-relate, is absolutely essential to understand. You have to know these things. If you don’t, then there is homework to be done. Also, knowing how your choice of aperture affects depth of field, is inescapably necessary if you want to be serious about photography. But these elementary concepts are really best studied with a good basic book on photography, and your camera in hand.
Of course there are other essential basic things we need to know – but to fixate on the specific numerical values – that is a dead-end street. If you find yourself constantly needing to know the EXIF data of an image, or specific numerical values, then I do feel that you’re following a too technical path to the beauty of photography. Photography isn’t about cameras or camera settings. I know, I know, quite ironic coming from a gear-head like myself. And perhaps also ironic since much of this blog is about photography technique. Still …

Direction & Quality of Light
I wanted to distill the essence of what we, as photographers, work with – light! Before we can truly grasp on-camera flash and off-camera flash, and really, any kind of photography, we have to be aware of the direction and quality of light. We need to observe the light that we have, and then decide how best to use it, or enhance it.
With this book, I try my best to share those “aha!” moments with you, and I do believe this book can make a difference to your photography.
The book is available on Amazon USA and Amazon UK, or can be ordered through Barnes & Nobles and other bookstores. The book is also available on the Apple iBook Store, as well as Amazon Kindle.
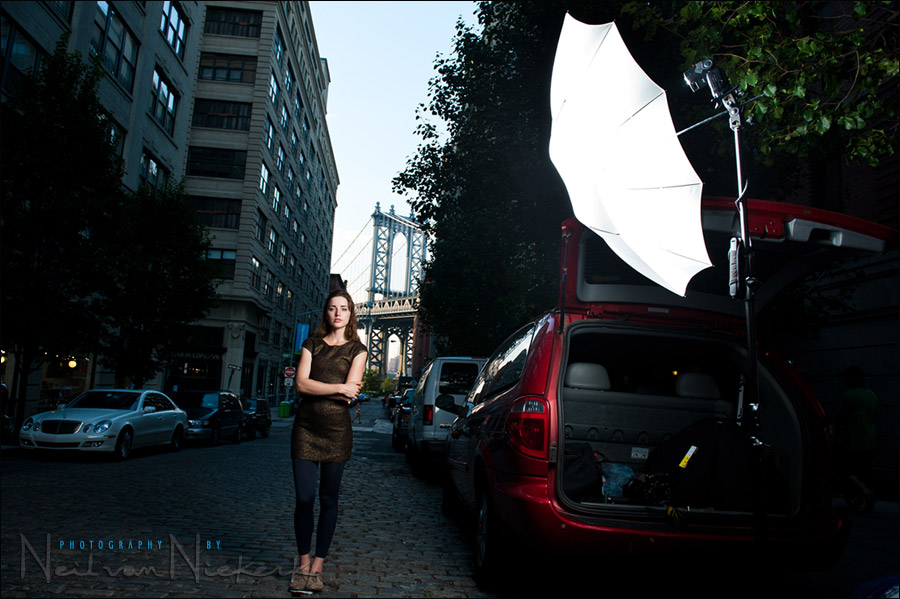
The lighting set-up used here
Here is the set-up, right next to my van where I had parked it in the street in Brooklyn. Instead of walking much further to find a background that looked urban, I decided to do it right there in the street. We’d quickly step out of the way when any car slowly ambled towards us on the cobbled street. The light-stand wasn’t in the street, but right behind my car. For simplicity of setting up, I used a shoot-through umbrella.
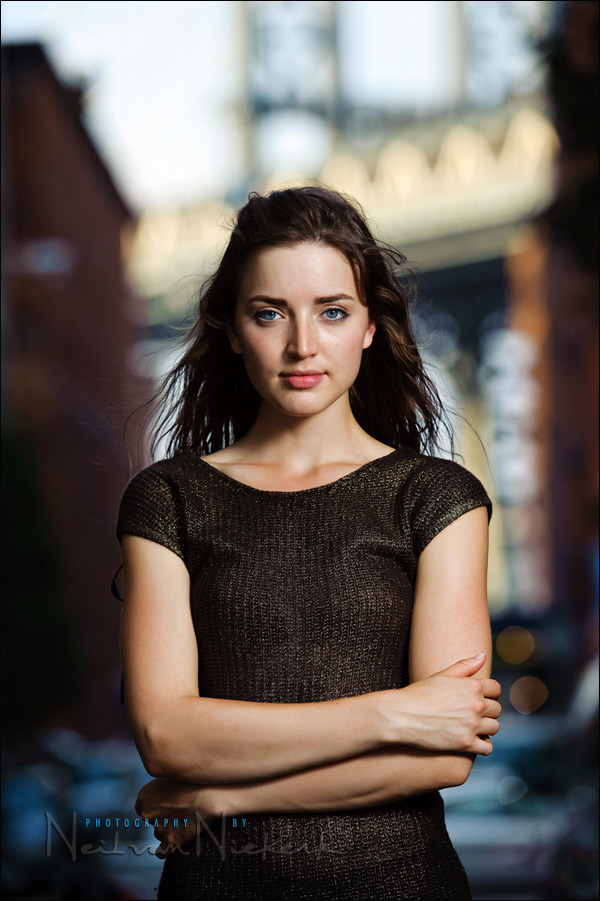
Here is the final image as shown at the top, and the same without the off-camera lighting. As you can see, the background light changed in just a minute or two and is less bright here, and less warm, as clouds moved in.
Summary
When reading up about photography, it should be kept in mind that the specific numerical values of camera settings are usually not all that essential to understanding technique, nor the art of photography.
Related articles
- Manual flash vs. TTL flash
- So what are your camera settings? – the thought-process
- Practical tutorial: Controls for manual flash exposure
- Camera & flash settings: what do you want to achieve? (model: Ulorin Vex)
- Flash photography tutorial: Balancing flash & ambient exposure (model: Anelisa)
Yeah, yeah … so what’s the f stop? :-)
Great article.
Cheers!
Bogdan
Maaaan, sometimes you can lead a horse to water .. and all you want to do is drown it.
Neil, thanks for informative post.
Does the following sound like a good thought process when setting up a shot such as this?
1) position model relative to background/ambient light
2) set focal length for desired composition/compression
3) set shutter speed near sync (to minimize blur at longer FL, and get max flash power)
4) set aperture for desired DOF
5) adjust ISO for desired background exposure
6) tweak shutter, aperture, ISO as needed
Thanks,
Les
Let’s take it step by step as you have it there:
.. 1) position model relative to background/ambient light
Yes, to an extent. But we can always change our own position relative to the model and background. The first real step then would be to find a suitable background, and a place where it the light will work in your favor – either as just available light, or as an area where you can add some lighting.
.. 2) set focal length for desired composition/compression
Yes, to an extent. This comes back to my reply in step 1 … which has to do with pre-visualization – finding a place where you can work. The focal length used is then often derived from that. But I do change lenses and my own position .. and hence perspective.
.. 3) set shutter speed near sync (to minimize blur at longer FL, and get max flash power)
Yes, if we were working in fairly bright light.
In lower light level, we’re less locked into the idea that max flash sync speed is a good place to start at.
.. 4) set aperture for desired DOF
Yes, if possible. But this is also dependent on whether we have enough juice in our flash setup if we need a wide aperture, forcing us into high-speed flash sync.
.. 5) adjust ISO for desired background exposure
Yup.
.. 6) tweak shutter, aperture, ISO as needed
Yes. This is more easily done if we are using TTL flash rather than manual flash. With manual flash, one adjustment affects another. (Shutter speed excepted.)
Beautiful color and tonality!
Neil, you will have to share your post-processing technique here!
My post-processing is very similar to how I described in this previous post.
Neil, the last photo’s show nicely ‘the making of’.. I wondered if you used PocketWizard for triggering the speedlight? If so, is your speedlight in manual mode?
Thanks,
Jan, I used on on-camera flash as Master , to wirelessly trigger the spaced speedlight. I had the Master flash’s own output disabled. I used the Slaved flash in manual output just to keep exposures consistent.
wow excellent post neil. I agree – the numbers are emphasized far too often. Even if someone were to go to the very spot that you shot this image, those numbers would be meaningless. The ambient around you would changed by that point!
BTW, is this the 70-200mm on the D3 to shoot this shot?
for DX users would you recommend the 70-200mm or the 85mm F1.4D?
Nick, yup, that was taken with the Nikon 70-200mm f2.8 VR II zoom.
Disregarding the price, I think the Nikon 70-200mm f2.8 VR II zoom is a more versatile lens than the 85mm f1.4 optic. The same goes for the Canon 70-200mm f2.8 IS II lens vs the Canon 85mm f1.2 II lens.
Wonderful article Neil :) Didnt realize it was at DUMBO until the second set of images were shown :) Really nice to see proper tonal placement being done :)
What a great read, thanks mate.
Good old common sense, nothing like it.
This article was a very clear explanation of your process. I feel that it can be easily followed. The interchangeable variable really can all lead to a correctly exposed image with with a rather broad range of outcomes. Pre-visualization is an important concept to start with. Without doing that first you will need to settle with what you have, sometimes it will work and other times it will be off the mark.
How far was the light from your subject?
Nice Bokeh!!!
what is the time when you take this, is this at dusk time?
Dante .. yes, it was late afternoon.
Hi Neil,
I would like to thank you a lot for the million tips, the beautiful photos and all articles you are writting. It is a dangerous website for non professional photographers though trying to shoot at least one picture having the same special look as yours… :-)
This leads me to a question : of course it is not about the f stop, but, the nice background is quite often obtained with a wide aperture, and a nice bokeh (as you explained in an other article).
My question is : is it possible with f4 (here comes the f stop question :P) (so with the canon 70-200 f4)
Is it possible with a 50mm 1.8 ?
Also, I saw that you used an umbrella instead of a softbox, is it a good alternative when budget is limited ? (and when it is not possible to explain to my wife why I would need to bring a softbox along)
Thanks and kind regards,
Cedric
That separation of your subject from the background is entirely do-able with an f4 telephoto zoom when used wide open. That shallow DoF doesn’t just depend on the actual aperture, but also how far your subject is from the background, and your focal length that you are using.
With an 50mm f1.8 ? Yes-ish. A 50mm lens isn’t ideal on a full-frame camera for tight portraits. And the 50mm f1.8 also tends to have harsh bokeh. But yes, you could.
Great post. Just one question (probably a very stupid one).
“There appears to be a fair amount of available light in the background, so this wasn’t a slow shutter speed, nor a high ISO. Since flash was used, we’re probably in the region of being close to maximum flash sync speed. As for ISO, going by the brightness of the background, we’re most likely in the region of 100-200 ISO.”
If the BG was not bright, wouldn’t you want to maintain a slower shutter speed to brighten it up? So, how does one deduce a fast shutter speed from the brightness of the BG?
Rishi … to answer your questions:
“If the BG was not bright, wouldn’t you want to maintain a slower shutter speed to brighten it up?”
Generally, yes.
Although there might be situations where you’d still want a faster shutter speed to freeze movement .. and then you’d rather use a wide aperture and higher ISO. It all depends.
“So, how does one deduce a fast shutter speed from the brightness of the BG?”
With this article I tried to describe the ways we could figure out the general camera settings by a common sense analysis of the image and the scenario that we might have encountered. Generally, when shooting in bright light, we’d have a higher shutter speed than if we were in lower light. Again, it all depends on what we encounter, and how we want to interpret the scene and subject.
Hi Neil, good post. In the setup picture looks like the flash is on. did you have the modeling light on? how did you do that remotely?
The flash here was a speedlight. So there’s no modeling light. What you are seeing is me firing the speedlight with the pull-back shot.
Hi can you answer a question please? I understand how to kill ambient light by increasing shutter speed in manual flash mode, but how can i achieve that same well lit subject and darker ambient background when shooting in TTL mode?
Tom .. keeping in mind that:
Ambient light exposure is controlled by the (usual) three camera settings:
– shutter speed,
– aperture,
– ISO
.. and that shutter speed, while below maximum sync speed, has no effect on flash exposure,
.. and that TTL flash exposure will follow your aperture and ISO settings,
.. it means that with TTL flash, you could change all three settings – shutter speed, aperture, ISO – to affect your ambient exposure, without affecting your TTL flash exposure.
I always love your articles. Just give me the F-stop is really lacking. We know that the DOF is lens dependent. The background blur is both F-stop and mm. That is why we use telephoto lenses to help separate the people. Yes we know that telephoto lenses also pull the background closer than it really is. So, it might be helpful to state the lens ie; 70-200mm @ F-4 @ 150mm. Of course the 150mm is the important data. I could for example take my 100mm F2.0 with a 1.4 multiplier on it giving me a 140mm lens with a F-2.8 equivalent. And it might be useful to state that ambient light was exposed -1 stop. For me shutter speed between 1/60 to sync is not that important except for ambient light exposure.(ie under exposed by 1-2 stops)
thanks