Off-camera flash: Rim-lighting and the intentional use of flare
For these promotional photos for aspiring model twins, Carina and Carolina, we went to a park. There are certain things I look for when working on an location, that I know will immediately give me a better chance at successful portraits. My book, Lighting and Design for Portrait Photography, looks at exactly that thought-process throughout the 60 chapters in the book.
The technique here should be quite obvious by now:
- A long lens (a 70-200 used closer to the longer end), compressing the perspective.
- Shooting with the background further away, to defocus the background as much as possible.
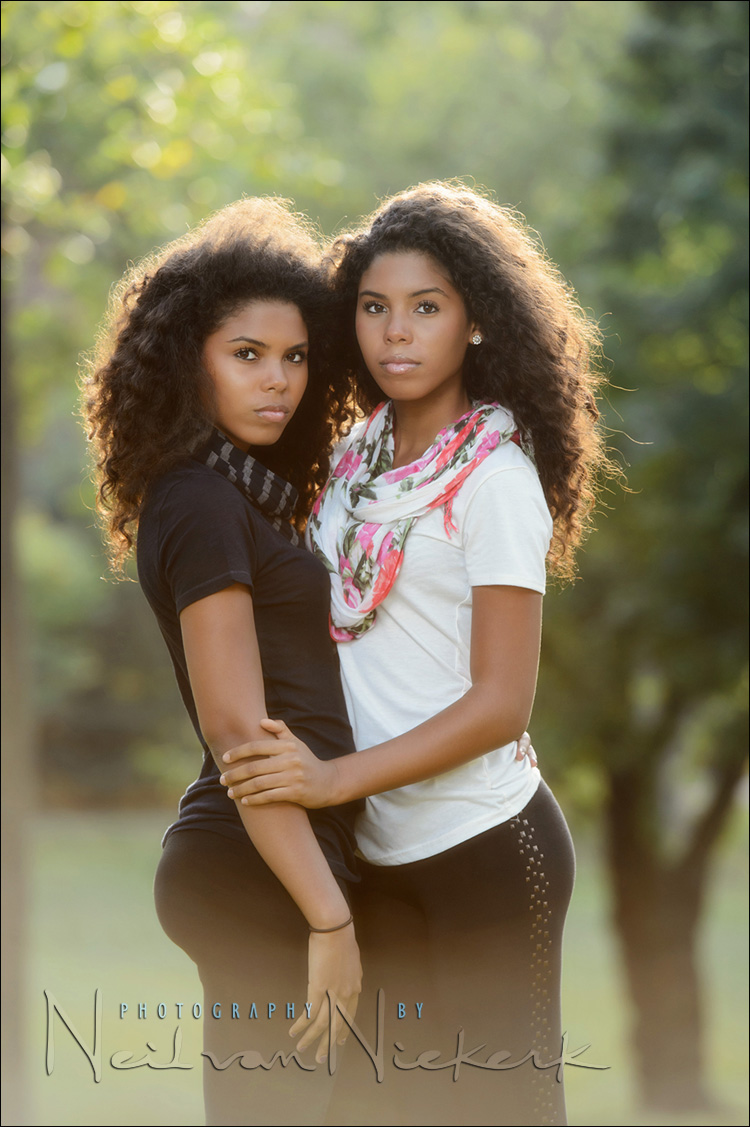
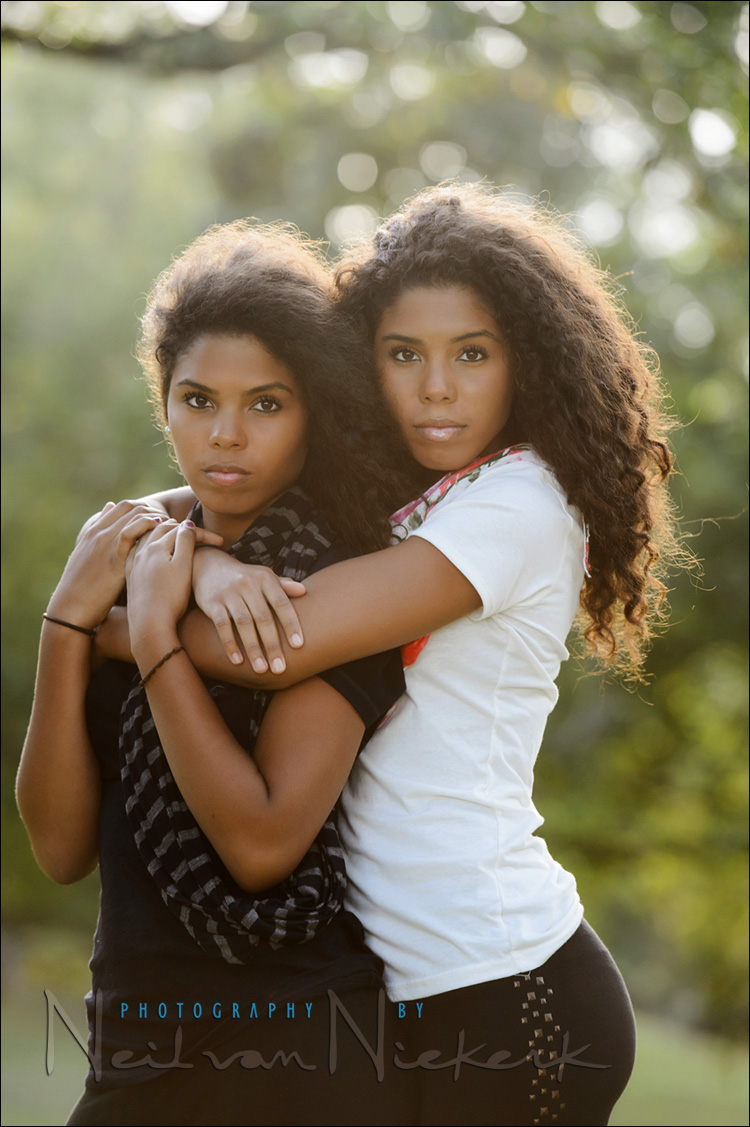
- Have the subject(s) with their back to the sun or strong light, which also creates rim-lighting. This helps with the separation from the background.
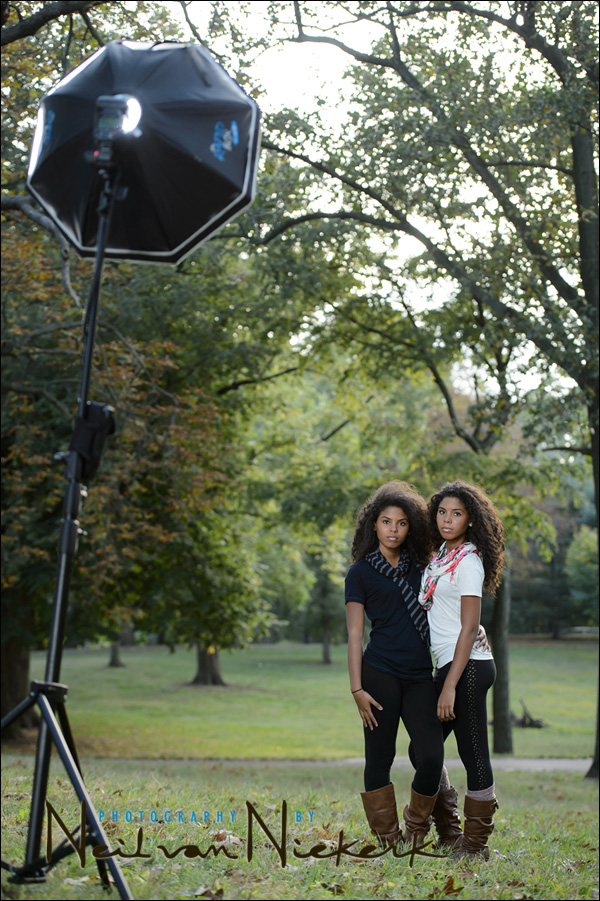
- The use of off-camera flash (with a softbox) to give flattering light as the main light. In this case, I used the Westcott Rapidbox – 26″ Octa Softbox (affiliate). This light is set to enhance the available light, or to balance the exposure for the subject with that of the background.
It’s a recipe which easily gives you solid results in most cases, and for me, is an sure-fire way to immediately get images that work.
When shooting outdoors, sunlight can be used as a second light to add rim-lighting on your subjects. Shooting towards the setting sun, the lens started flaring. I could minimize this by blocking the light with my hand (or a gobo), or I could move the setup so that I have trees blocking direct strong light hitting the front of my lens.
In this case, I liked the look of the flare, and felt it added warmth. By moving my own position around, I could control the flare so that it gave a natural vignette to the bottom part of the image – neatly mirroring the warmer brighter top part of the photo. In other words, the use of flare was quite intentional here.
Camera settings & photo gear (or equivalents) used
- 1/250 @ f/4.0 @ 640 ISO … with off-camera flash; flash set to manual
- Nikon D4
- Nikon 70-200mm f2.8 AF-S VR II /equivalent: Canon EF 70-200mm f/2.8L IS II
- Westcott Rapidbox – 26″ Octa Softbox
- Nikon SB-910 Speedlight controlled by PocketWizard FlexTT5 Transceiver & AC3 Controller
or alternately, the Canon 600EX-RT Speedlite controlled by Canon ST-E3 Transmitter - Manfrotto 1004BAC – tall light-stand
Directing your subjects
Then the next step is to let your subjects be themselves – if they are as naturally photogenic and spirited as these two girls. This is an important part of being successful with portraits – allowing your subjects to be themselves and then guiding them to show some aspect of their personalities. Or, it might just be your job as the photographer to present them at their best.
With Carina and Carolina, I spent a fair amount of time just photographing them dancing and laughing.
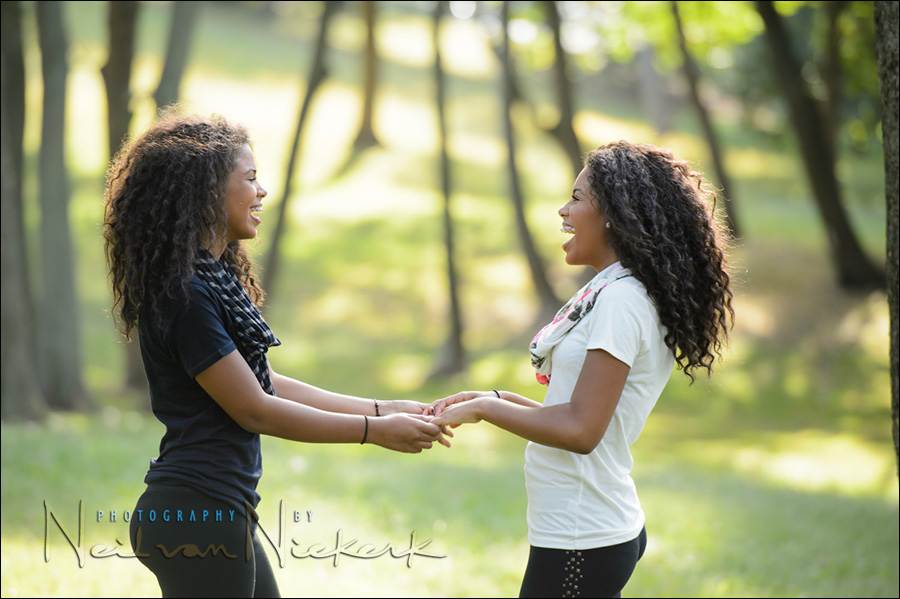
This was very much part of the process – to effortlessly get images which they like. Shooting a few sequences like this, I showed them, and they loved it. Now, having their confidence, it was easier to slightly guide their natural poses into the final images which were what we were aiming for, all along.
Lighting & Design for Portrait Photography
Lighting & Design is a follow-up of sorts to Direction & Quality of Light. It’s a slightly eclectic mix, discussing the thought-process with various scenarios shooting portraits. The examples use available light, bounce flash, off-camera flash as well as studio lighting.
The idea is that in every one of the 60 sections, there is something to be learnt and applied, regardless of your level as a photographer or where you shoot – all shaped to form a cohesive narrative arc throughout the book.
You can either purchase a copy via Amazon USA or Amazon UK. The book will also available on the Apple iBook Store, and Amazon Kindle.
Related articles
- review: Westcott Rapid Box – 26″ Octa Softbox
- Off-camera flash – Two speedlight setup for back-lighting (model: Anelisa)
- Camera & flash settings: what do you want to achieve? (model: Ulorin Vex)
- Flash photography tip – Adding flash to ambient light (model: Elizabeth)
- Off-camera flash essentials – video tutorials
- Off-camera flash photography
Hi Neil,
Just for reference, about how far from the models is your light in these photos? And how high up? I also have a Rapid Box and I’m always second-guessing my positioning. Thanks!
The pullback shot is meant to give an indication of the placement. I would say it was about 10-12 feet away from them, if I remember correctly.
It wasn’t very bright outside anymore, as you can see from the choice of ISO, so it was possible to get enough light on them from the single speedlight in the softbox.
I have been following your blog for several years now and the quality of your work never ceases to AMAZE!
All too often aspiring photographers are drawn to the technical aspects of a photo. Thank you Neil for reminding us that ‘getting their confidence’ was part of the final portrait
Excellent portraits, Neil!
Nice. Didn’t even need an assistant this time?
Nope, I traveled light and went solo on this.
Really great article Neil.
I love the natural vignette the flare gives, a great example of careful positioning to get the effect you’re after.
When using the Westcott rapid box do you use the reflector and/or zoom the flash to a specific point?
Because the rapid box has just one layer of diffusion some people use a stofen on the flash to soften the light a bit, not sure if that’s necessary.
I have the deflector plate, but don’t use it anymore. I keep the flash-head zoomed to around 35mm or 28mm. I wouldn’t use a Stofen in addition to the softbox – it would eat up too much light.
Here is another discussion about how the deflector plate should be used.
The ocf here matches the ambient perfectly. Well done!
Thanks Neil, totally agree re not using the stofen in the rapidbox.
Hello Neil:
I have been following your work for a while now and do like it, specially the way you keep consistency throughout.Now I know that some subjects photograph better than others but sadly not all subjects are models or “perfect figured” humans. With that in mind; could you please do a tutorial of how to pose and photograph your everyday citizen per say? Angles to shoot from, what kind of lightning to use etc. I have seen it from other photographers but since your work is unique I would like to see how you tackle that aspect of the portrait photography.
Otniel – there’s definitely a need for those tutorials. Good point.