Photo shoot with Off-camera flash – Adapting to opportunity
One of the fun elements of the Photo Walks in NYC, is looking for opportunity, and being ready for any serendipitous moments. We were photographing Claudia, using the Profoto B1 TTL flash (affiliate), and a 3′ octa-box as our off-camera lighting setup. Of course, we could also shoot available light … or sweeten it with a touch of off-camera flash. We have options in how we use light. It’s all part of the adventure of looking for great photos.
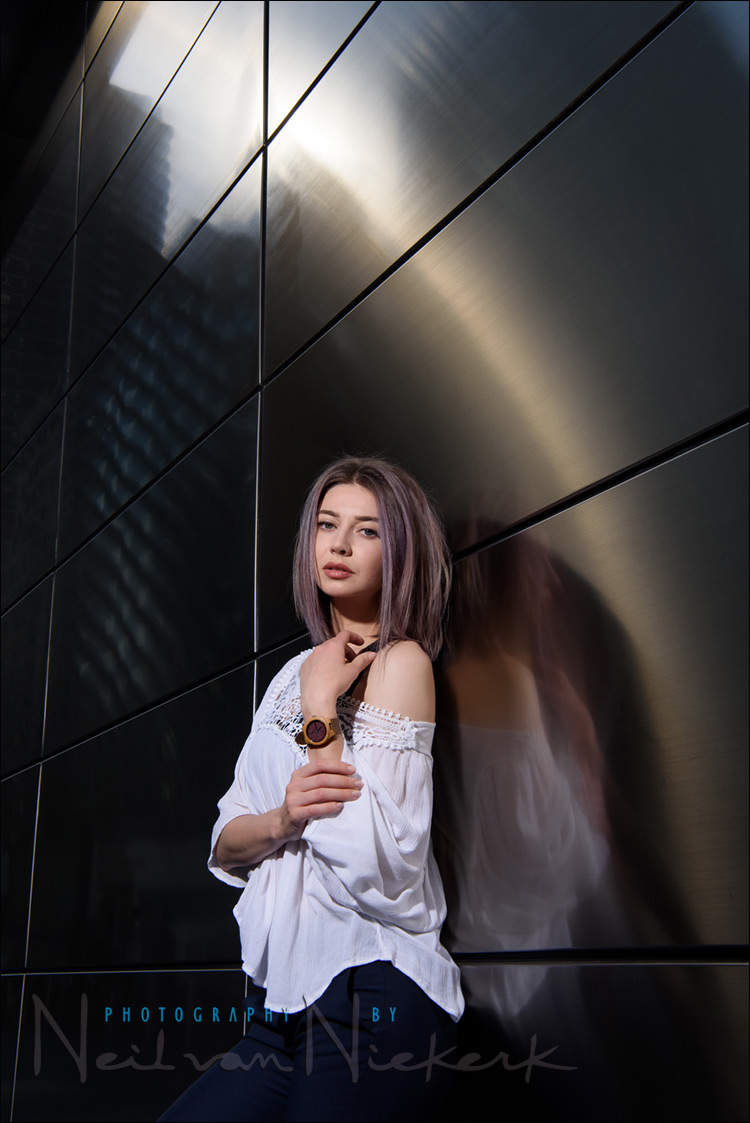
In this instance, there was this reflective metallic wall on three sides of the one building’s entrance. With the cars zipping around, and people walking past us, the patterns in the reflections were constantly changing. Great for shooting available light portraits of Claudia, as show here below:

A simple enough way of working, giving us some variety in the images. Then, walking around the corner, I noticed that the 5pm sun, which was leaning Westward, was reflecting in this semi-halo kind of way against the wall. I thought this might make a neat frame for a sequence of photos with Claudia.
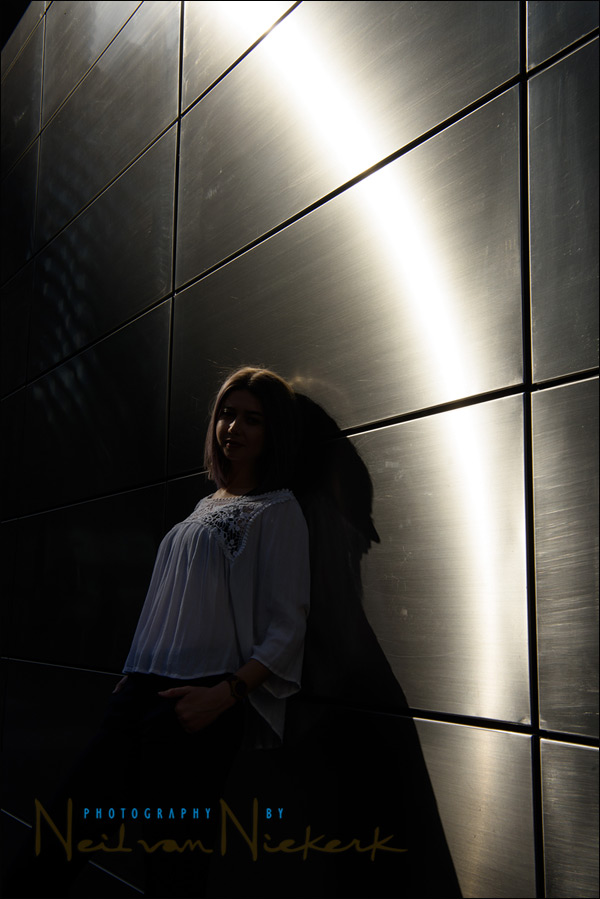
Of course, exposing for the reflection, would mean that Claudia would be heavily under-exposed … and this would necessitate adding off-camera lighting.
The softbox killed too much light, so I decided we should go with bare flash, so that we had a chance of matching that bright metallic reflection of the sun.
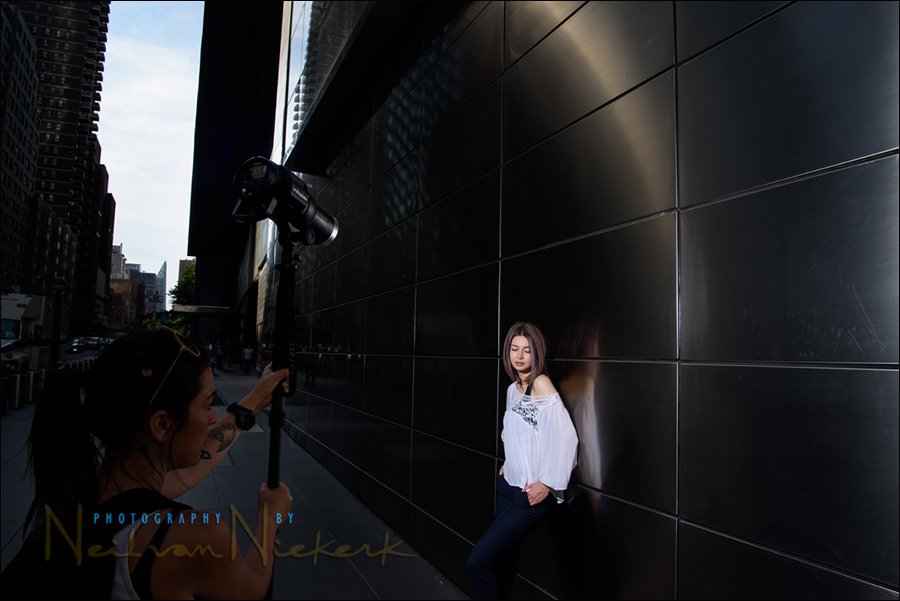
This pull-back shot will show how the bare Profoto B1 was angled towards Claudia. It was set to power level 9.5 which is close to max output. We had started at full output, but as the sun started dipping behind the skyscrapers, we had to adjust our camera settings, and the flash power. For the sequence here, we were are the settings show below.
Photo gear (or equivalents) used during this photo session
- Camera settings: 1/250 @ f/11 @ 100 ISO
- Nikon D810
- Nikon 24-70mm f/2.8E VR /equivalent Canon 24-70mm f/2.8L II
- (bare) Profoto B1 TTL flash (B&H / Amazon)
Even though we used a bare Profoto B1 here, these photos are entirely within the reach of anyone who uses a speedlight!
A little bit of homework
Working with a speedlight, what would your flash settings and the distance to your subject be, to get the same flash exposure as here? 1/250 @ f/11 @ 100 ISO
Hints:
Tutorial: How to use the guide number of your flash
Applying the Sunny 16 Rule & Flash Guide Number
Posing and positioning the light
A question came up in the comments, and it is an important one: “How did you get such soft flattering light with the bare strobe head?”
The key here is to work conservatively. I often see photographers who are new to using off-camera flash, place the flash too low, or too far off to the side.
I aim to have Butterfly Lighting, or Loop Lighting. This way there are no dramatic shadows, and little risk of the shadow of your subject’s nose creating a Charlie Chaplin mustache, or streaking across their cheekbone.
So, just a very simple way of posing my subject into the light.
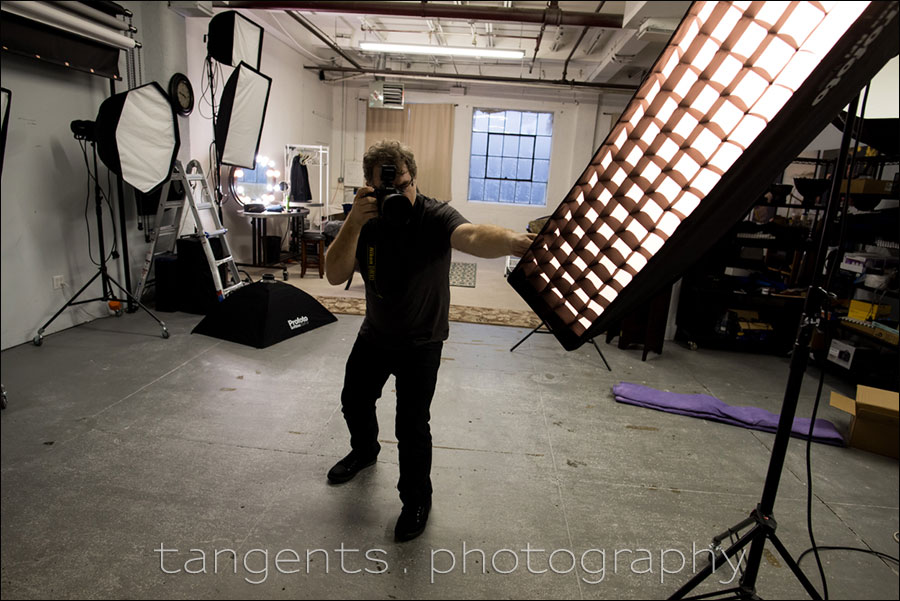
Have a look at these two images. The left-hand one is where I started. It also has mild Loop Lighting as a lighting pattern. (Close to being Butterfly Lighting.) The flash here was nearly at a right angle to the wall – in other words, at quite an angle to where I was photographing from. This caused that gradient of shadow across Claudia’s cheek. The lighting is flattering, but very contrasty.
Moving the light much closer to me, and having Claudia turn her face more to the camera, gave light which was more flat … and hence, more flattering for such a small light source.

Summary
The algorithm is to find our background exposure – in this case, the semi-circle reflection of the sun … and then expose for our subject with flash. For the thought-process in how we got to our flash settings, have a look at the little bit of homework given above.
The thought-process here is very similar to other tutorial articles here, in how we progressively set this up for a successful photo. No haphazard jumping around between settings! Then it all falls into place much more easily.
Related links
- Using interesting available light (model: Olena)
- Off-camera flash vs. available light (model: Olena)
- Photo shoot: On-location lighting problem solving
- Off-camera flash photography
- Gear list – Starting out with off-camera flash
- More info on Flash Photography Workshops
As far as the homework is concerned, I would set my Canon 600EX-RT speedlite – guide number 60m (197′) when zoomed at 200 – at full power and the subject at 5,5m (60/11), but my camera (Canon 6D) has a max sync speed of 180… and from now on I am lost.
Using 1/180 @ f/11 @ 100 ISO instead of 1/250 @ f/11 @ 100 ISO should give a brighter background: the aperture should then be adjusted accordingly in order to have the same background, I’d say f14. In this case the distance from camera to subject should be 60/14= 4,3m. But this does not answer the request of keeping the 1/250 @ f/11 @ 100 ISO values…
Keeping a shutter speed of 1/250 puts me in the realm of HSS for my camera and this implies that I lose output power from my flash, but I have no idea of how much and hence how much closer the subject should be…
Marco, yup, you wouldn’t want to go into High-Speed Flash Sync territory here. You’d lose light unnecessarily. Nothing to be gained by a shallowed depth-of-field here.
Your calculations are good, and as such, where you there, you’d just shoot. The halo on the wall would just be a bit brighter – this would not be a problem at all, since there is no “correct exposure” for that. As long as it works with the overall design of the photo, we are good.
Alternately, you could adjust your aperture down by that 0.7 stops, and move your flash closer accordingly.
But we have some leeway here because, as I mentioned, there is no exact correct exposure for the background.
Great article! How did you get such soft flattering light with the bare strobe head?
Heather – I’ve added the reply to the body of the text. It is an interesting question that I think will be important to others too, so I made it part of the main article. Thanks!
Just come across this article, so glad I did! That bit about having butterfly and loop lighting! I find working on my own as a wedding photographer, having a softbox is too much, so I use bare flash. And knowing this ^^ is definitely going to help me achieve much softer and flattering light – thanks!
I have never shot with manual flash, so I need to practice. :)
Neil’s background exposure: 1/250 @ f/11 @ 100 ISO
I have a Nikon D700 and a SB-900.
The Guide Number of a Nikon SB-900 at full power, set at 35mm, is 111.5 ft.
GN = f-stop * distance
111.5 = 11 * distance
111.5/11 = distance
Distance is approximately 10.14 ft (two significant digits).
So, I have to hold the SB-900 about 10.14 ft. away from the subject, at full power, set at 35mm. And just like Neil’s Profoto, the speedlight would be bare.
Nailed it!
Wow!!!
Did you do any post-processing for exposure?
The main adjustment to the RAW file, was that I pulled up the Shadow detail quite a lot to 50. This brought out more of the detail of the facade to the left-hand side of the frame. Otherwise it would’ve been black.
I also adjusted the WB a tiny bit.
Then, aside from a few skin blemishes that I fixed with the Healing Brush – all I did was as described here: Retouching for portraits, which is a blend of the Shine Off plug-in, and Portraiture … both of which I have on layers with reduced opacity.
Beautiful shot and a good eye for the opportunity! Very good article as well on the flash’s Guide Number – thanks.
Neil, this calculation works when the flash is zoomed around 35mm – is there a calc when zooming the flash to other lengths such as 200mm?
…and what about ISO ? fe. ISO 200 ?
You will have to check the distance scale on the back of your flash for this. This info is all given to you.
If your flash doesn’t show a distance scale, then you will have to carry around a copy of the Guide Number table that came with the flash. Punishment enough for not buying a flash with better features.
i`ve found the answer.
If you change ISO from 100 to 200 for example, you have to multiply your GN result by 1,4 . If 400 – by 2,0. If 800 – by 2,8. Exactly like apertures.
So :
1/250 @ f/11 @ 100 ISO
GN = 111,5 * 11
111,5/11 = 10 feet
1/250 @ f/11 @ 200 ISO
GN = 111,5 * 11
111,5/11 = 10 feet * 1,4 = 14 feet
1/250 @ f/11 @ 400 ISO
GN = 111,5 * 11
111,5/11 = 10 feet * 2,0 = 20 feet
and so on :-) Maybe it`ll help.
Although a little off the specific topic, I wanted to say I thoroughly enjoyed the two hours I spent under your direction during the recent photo walk mentioned above. The $ investment was well worth it. The Columbus Circle venue was challenging in terms of light and composition, but I improved my skills and confidence. Thanks again, Neil! Appreciate your patience. I will publish my photos soon–I promise.
Another great article, Neil. I’m addicted to Tangents blog.
I have a Yongnuo 565EX, GN 35.5 (measured) so with full power I should put the flash about 3m.