Lighting a vintage styled boudoir photo session, using LED fresnel lights
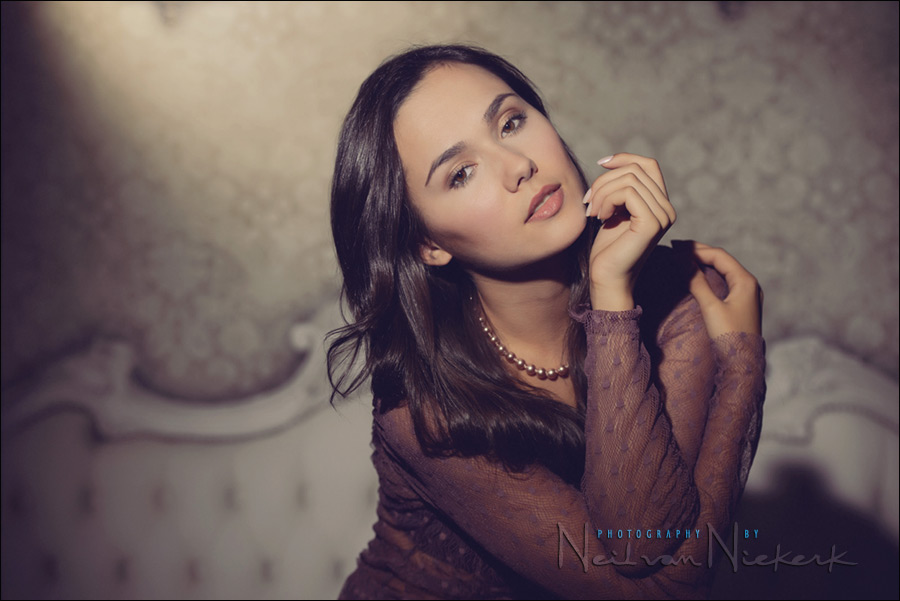
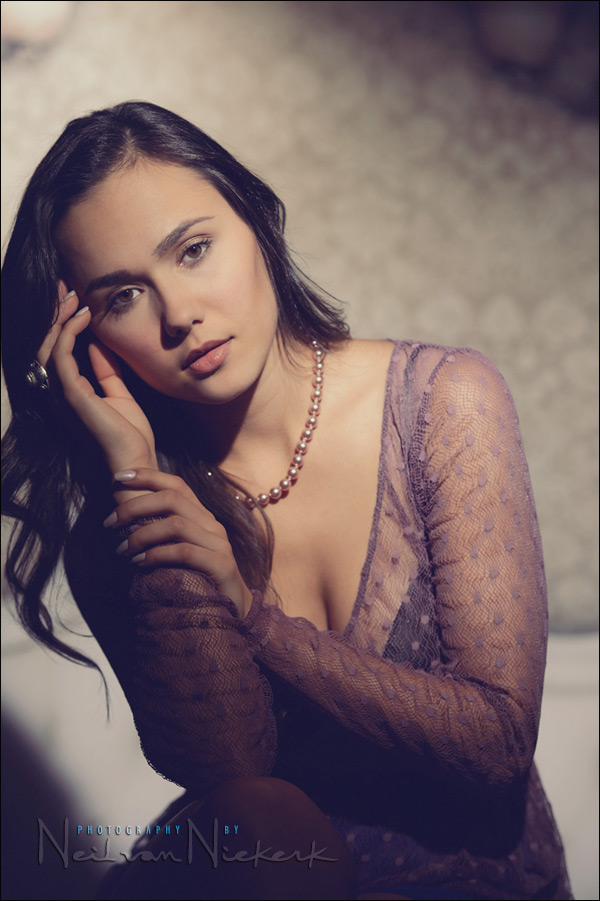
Working with the ever-delightful Olena in my studio, we went for a mix of outfits and looks. We started off the photo session with straight-forward headshots, but then when Olena showed me this outfit, it just begged for something with a more vintage feel in lighting. So, drawing on the classic Hollywood glamor lighting for inspiration, I used the Litepanels Sola 4 LED Fresnel Lights (B&H / Amazon), to create that dramatic light on her, and on the background.
I’ve used the same lights before for Hollywood Glamor style portraits, and loved the effect. The lights, being a smaller light source than a softbox, need more careful placement, and more careful posing. So using lights like these, need to be more controlled. The end result though retains that air of mystery and that certain allure than boudoir photography needs to exude.
camera settings: 1/160 @ f/4 @ 800 ISO
I didn’t use any gels, so the Litepanels LED lights were Daylight WB.
I had Olena sit on a high stool in front of the backdrop. The stool rotates, so it was easy to change her body’s position, while having the small background still fill the frame. The longer focal lengths that I could use with the 70-200mm f/2.8 lens, helped in controlling the background. The backdrop is made by Rock The Drops, and yup, I still need to figure out a more permanent way of hanging and storing backdrops.
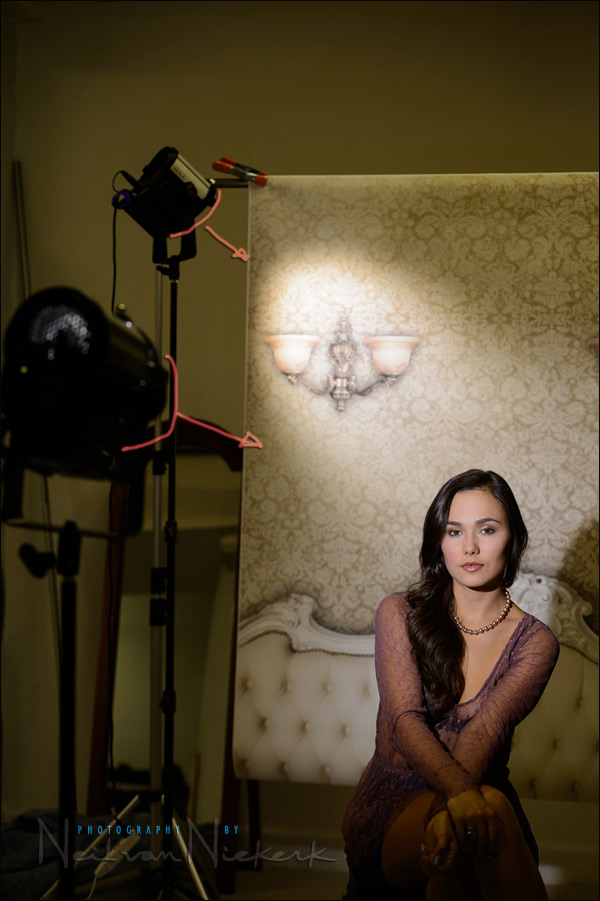
The pull-back shot shows the positioning of the lights. I marked the lights and the direction of the light in this image:
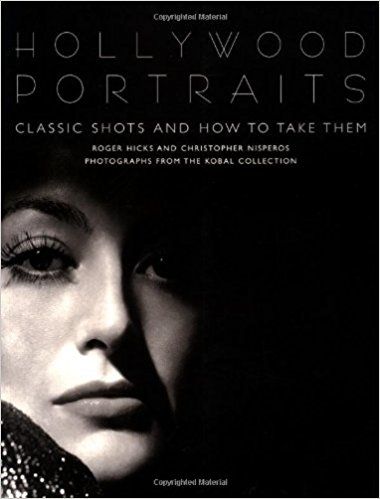
Books on Hollywood portrait lighting
I strongly recommend this book where the authors analyze and break down some of the best known portraits and describe how the images where lit – Hollywood Portraits, by Roger Hicks and Christopher Nisperos. (Amazon)
Post-processing
I like images with punch to them, so I’ve changed my default settings for my RAW files to pump up the contrast a bit. For the images from this session, the tonal range had a rapid change from the brighter areas to shadow, giving really contrast images out of the camera. Even more so with my default RAW settings. Therefore, I pulled the Contrast slider down when I generated the JPGs from the RAW files.
After skin-retouching using the Healing Tool in Photoshop, I ran Portraiture and Shine-Off, as described in the article: Photoshop filters – retouching for portraits. Then finally, on a separate layer (so I can control the opacity), I used a Photoshop filter to add a vintage feel to the image.
Photo gear (or equivalents) used in this photo session
- Nikon D4
- Nikon 70-200mm f2.8 AF-S VR II /equivalent Canon EF 70-200mm f/2.8L IS II
- Litepanels Sola 4 LED Fresnel Lights (B&H / Amazon)
Related articles
- review: Litepanels Sola 4 LED Fresnel Light (model: Ulorin Vex)
- Hollywood Glamor lighting with video lights (model: Elle)
- Photoshop filters – retouching for portraits
- Lingerie photo session: video light & studio flash (model: Olena)
- How to use video light for photography
- Details and sequences – Increase your sales in boudoir photo sessions
The top photo is excellent Neil. The vintage processing is superb and fits the lighting and pose.
Very good job Neil. Wish I had a studio where I could try to be creative. Neil, a few years ago you shared with us your raw settings with outdoor portraits. Now that raw has been updated in CS6 and CC, could you share them with us again please?
I could do a screen capture to show my default RAW settings, but it would only really help Nikon D4 shooters.
I always enjoy looking at your images. Do you do any selective sharping of your subject’s eyes? They seems to just draw my attention to the eyes.
I don’t do selective sharpening.
What you see there is most likely the effect of using a wide aperture on a longer focal length of a super-sharp lens, and focusing on her eyes.
The backdrop fooled me. I thought it was a real couch. I think the narrow field of view, the perfectly-position stool, and the dramatic lighting made the backdrop especially convincing. I say this because a while back you used a “Rock the Drops” backdrop in a different post and I immediately recognized it as a backdrop. Great post as always! Thanks for sharing your talents!
Justin
Then I must be getting really good at this!
Believe it or not, the settings you had up a few years ago may have been for Nikon but it wasn’t that much different for my Canon Raw files because my outdoor portraits really improved so a screen shot of your photoshop raw settings would greatly be appreciated.
Hi Neil, do you foresee constant LED lights ever becoming the go-to choice over strobes for in-studio portraits as the LED light technology continues to improve?
I do think that LED lighting / continuous lighting will become more and more popular. I don’t think it will ever become more popular than flash, since flash packs a lot of power in small units.
Hi Neil,
I have a question about the shadows, on first pictures the two lights are placed slighlty on the side, I would expect to see the nose shadow but there is nothing, I’d like to understand this because the nose shadow is often a problem in my attempts to use lights.
The one light is on the background. The other is pointed to Olena. I am very specific with the posing, that there is no weird nose-shadow.
Oh wow a very beautiful composition lighting and model. your backdrop is so realistic looking. If you hadnt done a wide angle shot to show the setup i would have thought it was real. If you dont mind me asking where could something like this be purchased? Any specific name for it?
Del
The backdrop is from Rock The Drops.
I don’t offhand recall which one it was.