Planning to shoot a promo video
When planning to shoot a promo video – or any video for that matter – there should ideally be some narrative or some forward momentum in what is being portrayed. An idea that propels it forward and gives it meaning. A friend once tried to convince me that I should team up with another photographer who had video gear since we would make a really good video with the gear we had available between us. I immediately put a spanner in that by insisting that without an idea or a story, we’re lost. We have nothing. Someone with an idea and a mobile phone would be many steps ahead of us. All the gear in the world doesn’t help if there isn’t a core idea on which everything rides. Some kind of narrative or storyboard.
My friend, Erik Colonese and I have, have been working with a New Jersey based boudoir photographer, Cate Scaglione, in developing a series of promotional videos for her. Having worked with Cate before, I knew we’d have a solid foundation because of her experience as a former Director of Global Advertising for a large luxury brand. She helped create television and print campaigns for new product launches and celebrity endorsements.
I knew we’d be able to work with her vision, which would be encapsulated as a storyboard as a guide. Of course, Erik and I discussed everything with her beforehand, and helped suggest changes.
With this, we could shoot with specific ideas in mind. Of course, we’d adapt and add to it off the cuff, but this was a solid foundation to make sure we had enough material for the edit stage.
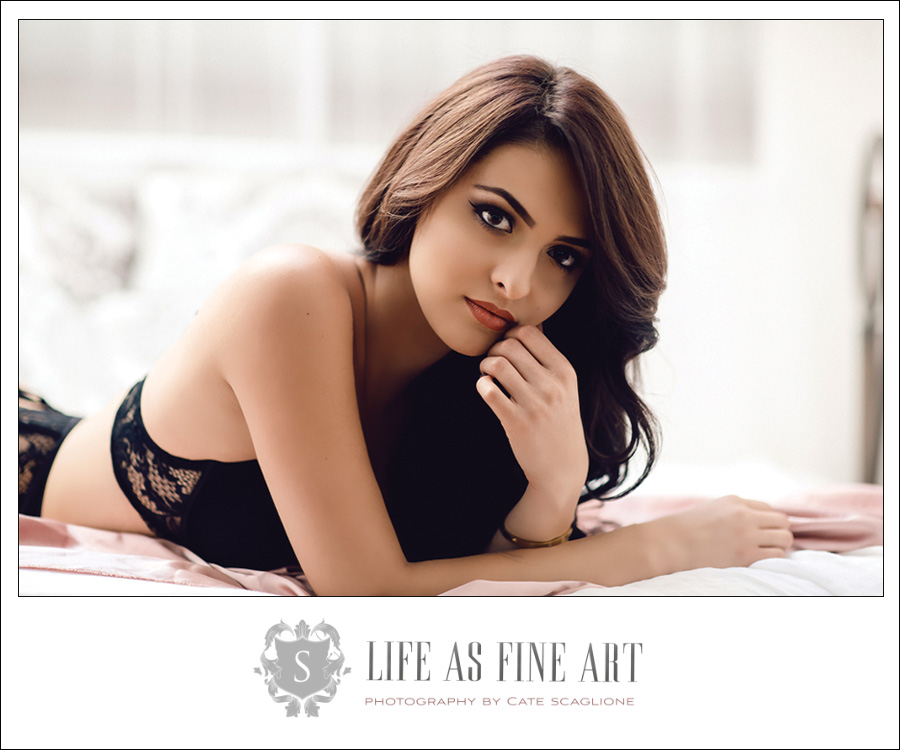
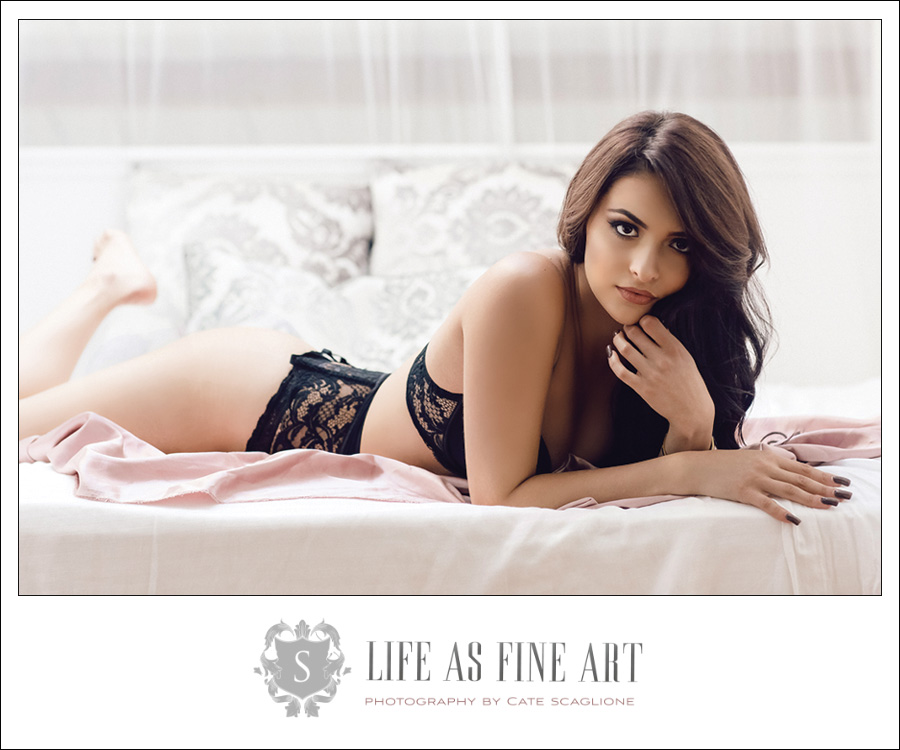
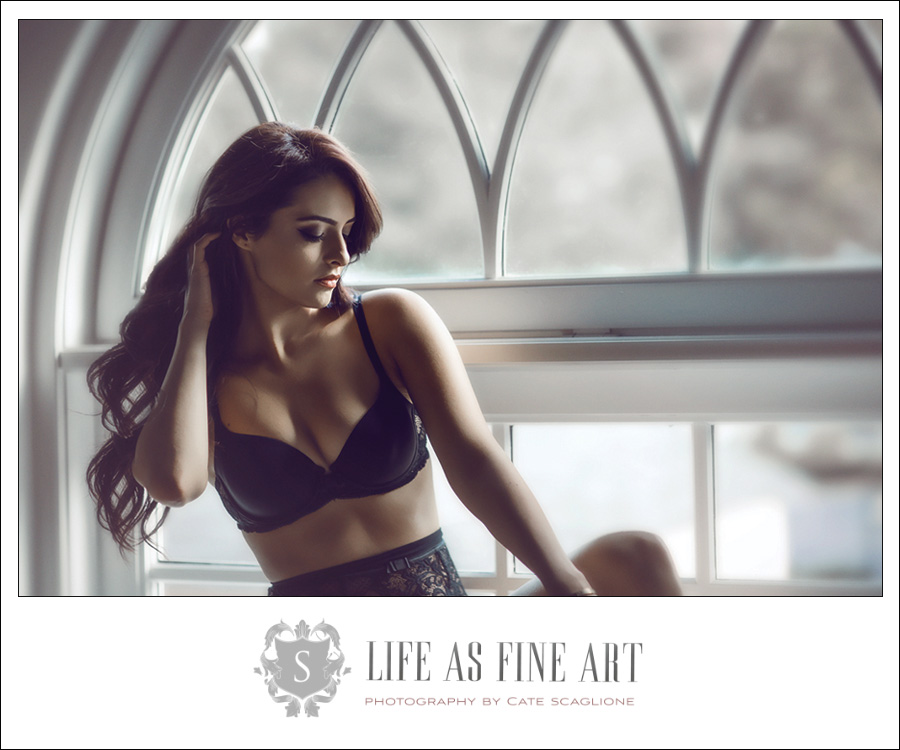
The video above of Bella, and a similar video of Jewell shown in the companion article – Shooting a boudoir photography promo video – were shot within a week of one another, as part of a theme that Cate wanted to develop in her marketing.
Working from a storyboard
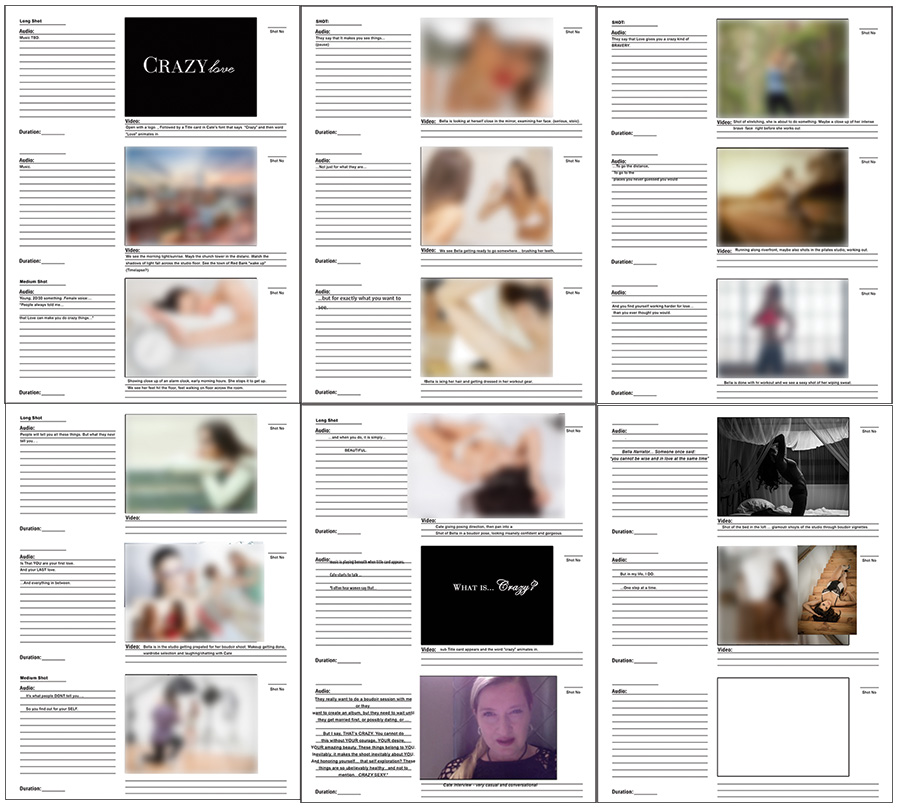
This then is the plan that Erik and I worked with on the day of shooting. Snippets of words, and intended dialogue. Notes. Also, images grabbed from our inspiration folders, or from Pinterest. Images that could help form our own ideas and describe more or less what we would aim for. Obviously, it is all open to interpretation. The studio and the lighting and the background and our model – everything in fact – would shape what we actually did. But this storyboard helped anchor us, and helped us tick off video sequences of our To Do list. This storyboard also gave us something to improvise on. A springboard.
As you can see, we originally named this ‘Crazy love’, but in the end Cate decided that it would be better to name the clip after our subject in the video – Bella. An important element to this video (and the future promo videos), is that these and to be client stories and not models. Real stories. Bella’s own words. The promo videos had to be real to appeal to other potential clients.
In the space of one week, we shot material for two of these clips, with another two promos still in the planning stage. We all agreed that a series of these shorter promos would work better than a longer one. More variety, and to the point. Each of them targeted to a different potential client.
With the initial edit of the promo video, we felt that the story was too linear as we had it there. To give the story more immediate appeal, we made it non-linear. We had enough footage to play around with the sequences and settle on a final version that Cate and Erik and I were happy with. Again, shooting with specific ideas in mind as our springboard, gave us enough footage to play around with in the edit. I’m not sure that randomly shooting stuff and making things up as we go along on the day, without a basis, would’ve delivered as much useful material.
I can’t stress this point enough – if you are going to create a video (that is not an event that is presented for you to capture on video), you had better have a solid plan to create a final video that will hold together.
More on Cate’s style of shooting
In Cate’s words:
With boudoir sessions, I like to use only natural light. In fact I go so far as to eliminate other ambient light so that I’m always working with what nature provides. Fortunately, my studio has large windows that allow me to shoot this way.
I like to keep equipment, props etc to a minimum so it’s always about expression, connection and “being in the moment”. That’s how I get the emotion to resonate in photos.
I try hard, all the time, to bring in other lighting to my boudoir and when I do, it’s just not me. So I’d rather bend and shape light to get beautiful effects I love than force myself to replicate what I know is possible for my look.
About the music choice in the video clip
Again in Cate’s words:
There were a million different directions we could have taken this video. Music largely dictates a mood and a rhythm of the spot. She could have been edgy /sexy but the goal here was to get people to relate to a story. And the music was to create emotional connection rather than the obvious sensuality of it.

Video, sound & lighting gear used during this photo session
There are two parts to this video:
- The photo session, with Cate photographing Bella – we wanted to depict her rhythm and style of shooting. Here we relied on the available light – the same as Cate was using.
- The interviews with Cate, Bella and Miranda (the MUA and hair-dresser). These were static setups with specific lighting that I used. We ended up using Cate’s interview just as a voice-over.
Static footage where the camera doesn’t move, was shot on:
For more details about the gear used: Shooting the promo video.

Moving video was shot with a gimbal setup:
- Defy G2X gimbal
- Nikon D750
- Nikon 20mm f/1.8G
For more details about the gear used: Shooting the promo video.
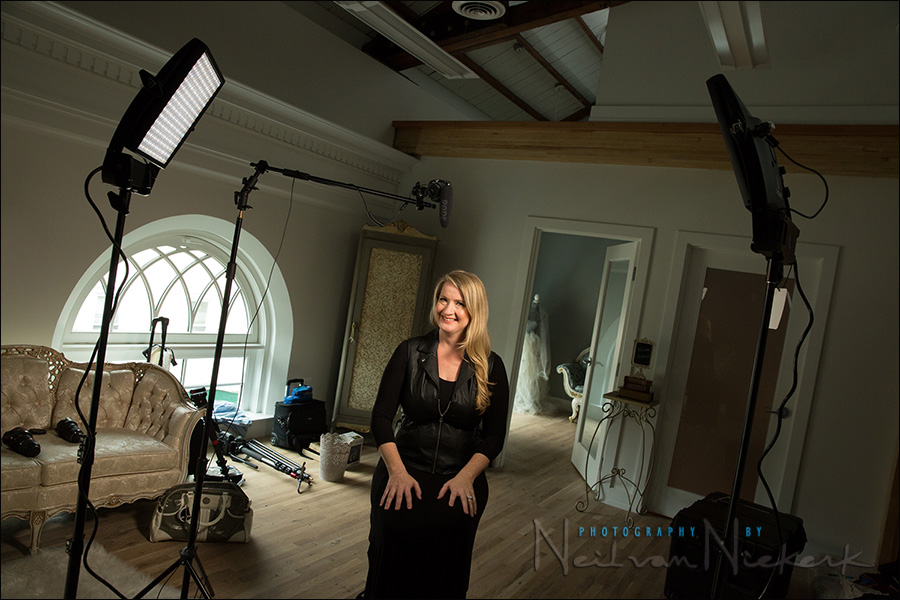
Here is the setup with Cate’s interview (for which we ended up only using as a voice-over). The interviews were shot on two cameras, with our subject looking into the one camera.
- Rode shotgun microphone (B&H / Amazon) overhead on a boom arm.
- The sound was recorded on a Zoom H6 audio recorder (B&H / Amazon)
- Lighting for the interview: Litepanels Astra Bi-Color LED Panel (B&H / Amazon)
For more details about the gear used: Shooting the promo video.
Summary
The success of the promo clip came together in careful planning – from the storyboard stage, all the way to having a great selection of gear to shoot with. But most of all, the mapping out of the shoot was what made the actual day of shooting a lot easier.
Credits
- Cate Scaglione – Life As Fine Art – boudoir photographer
- Miranda Richards – hair and make-up artist
- Erik Colonese – videography & video editing
- Neil van Niekerk – videography
Related articles
- Shooting a boudoir photography promo video (Jewell)
- Intimate male portraiture – two perspectives
- Lighting for a small commercial video shoot
- Lighting an on-location Fashion shoot
- Cate Scaglione, boudoir photographer – Life As Fine Art
- NJ commercial and corporate videography
Excellent article Neil. I don’t shoot video personally but would subscribe to the premise that you need a story board to start the creative process off with.
Always love reading your articles and seeing you put the Litepanels to use!
Great article and fantastic video.
My D750 produces fantastic quality video and using crop mode is a great idea when using it on a balanced gimbal.
Two questions:
1. I always use the D750 in Manual mode for videos and whenever there’s changing light, Auto ISO. It manages to produce perfectly exposed videos that seamlessly changes the ISO between bright and dark. Do you also use Auto ISO in changeable light settings or do you have another trick figured out?
2. When the subject distance varies, keeping focus is almost impossible. Do you focus manually when the distance changes or is there a setting that works that I don’t know about?
Kobus … There’s a bit more leeway here than you’d expect.
With 1080p the resolution is much lower than we are used to with high-resolution stills images. So that tends to mask some DoF errors.
I set smaller apertures when I know there will be movement. Now, if we consider an example of someone walking towards the camera, into the frame and then past us … for the short duration where your subject moves towards us, and are still out of focus – this wouldn’t really bother us, because it is a brief moment an then they are sharp. And then, as they move past us again, out of the sharpness given to us by our DoF, it is for only a brief moment again.
We would barely notice that in a continuous narrative. That short movement into the area of sharp focus, and then out again, doesn’t really register for us if there is momentum to our narrative. I hope this makes sense?