Romantic wedding portraits with the modeling light from a flash
Defining your style in wedding photography is, for me, as much about the way you use light and lighting, as it is about composition and posing, and timing. All the facets have to come together, continually through the day to create a successful and representative view of the wedding day. When it comes to the romantic portraits of the couple, posing and lighting are inter-twined. You can’t think of them as separate things.
With the way I use light, I don’t want to be fixed with one specific way of doing it – the style of lighting has to suit the location and have context. This is a regular motif on the Tangents blog over time. For example:
• Lighting ideas for romantic wedding portraits
• Adapting the use of light & flash photography
Using different light sources need not imply a jump in style. If you understand that how to use the Direction & Quality of Light, then you can pretty much use any light source. With that, there are times when using a continuous light source that is balanced with the existing Incandescent / Tungsten lighting, is the better choice. In other words, using video lights for the portraits.
While I still bring along a video light with me when I photograph weddings, the Profoto B1 TTL flash (B&H / Amazon) has been a game-changer for me in several ways. One of them is that I started using the Profoto B1 modeling lamp as a video light. While that example in the linked article has Anelisa as the model, in this article I wanted to show examples from two weddings, and how I slightly adapted to my surroundings.
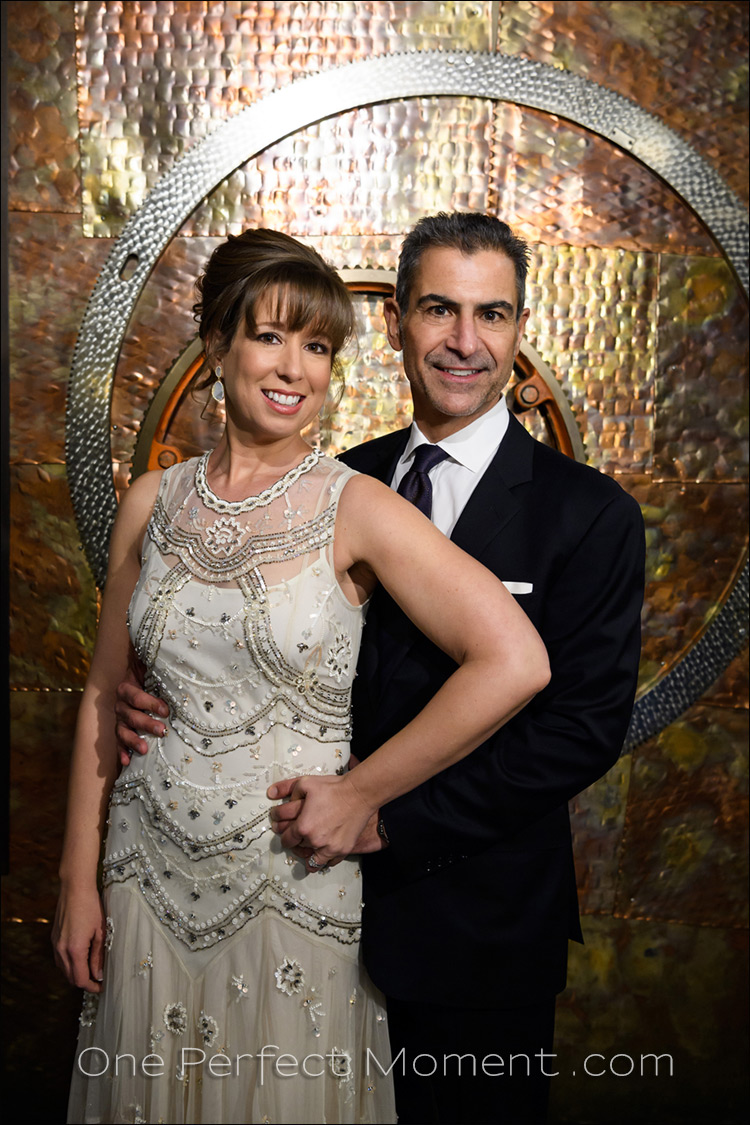
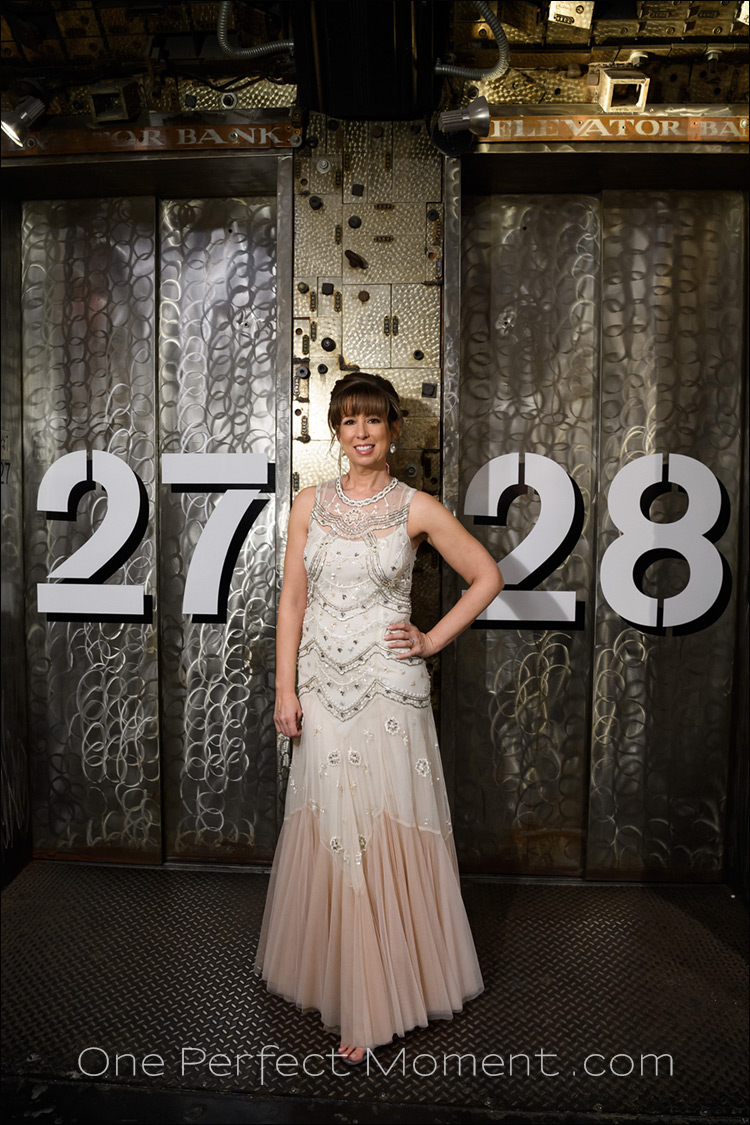
With these three photos from Marni & Nick’s intimate New York wedding, we went across the road from the venue, to Chelsea Market for the romantic portraits. It was cold outside, and we had a limit on the time, so I decided that the nooks and crannies of this indoor venue would offer the most variety for backgrounds. Since there was a lot of available light around us from the various light sources, I used the modeling light from the Profoto B1 mostly to clean up the existing light so that the light on our couple looked good. The light modifier on the Profoto B1 was the Profoto OCF Beauty Dish (24″) (B&H / Amazon) with the diffuser and deflector plate removed. So it was a bare light source, slightly softened by the light reflecting off the beauty dish’s canopy around the flash. The White Balance of the RAW files were set around 2800K in fine-tuning during post-processing. Close enough to an Incandescent environment to give a nice fill light on the couple that matched the available light.
Flash (even gelled) would have been too intrusive here – mostly for the lack of space to maneuver around. Also, I didn’t want to draw undue attention to us with the flash going off. So for these various reasons, this was the bed option here in terms of our lighting.
Camera settings & photo gear (or equivalents) used during this photo session
- 1/200 @ f/4 @ 2000 ISO
- Nikon D5
- Nikon 24-70mm f/2.8E VR /equivalent Canon 24-70mm f/2.8L II
- Profoto B1 TTL flash (B&H / Amazon)
- Profoto OCF Beauty Dish (24″) (B&H / Amazon) with the diffuser and deflector plate removed
- 75″ tall Gitzo monopod to hold up the light
If you are curious what the Profoto OCF Beauty Dish (24″) (affiliate), looks like, and the results it gives with flash in daylight – there are examples in this article: People skills for portrait & wedding photographers.

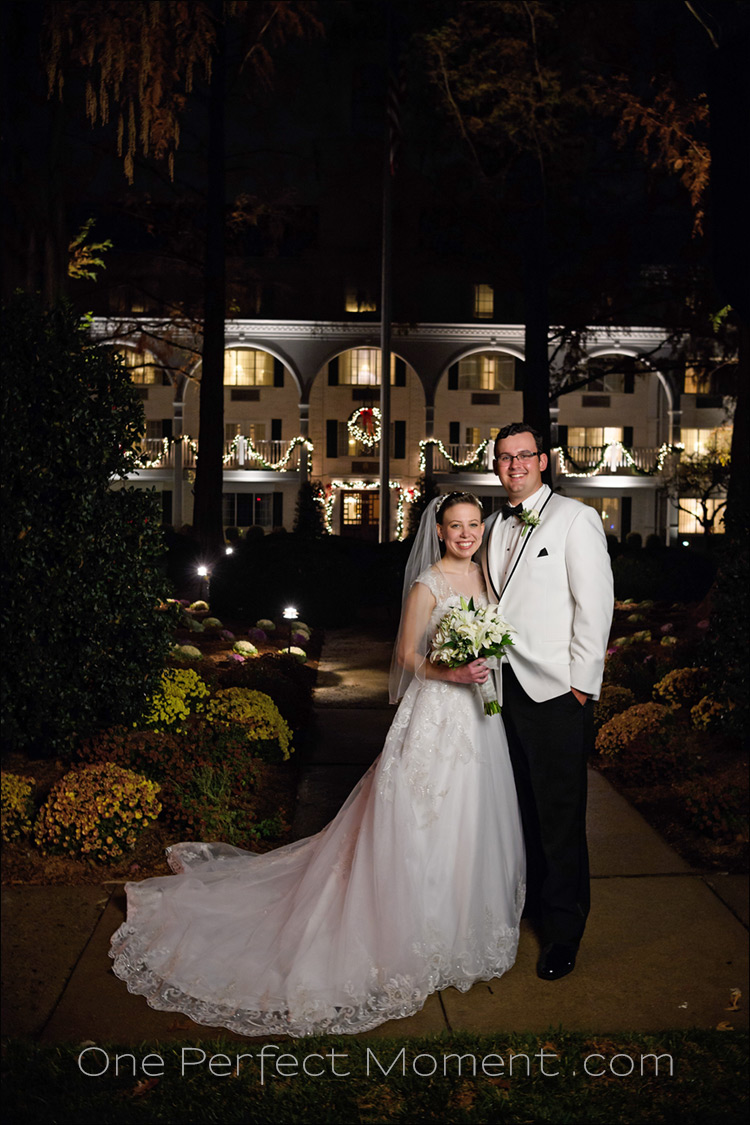
For Olivia and Thomas’ wedding portraits, it was already dark by the time we go to do these. I wanted a lighting style that fitted with the existing light in the background – the venue and the lights in the gardens. To get to decent enough camera settings – avoiding camera shake, and having sufficient depth-of-field – I worked at 1/30 @ f/4 @ 1600 ISO for the two examples shown here. This did leave the background darker than I would’ve liked – which meant that in post-processing the images, I used the Shadows slider in Photoshop to bring up some detail in the background. This still left the lighting on our couple to look good in context – flattering, but still slightly dramatic.
The Profoto B1 had the Westcott Rapid Box 36″ Octabox (B&H / Amazon) on it, but with only the inner baffle. The double baffle killed too much of the modeling light’s power, so I removed the outer baffle. This meant we had to use the light source closer to the couple to get to decent camera settings … and this in turn gave us more pronounced light fall-off, as you can see in the top image. Yet, this worked to our advantage here, bringing attention to the couple. In the example below, this helped in not over-lighting the plants in the foreground – just an island of light on our couple.
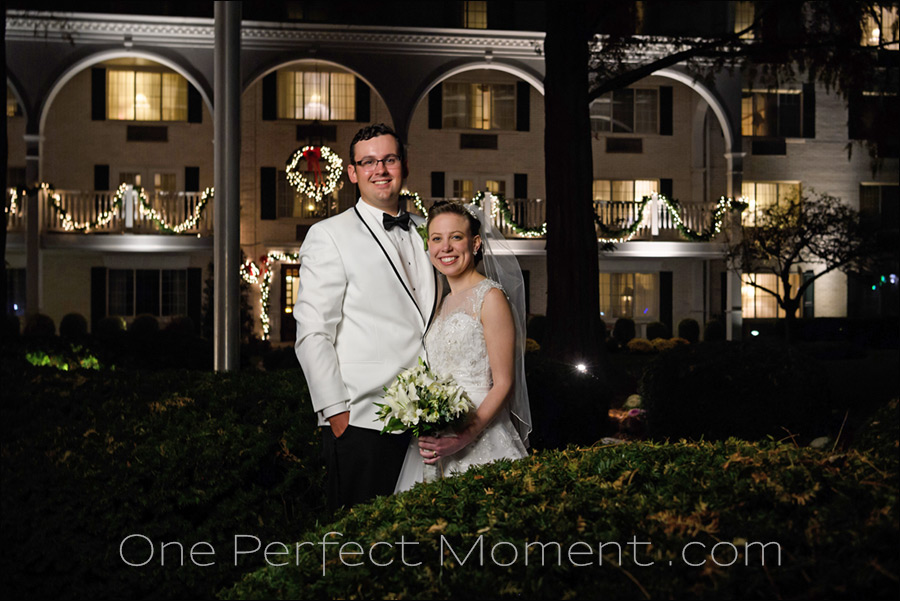
The pull-back shot to show the positioning of the light in relation to the couple – I wanted the light to favor the bride.

Camera settings & photo gear (or equivalents) used during this photo session
- 1/30 @ f/4 @ 1600 ISO
- Profoto B1 TTL flash (B&H / Amazon)
- Westcott Rapid Box 36″ Octabox (B&H / Amazon) with only the inner baffle
- 75″ tall Gitzo monopod to hold up the light
If you are curious what the Westcott Rapid Box 36″ Octabox (B&H / Amazon) looks like in general use, and the results it gives with flash in daylight – there are examples in this article: Outdoor photo session with kids, using off-camera flash.
Summary
With these examples from two different weddings, I wanted to show how the same lighting idea was adapted to different places we were shooting – all with the idea to give superb results while remaining flexible in our approach. And there is a key idea hidden in the pullback shot – in posing the couple, I mostly concentrate on the additional lighting favoring the bride.
Related links
- Using the Profoto B1 modeling lamp as a video light (model: Anelisa)
- More articles on using video light for photography
- Info: Workshops / Photo walks – NYC
- review: Profoto B1 flash
- Using the Profoto B1 flash at a wedding
- Marni & Nick – an intimate New York wedding
I notice you primarily shoot with the D4 (and with your new D5). Do you miss the higher megapixel count you would get from the other full frame bodies, or does the AF and low ISO performance more than make up for only having 20 MP?
Hi there Tim
I do use the 36 megapixel Nikon D810 for when I need high megapixel images, such as the photo session with a band for their album cover.
For weddings, there is (for me) less need for such a high resolution.
A photo taken with the 16 megapixel Nikon D4, offers a resolution of 4928 x 3280 pixels.
At 300 pixels per inch you could print an 11x 16 inch photo without even needing to upscale the image.
My main album option that I offer, is 11×11 inches.
The largest an image is most likely to be printed would be a double spread image would therefore be 22×11 inches.
So there would have to be some upscaling if I were to print at 300 pixels per inch.
The album company that I use, prints at 254 pixels per inch.
On the long side, 4928 pixels at 300 pixels per inch = 16 inches wide.
At 254 pixels per inch, the image will be 19.5 inches without up-rezzing it.
So it would only be a mild up-rezzing of the image to get to 22 inches, and that won’t have any noticeable degradation to image quality.
So for me, the 16 megapixels is fine for the majority of my work.
The 20 megapixels of the Nikon D5 more than adequately covers me.
Then there is always the 26 megapixel Nikon D810 for critical work.
Hi Neil
With the last image, I take it you used a tripod given the 1/30th shutter speed? Or was the 24-70 VR lens stable enough to cope with camera shake? The image looks tack sharp.
Wonderful images by the way.
Thanks
Paul
I don’t normally work with a tripod – especially so with weddings which tend to be fast-moving.
Here, the stabilized lens helped a lot in getting crisply sharp photos.
Hi Neil, Happy New Year! Since I have a wedding coming up that will require a lot of light (indoor church wedding late in evening) I am off to purchase this (will use your link) is it difficult to set up and learn coming from a speed light background? Do you need to purchase the trigger in order to use this light? Thank you again for all that you do. I have had the pleasure of attending your workshop as well as seeing you speak.
Michelle … the Profoto B1 is super-easy to use and get used to. What I especially like (aside from the power), is that with the trigger on the camera (which you have to purchase), is that you can flip between TTL mode and manual flash with the push of a button.
Hey, Neil. I enjoy reading your blog, and I must say that I was considering the purchase of the Lowell…but the incandescent light caused me to look elsewhere…
I also have to tell you that I got quite a shock when I saw some of the photos watermarked ONE PERFECT MOMENT, because that happens to be my email.
One Perfect Moment is my wedding & portrait website. I chose it as my business name (and LLC) because no one can spell my name. If you do a whois on the domain name, you’ll see it was registered in 2004. I also have all the relevant top-level domain names.
So that’s why my photos are watermarked as “One Perfect Moment” … makes it easy enough for people to find my website if they like an image they see during a web search.