How the size and placement of studio lights affect the photos
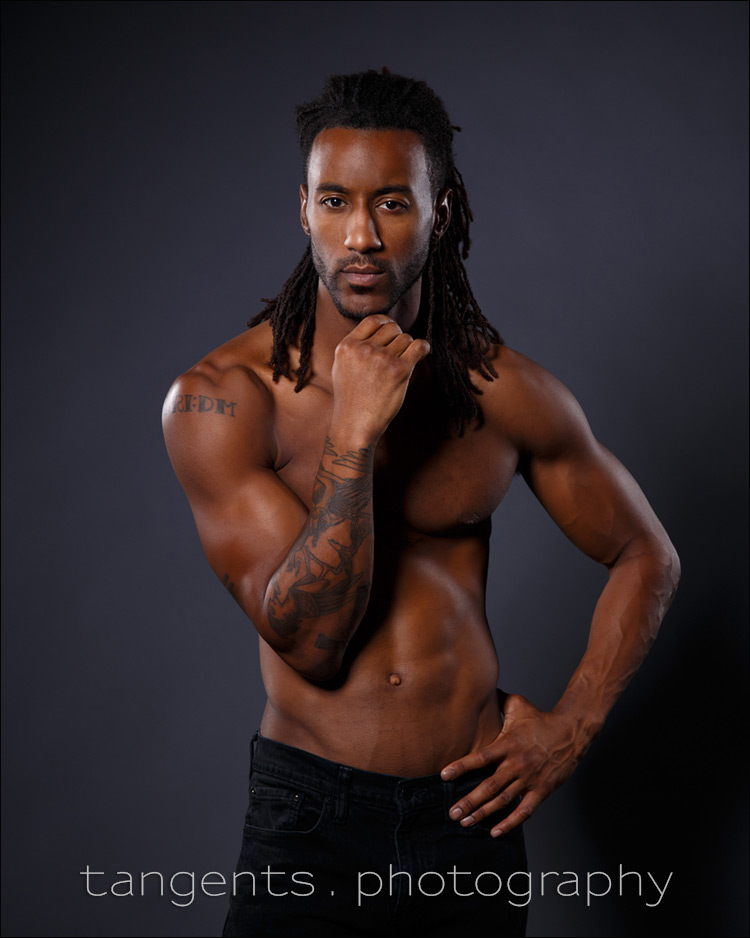
Mateos, a model & fitness trainer, in the studio. More than just a fitness photograph (via dramatic light to show off his physique), I wanted these to be portraits as well of this athlete. With fitness photography, the approach is usually to have photos where you show detail and contouring. This is usually done with more contrasty light – small light sources at an angle to your subject.
To get the rim-lighting shown here, there was the typical setup of two gridded stripboxes to the side and behind Mateos. Pretty standard for this kind of photo where you need to show detail and contouring.
The difference between these two photos then, is due to the difference in the position and size of the main light:

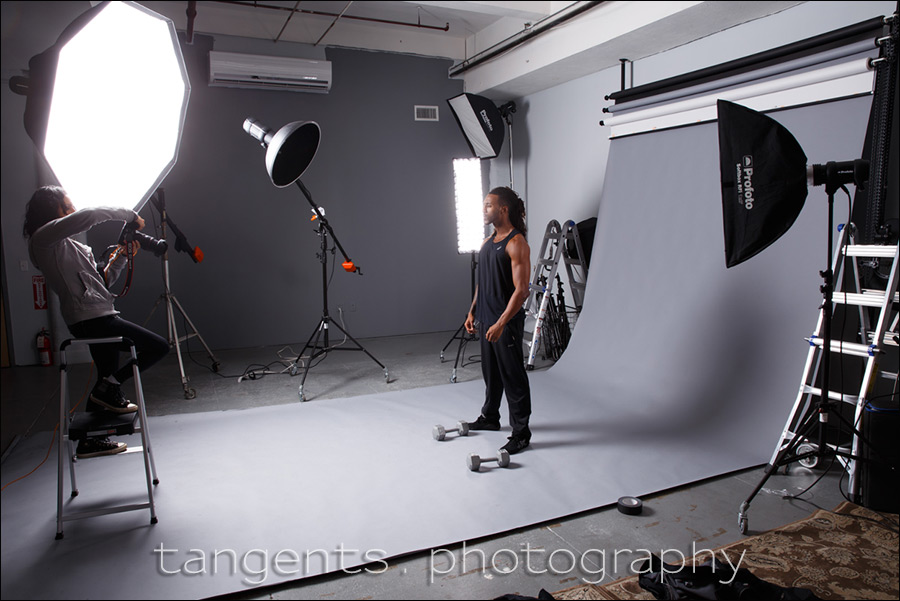
These are the two pull-back shots to show the lighting setup. My friend Yasmeen and I were shooting for Mateos’ portfolio. Yasmeen is a Fitness photographer in NJ. That’s her on the ladder. She’s …. not as tall as I am. But I digress. The lighting setup!
As you can see from the pull-back shots, we had two different main lights – different sizes at different distances. The reason why we set up the lights like this, was so that we could a different look without interrupting the flow of the shoot. We could just switch the one light off, and the other one on … or, we could even have had the large light act as a soft fill light, had we chosen to do so. Much more elegant than changing the lighting setup between sets. We get to keep the rhythm.
These two photos will also somewhat serve as examples of:
– the larger the light source, the softer the light.
– the inverse square law.
Both photos at the top were taken at: 1/160 @ f/11 @ 100 ISO
This obviously means both lights were set to the same exposure … yet the background is brighter in the photo with the larger light source. That the background is brighter has nothing to do with the size of the light-source, but has to do with the distance from the background. For the same exposure, the light that is set further back, will give a brighter background. This is the effect of the Inverse Square Law. We discussed the topic of Bounce flash photography & The Inverse Square Law in that previous article. It’s the same reasoning why the background here appears brighter.
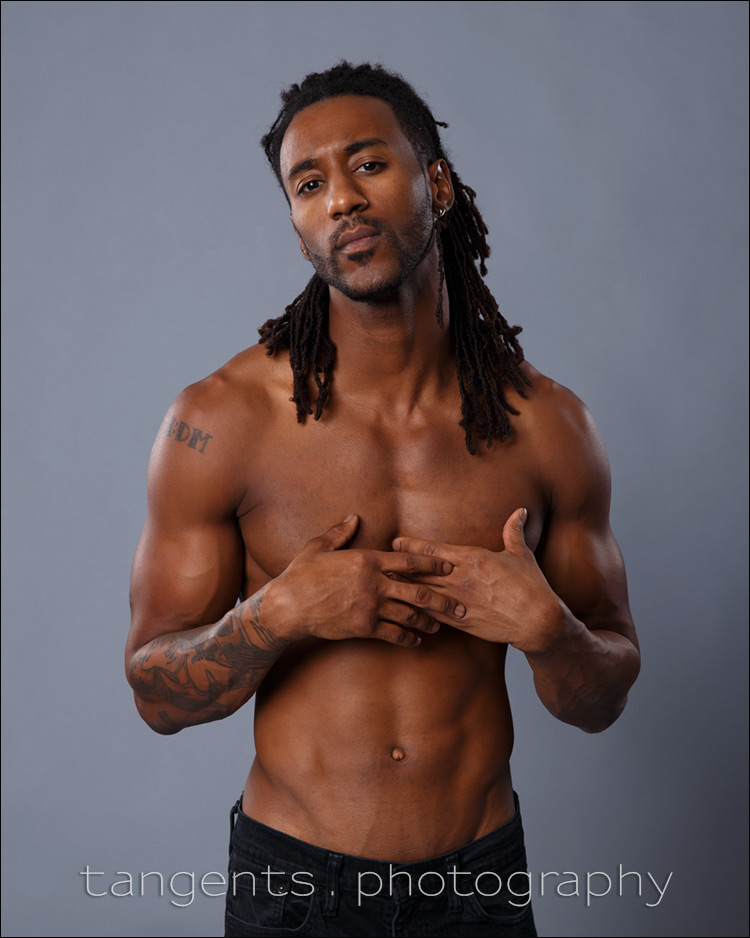
At the same time, you can readily see the difference in how the light from the larger light source wraps him to create softer shadows. You can see it specifically in the shadow under his arm. In other words, the larger light source gives softer light / less contrast.
The lighting setup was fairly straight-forward – two gridded Profoto 1’×3’ softboxes on either side of Mateos to help with the definition, and simultaneously help separate him from the darker background.
The main light in the second image was the large Profoto 5.0’ RFi Octa Softbox on a studio boom arm by Redwing.
In the first setup, the main light was the honeycombed Profoto beauty dish. The result is a lot more contrast in the photo – more drama! Just perfect for this kind of shoot.
Photo gear and lighting used during this photo session
- 1/160 @ f/11 @ 100 ISO
- (4x) Profoto D1 Air 500Ws studio lights
- Profoto beauty dish
- or the large Profoto 5.0’ RFi Octa Softbox (B&H / Amazon)
- Both with (2x) gridded Profoto 1’×3’ softbox
- Savage Fashion Grey paper backdrop
- Manfrotto light-stands
Summary
The smaller, more contained light source will give us more contrast / more defined shadows.
The closer our light is to our subject, the darker the background will appear. With the larger light source, the light is placed further back … and hence the background is brighter. Note, the relative brightness of the backgrounds have little to do with the size of the main light.
There’s a certain behavior we should anticipate from our light sources – depending on distance and size. And in-between, there is a huge variety in how we can use our light.
Related articles
- Fitness photo session in the studio
- Your first time in the studio
- Working with a large Octa Softbox
- Using a beauty dish in the studio
- More articles on Studio Photography
Neil, Thanks for this post and example of lighting. Another learning experience for me! You mentioned that the two smaller light sources are off the the sides of the model. Looking at the pull back photo, are the two light sources also slightly behind the model? Perhaps 30 or 45 degrees back from straight to the sides of him? Thanks. –Peter
Peter .. that’s exactly it. Those lights are usually placed around 30 to 45 degrees behind your subject.
Loved seeing the two main lights set up at the same time, and the way you so quickly achieved two very different results. The setup really nails the concepts of how and why the light behaves, depending on the distance from the subject. I imagine this will be a real “light bulb” moment for many photographers. Thank you for another great studio lighting lesson. Superb!
Another awesome post! There’s always something new to learn from the bts shots.
Thanks for sharing!
Neil,
can you tell us, what is the difference between these scenarios :
– when fill light is on the side of main light – as you mention above
– when fill light is on the other side of main light (lets say about 45 degrees to each other)
is there any difference ? You`ve worked this way ?
Thank you Neil for your BTS shots and explanation as I always find these most helpful (a picture worth 1000 words). Great torso definition with the Beauty dish.
I am increasingly understanding how to use the inverse square law and the greater fall off to the background when a light is placed closer to the model.
I would also be interested in your comment on the use of gridded beauty dish vs non gridded. I was wondering is it not only close location and angle (per the BTS shots) but also the gridded beauty dish, that may help to contribute to a darker background as I have assumed there is less spill.
Paul .. Without the grid, there is spill light to the sides of the beauty dish. You won’t see this if you shoot a tight portrait, but if you shoot wider, you might notice it.
This article shows some of that with the Westcott Rapidbox – Using a beauty dish. While this wasn’t a “proper” beauty dish, it will illustrate what happens with wider shots. A grid contains that … but a grid also makes the light more contrasty.
A grid would help contain the spill, for sure.