Studio photography lighting tips – your first time in the studio
Since I make my studio here in NJ available as a Photo studio rental space, I frequently meet newer photographers who would like to dabble in studio photography a bit, but don’t have much experience of working in a studio. Sometimes they have experience with off-camera flash on location, or with a small home studio – and they would like to try out working in a larger studio area, using a range of studio lighting gear. (Btw, aside from some continuous lighting, the studio flashes are all Profoto. There are reasons for this.)
With their first time in the studio, the newer photographer might be a little overwhelmed with all the choice – where to even start!? My suggestion is always to start with very simple lighting. You can achieve a lot without going all the way and using five studio heads with five different light modifiers.
With a fairly straight-forward way of working with studio lights, here are my tips for your first time in the studio. It shouldn’t be overwhelming – it should be stress-free fun instead!
Tips for your first time in a photography studio
1. Start with one light. From there, you can eventually add a fill light, or a hair light, or maybe just a reflector to the one side. Really, keep it simple. Don’t just randomly add more lights – from your test images, figure out what you need to add, or what you need to take away. Until you have the confidence, and can swagger a bit in the studio, make simplicity the key to successful portraits in the studio.
2. Use the modeling lights – because what you see with the house-lights on in the studio (as in the pull-back shot shown below), is NOT what you’re going to get in camera when the studio lights fire. The modeling lights will help you previsualise your photos, and help you in positioning your lights – and posing your model.
3. Your first decision about light modifiers will hinge around whether you want a large light source giving you softer light, or a smaller light source giving you more contrasty light. There are options with either of those two choices, but broadly speaking these are your two main choices – softer light vs more contrasty light.
Here are some examples:
• Using the beauty dish as a single light source – the beauty dish will generally give more contrasty light.
• Lingerie photo shoot with Carly Erin. Here we used a 7′ parabolic umbrella, and you can see the light is flattering and soft, but shooting with the light at an angle, let us sculpt her body with the light, instead of just giving flat light.
4. Camera settings! This is where the newer photographer in the studio sometimes becomes stuck. Again though, this is not scary. Photographers that shoot on location, will have the idea imprinted that you have to meter for the available light. If you use off-camera lighting outdoors, you invariably take the ambient light into account. However, when you shoot in the studio, you don’t. That’s the primary difference. In the studio, you decide what your camera and flash settings are. You don’t even meter for the ambient light in the studio, since this is usually negligible.
You have to make the decision. You want f/8 as your aperture? Then choose f/8 and change the power of your light (or the position of your light), to give you f/8 at the appropriate ISO setting. Usually you will be shooting at 100 ISO or 200 ISO in the studio. If you shoot in a studio where you use speed lights, you might want to be at 400 ISO. It all depends on what you have. But ultimately, you decide on your camera settings. As simple as that. What do you need?
5. This brings us to the next step – using a light meter in the studio. It’s dead simple. You stand where your model will stand, and point the light-meter at the light, and trigger the light with the remote trigger. Then you change the flash output (or distance), until you get to your chosen camera settings. And your camera settings are? (Hint: whatever you decide on.)
Here are some useful articles:
• A first-steps guide to using a light meter with manual flash – even though this is for off-camera flash when shooting on-location, much of the thought-process is the same. The only difference is that in the studio we don’t take ambient exposure into account first.
• Of course, if you don’t have a light-meter, you could always use the histogram to determine exposure for basic lighting setups. This will help you get to a starting point as well.
6. Move your lights around between sequences for variety.
Even a small change in the light’s position can make a difference.
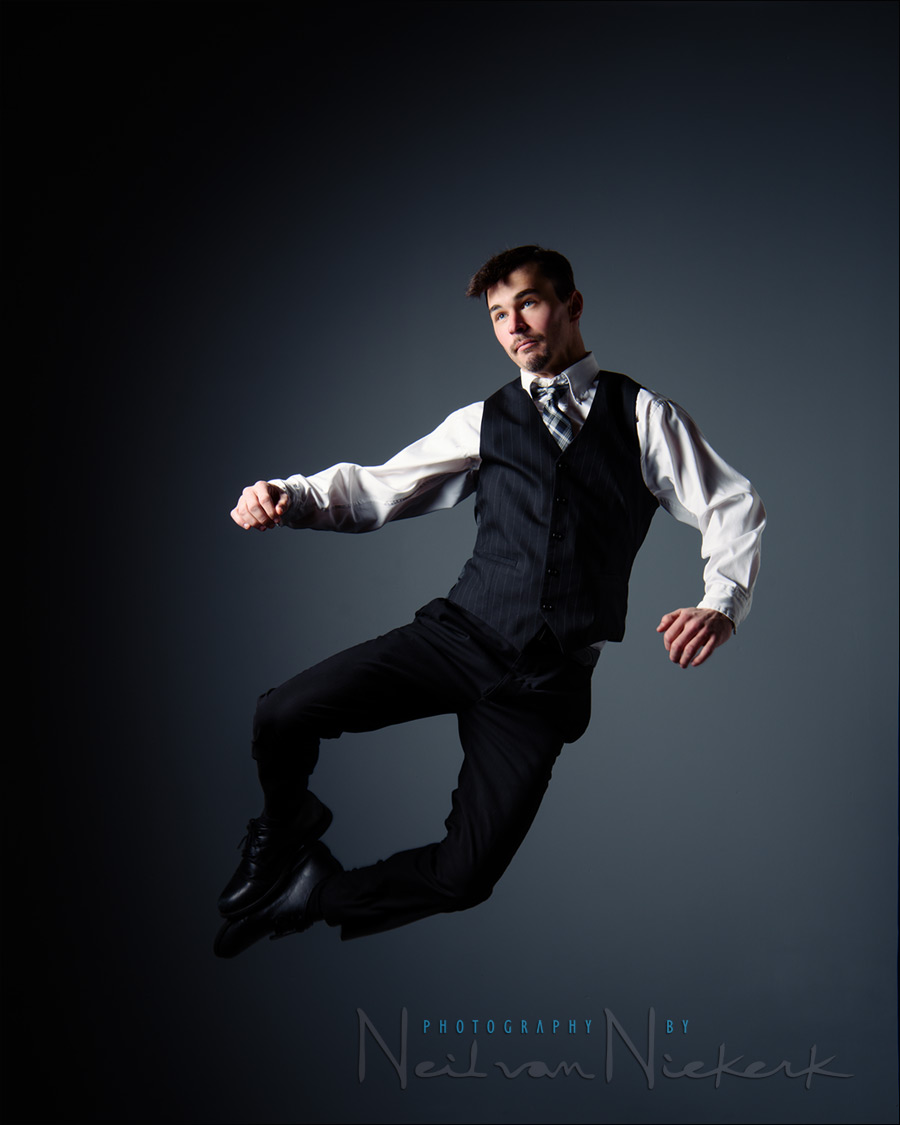
7. Posing and lighting are inter-connected. Especially if you use smaller light sources, you have to guide your model in how to pose towards the light. Your models can be more free in their movement if the light source is huge – however, with smaller light sources, their pose or movement has to be done with consideration of the light’s position.In the example photo, Alex’s head was turned towards the light with specific intent – so that we can see his features.
Summary
That’s it! It is that uncomplicated to start shooting in the studio. Of course, as with pretty much any field of photography, there’s a never-ending learning curve from that point onwards. But that’s part of our adventure.
If you’d like to learn more about how to work in a studio, I offer Studio Lighting Workshops too.
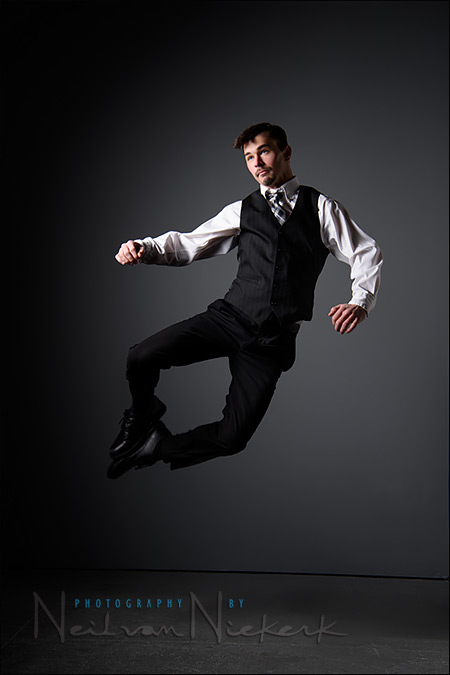
This photo is a good example of a very simple lighting setup that gives beautiful dramatic light — just one studio head with a light modifier, and a V-flat as a reflector. Dead simple. The single light source was a Profoto D1 500 Ws flash (B&H / Amazon), with a Profoto 1’x6’ gridded strip-box (B&H / Amazon).
I rotated the stripbox to simultaneously light Alex and the background here. The 1×6 stripbox is large, but the egg-crate grids make the light very tightly controllable, creating that light fall-off. Instead of blasting light all over the studio, there’s now more specific control.
Camera settings and photo gear used
- 1/200 @ f/8 @ 100 ISO
- Nikon D810
- Nikon 24-70mm f/2.8E VR
/equivalent Canon 24-70mm f/2.8L II - Profoto D1 Air 500 Ws Monolight
- Profoto 1’x6 gridded strip-box
with a Profoto 50 degree soft-grid - white V-flat as reflector
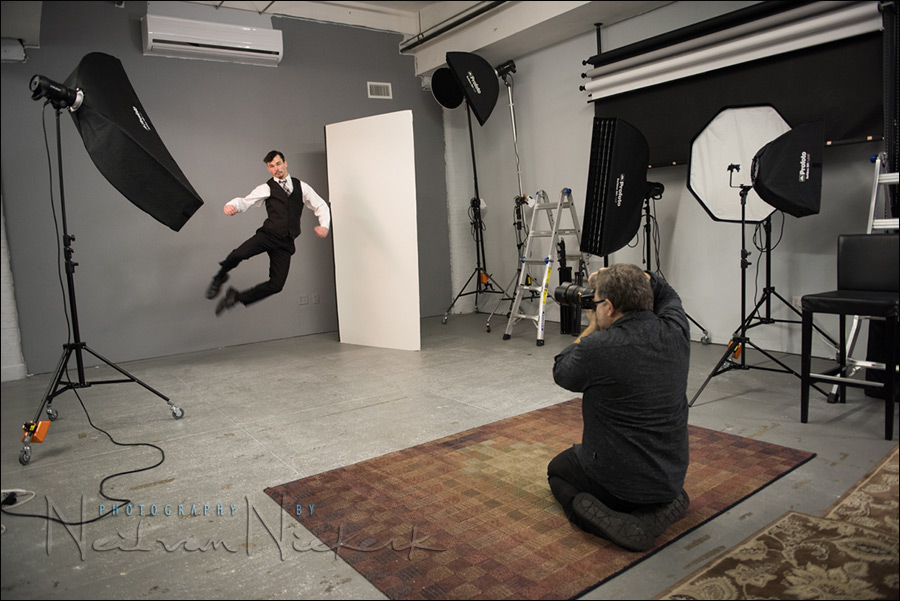
Here is the pull-back shot – it is relevant to the discussion here about shooting in the studio for the first time.
Related articles
- More articles on Studio Photography
- Photo studio rental NJ
- Studio Lighting Workshops
- Using a gridded stripbox as the main light (model: Claudia)
- Fitness photo session in the studio (model: Matthew)
- Dramatic portraits of kids – Lighting and intent
- Using a big gridded strip-box / soft-box (model: Anita)
Fantastic advice Neil, a great way to start in the studio. I work 99% of the time out on location, which often means setting up a portable studio at the clients premises or home. This usually means taking way too much kit, and having most of it stay in the car.
The one area I struggle with is which Light Modifier to use. And of course when working alone, it restricts what I can take so generally two umbrellas and a softbox, that’s it. When I do have an assistant with me, I generally take a wider variety of modifiers and more closely match individual products to specific situations.
All excellent advice. I’d perhaps just add one thing – by keeping it without moving the lights, when the photographer moves around the subject shooting from different angles, using the same light power settings, very different images can be made.
Neil, Excellent a piece of advise. You are always so motivating us. I don’t see you have the Eyelighter in studio. You don’t use it anymore? I’m thinking buying one but never think it would worth the hight price vs normal rectangle reflector for general usages
The Eyelighter is listed under the studio gear. It’s there. It is also definitely a part of my lighting setup for headshots.
I like the specific reflection it gives in the person’s eye, but most of all, how easily I can rotate the Eyelighter to change the lighting and the contrast.
Great post through the simple steps walking in a studio .. Thanks Neil
Step by step encouraging tips for those who are willing to shoot in studio… Experiencing light, with right steps leads photographer to better return for exertion. Thank you Neil.