Studio photography – Lighting simply for impact
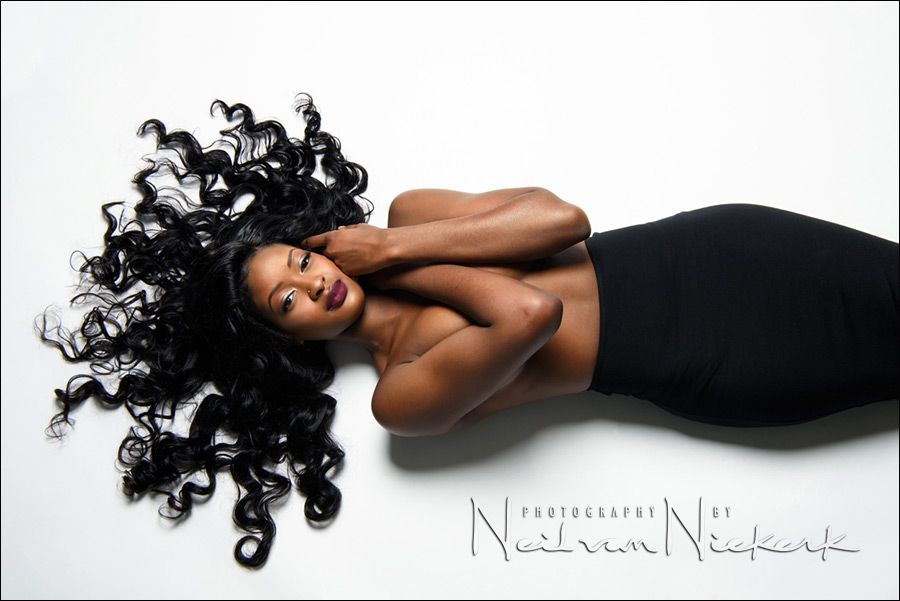
This striking image is from a commercial gig, shot in my studio for a company launching a range of hair extension products. For this sequence, one of several different setups we did, the client wanted this view and this look – so I had to decide on the best way to light their suggestion. We really make the hair the focus of the image, so I had to shoot from above on a short step-ladder.
The decision on how to light this, was based on the commonly accepted principle of starting with a single light first, and only then building it up if needed. Now, before we go further – while I used studio lighting here, there isn’t anything done here that is out of the reach of someone using speedlights in a smaller area. I do have the luxury of the high ceiling in the studio perhaps.
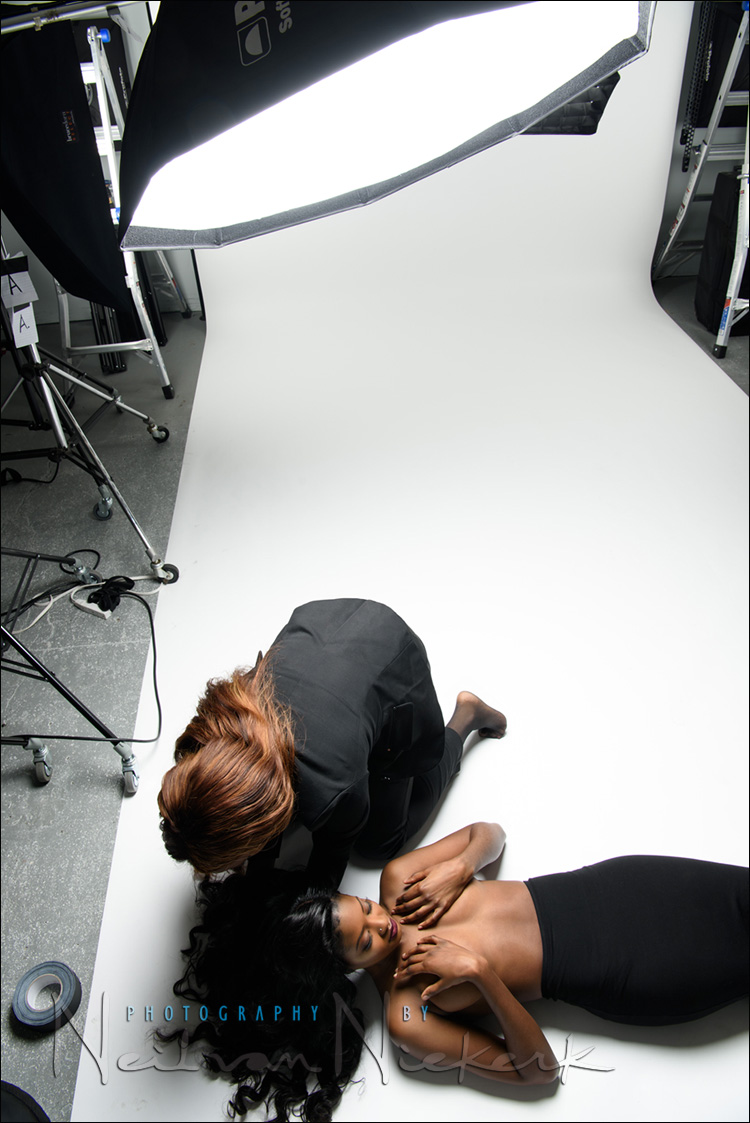
While I wanted this light to be diffuse, there had to be some contrast. There had to be distinct shadow, but with a soft edge. I didn’t want the light to be flat – I wanted that gradient of light going into shadow across the side of her face turned to me. I therefore deiced on a smallish softbox that was positioned so that it was coming slightly opposite of me. chose a smallish softbox
The pull-back shot below will show the lighting, and you’ll see how it was positioned to give me this lighting – the Profoto RFi 3.0′ Octa Softbox (affiliate), mounted on a Manfrotto 025BS boom w/ 008BU stand & casters (affiliate).

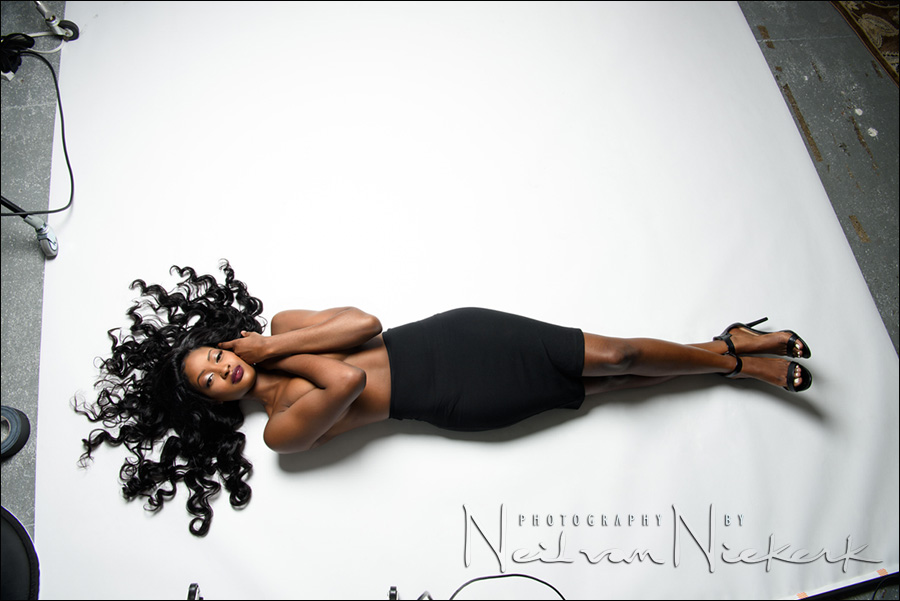
In this wider shot, you can see how the light fell off to her feet – but this wasn’t a problem, since the intention with the sequence of images we shot here, was to show her hair attachments.

If I had wanted to achieve similar lighting, but with our model lit up evenly across her entire length, but with a similar shadow, then the Profoto RFi 1’×6’ softbox (affiliate) would’ve been just handy. It’s quite a versatile light modifier: using a big gridded strip-box / soft-box.
In terms of her pose, I directed how she should finesse the position of her hands. I also asked her to turn her face slightly away from me – into the light. It always comes back to that – the Direction and Quality of Light.
The execution and lighting of this photograph is therefore quite straight-forward – but it was all that was needed here.
Photo gear (or equivalents) used in this photo session
- 1/125 @ f/11 @ 100 ISO
- Nikon D810
- Nikon 24-70mm f2.8E VR /equivalent Canon 24-70mm f/2.8L II
- Profoto D1 Air 500 Ws studio light
- Profoto RFi 3.0′ Octa Softbox
- Manfrotto 025BS boom w/ 008BU stand & casters
- For a portable, collapsible option: softbox for on-location headshot photography.
Related articles
- Dramatic lighting: using the beauty dish as a single light source
- Using a big gridded strip-box / soft-box
- Low-key lighting for a dramatic portrait (model: Randy)
- Softbox for on-location headshot photography
- Studio rental NJ
Studio lighting workshops
If you are interested in learning more about studio lighting, including lighting for headshots, I offer workshops on studio lighting. The workshops will be held at my studio space in NJ, and it has a wide range of studio lighting gear to play with!
Hello,
In my experience, when the model lies on the floor and I photograph from above, the head/neck has a weird look. I wonder if you supported her head somehow – a pillow perhaps?
Not this time. I think all that hair might’ve had something to do with it.
Nice work. Love the simple lighting; really gets the message across.
Hi Neil. How do you manage to have such a clean white backdrop? My models need to stand in high heels and they sometimes get dirt or dents in the white backdrop
Alex … I place the white as close to the edge of the histogram as I can, without affecting skin tones.
Then, in editing the RAW files, I can play further with the Whites slider and the Highlights slider, to make the whites cleaner.
And then finally, I use the healing brush in Photoshop to clean up a few messy spots on the white paper backdrop.