Time-Lapse Photography project in New York: Cipriani
The beauty of time-lapse photography is that you are able compress a much longer event, into a shorter video which can be visually grasped. One of the biggest time-lapse projects I have been involved in, is for a New York event planner, Norma Cohen Productions, who needed a time-lapse video to show the epic scale of a wedding reception that she was tasked with. It took 3 days to set up this entire event! I shot 32,500 RAW frames with 4 cameras over the course of those 3 days. And yes, it took my computer several days to grind through those!
In working out the logistics for this photo shoot, I figured that I needed a minimum of 4 cameras. The one camera was mounted permanently to a vantage point two floors up, and would shoot continuously and provide a framework for me to add the other clips to. The other 3 cameras were “roaming” cameras to get different perspectives, and capture the different parts of what was going on. All of this would then give me the footage needed for a dynamic video.
In the end, the main camera gave me the framework for the complete 4’45” video (shown later on in this article.) I rendered the video (from the individual JPGs) via Final Cut Pro X (FCPX). From this main video, I created another 3 shorter versions for my client. The video shown at the top is the shortest version at 1’50” and it probably gives the best impression of the activity – short enough to retain your interest, but with enough detail to retain the story-telling element of what happened.
With this, I want to show some of the behind-the-scenes work that went into photographing the construction of the decor at this event, and creating various time-lapse videos from this.
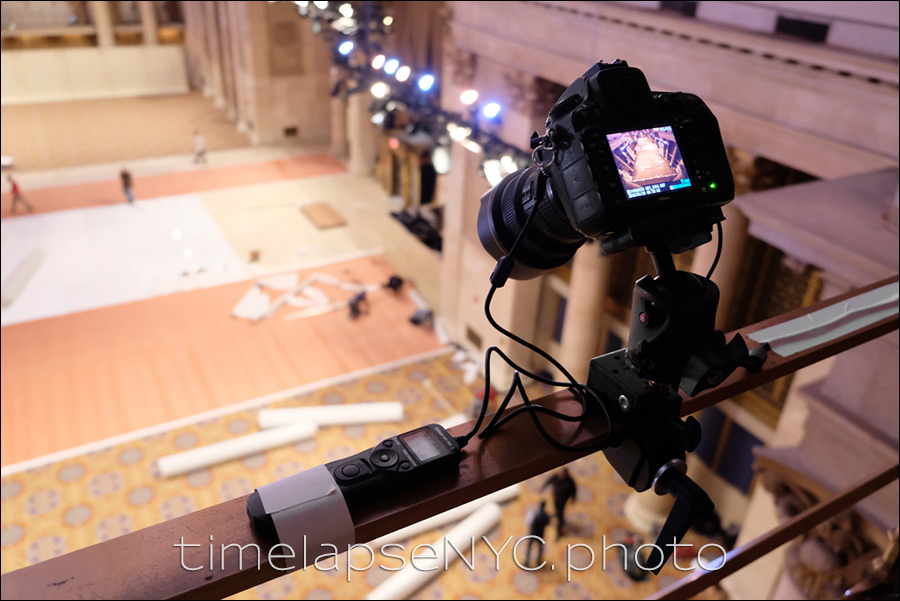
This is where the main, static camera was clamped into position. The camera was also connected to AC power which allowed the camera run indefinitely. Similarly, the timer that you can see there, would also fire the camera until the end of the project, 3.5 days later. Since the camera’s intervalometer maxed out at 9,999 frames, I needed the intervalometer to just keep shooting until we were done. There were two long breaks (of 6-7 hours) during all this, which allowed me to download this camera’s memory cards. Other than that, this camera was just left alone, with me checking up on it every few hours.
Decisions and problem-solving
Much of photography work is problem-solving. You could even validly argue that there is more of that than the actual creative process. We might have a specific thought-process or set of ideal practices to follow, but there is also a need for flexibility. You know, just what we do in photography.
With this photo shoot I didn’t have much of a brief. I find that often clients don’t know what to ask for with time-lapse, since they don’t have the technical knowledge to know what they want – they just want time-lapse. And that is where we come in as photographers and problem-solvers. So I had to made decisions based on past experience, and what I think would work best.
My main consideration was what intervals should I use to shoot the sequences. This would determine how much the action flowed. How smooth it seemed. And this would in turn give us a range for our ideal shutter speed. I needed to have this down right from the start. It isn’t something I would want to adjust on the fly because I wanted consistency.
The thought-process about camera settings and interval choice was explained in this article and video: Camera settings for Time-lapse photography. Also check out the E-book by Ryan Chilinski: Everything you want to know about Time-Lapse Photography. It really has everything you want to know about Time-Lapse Photography.
Along those lines, I decided on:
20 second intervals with 15 second shutter speed.
This would mean my ISO would vary between 64 – 100 ISO,
and the aperture would vary between f/11 and f/16
Now we come to another crucial part – with an interval of 20 seconds between each photo, a camera would take 3 photos per minute. At a frame-rate of 30fps for the final videos, a camera would need to run for 10 minutes to give 1 seconds of final video.
Therefore any of the roaming cameras had to be in a position for an hour to give 6 seconds of time-lapse video. Any video segment shorter than 6 seconds would most likely not be useful. This meant that anywhere I positioned the camera, needed to be out of the way of workers, and also needed to have something useful in the frame to give a video clip with actual usable content. I couldn’t keep chasing the action. I had to figure out a good angle where they would be busy, and hope that any workers would be consistently busy in that area for the next hour at least.
Even though it wasn’t very bright inside this venue, the slow shutter speed forced a small aperture. I didn’t want to go all the way and use ND filters. When the light levels went really low towards the end as they set up the mood lighting around the tables. the images were under-exposed by up to 3 stops. But since this is the Nikon D810, and I am shooting at the lowest ISO with a high-resolution camera … and only going to 1080p, noise would not be a problem at all. I adjusted these files by hand, using ACR / Bridge. From these I created JPGs, and then rendered the separate video clips with FCPX, and then compiled the completed videos again with FCPX.

Cameras, lenses & time-lapse gear
I took this photo the day before as I was preparing my gear. These were the cameras I took with me:
- (2x) Nikon D810 camera, each with a Nikon 14-24mm f/2.8 (B&H / Amazon).
The one camera could have a grip on it. During the shoot, I found that the D810 batteries lasted about 4 hrs each, shooting at the determined rate.
With the grip, I was able to change the grip’s battery every 4 hours without interrupting the camera … ie, this gave me indefinite battery life as it switched to the camera for a minute before reverting back to the fresh battery in the grip. This is where the Nikon bodies with a grip gives me an advantage over a Canon body. I could hot-swap a battery and the camera would continue. I just had to be super-careful not to nudge the camera. Another note – with Canon, the moment you open the CF card door, the camera stops. With Nikon I can open the CF card too, and hot-swap a card without affecting the camera’s operation … except perhaps lose one frame.
The one camera that would get the aerial view, would be on AC power.
- Nikon D810 camera and a Nikon 20mm f/1.8G (B&H / Amazon)
This is the camera and lens combination that I mostly keep for work on a dolly for when I need cinematic movement to my camera. Here is an example of a time-lapse video shot on a dolly that gives that kind of camera movement: Brooklyn waterfront.
Even though 1080p is around 2 megapixels, and even 4K is only around 8 megapixels, I shoot with the high-resolution Nikon D810, since it allows me a lot of room for creative cropping afterwards. This previously mentioned article – Camera settings for Time-lapse photography – explains that too.
- Nikon D5 with a Nikon 24-70mm f/2.8E VR ,
which I later swapped out for a wider Nikon 16-35mm f/4G AF-S VR (B&H / Amazon)
The Nikon D5 and the 24-70mm lens is one of those combinations that are married – the lens just never comes off, in an attempt to minimize dust on the sensor. But during the shoot I realized I needed a wider lens at some point, and I grudgingly swapped the 24-70mm out for that wider zoom.

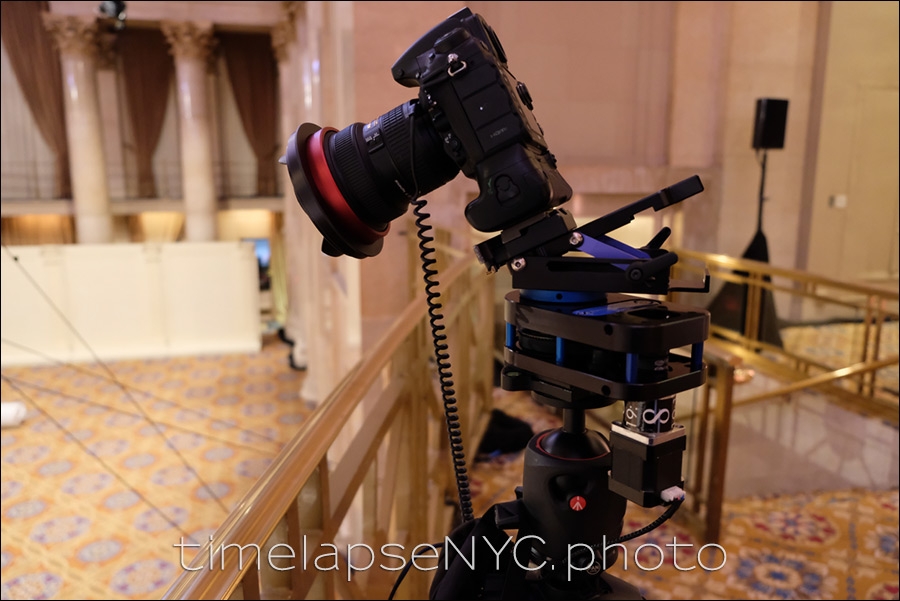
Here is all the gear before I strapped the bags down on the cart. The big bag on top has all the time-lapse gear, including the dollies and other paraphernalia of time-lapse photography. I ended up not using any of the gear that gives camera movement, except one sequence that I shot with the Dynamic Perception Rotational Controller. I found that the workers were too unpredictable in where they would work on the floor, for me to set up motion. So aside from the one sequence, the rest of the 40+ sequences I captured, where static. You can see part of that rotational sequence in the longer time-lapse video shown at the bottom of this article.
The bag to the right on the bottom, only contains tripods …. three of these bad boys:
Manfrotto 057 Carbon Fiber Tripod (B&H / Amazon), with the Manfrotto 057 Magnesium Ball Head (Amazon)
The tripods need to be sturdy. You absolutely need to keep camera vibration to a minimum.
The bottom bag to the left has all the cameras and lenses and batteries for the cameras.
Here is a video interview with PDN magazine, where I describe the equipment that I use for time-lapse photography: Featured on PDN: How to shoot cinematic time-lapses.
A few notes:
– Vibration Reduction / Image Stabilization needs to be OFF on all lenses. You can’t risk the VR / IS causing even the slightest amount of subject movement in the captured frame.
– Similarly, the lenses are set to manual focus.
– All camera settings are matched, including the date & time settings.
Sensor dust and cleaning your sensor
With time-lapse photography you will immediately realize that your sensor needs to be meticulously clean. This is why I have two D810 bodies with lenses that just never come off. It is soul-sucking nightmare to clone out dust spots over hundreds or thousands of frames … and most often you won’t be able to convincingly do it since you will see some kind of video artifacting taking place where you clone out spots.
I describe what I use for Camera sensor cleaning. The best device that I found for lifting spots that won’t budge, is the Eyelead SCK-1 sensor gel stick (Amazon).
Ultimately, marrying lenses to specific bodies helps minimize the risk of sensor dust.
A few behind-the-scenes photos showing the cameras as they were set up to capture specific sequences of events happening.

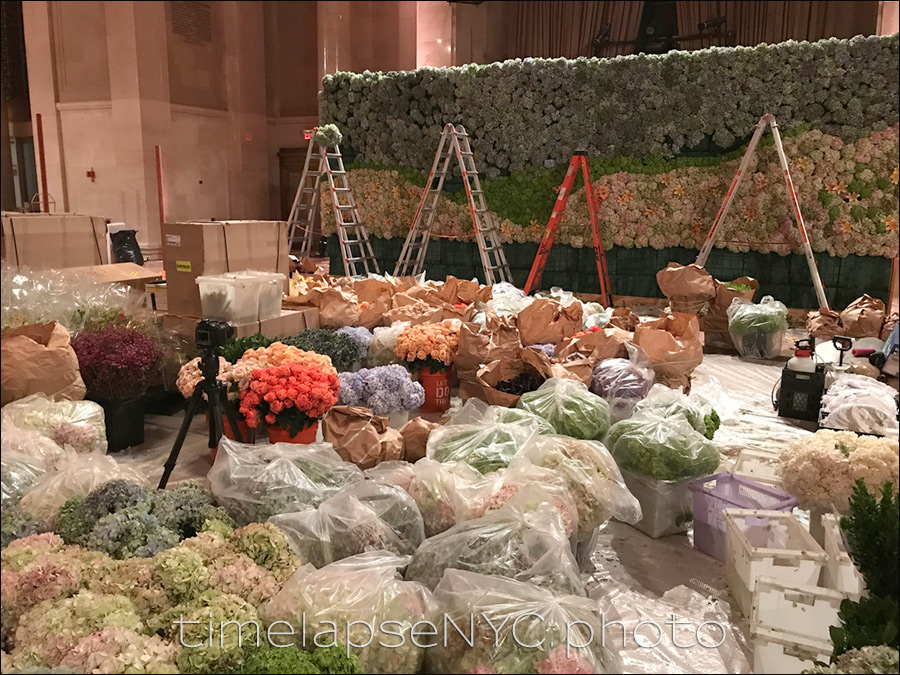
Two of the cameras on the floor, capturing the two flower walls being completed on either side of the dance floor.

Because it was such a long project, I had to periodically back up the images to two hard drives so that there was no risk of data loss. That is something I am paranoid about. Data loss would be a professional calamity.
Here is the one camera as it was set up with the rotational motion controller. As mentioned earlier, I only shot one sequence this way.
And here is the full, 4’45” video showing the events in a proper time scale. With that, I do think the shorter version is the more dynamic one to watch, and still get a real impression of what went on.
- For more info about Time-Lapse Photography in New York (and New Jersey)
Related articles
- Camera settings for Time-lapse photography
- Other articles on Time-lapse photography
- Everything you want to know about Time-Lapse Photography, an E-book by Ryan Chilinski
- Time-lapse photography NYC
Massive job – well done!
Perfect! You have a great eye.
Incredible!
Daaaang, that’s a massive setup. Great way to show off all that effort!
WOW, this is AMAZING!!!! I seriously can’t believe how much work went into creating that space. Loved watching the flower wall come together! I’ve always been a little obsessed with time lapse stuff but too intimidated to try it myself. I’m still too intimidated, haha, but I absolutely loved this! Thanks for sharing, Neil!
Speechless! Superb timelapse work! I’ve clicked and searched through every single educational link in this post. I even went down a little bit to far into the rabbit hole (your website/blog ????)…lol. How much do you think this wedding cost and where can we see the wedding photographers work? Really enjoyed this post! ?
I would say this wedding cost in the region of $300,000 and up. Somewhere there.
When I posted this video clip on FB, a photographer friend messaged me to tell me he was the photographer. His work is really exceptional, so I am glad a wedding at this level went to a good photographer. I haven’t seen any of his photos from this wedding yet.
OMG!! So much work involved! Not just on your behalf either, in setting up the whole venue too!
Interesting on the battery front, I always wondered how such long time lapses worked with batteries – thanks for sharing.
That’s an amazing amount of gear! Great result. Can’t imagine how much card swapping you had to do!
WOW, this is INCREDIBLE!!!
Splendid timelapse. Absolutely love it and I should try this as well in one of my weddings.