Using a neutral density (ND) filter to control DoF with flash
When working in bright sunlight with flash units that can’t go into high-speed flash sync, we have a ceiling in terms of our shutter speed / aperture combination. The shutter speed limitation then would be our maximum flash sync speed. The bright daylight would then imply a small aperture – most likely around f/11
Why f/11 ? The Sunny 16 Rule dictates that in bright sunlight, we’re most likely working at 1/100 @ f/16 @ 100 ISO. This translates into a handy short-cut of: 1/200 @ f/11 @ 100 ISO, where 1/200 is the maximum flash sync speed of many cameras. I use Nikons so my max flash sync speed is 1/250 hence that is where I normally operate when using flash in bright light.
In this bright light, to get to wider apertures for a shallower depth-of-field, we need to cut the amount of light. We can do this with a Neutral Density filter (affiliate).
The first concern is usually that the ND filter cuts the flash, but this isn’t a particular problem, since the ND filter cuts flash and ambient light by equal amounts. So if we have 1/200 @ f/11 and then add a 3-stop ND filter, we end up with f/4 which is much wider than f/11 and gives us better control over our DoF. A 3-stop ND filter is usually denoted as an .9 ND filter, where 0.3 is a stop, and hence 0.1 is a third of a stop. A Neutral Density filter that is marked as 3.0 will therefore be a 10-stop ND filter.
As a side comment, please note that shallow depth-of-field is not the same as ‘bokeh‘. With the recent photo shoot with Ulorin Vex, I decided that it might be as good an opportunity as any to see how a Neutral Density filter affects the results.
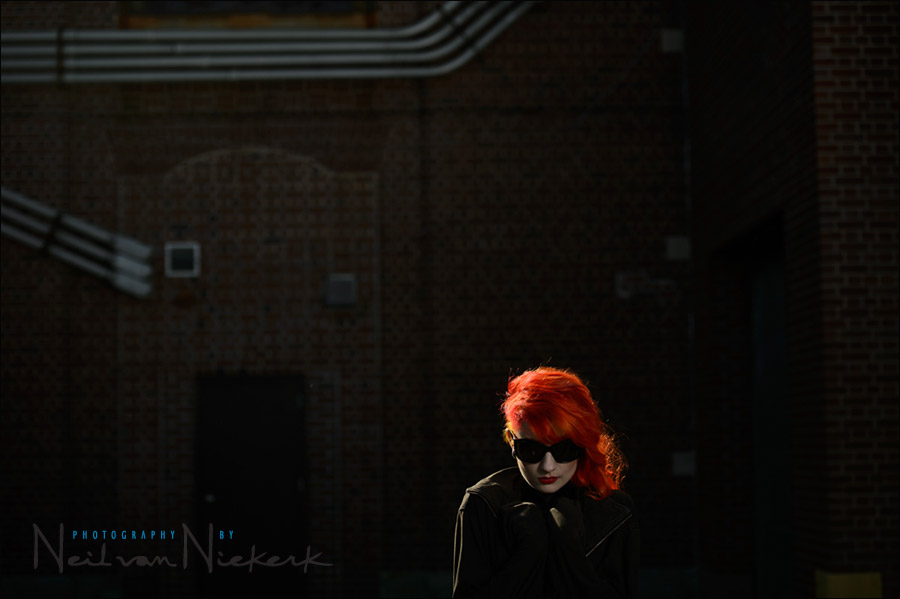
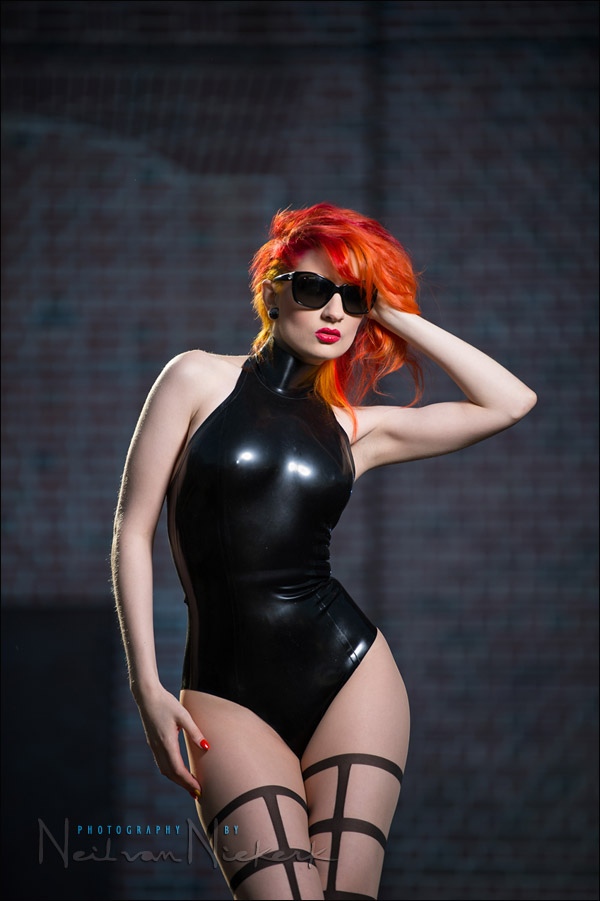
Working outdoors at this old warehouse, I needed a baseline exposure. I based this on the sunlight on her hair in the late afternoon. A few test shots showed that good settings would be: 1/250 @ f/8 @ 100 ISO. Just a stop off from Sunny 16. It’s still a good guideline. With the ND filter killing three stops of light, we will end up at f/2.8 which is great. The neutral density filter that I used here: B+W (3 stop) ND Neutral Density filter – 77mm (affiliate) For this test shot, there was some flash, but not enough for correct exposure. Here is the lighting setup. You can see part of the two lights that were used:
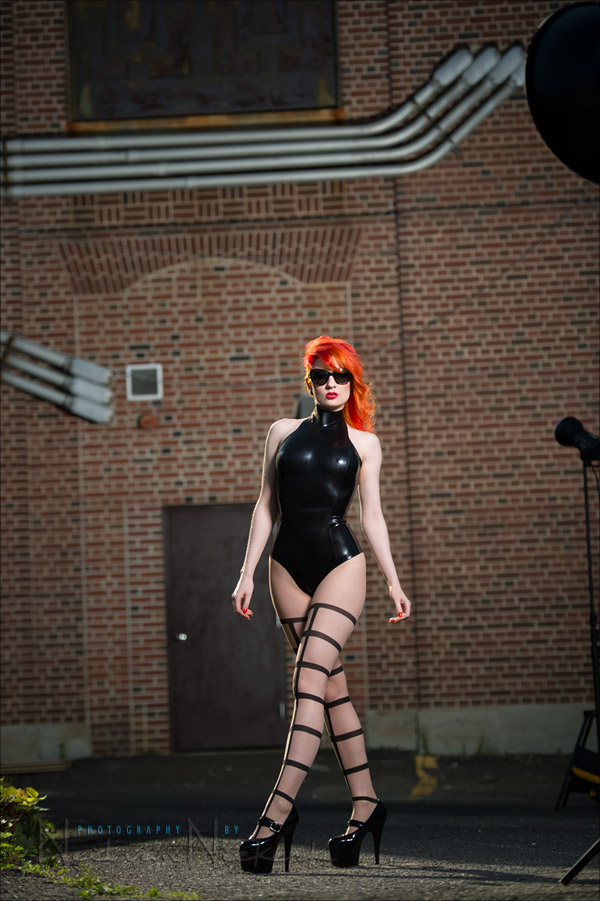
There were two Profoto D1 Air 500 Ws studio lights (affiliate), driven by the Profoto BatPac portable battery (affiliate). The main light on Ulorin Vex was via a Profoto D1 studio light, modified by a Profoto beauty dish with a 22″ sock (affiliate).
If the Profoto B1 flash (affiliate) had been available at the time, then I could easily have circumvented much of this by going to High-Speed Flash Sync (HSS).
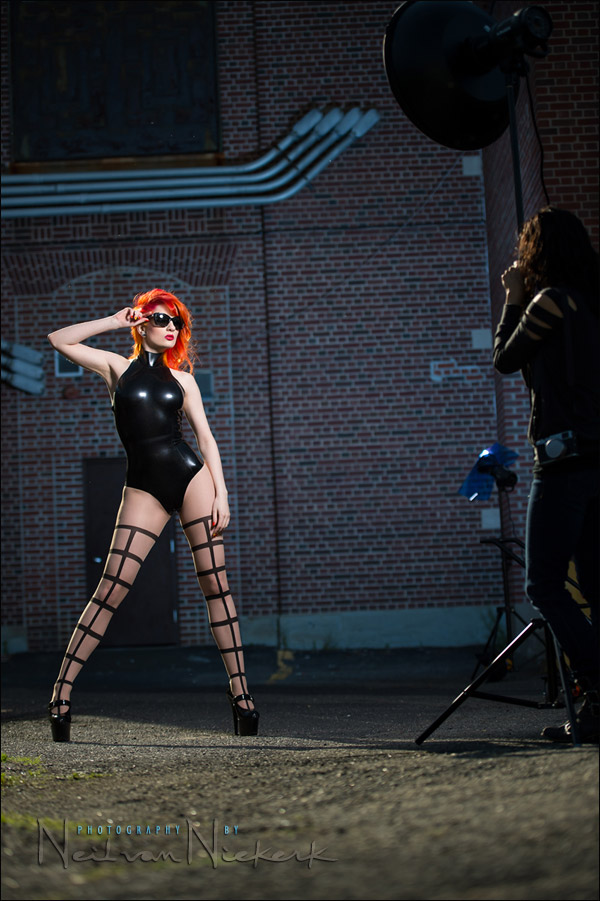
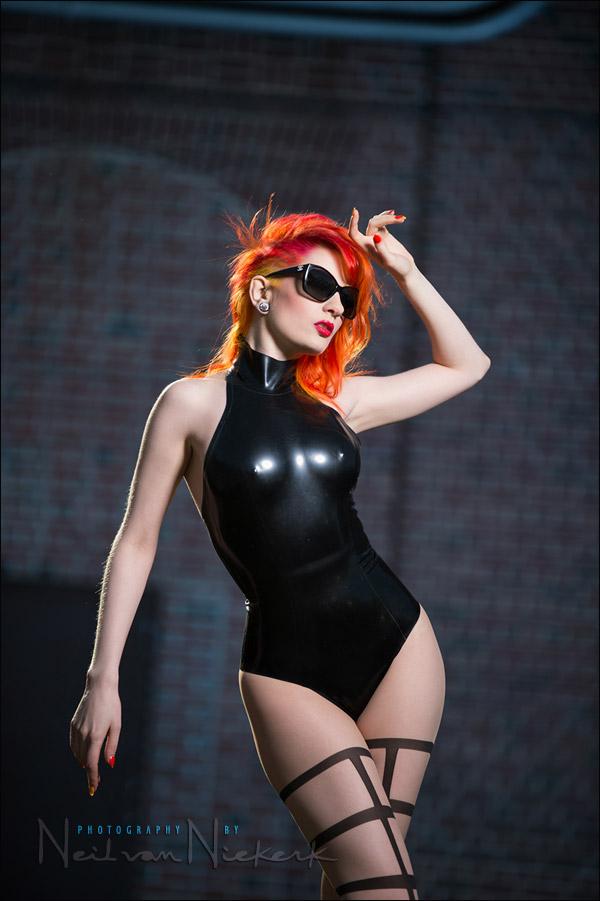
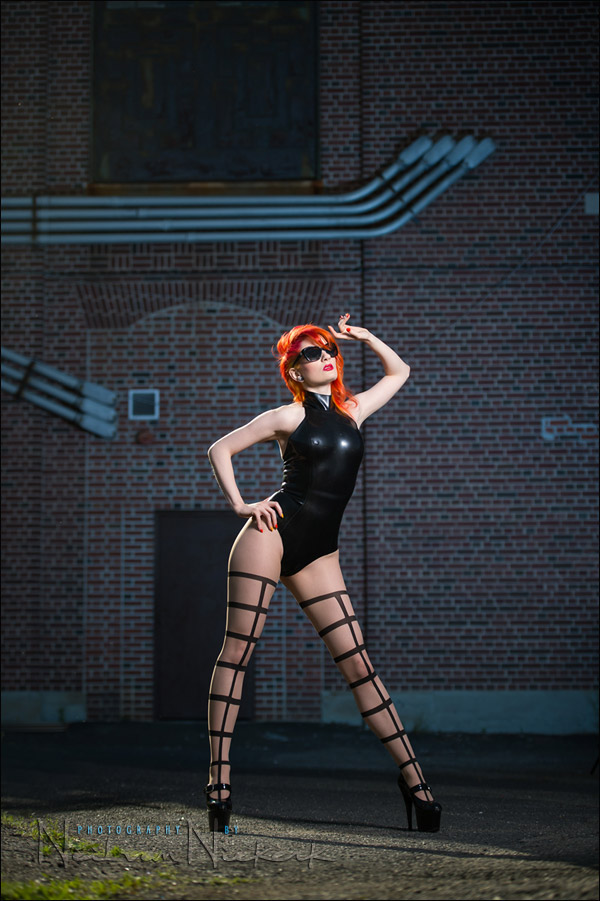
If I didn’t add some light to the building, the background would’ve gone black, similar to the test shot shown above. I did this with the second Profoto D1 500 Ws Monolight that had a Profoto 7″ Reflector on it. Using both lights like this, it looked … okay. It lacked something. With Ulorin Vex’s dramatic latex outfit, I had to bring in a little more drama with the lighting. So I added a blue gel to the flash in the rear that was lighting up the building. You can see the blue gel on the flash here, held in place with gaffer tape. The blue tint to the background immediately gave it a more other-wordly look.
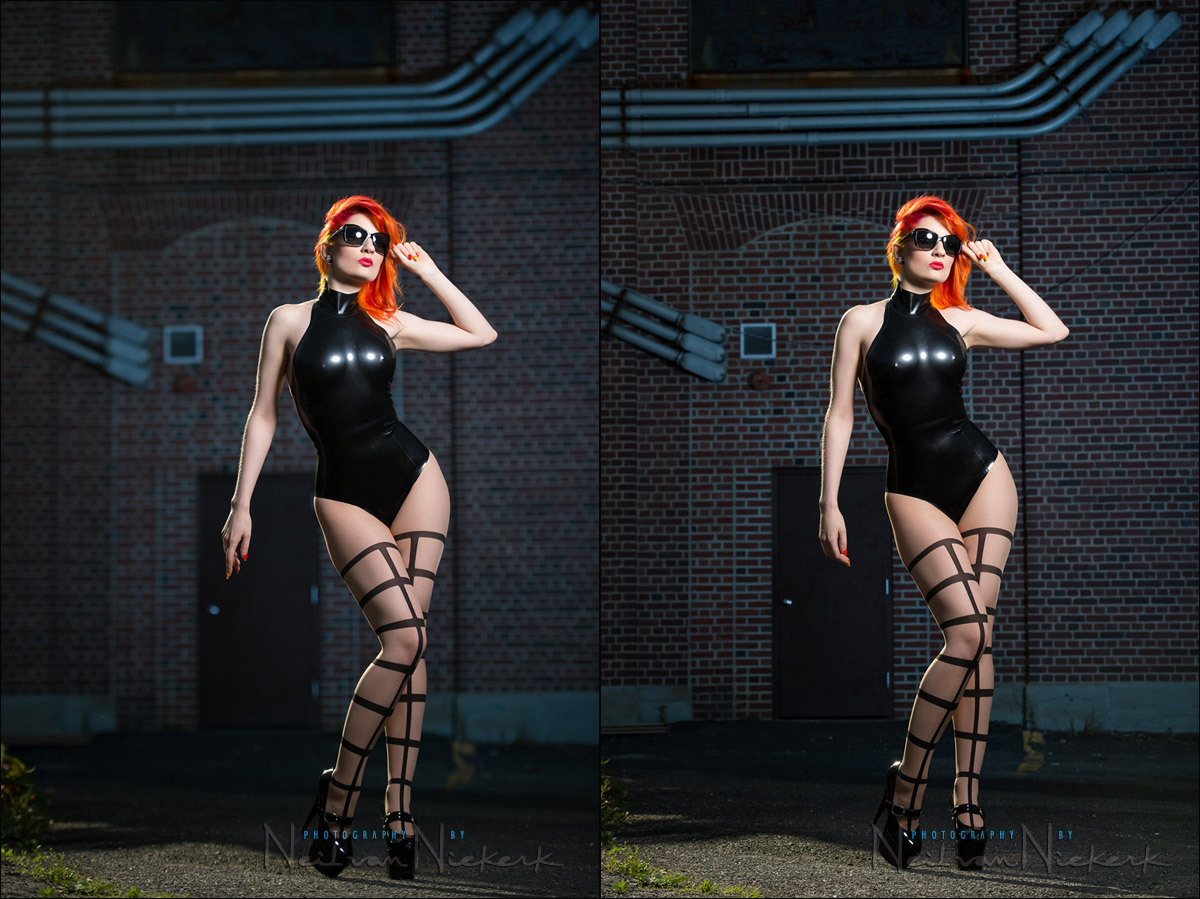
A comparison to show the effect of the blue-gelled background versus no light on the background.
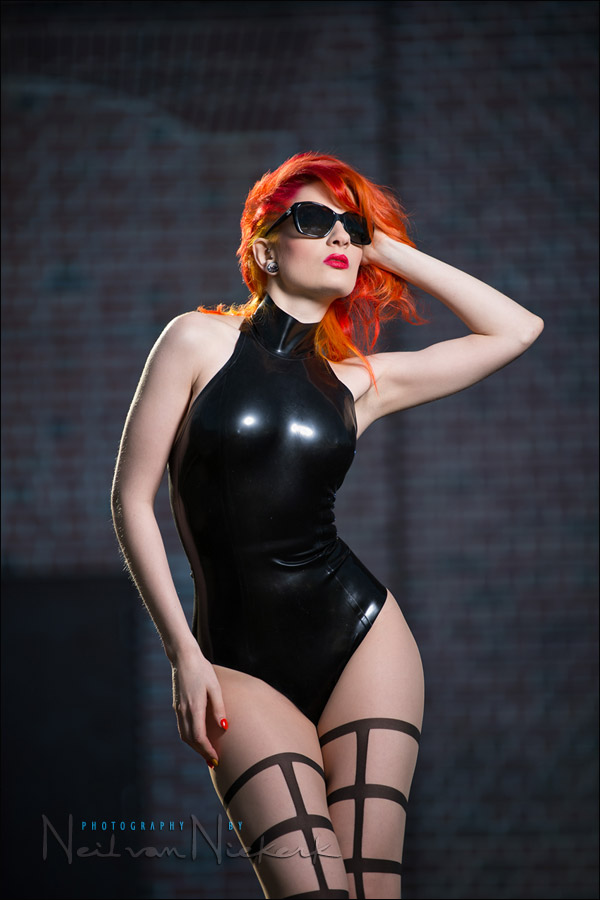
With the aperture at f/2.8 due to the ND filter, I tried various compositions by zooming in and out.
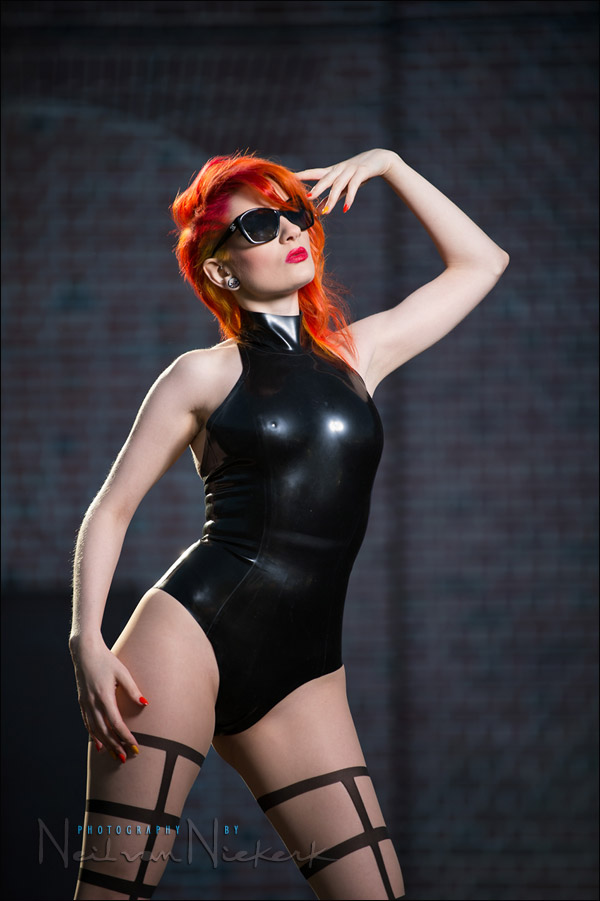
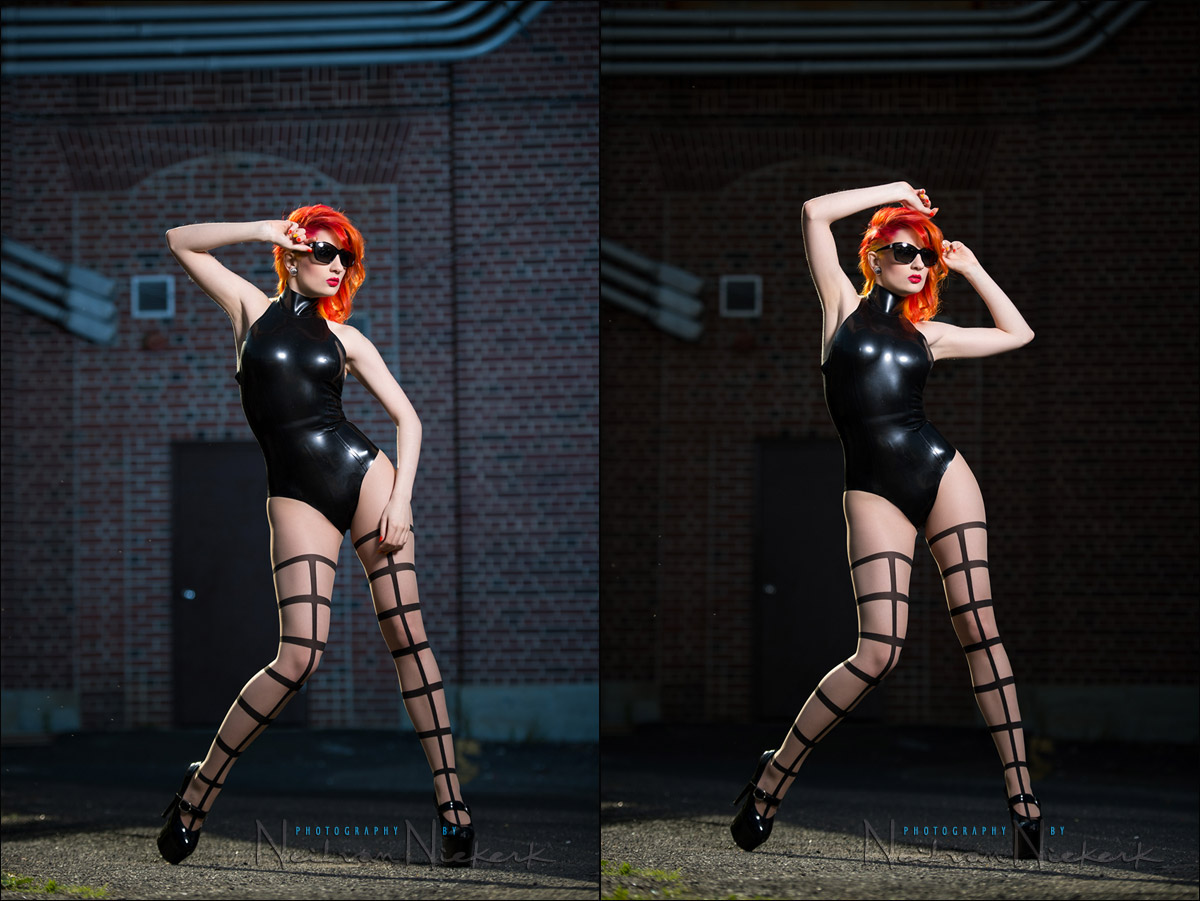
All camera settings at this point were: 1/250 @ f/2.8 @ 100 ISO Let’s compare what f/2.8 (using the ND filter) looks like against the “normal” f/8 that I would’ve had to use. Remember, the base exposure was decided by the sunlight on her hair. The rim-light you see on her arms and body is from the sunlight as well. Perfectly balanced. Right-click and select “open image in new tab” to see these comparison images larger.
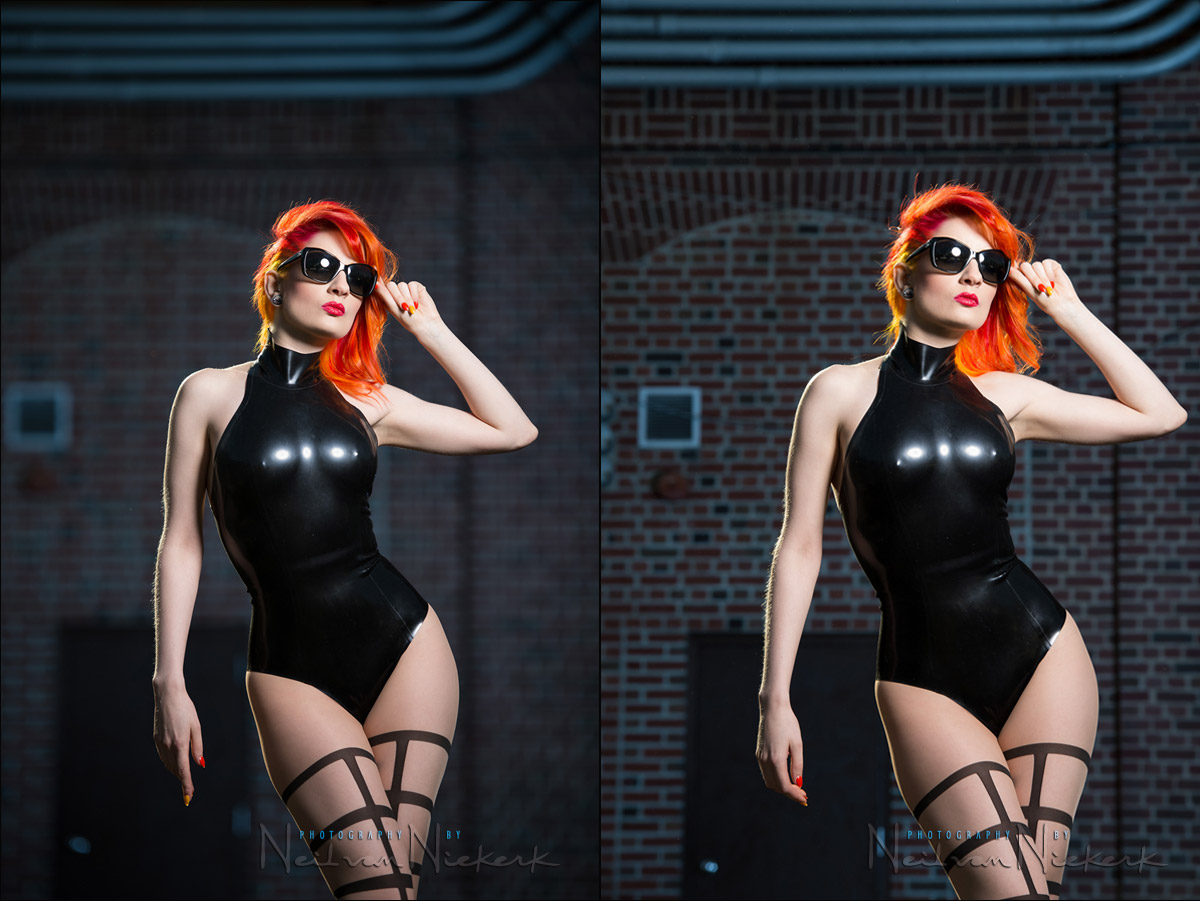
The difference in how that 3 stops change in aperture looks, is quite noticeable. Some may prefer the more pronounced background, and for some scenarios it would be the better choice, but here, imho, the shallow depth-of-field works much better. With the sun adding the rim-light, the shallow depth-of-field makes the separation even more pronounced. (Again, right-click and “open image in new tab” to see these comparison images larger.)
The technique in using a Neutral Density Filter
- find your basic exposure
- add enough flash to balance the shadowed areas with the brighter sunlit areas.
- add the ND filter
- change your aperture accordingly to get shallow depth-of-field.
- if you run out of apertures, raise your ISO a notch. In other words, if you should end up at f/2 by your calculations, and your lens is only an f/2.8 then raise your ISO by stop to get to f/2.8
- if you can’t count your aperture settings yet, then simply count the camera clicks.
That really is the gist of it. Slap the ND filter on, change your settings accordingly, and there you have it … shallower depth-of-field when using flash units that can’t go to high-speed flash sync. When using flashes that can go to high-speed flash sync, there is a penalty to be paid in terms of loss of effective power / range. Then a ND filter would still be very useful in using your speedlight in bright sunlight. We’ll cover this in future articles.
Photo gear (or equivalents) used in this photo session
- Nikon D4
- Nikon 70-200mm f2.8 AF-S VR II / Canon EF 70-200mm f/2.8L IS II
- Manfrotto 1004BAC – tall light-stand
- (2x) Profoto D1 Air 500 Ws studio light
or Profoto B1 portable flash (500 Ws) - Profoto beauty dish w/ a 22″ sock for a beauty dish
- Profoto 7″ Reflector for Profoto Flash Heads
- Profoto Air Remote Transceiver
- Profoto BatPac portable battery
Related articles
- The importance of understanding max flash sync speed
- Tutorial: High-speed flash sync
- Using a neutral density (ND) filter with flash
- Overpowering hard sunlight with flash
- What are your camera settings?
- Overpowering the sun with flash (models: Sarah & Mark)
- Other photo sessions with Ulorin Vex
A little bit of homework
- I mentioned that you could raise the ISO if we ran out of apertures:
If you run out of apertures, raise your ISO a notch. In other words, if you should end up at f/2 by your calculations, and your lens is only an f/2.8 then raise your ISO by stop to get to f/2.8
Why didn’t I mention the possibility of lowering the shutter speed? What would be the implication?
- A comment that was posted on Facebook, stated / asked:
What happened to just turning the power down? and if you need reduction get some elcheapo ND gels and put them on the flash instead of darkening your viewfinder and making your photos fuzzy with filters over the lens.
What would happen in this specific situation of I had turned the power down? And what would happen if I put an ND filter on the flash?
Hey! Thanks Neil!
Been waiting for this one, and well explained and executed!
I shall have to charge-up my 600watt Lencarta Safari Flash and get out and give it a go next w/e if the weather is nice and sunny here in the UK as it has been last 3 days! I don’t have a model as good lookin as Ulorin Vex though :-)
Keep up the great photography and fabulous Tangent as always!
Mike.
I sometimes use an ND filter in my studio for the same reason and with the same results. My Elinchrom’s tend to be a bit too strong even at minimum settings to get any DOF effect, but with the ND filter I can open up the apertures a lot more.
I usually end up being lazy in situations like this and simply throw three of my 600EX-RTs together in one group and allow them go into HSS. I noted that HSS seems to work better (since I lose less light) if I use a bounce umbrella instead of a softbox or shoot through umbrella.
Obviously this depends on if it is windy or not outside. I can normally get away with it if I put weight bags on my stand. :)
Very interesting article , thanks for keep sharing this tips-knowledge with us ! !
Great article. I have been testing a variable ND filter in situations like this with my Einsteins and 600RTs with some great results. Now I have a better understanding of a starting point to adjust from…
Great article, and I’m looking forward to your example with a bright sunlit background. I often have to do quick portraits in mid day sun with brightly lit water/sky in the background, shooting 1/250th @ f11@ 200 ISO. Gotta pick up an ND filter! (Love seeing your beautiful model with curves and NO stick thin legs.)
Colleen .. it is *exactly* the same thought-process then.
Neil vN
Great article, Neil! I always love how easy you make your tutorials. I’ve been shooting with ND filters and strobes on battery packs ever since I read your book, Off Camera Flash. The quality of my shots are so much better and controlled than with just reflectors, or nothing.
Thanks again,
Merrit
It is interesting how TTL in SB900 works in situation like this. Flash works as hard as at f/11? I know TTL accordingly force flash to get more juce and propably will display wrong range. In manual mode I need to set f/11 at SB900 when ND filter is on?
Anyway, very interesting article, thanks for sharing.
Tad, if you need f/11 worth of light, then your flash still needs to dump f/11 whether you’re using TTL or manual.
Your ND filter will give you a different aperture settings, but you still need to think in terms of exposure settings as if “normal”.
Similarly, your flash’s Guide Number or the distance scale on the back still needs to be used as if working without the ND filter.
Neil vN
Wouldn’t a polarizing filter work as well to cut the light a bit?
Yup, a polarizer would cut out nearly 2 stops of light.
Neil vN
Great article Neil!!
Glad you mentioned that the DOF has nothing to do with the Bokeh!
People have a habit of confusing this and it drives me crazy!!
I’ve been trying to come up with an ND filter for my situation
and was confused about the .9 designation! Thank you for the
very timely article.
One fast question for you:
What other ND filters do u normally Use?
Do you get several for each lens or do u use the 4″ square filters?
Thank you very much for this great article!!
Mark
Neil,
Have you found that the three stop ND filter is what you use “most” of the time or do you recommend that a person get multiple different ones providing different levels of stops?
The B+W 77mm 1.8 (6 stop) ND MRC 110M Filter (B&H) would in theory be good to bring an f/11 sunshine exposure down to that wafer-thin f/1.4 aperture, with the 6-stop reduction in light.
But in practice it isn’t a realistic way of shooting wide-aperture portraits, because the viewfinder becomes impossibly dim.
So I keep to the 3 stops change of the B+W 77mm 0.9 (3 stop) ND MRC 110M Filter (B&H)
The deeper ND filters are more suited for landscape work and such, where you’re deliberately forcing a slow shutter speed, than trying for a wide aperture per se. It’s a different approach.
Neil vN
Alright, sounds good! I will probably drop the change then for a .9 ND for four of my different sized lenses then based off what you are recommending.
jhilgers,
May want to look into some step down rings instead? Save you a little bit of money that way.
I have used the 3-stop ND filter in bright sunlight while using TTL flash. It’s not quite as “straightforward” as using manual flash, since I usually need one shot to see what it looks like at the settings I have chosen, and then I have increased FEC on the flash to provide more power. It usually takes me a second or third shot to get the light level where I want it to be.
Changing the shutter speed will affect your ambient light. And since we’ve already dialed in our ambient/flash ratio, we really don’t want to touch this. Likewise, putting an ND on the flash or lowering the flash power has no effect on the ambient. And if we’re already at max sync and the lowest ISO, we’ve nowhere to go. We want to keep our ambient to flash ratio the same once we’ve nailed it.
Thanks very much Neil for an interesting and informative article.
Neil, excellent article!
But (a) what do you mean by first finding the base exposure, (b) how do you do it, and (c) why off her hair? Do you use a handheld light meter?
Artur .. you have to keep in mind this wasn’t a studio shoot, but out on location.
The late afternoon sun was streaming through between the buildings, and I decided to position Ulorin Vex there so that her hair was backlit by the sun. The same sunlight from behind her, gave that rim-light on her arms and her body as well.
Because of this decision – to use some of the available light – my exposure settings were fixed to a large extent.
Too much light, and her hair would blow out completely in the sunlight.
Not enough light (ie, completely under-exposed), and I would lose the effect of that sunlight.
So the decision to place her right there, meant I had to figure out my available light exposure.
I didn’t want to expose for her shadow side, since then her hair would blow out completely. I also wanted the dramatic light from the beauty dish, as compared to the soft light there.
As for how I metered for the ambient light … I didn’t. I knew the Sunny 16 Rule would get me close, and adjusting my settings over a few test shots got me there.
Metering for my main strobe … I could’ve done that, but I didn’t. From experience I have a good idea of the distance-vs-power ratio of that particular light with the beauty dish.
Remember, manual flash exposure depends on:
– aperture
– ISO
– distance
– power
So it is quite possible to get a reasonably good guesstimate of the flash exposure, just because these 4 things are in perpetual balance for correct flash exposure … regardless of where you are.
Neil vN
The Sony A99 uses electronic view finders so when using a ND filter, turn off the live view effect and you see a properly exposed preview, that makes it easy to frame and focus the image.
Quin
Answer to Homework question #1
Lowering the shutter will increase the ambient light which we’re trying to reduce with the ND filter. No point in doing that!
Increasing ISO will work fine because if the subject becomes over exposed, just reduce the power of the flash or move it farther away from the subject.
Neil, I got all of your books and find this blog not only helpful but inspiring to keep on growing and improving. Hope to see more of your educational material and purchase the products that you recommend!
Neil, in regard to your answer to the homework no 1.
Can we look at it this way round:
If we lower time, it will affect the ambient only, and then we move aperture to 2.8 which affects ambient and flash and as a result throws our exposure out of balance? But if we bump up the ISO, which affects ambient and flash, and then move the aperture to 2.8,which affects both as well, both light sources will stay in balance?
Homework……?
Shutter speed (whilst below the flash max sync speed) has no impact on flash power. If you were to run out of apertures, and compensated by lowering shutter speed as opposed to raising the ISO, then the implication would be that you lose some of the range from your flash.
e.g you have less range out of your flash at 1/100 f 2.8 ISO 200 compared to 1/200 f2.8 ISO 400
Therefore you would have to move the flash closer to subject if taking the route of lowering shutter speed.
Hi Neil,
Thanks for the tutorials, really interesting.
The problem I have is with using the D800 Nikon, at apertures of 2.8 and f4 with the longer end of the 70-200 zoom, the dof is so small I can just manage to get the eyes sharp when viewing at pixel level.
Is this the same for you or is there a trick I am missing?
Many thanks
Michael
There are strong specular reflections on her outfit. Was that a creative decision? Do you find it a distraction?
The reflections are just the nature of her wearing black latex.
In the related article you’ll see that I removed the specular reflections in the accompanying photos, using Photoshop.
Neil vN
Hi Niel,your blog is great!
thanks for sharing.
I’ve some questions about the filters.
the technique that you’ve explained is clear.
how dim the viewfinder get with an ND8 filter in front of the lens?
it is dim like a lens stopped down to f5.6 or worse?
Is there any color shift or color cast using an ND8 filter?
And last question. Using an nd8 filter affects in any way the autofocus capability of a reflex? And i mean the autofocus of any reflex. top reflex are able to autofocus even if the max aperture of the lens is f8 but with a Nikon d3100 you can use those filters too?
Sorry for my English. i know it’s not so good but i hope that I’ve explained my point well.
Yes, the viewfinder becomes very dim. You do lose 3 stops.
In theory there should be no color shift, but of course, each filter or piece of glass will have its own light transmission qualities that will affect color. I would guess that the more expensive ones are more neutral.
I am sure the ND filter affects auto-focus. And it is nearly impossible to see in the viewfinder alone if you have accurate focus.
Hi Neil,
Thanks for this post, as always. I was wondering which you would consider more efficient, an ND filter, say, 3 stops, vs. using high speed sync. I don’t have any NDs, and when I use HSS, I find using any kind of modifier sucks up too much of the remaining power. Have you ever run a comparison of the two?
With High-Speed Flash Sync, you lose light from your flash. So that daylight-to-flash ratio is skewed.
Using an ND filter maintains that daylight-to-flash ratio. It cuts the ambient light and the flash equally. But in cutting it down, you get to that f/2.8 type apertures.
So the use of an ND filter allows you to do something that the use if HSS doesn’t.
True enough (and thanks for replying). Maybe to rephrase my thought. Say you have only speedlites for outdoor shooting and you are out in bright sunny conditions. You want to soften your light a little (or maybe you don’t) but you do want to balance your exposure and want more than fill flash. What would you choose between ND and HSS if both were at your disposal? I was watching this B&H video http://youtu.be/4AoaNMWvfZE?t=39m10s (at around 39 minutes) and from what I could see I’d get more power from my speedlite out of an ND. The photographer doesn’t state what level of density he adjusted the ND to, though. Thanks!
Upon further research, I think I found your thoughts on another post on your site. Item 3 of this post pretty much addresses what I was after: https://neilvn.com/tangents/high-speed-flash-sync/ Thanks again, Neil.
Hi Neil,
I’m still a little confused.
If I am using manual off camera flash (no TTL with Pocketwizard Plus X’s) set to 1/2 power and I am getting a reading of f11 @ 1/250th sec. If I add a 3 stop ND filter the only adjustment I have to make is to drop my aperture down to f4? No adjustments to the flash power? Seems too simple. Am I missing something?
Thanks Ross
That’s it. Nothing more to it.
Let’s say for a specific scenario you have f/11 but you would like f/4 aperture, but you can’t go to HSS … then you pop a ND filter in front of your lens, and it kills 3 stops of ambient & flash. In tandem. So you have f/4 and you’re happy about it.
The only negative is that your viewfinder becomes darker and your AF more hesitant.
But that’s it.
Thanks Neil, seems ridiculously simple.
If I could ask a “tangentially” (pun intended) related question, using manual off camera flash and following your techniques posted elsewhere on this blog, am I correct in presuming that once I have determined my choice of aperture, shutter and ISO to correctly expose the background (or slightly under expose it) then to achieve the correct flash exposure on my subject I adjust the power output of my flash or the distance of the flash until I achieve the desired f-stop? Is this true even when the aperture/shutter/ISO combination has been selected to slightly under expose my background?
Thanks again,
Ross
Thank you, I’m for sure going to give this a try older camera and flash that doesn’t HSS. I got ND let goes.
Hi Neil, did you end up posting this in a different article as you said above? “When using flashes that can go to high-speed flash sync, there is a penalty to be paid in terms of loss of effective power / range. Then a ND filter would still be very useful in using your speedlight in bright sunlight. We’ll cover this in future articles.”
I’ll still scratching my head as to why an ND filter would be better than HSS when using my Canon 600s. Are they? I think I would need to see a chart to understand why, because it seems like 6 of one and half dozen of the other to me right now after reading about the topic. Don’t you loose the exact same amount of power from the speedlite either way—with HSS or with ND filter?
Hi there Tommy
Check out this video tutorial on High-Speed Flash Sync. One of the take-aways there is that you lose power when you got into HSS. That changes the way you can balance flash and ambient light when you are working in super-bright light, and you are at the limit of what your flash can deliver.
To keep out of going to HSS, but still retain the use of a wider aperture, you use an ND filter.
The Neutral Density filter would typically cut 3 stops or 4 stops of light, depending on the kind you buy.
Now, instead of working at 1/250 (or 1/200) @ f/11 @ 100 ISO, you are now working at 3 stops wider aperture.
You get 1/250 (or 1/200) @ f/4 @ 100 ISO with the use of a 3-stop ND filter.
You now achieved an f/4 aperture without going into HSS … implying your flash still works at maximum efficiency.
That ND filter will cut 3 stops of flash AND 3 stops of ambient light. So the balance remains the same … but you don’t go into HSS and lose that extra stop of flash power.
The essential thing to realize here about the use of the ND filter, is that it doesn’t change the BALANCE between flash and ambient light.
The ND filter is also useful if you work with older flashes that don’t allow HSS.
I hope this makes more sense now. But do watch that video. It will help make things fall into place.
End of 2024 and this article still holds true, and is a great information! Thank you!