Simplifying composition with a fast telephoto zoom
If you can create a good photograph out of seemingly “nowhere”, then you can bring a variety to your images that is out of the league of photographers who have to rely on picture-perfect scenery. This is especially true with wedding portraits. We’re under pressure for time, and on top of that we can’t always control where we shoot. We have to make it work wherever we are.
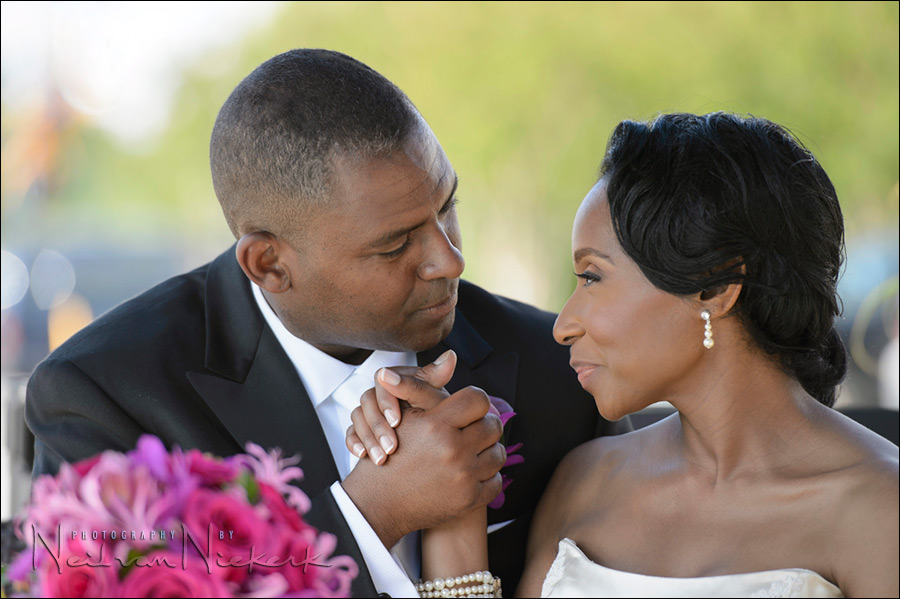
One of the basic techniques I rely on heavily with my wedding photography, is to eliminate distracting elements by shooting with a fast telephoto zoom. The shallow depth-of-field works to my advantage. And the longer focal length compresses the image so that the background isn’t a sweeping vista anymore, but a narrower view which YOU can control with your own position. Move around to find that composition.
The photograph above is perhaps an excellent example of this. The groom, also a photographer, left this comment on the Facebook album:
I also had an “ah ha” momemt watching you create images. We went to unfamilar places and you played with the background blur to create cool shots like the one of us sitting on wicker chairs, at a dumpy metal table, outside, facing a pedestrian-filled parking lot.”
There really wasn’t much more than that – the concrete slab outside a restaurant, with a few tables and chairs, with a parking lot in the background, and a few small trees and shrubs. Now, I don’t quite have a pull-back photo to show you where we were, but I do have this test shot with a slightly wider field of view, which shows some of the background. It was a mess.
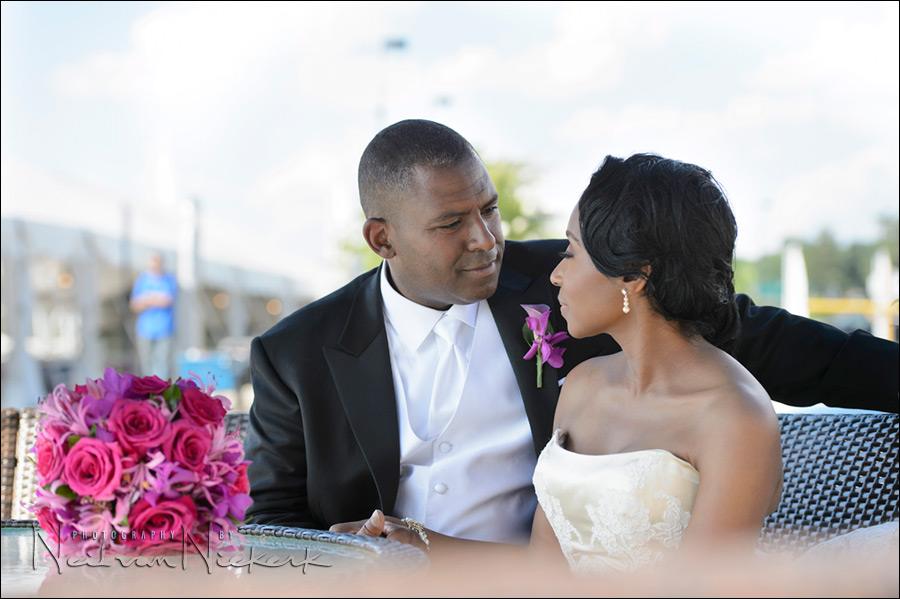
I wanted to make sure the light there was flattering, before continuing, so I took a few test shots, including this one. Then I fine-tuned the composition in camera, by moving around. It is essential to move around, and thereby changing your perspective and the background.
Camera settings & photo gear used (or equivalents)
- camera settings: 1/250 @ f/4 @ 100 ISO … ambient light only
- Nikon 70-200mm f2.8 AF-S VR II / Canon EF 70-200mm f/2.8L IS II
My focal length was 200mm. I purposely used the lens at its longest focal length. Then *I* move around to frame properly. I do this instead of just zooming to find my composition. It’s a very specific technique, and one I mentioned in a previous article: composition for full-length portraits – step back!
The reason why I decided to take the photo here, is because this is where the couple was waiting for me. The limo had dropped them off here, and we were going to walk around the waterfront for a while, for the romantic photo session. So they waited for me here in the shade, for me to catch up with them. So this is where we started with the photo session .. a found moment that I worked around, by shooting with a long lens, allowing them to just talk to each other.
The resulting sequence of images is one that I am quite proud of, especially since it received a few glowing comments … even more so when they come from my client!
Related articles
- Wedding day portraits – simplifying composition for effect
- Bride and bridesmaids – finding a nice background
- Romantic wedding portraits – more than just the kiss
- Aluanda & Clarence – wedding at Oxon Hill Manor
- More articles on wedding photography
Neil, the technique you described works really well.
1. What’s your prefered aperture (range) when using this technique with the 70-200mm lens?
2. What do you do when there is a lot of clutter and you photograph a group?
MvH: The aperture (and other) information is under most of Neil’s images. To get this effect with this lens you’d typically work in the 2.8-4.0 range.
Neil,
While not giving you the narrow view of the subject as much, wouldn’t a 50mm f1.4 (say on a D7000) give you a good depth of field allowing you to create a nice background?
Robert
Robert, not really. The 200mm focal length gives a much tighter field of view than the 50mm on a 1.5 crop sensor can.
This is such a great photograph. And when you read the narrative and see the pull-back shot you realize what a stunning and effective example it is of this technique.
Neil, with such a shallow DOF, where did you focus, to the man’s or woman’s eye?
Did you use central focus point and recompose or did you move the focus point to the eye?
Thanks.
Ryano .. I tried to make sure that they were as close to being in the same plane of focus, as possible. In this case though, I did focus on the groom, since most of the bride’s gestures were directed toward him .. and the accent in this photo is his expression.
Hi Neil…
another poster asked about a crop sensor, so just wondering myself if I were to use a crop body (canon 7D) with the 70-200, would I be able to achieve similar results and also should I use the the focal length of 200 with the crop magnification factored in or just max zoom 200mm marking on the lens itself resulting 320mm?
Thanks
On a 7D with a 200mm lens the FOV as you correctly stated will be similar to a 320mm on a FF sensor. This will have the effect of giving you an even tighter composition at the same distance, so you’ll have to move around (and a little back) to get the shot as you like it.
Not to speak for Neil, but the actual numeric telephoto setting is not what is important here, but rather the concept of compression that a telephoto brings to the composition — that is the point Neil is trying to make. By reducing your FOV with a telephoto, you reduce background clutter/distraction and bring the viewers attention on your subject rather than the background.
Carlos nailed it. Eloquently.
It’s about the technique rather than being too stuck on the specific numbers. Just get the shot. But make it count.
I’ve been serving as mostly-volunteer photography for a nearby summer-stock theater. My favorite is to photograph the dress rehearsals, when I’m free to roam the cross-aisle behind the last row of seats — all the better to frame the actors against the set.
Theater photography is interesting as a training ground, and I recommend at least a small dose of it to anyone. Consider that the director has taken care of posing the “models” and the lighting director has taken care of lighting. (Existing light all the way, during a dress rehearsal or performance.)
So the photog is free to pay attention to timing the shots and framing them (not just by twirling the zoom ring but by moving around to position the subjects against the background. It starts with the obvious — does a door casing sprout out from someone’s head, or does the door or window frame provide a natural “picture frame”? — and moves on from there. How does a given array of actors look from different angles? etc.
It’s not so much the out-of-focus effect that Neil is achieving, given the ratio of distances (camera to subject: subject to background), but experimenting with framing and then pouring over several hundred images after a show trains the eye to what works and what doesn’t.
this is one of my favorite techniques. A long telephoto can help you not only take out the extraneous elements, but it will often give a certain intimacy to images that aren’t normally seen with shorter focal lengths. We get drawn into the special moment that is occurring.
Hi Neil!
Did you use “flash” in the above wedding portrait? Or were you outside the effective range of flash?
Could you please tell me what is the maximum effective distance I can be from subject with an on camera 580ex II (mounted on a 5D II & Canon 70-200 f/2.8L IS II)? This will be an outdoor wedding reception (my son’s). I’am wanting to take GOOD portraits of individuals, bride & groom (candids mostly)& etc..
I’m used to studio photography & not experienced in weddings. Any good pointers for me with equipment being used(580 ex II, 5D II & 70-200 2.8 IS II mounted?) The canon lens is new ;~)
Do you as a rule, use flash w/the 2.8 70-200 lens? I will only be using on camera flash.
Any help or suggestions from you Neil are MOST appreciated. THANK YOU!