
posing your subject – direction of light & choice of background
Reinforcing the ideas from a few previous posts,
we’re going to look at that intersect where everything comes together:
– direction of light,
– choice of background,
– posing your subject,
– positioning yourself.
When we work with our subject – whether a family member or a model or anyone we’re photographing – then we have the opportunity to control at least a few aspects to make the final photograph more successful.

Direction & Quality of Light
I wanted to distill the essence of what we, as photographers, work with – light! Before we can truly grasp on-camera flash and off-camera flash, and really, any kind of photography, we have to be aware of the direction and quality of light. We need to observe the light that we have, and then decide how best to use it, or enhance it.
With this book, I try my best to share those “aha!” moments with you, and I do believe this book can make a difference to your photography.
The book is available on Amazon USA and Amazon UK, or can be ordered through Barnes & Nobles and other bookstores. The book is also available on the Apple iBook Store, as well as Amazon Kindle.
I usually take care to position myself and my subject such that the background is complementary, or at least neutral. I normally try to avoid a background that is cluttered and will distract.
Even when working in an urban environment and doing street photography, the various elements in the frame need to work together to make the image successful. A photographer like Matt Stuart has a genius for pulling disparate elements in the frame together to make images that are incongruous, fresh and striking. There is a balance there, even if the frame is busy. The point is that even with street photography like that, the photographer relies on deliberate framing for success.
Back to the portrait above of our model, Catherine, taken during a recent personal workshop – the choice of background is deliberate. Here is what the wider street scene looked like …
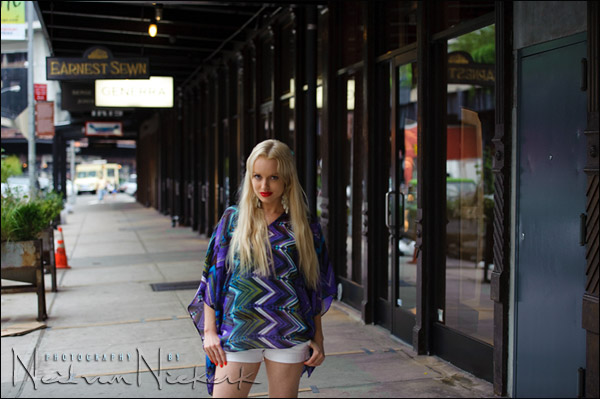
From all that clutter, I recognized that with a longer focal length, I could use the defocused repetitive pattern of the shop-fronts. I then composed tightly with a 70-200mm f2.8 zoom.
The lighting in that photograph at the top is all available light. No flash. But I also noticed that the awning we were working under would block the light from above. This meant the light wouldn’t be top heavy, but would mostly be coming in from an angle. This deliberate placement of our model meant we had great light falling on her. Now we just needed to pose her so that her back was somewhat to the light, but that she was facing outwards to the light.
The way that we worked with the light here, is exactly as described in a previous article about an available light portrait of Anelisa. We can work towards recognizing these light patterns and using them.
With that in mind, we’ll come back to the same topic with another examples from the same photo shoot.
camera settings & camera gear (or equivalents) used in this photo session
- 1/160 @ f2.8 @ 640 ISO … no flash.
- The 70-200mm f2.8 lens used at 200mm for maximum isolation against the background.
related links
- effective on-location portraits (model: Anelisa)
- direction of the light – using available light (model – Shawna)
- using the available light is not a random thing
- photographic composition – look at your background (model: Jess B.)
Hi Neil,
Regarding the settings you used for the image (1/160 @ f2.8 @ 640 ISO), did you arrive at those settings by aperture first (dof), shutter second (for camera shake reduction) then ISO last? Apologies for sounding over-analytical.
Thank you,
Donald R
Thanks for the workshop, Neil! :-)
Hi Neil,
– a question about your metering technique – in the scenario like one above, do you use matrix mode to get an overall ambient reading and then adjust your shutter speed and/or ISO (based on your experience and knowledge), to put exposure on your model where you want it?
Or are you in spot (or center-weighted) mode, and take a reading of her face, zero your meter there (again adjusting your shutter speed and/or ISO, assuming you’ve already settled on your aperture), and let everything else fall where it will.Then, once it’s done (and she stays in pretty much same light) you’re recomposing and re-framing your shots however you want, not worrying about your exposure meter anymore, because her face will always be properly exposed?
I’m trying to figure out the proper exposure to start with with similar outdoor situation without too much chimping and shooting tens of test shots.
Should I meter the face, and don’t bother with with anything else? Or should I use matrix and guesstimate whether to put my meter over or under zero, based on tonality of the scene?
Thanks,
Mario
1/160 @200mm very sharp