This topic - balancing flash and ambient exposure - seems to one that many newer photographers struggle with. The big hurdle seems to be the basic starting point - how do you decide on the exposure for each?
I'd like to explore this topic a bit with this post. The trigger for this was a question that someone emailed me regarding an image in one of my books on flash photography. Instead of answering the question directly, I thought that a wider answer might be more illuminating. We're still on that perpetual quest Read more inside...
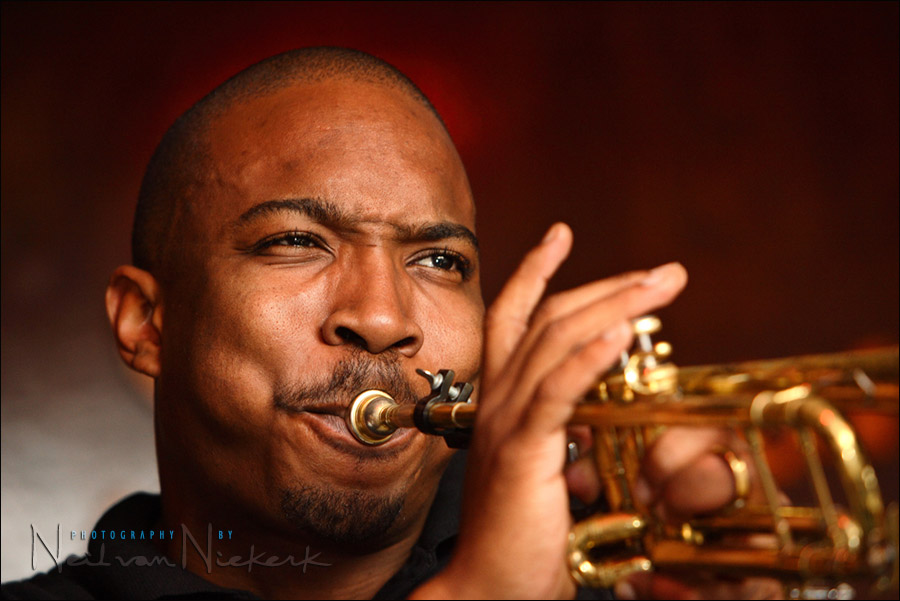
An photo of a jazz trumpet player during a session in a club, lit by on-camera bounce flash. Since it's a perfect example of how I use on-camera bounce flash so that it looks nothing like on-camera flash, I'd like to use it to illustrate this summary of on-camera bounce flash technique:
The light in this image is nearly all from my flash. The red hue in the background, and spilling onto part of the trumpet and his skin, is from the strong red lights in the night-club. To eliminate this, I under-exposed the ambient light, by choosing my camera Read more inside...
Tutorial: How to use the guide number of your flash
GN = distance * f-stop
Your flash's Guide Number (GN) is determined at 100 ISO, when it gives correct exposure at a certain distance, multiplied by the f-stop
The idea that we can figure out the manual flash exposure by the combination of distance and aperture (for a given ISO setting), was covered in these recent topics:
- getting the most power out of your flash / speedlite / speedlight
- practical tutorial: controls for manual flash exposure
In these articles, we relied on the display on the back of the Read more inside...
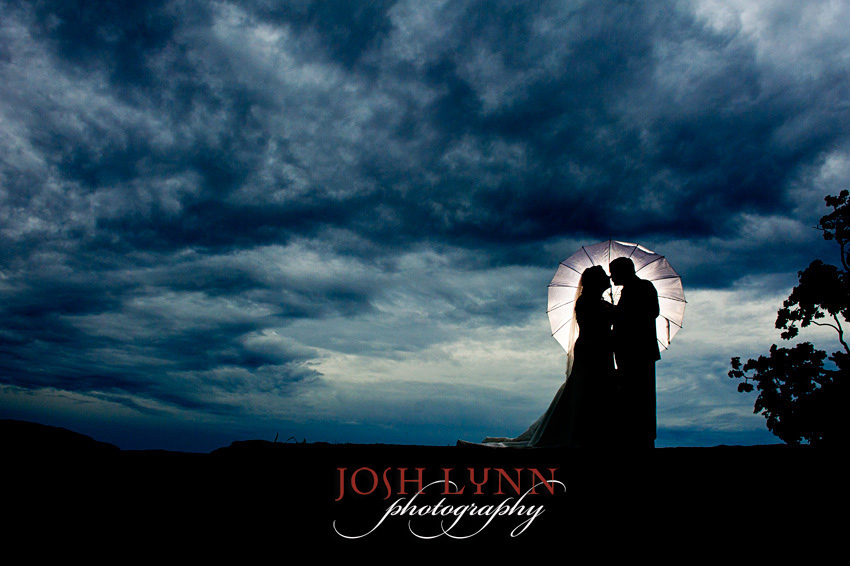
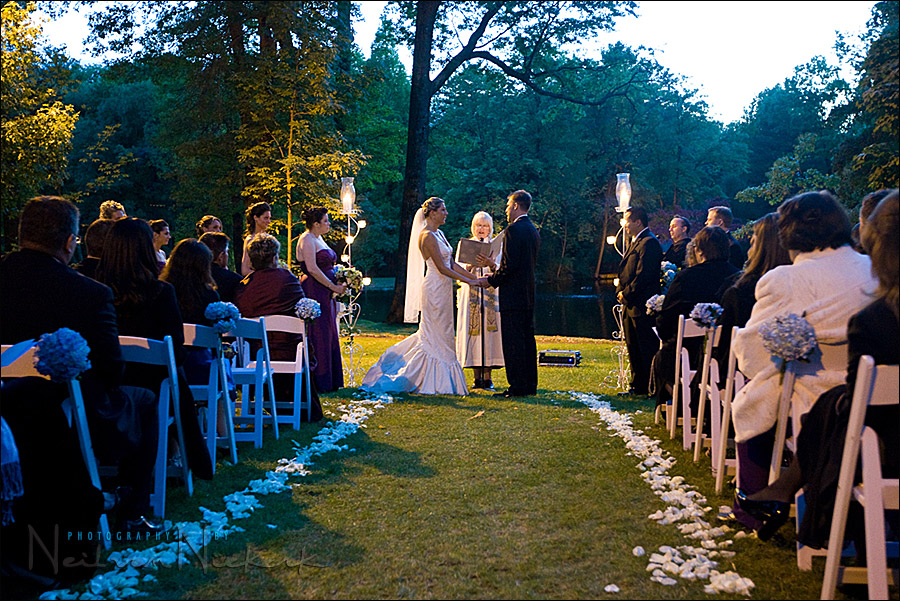
off camera flash for portraits of the bridal couple
My friend, Josh Lynn, just posted this spectacular wedding photograph. It does look like he used flash there, so I thought this would make a another good example to see if we can 'reverse engineer' a photograph in terms of his settings and setup.
I first had a guess at how he set this up; and then had a look at the EXIF data, and this revealed the true story. See if you can decipher this image yourself, without scrolling down at first ... Read more inside...
using neutral density (ND) filters with flash to control depth of field
Working in bright light, the limitation of having a maximum flash sync speed forces a small aperture on us. That small aperture means more depth of field than we might like.
There are two ways to force a high shutter speed / wide aperture combination:
- go to high speed sync (HSS) mode.
- use a neutral density (ND) filter.
Using HSS dramatically cuts down our power of our flash, so if we're working in very bright light, we might be past the edge of what our flash is capable of. Then we need to bring it Read more inside...
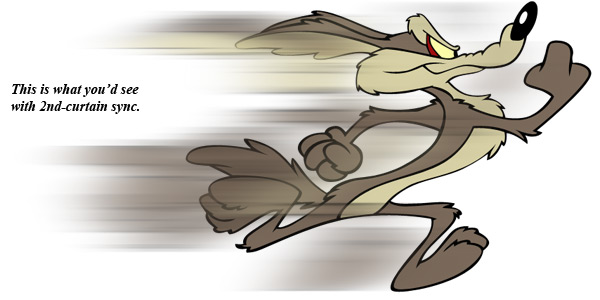
A topic that has been briefly discussed on the Tangents blog before, is that of first curtain flash sync vs second curtain flash sync. First curtain sync is also often called front curtain sync; and rear curtain sync is often called second curtain sync. (This is also covered in my book on flash photography).
Since it is an important topic in flash photography, let's look at what this entails and the difference between the two ways we can sync our flash .. and why would the one way would be preferable over the other.
To help us Read more inside...
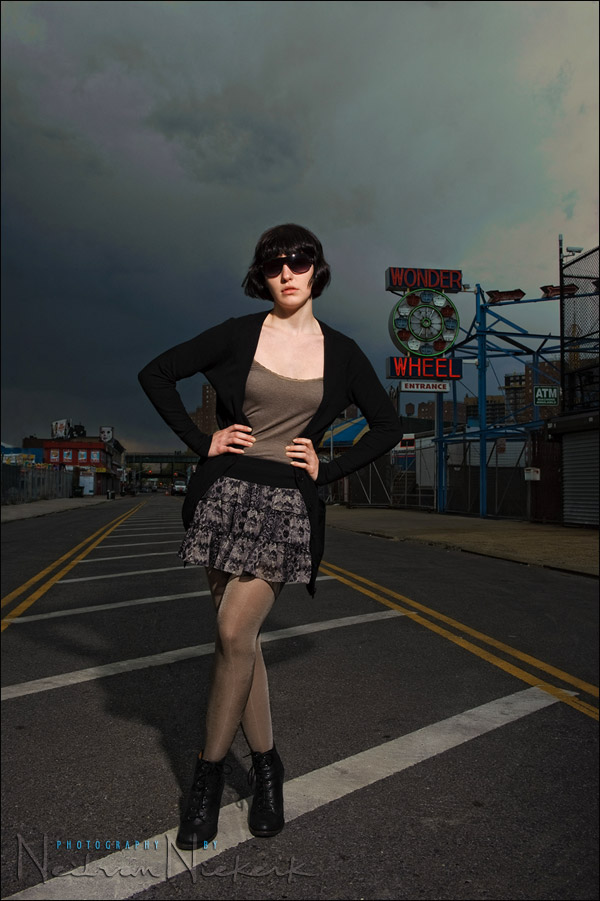
When I saw this dramatic sky with the approaching storm during our recent shoot at Coney Island, I knew I wanted to photograph our model against it. By the time I actually started taking photos, the raindrops were already spattering around us. So there was little time to work.
I knew I wanted a brooding sky. Now, depending on how I chose my exposure, I could've had a much the sky appear much brighter, or just a little bit brighter than shown here. There's a whole range of possibilities in how I could've exposed for my Read more inside...
tutorial: Balancing flash with available light / ambient exposure
Many of the questions I get on the Tangents blog relate to balancing flash with available light, and I want to pull it all together into a single article.
The questions often revolve around metering for the ambient light, and how to balance flash with the ambient light. Tied in with this, is how to make the decision about which camera settings are the best. It's a juggling act, balancing all the factors quickly enough ... and still being able to deliver solid photos.
The answer to the questions about how to Read more inside...
wedding photography: flash and low ambient light - adapting during the shoot
I'm often asked what I would do when I encounter a situation where you need to use flash, but there is no easy way to bounce flash. My flippant answer is ... you're screwed!
Well, not really. My advice is that you have to improvise and in some way of finesse your use of light. In tough situations, you still want to try and shy away from using direct on-camera flash whenever possible. Direct on-camera flash as the main source of light is rarely aesthetically the best choice. Read more inside...
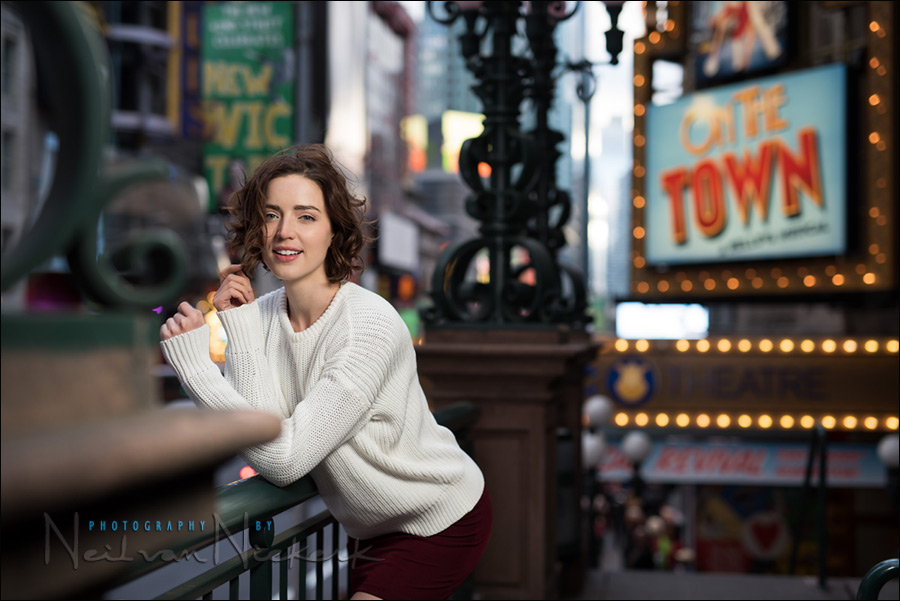
Going by the emails that I receive, one of the areas that many photographers struggle with is that of combining ambient exposure and flash exposure. This question is also expressed in other ways. It can be a frustrated, "where do we even start?" I also often see it expressed as an involved step-by-step deconstruction of technique, making the entire process more complex than it is.
In reply to that, and many other emails I've received in the past few months, I'd like to offer an analysis of a few images from a recent shoot.
One of my Read more inside...