Bounce flash and choice of background + backlighting
This is where style and technique intersect – the choice of how to use flash (or any other kind of additional lighting) at wedding receptions. Many photographers prefer the crisp look of multiple off-camera flash setups at wedding receptions. While I do think some of the photos look incredible, I am not convinced that the success rate is all that high. Hot spots in the background, and weird cross-shadows will mar many of the photos. My preference has always been for the predictability and flexibility of using on-camera bounce flash.
A question that then comes up is, what about back-lighting? I don’t back-light during the wedding reception. For romantic portraits with the B&G, yes, I might. But not the reception. I prefer the flexibility of moving around independently.
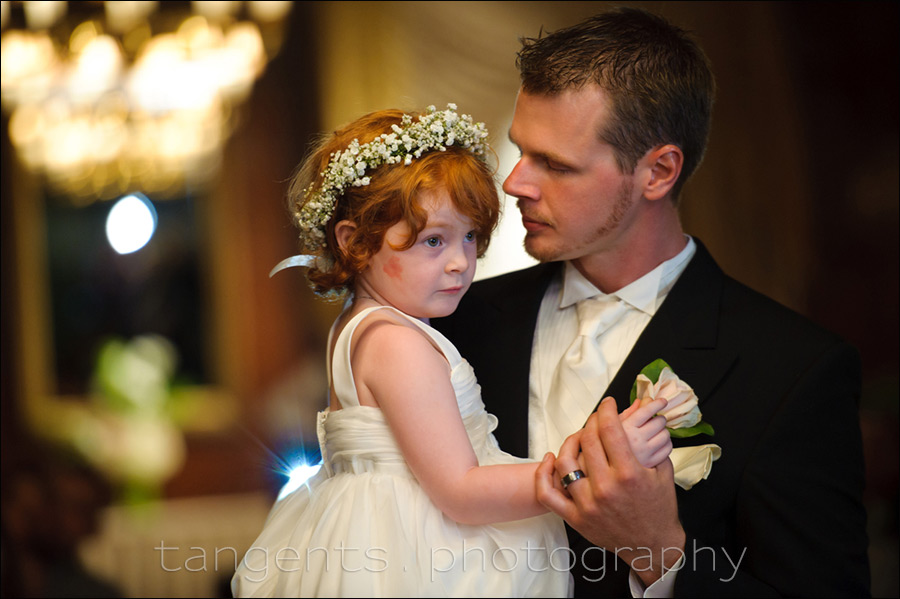
I do try to avoid that black-hole background where the subject merges into deep shadow.
This is done in two ways:
1. ) Pushing my camera settings so that I get more detail in the background.
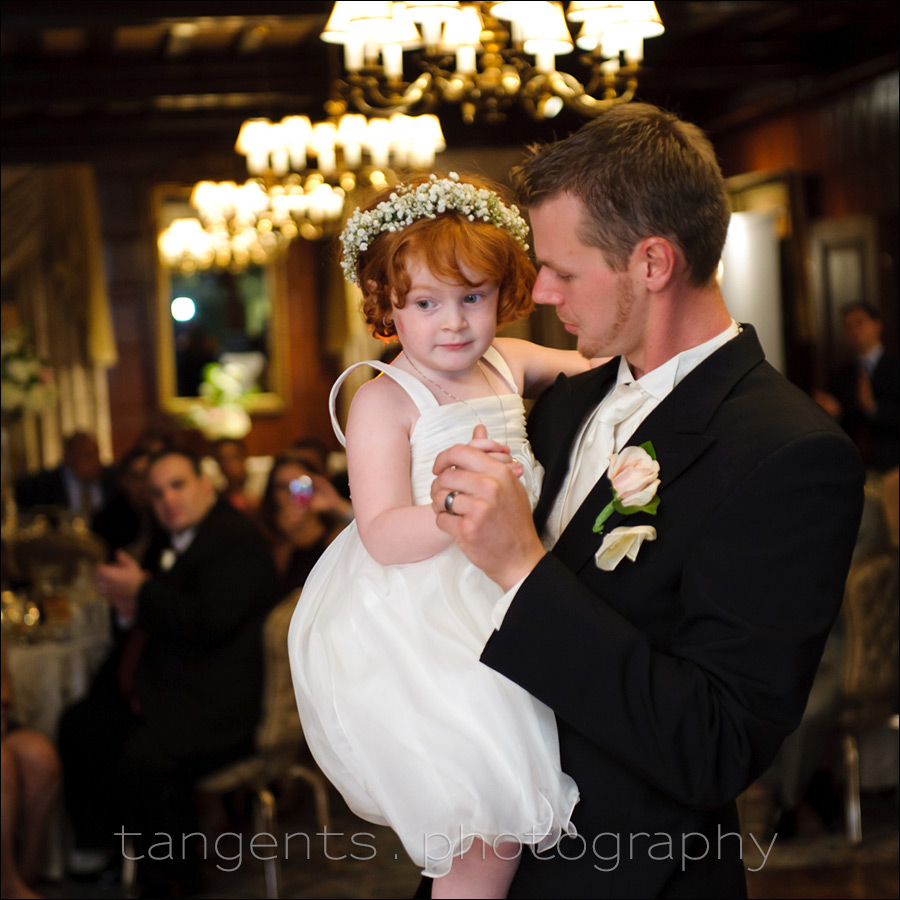
2.) Then, I also do my best to have some out-of-focus elements in the background that is brighter. I choose specific backgrounds where there is some light which helps separate my subject from the background. This could be DJ lights, up-lighting, a doorway, sconce lights, anything. Just not a dark-hole background.
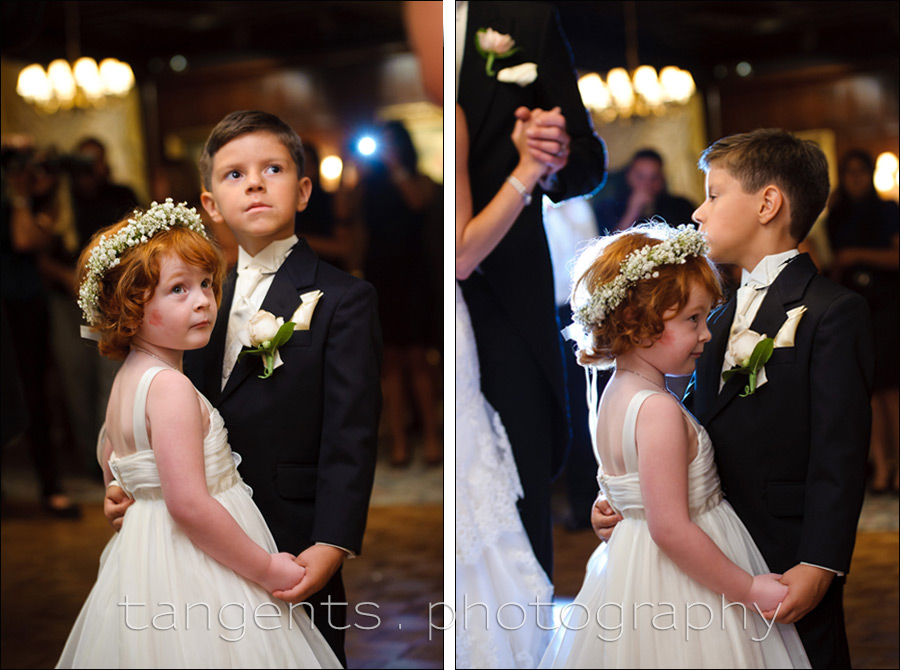
When I shoot like this during receptions … what I am aware of, is my own position in regards to the background. I don’t try and make every shot in every direction work.
Camera settings & photo gear (or equivalents) used for these photos
- 1/60 @ f/2.8 @ 1600 ISO
- Nikon D3
- Nikon 24-70mm f2.8G AF-S /equivalent Canon 24-70mm f/2.8L II
- Nikon SB-910 Speedlight /equivalent Canon 600EX-RT Speedlite
- the BFT (black foamie thing)
The few examples here (from a wedding in 2011), show this way of using bounce flash. Here I still used the Nikon D3, and shot at 1600 ISO. These days I would tend to push the ISO higher for a brighter background.
Working with on-camera bounce flash like this though, most often allows me more flexibility in my own movement, and I can shoot in large reception venues with a wide-angle lens without risk of hot-spots from an off-camera flash. Here is another example: Wedding reception lighting with one flash.
Using on-camera bounce flash effectively like this, is also described in my book, On-Camera Flash Photography:

On-Camera Flash Photography – revised edition
This book is explains a cohesive and thorough approach to getting the best from your on-camera speedlight.
Particular care was taken to present it all with a logical flow that will help any photographer attain a better understanding of flash photography.
You can either purchase a copy via Amazon USA and Amazon UK, or can be ordered through Barnes & Nobles and other bookstores. The book is also available on the Apple iBook Store, as well as Amazon Kindle. Also check out the Amazon Kindle store.
Learn more about how the cover image was shot.
As regular readers of the Tangents blog might suspect already, I did use the Black Foamie Thing here to control the direction of my light, and to control spill from my flash.
It is the least expensive light modifier you could possible make.
The aspect of it that I take pride in, is that it now isn’t about the specific device you plonk on your flash .. it now really becomes about the crucial part of flash photography – the direction of light.
In essence what it does is block your light from your flash from hitting your subject when you bounce to the side, or bounce your flash slightly towards your subject.
One of the photography industry magazines, recently featured an article on Lighting throughout a wedding day. In the section on Lighting the Party and Dancing, the author mentioned that she “despises flat on-camera flash”. Well, it need not be that bad when you use directional on-camera bounce flash.
Oh, the other advantage of using the BFT (which sits underneath your speedlight, NOT on top), is that it blocks the light of your flash from blitzing people in the face when they stand close to you. This is important enough when you are standing close to the mother of the bride or someone you truly need to love you as a photographer. ie, it really reduces the annoyance factor of bare bounced flash.
Materials for the flash modifier used – the black foamie thing

The BFT is held in position by two hair bands (Amazon), and the BFT is usually placed on the under-side of the flash-head.
The linked articles will give clearer instruction, especially the video clip on using the black foamie thing.
Summary
Does using on-camera bounce flash destroy the mood? That’s open for debate. I could say there wasn’t much mood other than ‘dark‘ at this reception venue. Flash was necessary. HOW to use the flash is open for discussion though.
Whether you decide to use something as simple as on-camera bounce flash during the wedding reception, or go as complex as multiple off-camera flash setups … it it important that you maintain a consistent style. Consistent throughout your website, so that clients know what to expect from you. Also, it needs to be consistent and predictable during the wedding reception. It has to be a technique that you can use to consistently deliver images that look as good as you promised your clients.
Related articles
- Which direction to bounce on-camera flash?
- review: Best light modifiers for on-camera flash
- Tutorial: Bounce flash photography
- More articles on Bounce Flash Photography
I use ocf during receptions. In a lot of situations I like the look (and it makes me feel fancy lol), but it is limiting as only a few angles work. You post is making me rethink everything. But with bounce only, how do you deal with cavernous 2 story black ceilings and dark walls or wood barns with all kinds of mixed lighting? Or outdoor patio dance floors with next to no ambient light? I suppose the answer to this could be its own blog post.
With those scenarios like wood barns or cavernously dark places … I’ll easily concede that you do need off-camera flash of some kind to help create separation and depth.
As an example, here is an image from a Bar Mitzvah party, held in a venue with black walls and ceiling. There’s just black nothingness.
This photo shows the back-light at work, with the DJ’s lights too, of course.
There’s always a shock when flash reveals airborne contaminants you’ve been inhaling for the past hour! Is that dust?
Neil – Nice to have you back.
In a situation described by the Bar Mitzvah photo, if you only had on-camera flash, what would you do to light this? In my mind, I think this would be a great photo if the subject was lit, the crowd was in shadow, and had the DJs back light to separate the subject. Would you consider direct flash with modifier, and if so, which one is your favorite, if there is one?
Thanks – Dave
Ideally, I wouldn’t use direct flash unless absolutely necessary. I have a TTL cord in my camera bag for this kind of thing, and would hold the flash (with a small softbox) in my left hand.
Thanks, Neil. That’s what I was looking for, the “what would you do?” to make the photo. But, as it would be great for one photo, wouldn’t it be tough for an entire event in a place like this?
Just tough it out!
In your example, where did you bounce the flash?
Beatriz … I bounced the flash up, and over my shoulder to hit some place behind me.
The rule of thumb I work with: I bounce my flash into the direction that I want the light to come from.
Hey Neil, great article. I personally don’t believe that using on camera flash “destroys” the mood. I have been using your lighting techniques on several occasions and I love it! I have found that adjusting my shutter speed as well as te flash power helps with what mood I want to capture.
Neil, when you use off camera flash(like the example above) do you use speed lights or strobe?
On-camera speedlight.
Hello Neil,
On the black foamie thing, i see that it extends a very short distance beyond the flash lens. Nice to know, i had been using a piece of styrofoam with hair bands quite a while and it’s a bit too long. So all it really needs it to hide the spill by couple inches, right?
That’s it. Just enough of a lip to avoid spill from your flash.
Hi Neil do you have a general rule as to how many stops underexposed you normally are? I know it depends on how much ambient light you want to kill but do you find you are at stop or 1.5 stops more often than not? Also do you have a general rule as to how many stops underexposed the ambient is before you start to see blur from 1/60th sec shutter speeds? Thanks!
Steve … that’s not an easy question to give specific values to. There are too many variables. Mostly, it will depend on subject movement, and how steady one can hold the camera.
Check out this article: Will flash freeze the action at slow shutter speeds.
Also, this discussion on the various scenarios in balancing flash with ambient light.
Thanks Neil.