
Which direction to bounce on-camera flash?
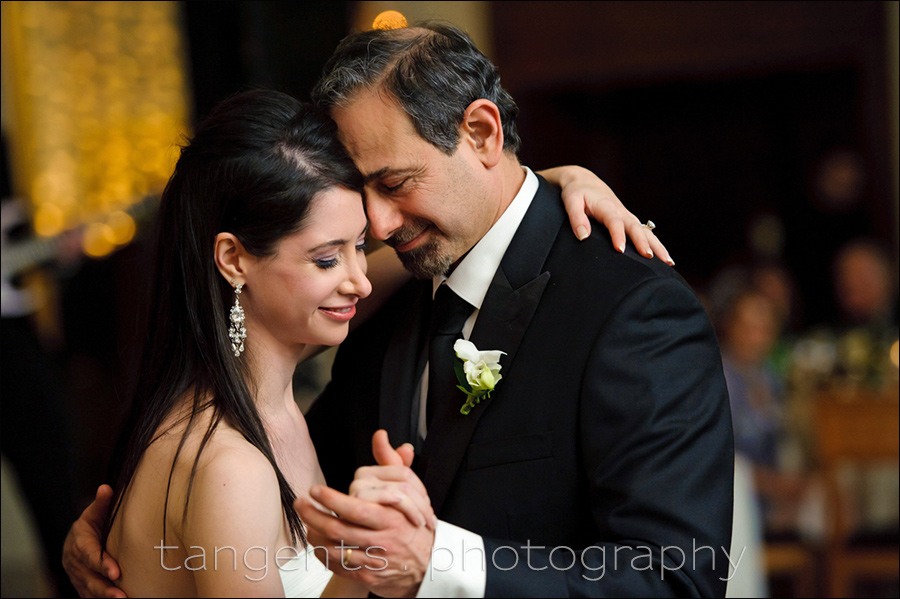
When photographing any kind of portrait with on-camera bounce flash, my main consideration is that I want flattering light. For example, this photo of the bride dancing with her dad, I want flattering light to illuminate her face. It should be obvious that I decided to bounce the flash towards camera-right, so that the light comes in from that direction. I don’t want to light up the side of her head. I want to light up her face.
This means that as the couple rotate, I will continually adjust the direction that I bounce my flash into. This is an important point – the direction that I have the flash pointed to, keeps changing as people move. It’s never really static unless my subject is static.
When photographing a portrait, whether with one or two (or more people), using on-camera bounce flash, you have to consider the direction that you want to bounce the flash in.
You want to avoid just bouncing your flash in a generic way, without thinking how you want the light to appear .. or worse yet, just shoving a plastic diffuser over your flash, thinking that will give you better light from your on-camera flash. It is easy for us to do so much better than just thoughtlessly using a generic flash modifier.
This is also discussed in detail in my book,
On-Camera Flash Photography. (Amazon USA / UK).

As mentioned in the tutorial on bounce flash photography, I bounce flash into the direction that I want the light to come from. This implies that I don’t keep my flash pointed only in one direction for the entire event – instead, I am constantly changing the direction that the flash-head points into, to match the direction I want the light to come from.
This in turn implies that as the couple rotates during the dance, I will continually twist the flash-head to point in the appropriate direction. Sometimes to camera-left; sometimes to camera-right; sometimes just over my left shoulder, and sometimes just over my right shoulder.
I usually favor the woman if both their faces are visible. This is also an important point – I favor the person who would be better served with flattering light.
And just for those who can’t quite make the jump, I need to make it clear that this is useful advice for any kind of portrait where you use bounce flash … and not just weddings.
Camera settings & photo gear (or equivalents) used for these photos
- 1/100 @ f/3.2 @ 1600 ISO
- on-camera TTL bounce flash
- Nikon D3
- Nikon 70-200mm f2.8 AF-S VR II /equivalent Canon EF 70-200mm f/2.8L IS II
- Nikon SB-910 Speedlight /equivalent Canon 600EX-RT Speedlite
- flash modifier: Black foamie thing
Those of you who regularly follow the Tangents blog, will know that this simple flash modifier is my choice as the most simple light modifier for on-camera bounce flash. More info: Black foamie thing. Here is a comparison of various light modifiers for on-camera flash.
Materials for the flash modifier used – the black foamie thing

The BFT is held in position by two hair bands (Amazon), and the BFT is usually placed on the under-side of the flash-head.
The linked articles will give clearer instruction, especially the video clip on using the black foamie thing.
Camera settings & photo gear (or equivalents) used for these photos
- 1/100 @ f/3.2 @ 3200 ISO
- on-camera TTL bounce flash
- Nikon D5
- Nikon 24-70mm f/2.8E VR /equivalent Canon EF 70-200mm f/2.8L IS II
- Nikon SB-5000 AF Speedlite /equivalent Canon 600EX-RT Speedlite
- flash modifier: Black foamie thing
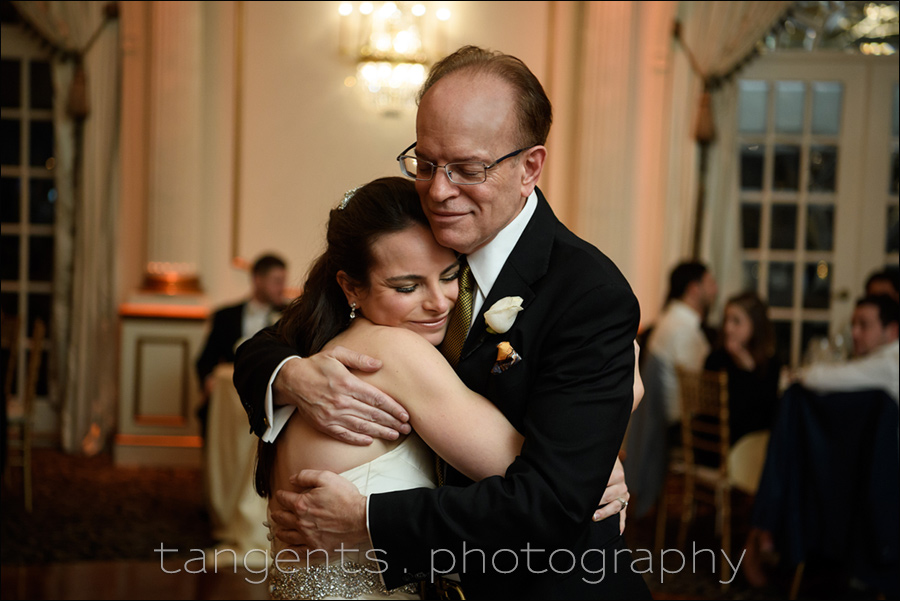
To illustrate again, with both people facing the camera, I will bounce my flash to favor the bride / woman. In this case, it should be obvious again that I bounced my flash to camera-right. The black foamie thing helped control the spill of the bounce flash. As an aside, this is the same venue that the photo in this article was shot at: Bounce flash photography & The Inverse Square Law.
Summary
When my subject isn’t static – as in these examples where a couple are dancing and rotating – then the way my flash is bounced, isn’t static either. I am continually changing the direction of my bounce flash to suit my subject. You can’t be lazy and just accept a “default” position – your lighting has to match the positioning and pose of your subject.
Related articles
- Improve your portrait photography: Lighting with bounce flash
- Best bounce flash modifier – Black foamie thing
- Bounce flash & direction of light
- Video clip: Using the black foamie thing
- Bounce flash and catchlights
- Throw away the tupperware on your flash
- How to get ‘short lighting’ with bounce flash
Good morning Neil, When I first read your blog years ago and after buying and reading two of your books, I became a convert to the bounce technique and the black flag… and the spinflash 360. The technique does point out how important it is to have a flash head that provides maximum rotation. I was so disappointed to find that although my Olympus 36R turned 180° to the left, that it only turned 90° to the right. That is a major restriction. The Metz 560 was somewhat better, as it turned 120° to the right. But I am so pleased that the little Metz i40 I bought for my Sony a6000 turns 180° in either direction! That’s what you want!
Thanks, Neil. This was really pertinent to the type of photography I mostly do (non-wedding events). I am constantly changing not only the angle of the flash head, but also the position of the BFT. I do this because I read another of your great articles where you were changing the BFT in order to keep the direct rays of the flash from hitting your subject.
What I struggle with sometimes is the amount of ambient allowed into the photo, and the influence that “not-so-great” ambient has on the overall lighting. I know it’s not possible to see, but I would find it so useful to have seen the photos you posted taken with the flash turned off, to get a sense of just how much the flash was lighting the shot. But, as usual with your photos, it looks like no flash was used, and the lighting is great.
In a large reception room what do you bounce off from – if there is no wall nearby?
Dennis – you need to dissuade yourself of the idea that you need a specific wall nearby:
– Wedding reception lighting with one on-camera flash
– High-ISO bounce flash photography
– Bounce flash and the Inverse Square Law
– Bounce flash – be bold!
But if there truly is nothing to bounce your flash off, then you have to improvise. Your best choice usually is off-camera lighting.
Thank you Neil – appreciate your effort in sharing those links with me. I went through all of them and now have a better idea of where you are coming from…!!!
I’ve bounced my flash off a dirt hillside behind me. Wasn’t very efficient, I didn’t realize this flash could “pop” that loudly, but it worked:
https://g1.img-dpreview.com/751575E6D94346FC92B0076295D99BF7.jpg
These 3 best friends were sitting in total blackness just laughing away. If you look at the window reflection, far right, you’ll see the bright hillside behind me.
What, don’t they have an auto-rotate zoomy flash yet?
Neil, do you zoom the flash wide or narrow for this kind of thing? Or let it change with your lens focal length?
Thanks.
Hi there Russ
I don’t think an auto-rotate feature would be of any use, since the camera and flash would have no idea of our subject or our intentions with the flash.
I mostly zoom the flash to the tightest zoom length, and keep it there. This avoids the annoying bzzzt-bzzzt as the flash head continually changes the zoom setting.
Thanks Neil. I’ve been using the BFT since I started weddings in 2012, all thanks to you :) I also constantly move the flash to get more flattering light to the bride. I love how I can short light my subjects with on-camera flash!
One of the challenges with this is when they move enough so the man’s face casts a shadow on the woman.
A great article and something I have found challenging at times. I don’t have a BFT but I have a flexi bounce card which has proved invaluable.
This was extremely informative. I always wondered about direction and diffusion, thinking the flash would be too harsh if I pointed it directly at the subject. I have some reading to do now so I can refine my bounce flash. Years ago, I purchased a Sto-Fen OmniBounce so I could “just [shove] a plastic diffuser over [my] flash, thinking that will give [me] better light from [my] on-camera flash.” It’s been sitting, unused, in my camera bag for years…