
Clam-shell lighting for headshots and portraits
Clamshell lighting is one of the simplest lighting setups for headshots and portraits. Two lights are set up to light your subject from above and from below. Both are at approximately a 45 degree angle. This gives an even light on your subject, that somehow has a glowing effect. Easy to set up, and gives consistently good results. Here I used studio lighting, but obviously it is just as easy with speedlights.
You must have seen similar clamshell style lighting setups, but with a reflector below instead. This 2nd light source from below (whether from another flash, or from a reflector) lifts the shadow areas. Depending on how much power you give this secondary light, you can eliminate shadows from below, giving more even lighting. There are various ways to get some light in under your subject’s chin. Either a massive light source behind (or slightly to the side of you), or a reflector of some kind, or some other kind of light source.
One item I often use in the studio, Westcott Eyelighter (B&H / Amazon), works well. You can see it in use in this article: Headshot photography – Clam-shell lighting setup. The eyelighter does depend on how you position the reflector in relation to your subject. The classic way of doing clamshell lighting however, is with a light source below your subject – usually a sofbox. As in this example.
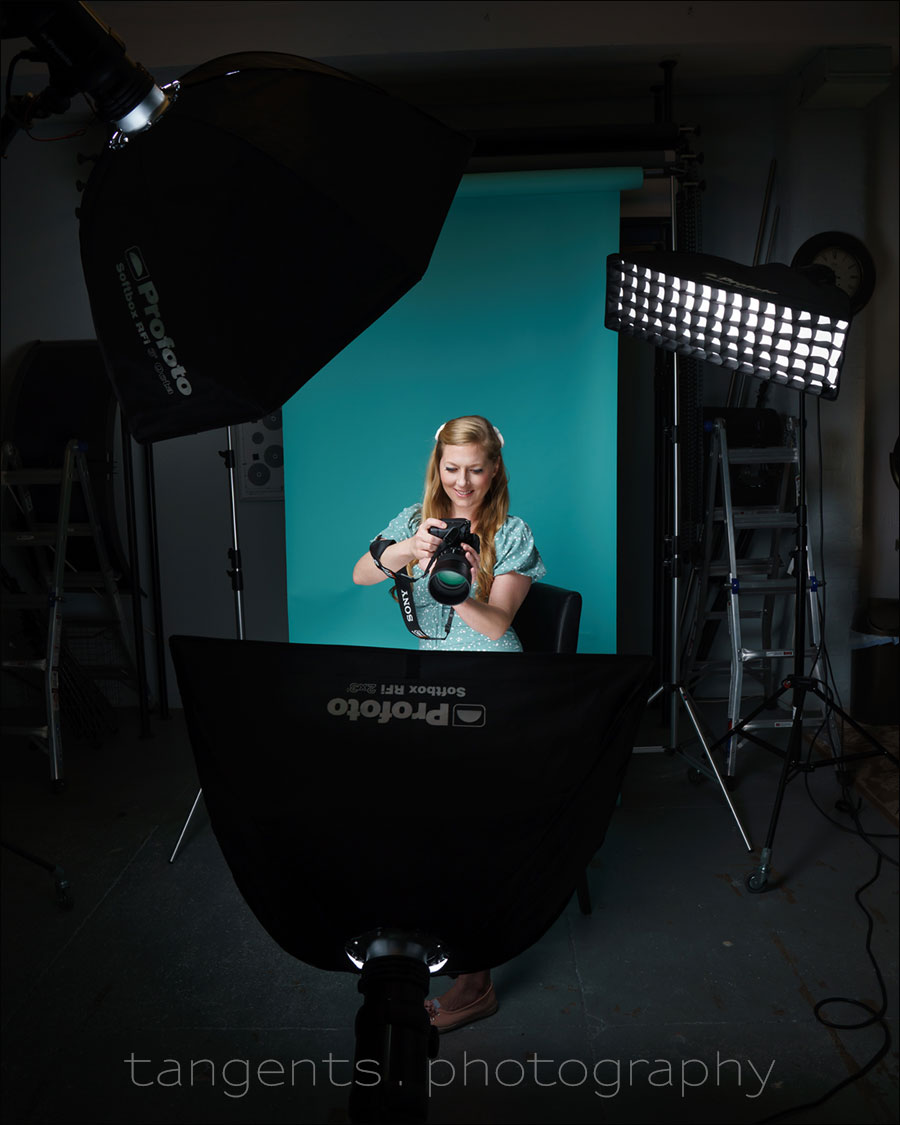
I used three Profoto D1 500 Ws studio flashes, as shown in this pullback photos. In addition to the clamshell setup. I added a rim-light from behind to subtly help with separation from the background.
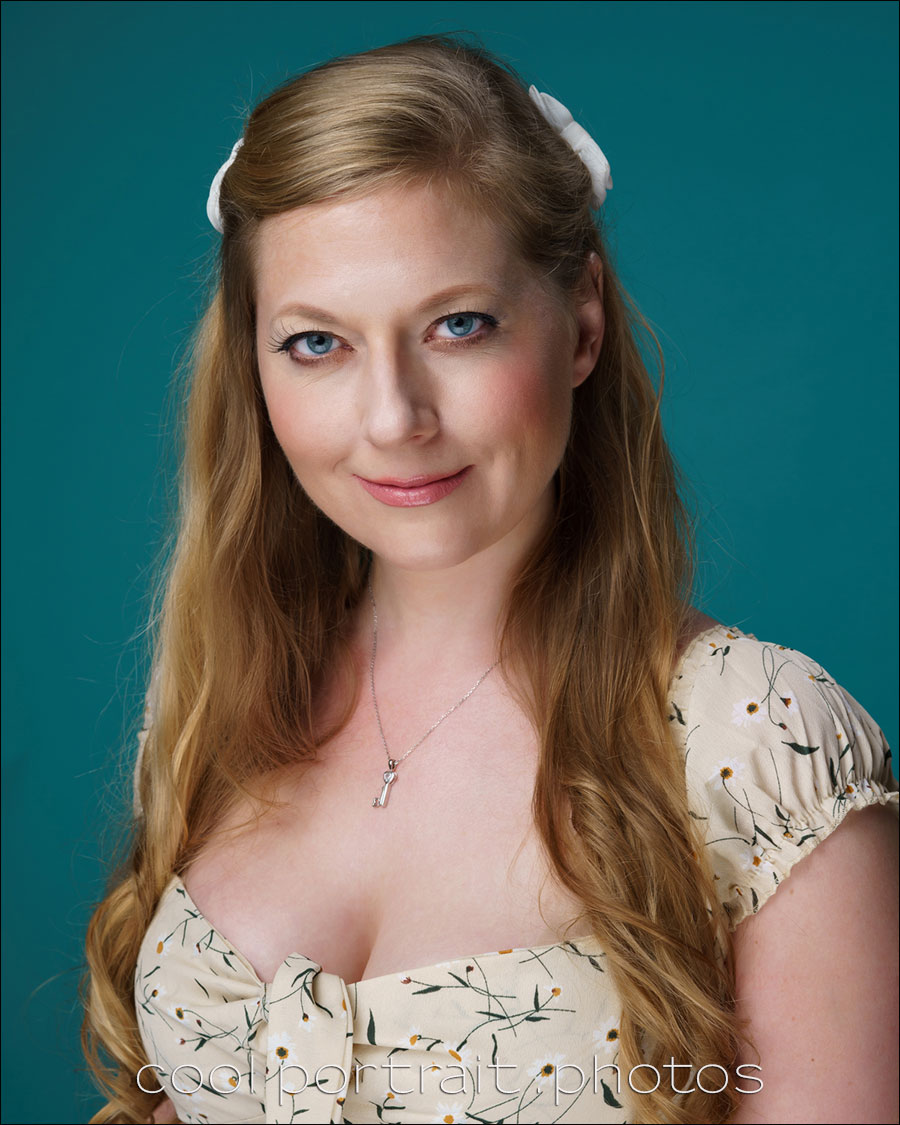
Using that smaller gridded octabox on her as the main light, gave more contrast to the side of her face. A larger light source would have given more even light across from left to right. We have choices.
Photo gear used in this photo session
- (3x) Profoto D1 Air 500 Ws Monolights
- Main light: Profoto 3ft RFI Octa Softbox (B&H / Amazon)
- Light from below: Profoto 2×3 RFi softbox (B&H / Amazon)
- Rimlight: gridded Profoto RFi 1×3 softbox
One challenge I had here in the studio was getting that other softbox low enough on the ground. For this I had a make-shift setup where I used a stem from another device and added it to rollers for a tripod. It works!
For a more permanent and elegant solution, check out the Photogenic backlight stand (on casters) (B&H / Amazon). The minimum height is 16″ which is low enough for this kind of setup.
About this photo session — for some reason I never felt like I was quite able to capture some of Emily’s spark and personality in photos — but with this most recent photo session with her, there’s more than just a glimmer of her delightful personality. This time I feel like yes, this is her! I recognize her now in the photos. Why this would be, I can’t quite explain other than gradually building up a rapport over the course of several photo session. A steady progression in my ability to elicit various expressions. However this may be, I do love the results.
Related articles
- Photographing headshots in a small space
- Headshot photography – Clam-shell lighting setup
- Headshot photography lighting setups in the studio
- Headshot photography: What makes for good head shots?
- BTS: Fashion catalog photo shoot in the studio
- Using Profoto gear on photo shoots and events

Hi Neil,
I do believe that “This is her!” should be the goal of a good portrait photographer. Mastering light(s) and “This is her/him” are both required and your effort to combine them produced an outstanding portrait. Kudos!
Your books introduced me to the wonderful and scary world of flash photography and through your sharing of your knowledge I began “seeing” the light, I learnt its behaviour and its effects on my photography.
But whenever I saw a perfectly lit photo with a model I felt something was missing, until I realized that it lacked the “This is her” effect.
I understand that it is not always a requirement (commercial photography comes to my mind) but a portrait that does not portray at least a glimpse of the person is not a portrait, it is just an image of the person, albeit a perfectly lit one.
Thank you for sharing!