Exposure metering & observing the available light
As a photographer you’ll often hear instruction to just “look at the available light”. Great. But this advice is also often given without clear examples of what we’re actually supposed to be looking at. So let’s explore that a little bit using a sequence of images of our model, Aleona, photographed during a recent individual photography workshop.
This is also keeping with the loose theme over the past few weeks, that for a photographer “using the available light” is not a random thing or just a meaningless catch-phrase.
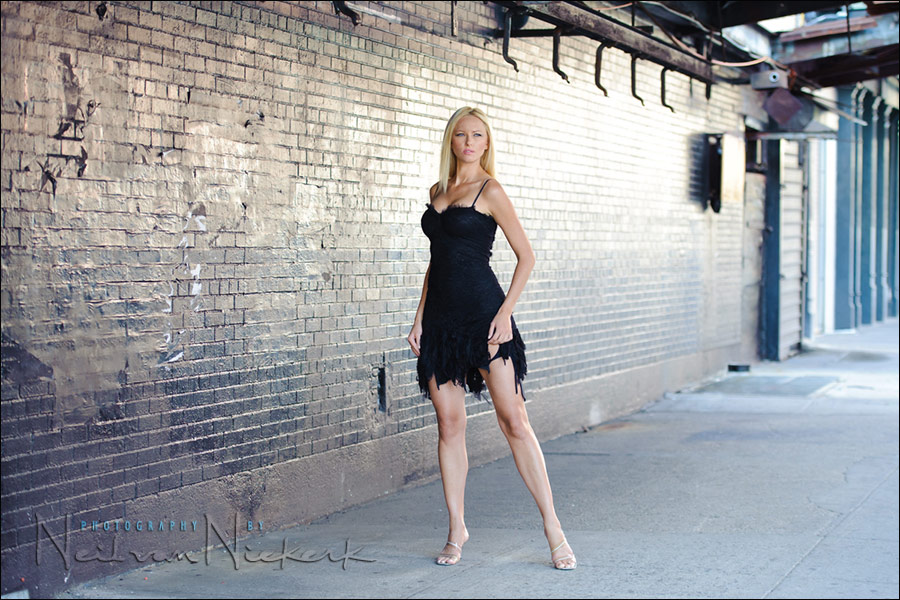
As an example, here is the pull-back shot of the image above. (I did some editing and image sweetening to it, but more about that later.) The light on Aleona is all available light.
Two things to take note of here:
1. we need to be aware of how the available light changes with our position … or not
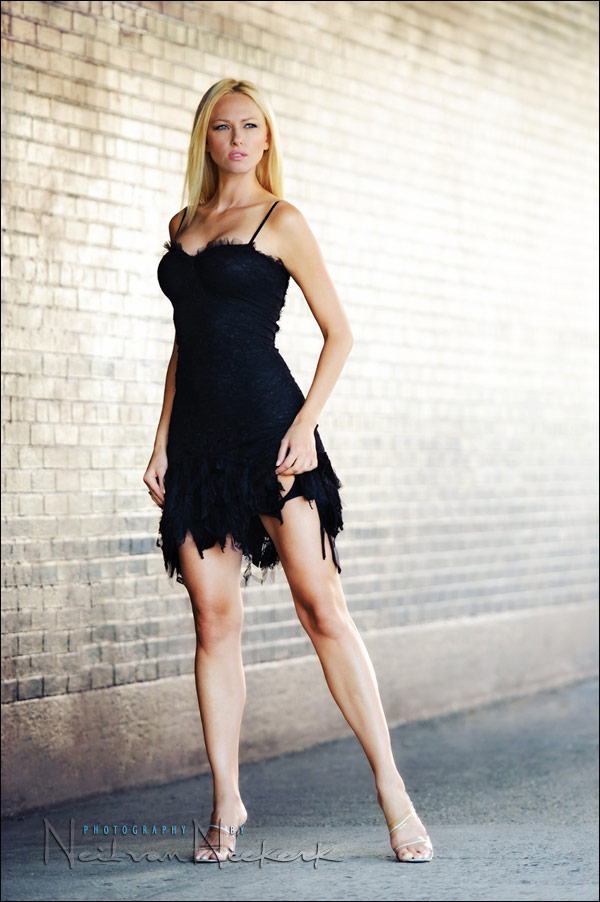
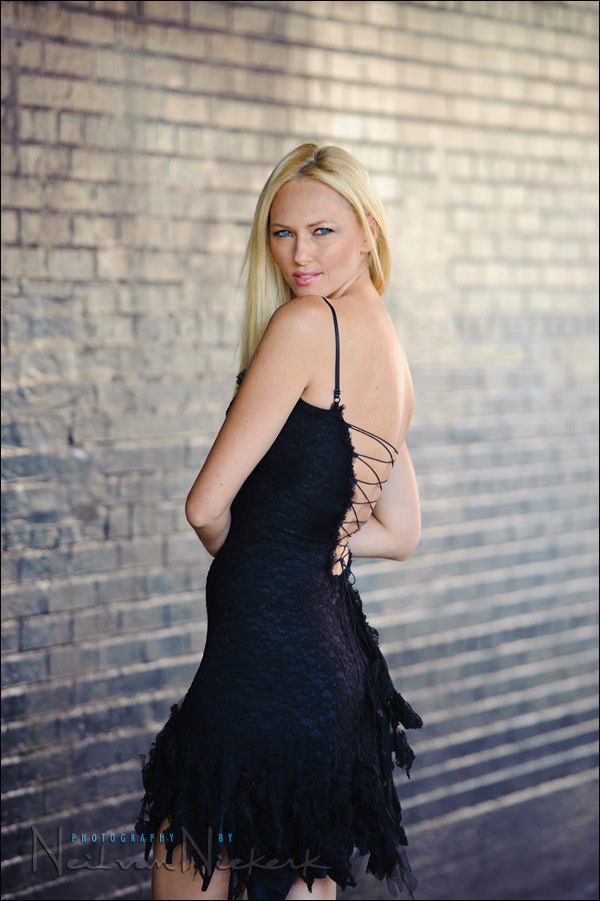
The wall behind her is painted black, but doesn’t necessarily appear as black. At our angle that we’re viewing it at here, it becomes reflective and blows out to a golden bright color. Or, as we change position, it becomes more grey. And finally, a head-on shot shows that the wall is indeed black.
It is the same light. All that changed was *our* position. So in that sense, this relates directly again to the article where I described my lighting setup in photographing a model, Ulorin Vex. By changing *my* position, I entirely changed the way the light appears in the images. A change in *my* position changed the resulting images.
Changing my position didn’t change my exposure metering settings for my subject, since the light was coming from a 180 degree sweep around her. But it did change how my background appeared. And this is something we can actually see while on location by actually *looking* at the light, and realizing that the black wall isn’t black anymore from certain angles.


2. exposure metering
The second thing to be aware of here, is that since it is the same light falling on Aleona, my exposure settings don’t change. My camera’s meter will show wildly different readings … but that doesn’t affect me, since I am metering for my subject.
And this comes right around again to a previous article where I photographed Anelisa with the Fuji X100. In that instance as well, by exposing for my subject, I let my background blow out. It gives a specific (and perhaps unexpected) look. But the central idea is that we need to expose for our subjects. Or, decide *how* we want to expose for our subjects.
So, with these three images of Aleona, I can’t let my background affect my exposure metering. I have to shoot in manual exposure mode to keep things simple, and keep my background (which varies from deep-black to super-bright) from affecting my exposures.
Here is the final image where I cloned out the extraneous distracting elements like the pulley system in the ceiling there. (Aleona is too tall for me to get the angle of view that I wanted, so I had to do some tweaking in Photoshop to get the image I wanted – a simpler image.
camera settings & photo gear used (or equivalents)
- 1/250 @ f3.5 @ 400 ISO … available light only
Hi Neil,
I’m a huge fan of your blog and tutorials. Yours is hands-down one of the best photography sites around.
I’m wondering if you could expand a bit on: “My camera’s meter will show wildly different readings … but that doesn’t affect me, since I am metering for my subject.”
I’m guessing that your histograms were wildly different for each angle and that blinkies were also different, so I was curious, are you spot metering on her face to get your exposure reading, and if so, is dead center on your camera’s meter (18% gray) the most accurate reading for a model of her skin-tone?
These are amazing shots — great model and I love the way you’ve used the background.
Nancy, my exposure metering is usually a combination of techniques … and finally checking the camera’s preview that I am happy with what I’m getting. Then of course, it is essential to shoot in RAW, especially to take up any slack in the exposure (and WB).
Her skin tone is too light to be regarded as 18% grey. It’s not a mid-tone.
So if you spot-metered off her skin, you’d have to open up 1/3rd or 2/3rds of a stop. (And still shoot in RAW anyway.)
I just had to take a minute to tell you how fabulous your posts are!!!! You explain things in such easy to understand terms….. THANK YOU so much for that!!
Very informative. From what I read, the camera settings did not change as you took the pictures from different angles? Thank you.
pics are yoour normal great, but she is spectacular!
Great advice as always neil,and amazing image!
Just Wondering did u use a reflector here for the face to bounce light back as most of the light is behind the model?
Many thanks neil,signed up for your workshop in ireland.Really looking forward to it..
Great article and once again great model. Like Mike said, she is spectacular. If I where to define the word woman, this drop dead gorgeous woman would be the definition.
Excellent informative post, as ever
@Nancy: “I’m wondering if you could expand a bit on: “My camera’s meter will show wildly different readings … but that doesn’t affect me, since I am metering for my subject.”
What Neil meant is to set the camera to manual mode, select the aperture need to achieve the desired DOF, come close to the subject and use the meter to adjust shutter speed/ISO as needed – this effectively “locks in” your exposure since the camera can’t alter aperture/shutter/ISO settings in manual mode. As you move around the subject, the reflected light from the scene will change and your meter will react by suggesting different exposure settings to account for the changes. What is important to understand is that if the light falling on your subject remains generally constant and your subject position in relation to that light is constant, then the exposure you set manually is correct regardless of what the camera suggests. That is why, he is able to capture the model correctly exposed, while the black wall gets overexposed.
If the camera is set on aperture priority, the meter will alter the shutter speed as you move around to account for the difference in overall reflected light, making it unlikely to achieve correct (or consistent) exposure of the subject.
Lesson: set your camera to manual mode, select your desired aperture and get close to your subject and meter from the area that you want to expose for – skin tone will be my chosen are in this photo. Then set the shutter speed/ISO to “lock-in” the exposure. Then – if your light source and subject position in relation to it remain reasonably constant – you can move around and shoot with no regards to what your meter tells you and be assured your subject will remain well exposed.
Hey Neil. I stop in almost every week and invariably I learn something new. This time, though, I have a rare (in fact, unprecedented) complaint.
I have no issue with product recommendations. If you use the product, all the better. After seeing you mention Totally Rad, I was curious enough to follow the link to their site. I took a 30 second peek and moved on.
What really concerned me was that I got an email from Totally Rad within an hour of visiting their site. I’ve never given them my address, never subscribed to any of their lists. I had never once been to their site.
That they would immediately SPAM me is a poor and intrusive practice. That you provided a link to what may or may not be a partner’s site, makes me think less of this site as well.
Hey Dan – sorry you received an email you didn’t want… I’ve been emailing with Neil, but I wanted to post here to get some more info, and add some clarification.
We collect email addresses for our mailings in 3 ways:
1) Via the Mailing List link at the top of our site,
2) The Sample Download link, which states pretty plainly that you’re also signing up for the mailing list, and
3) Customers who’ve purchased from us.
So unless you either signed up for the list by downloading our sample, or purchased something from us, I’m absolutely puzzled as to how you received our email. I literally don’t know how else your email address would have ended up in our database. The exception might be that you stopped by our tradeshow booth in 2008 or 2009 (we haven’t done a booth since then), but we would have had to scan your badge, and you would have also received about a dozen emails from us over the ensuing 2 1/2 years. Again, I’m puzzled.
I also looked into when / how you subscribed, because I was curious, and so far as I can tell, neither you email, nor anyone from the rodephoto.com domain has ever been on our mailing list. I’m a bit at a loss for explaining how we managed to send you mail, and we certainly never want to send mail to people who don’t want it (spam is a lose-lose).
I know that’s a long-ish response, but we take spam seriously, too, and I’m now curious as to what the heck is happening. You can contact us at http://www.gettotallyrad.com/contact as well if you have any questions (though you’ve probably already invested more time than you care by just following up here).
Again, my apologies for disturbing you. I honestly have no idea how that might have happened without your consent.
-db
I’m very much encouraged by the response. I don’t want to clog up the comments any more. I’ll forward the email off line. Maybe this was just an strange coincidence. FWIW – I don’t necessarily dislike getting email from companies and I actually like the idea of targeted advertising provided I have a way to opt out of things I don’t want to see.
Neil, I didn’t mean to insinuate that you had provided the address. I never believed that was the case.
This was a very informative post, I will have to go out and experiment :)
Great post Neil, thank you very much.
Thank so much, Neil and Carlos! I look forward to putting this into practice!
@Carlos and/or Neil. I’ll drill even deeper in regards to getting the correct exposure in this setup. When you decided on your preferred f stop and walked up to the model’s face to get the exposure, did you spot meter for the bright side of her face or did you take an evaluative average mter reading of her entire face to arrive to the correct exposure (Shutter Speed/ISO)???
Rob
Hi Neil, thanks for your useful tutorials.
Don’t you ever use a flashmeter to measure light?
Thanks Neil
Your kindness has illuminated the proper use of tools to express ones vision.