Flash photography – Changing the background color with gels
One of the biggest challenges when working in a studio, is that you’re essentially shooting in a plain rectangular box. When photographing portraits, the two obvious ways out of that is to create an interesting (or complementary) background, and then to create interesting (or flattering) lighting.
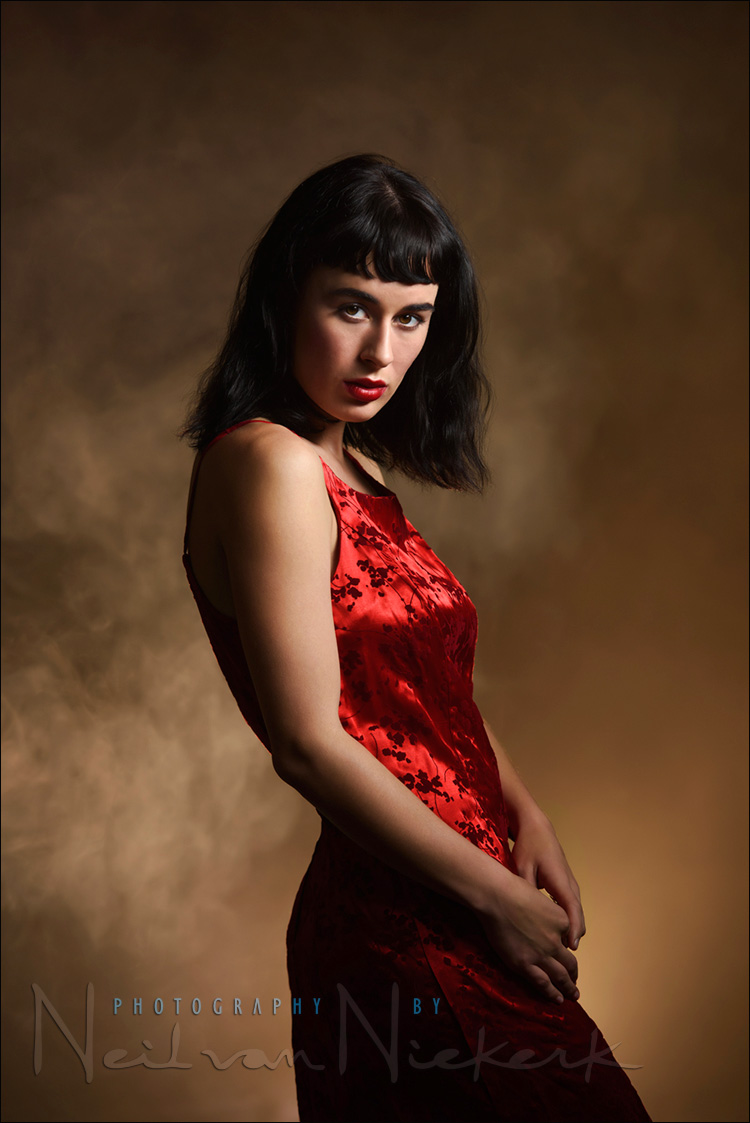
The lighting itself need not be complex. For this series of portraits of Olive, I used the gridded 1′ x 6′ softbox. By swinging it horizontally or vertically (or diagonally), I can change the way the light falls on my subject and the background. This article on Chiaroscuro lighting is a good example. So with these portraits of Olive, I could easily control the light fall-off on her body with the tall gridded stripbox. (Btw, check out Olive’s Model Mayhem page. She’s a delight to work with.)
The main light on her was an easy fix this time. Now the background – I wanted to change the colors up to complement her clothing she’d change in. Instead of changing the rolls of paper-backdrop, it was much easier to light the background with a flash and colored gels. For this I used the MagMod2 basic kit (B&H / Amazon). To gel a flash there are numerous options, but I doubt any are as easy and quick to change as the Magmod setup – magnets clip the gel holder into place. Super-easy to place on the flash, and just as easy to take it off again. Magnets! I mentioned these in the recent post – Best & worst photography purchases of 2015.
The pull-back shot (shown further down) will show the mottled muslin backdrop that I used. The gels didn’t really add much light to the backdrop itself – the backdrop was there to help create a background that has some kind of texture.
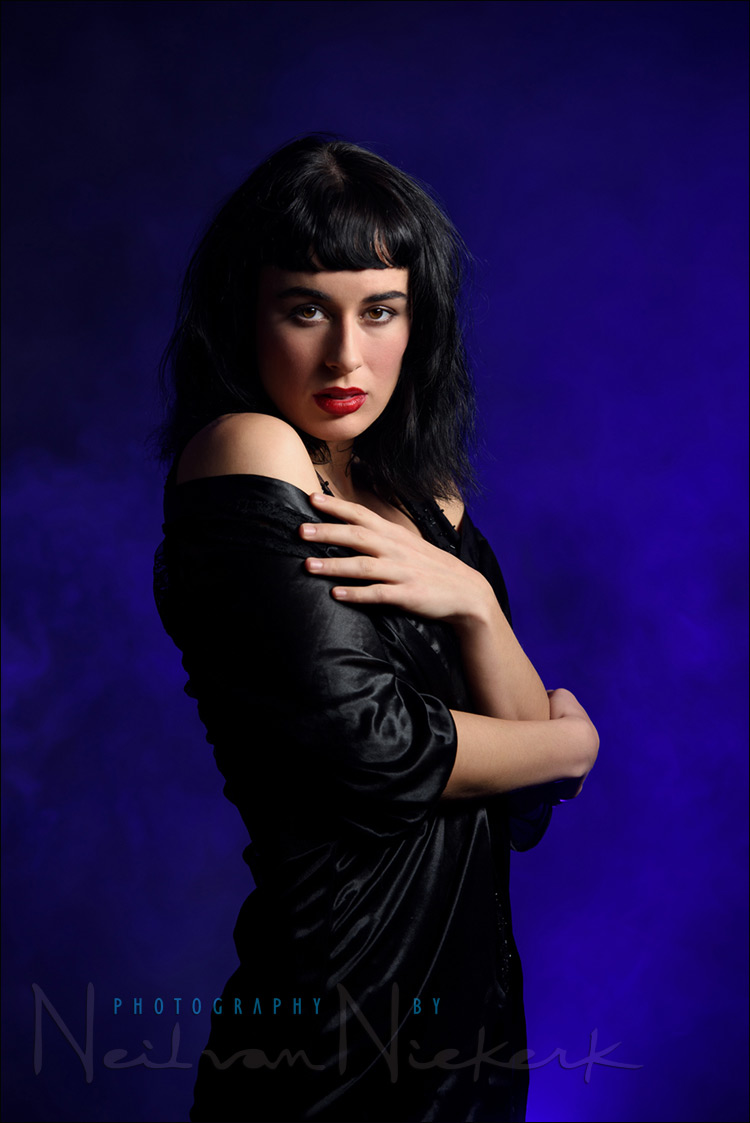
To hold the color of the background gels, we used a Fog Machine (B&H / Amazon). It is inexpensive and fun to use. In the pullback shot you can see the remote cable for the smog machine on the floor – Olive would press this with a toe to release the fog while I was shooting a sequence. She’s quite versatile as a model! The fog then created the dreamy texture, and showed the color of the gelled flash.
All of this added up to different backgrounds. The fog gave a non-static background from image to image, and the gels would give different colors with different sequences.

Lighting setup
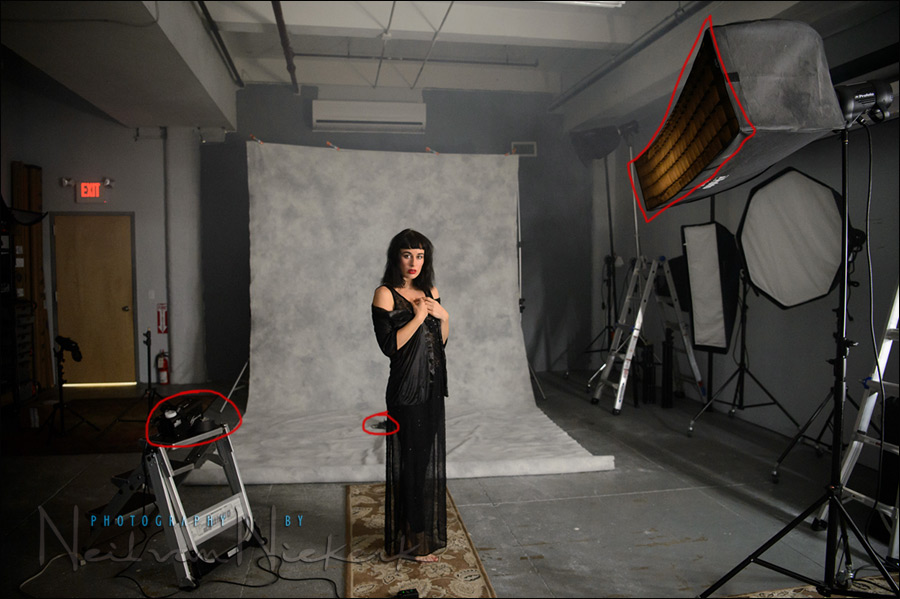
For this pull-back shot, I used the studio’s room lighting to show how the different elements were placed.
On the left, the gridded Profoto RFi 1’×6’ softbox (affiliate), as the main light. I could swing and rotate this as I needed. The light-stand is on caster wheels, so it was easy to its position a bit.
The Fog Machine (affiliate) is on the right, placed on the step-ladder. The fog would blow into the area behind Olive, towards the background flash. The flash on the floor in the background, had the MagMod gels (affiliate), and was pointed up towards Olive.
A relatively simple setup, providing a different look to every sequence we photographed.
Photo gear (or equivalents) used during this photo session
- Nikon D810
- Nikon 70-200mm f2.8 AF-S VR II /equivalent: Canon EF 70-200mm f/2.8L IS II
- MagMod2 basic kit (B&H / Amazon)
- Fog Machine (B&H / Amazon)
- Profoto D1 Air 500 Ws studio light
- Profoto RFi 1’×6’ softbox w/ grid
Related articles
- Image projection effects in the studio (model: Olena)
- In-camera special effects with gobo projection (model: Viktoria)
- Studio lighting – Influences & inspiration (model: Viktoria)
- Portrait lighting setup – Chiaroscuro (model: Frankie)
- Using a big gridded strip-box / soft-box (model: Anita DeBauch)
- Studio Photography Workshops
Studio lighting workshops
If you are interested in learning more about studio lighting, including lighting for headshots, I offer workshops on studio lighting. The workshops will be held at my studio space in NJ, and it has a wide range of studio lighting gear to play with!
Do you know of a flash that has TTL that will work on a Fuji XT1? I’ve taken a
course from you several years ago. It was a great workshop and I’m still a bit
in the dark when it comes to manual flash.
Thanks
Debbie
I used the small Nissin i40 flash for Fuji.
I don’t think it will be powerful enough for event work, but then, it depends on your style of shooting and the range of apertures (and ISO settings) you prefer.
Thank you for this article. I have been playing with gels lately but it was a little challenging. Your explanation helps a lot.
Hi Neil, just curious if you bothered with a radio trigger on the MagMod’ed speedlight or are you just using the optical slave?
I used the SB-900 in in SU-4 slave mode. No radio trigger.
Hi Neil, Great post; thank you. Would you imagine you could achieve similar results by using the edge of a large gridded octa instead of the strip box? Also, do you think the color of you background mattered much with this fog lighting technique? Seems to me the grey background isn’t playing into these photos…..
Neil… just purchased the MagMod2 Basic kit from Amazon via your link. I also picked up the MagMod Creative Gel Set. Wasn’t sure that was needed but it looks like that provides you with additional colors to play with.
It seems cheaper than buying several backdrops.
All you need is a Wall/backdrop and some space.
If I were to paint a wall for this very purpose. What color would you suggest to paint that wall?
One more question;
How much do you pay your models for a photo shoot?
Next year I want to work with a profesional model, hence the question.
I wish you a happy 2016 full of great things for you.
I would suggest grey rather than a white wall or backdrop. It is easier to add light than it is to take light away. You especially can’t “take light away” if you’re adding flash to it.
I pay models in the range of $30 – $50 p/h, depending on experience and travel.
If you photograph boudoir or nude or such, then expect to pay anywhere from $50 – $100 p/h.
I don’t do Time For Files with models. With friends I might. With models not. There’s a certain commitment that kicks in when a model gets paid. You will also draw the more experienced models if you offer payment.
Hi Neil, I’m curious about the fog machine which is cheap enough via the link you provided to just buy as an experiment. Do you use plain water or do you have to buy the ‘fog fluid’ that seems kind of pricey? Thanks for another great article.
You have to use the Fog Fluid, but at $22 for a gallon (which lasts a long time), it isn’t all that pricey?
OK thanks, didn’t know how long it lasted.
Happy new year to you Neil! How did you fire the speedlite behind the model, with the Profoto D1’s?
Steve also asked the same question above but can’t see a reply.
I treated myself to a B1 for Christmas but due to constant rain here in the UK I’ve yet to use it.
Wish you a healthy 2016!
Aaah, sorry, I had missed that. I had the flash slaved in SU-4 mode, which is an optical slave mode built into the Nikon Sb-900 / 910.
HI Neil
When using the gels, does the color get stronger the more power you use
The color becomes brighter, and eventually more washed out.