How to position off-camera flash
One of the most frequent (but easily corrected) mistakes I see when photographers use off-camera flash, is that they didn’t position the flash in relation to their subject. They simply place the flash to the side (and often at a too-extreme 90 degree angle from their own position), with the flash too low in height.
Your subject’s pose and their position most often dictates how you should place the flash.
We perhaps instinctively expect a light source to come from above somewhere, because that is where the sun is, or the light is coming from a clouded sky. Even with window light as used in paintings, the light source is slightly higher than the subject. Hence we get the light patterns which are standards in photography lighting – loop lighting and butterfly lighting. In other words, the light comes from somewhat above.
With this in mind, it is always a good idea to have your flash or additional light source placed higher than your subject.
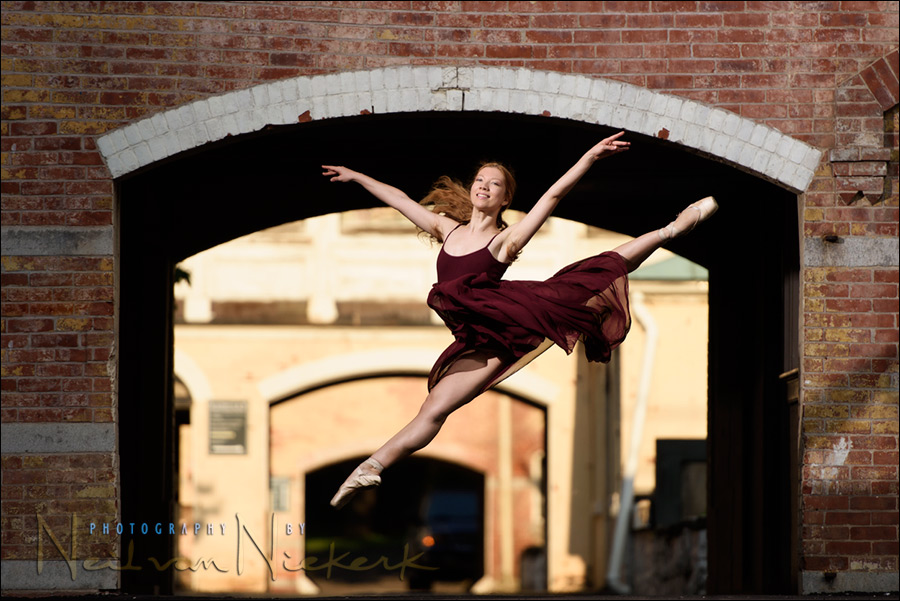
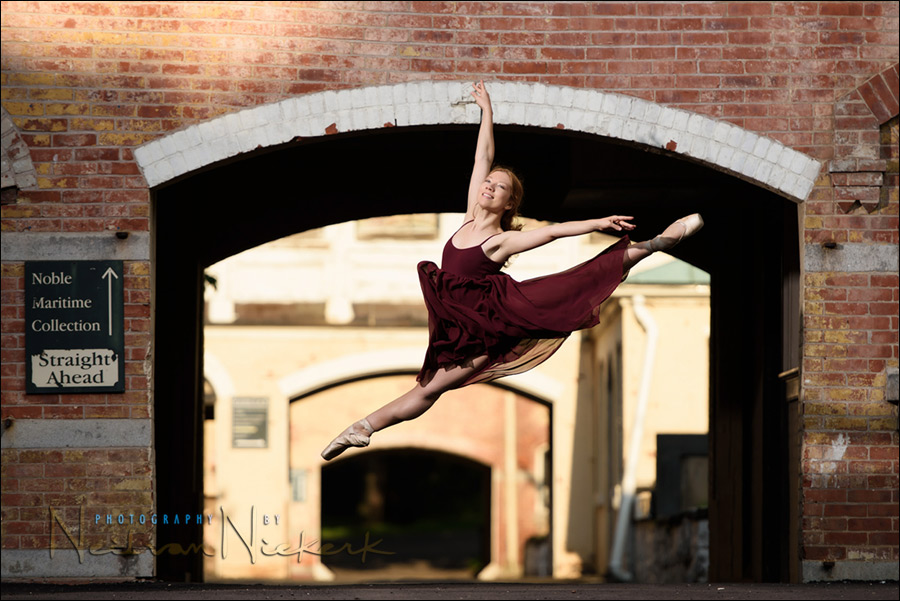
Where exactly, and how high, will depend on your subject. Looking at this example of dancer, Anna Russell, in mid-leap – we can compare the photos where the flash was too low, and where the flash (as in the main photo above), is placed more correctly in relation to her position and movement.
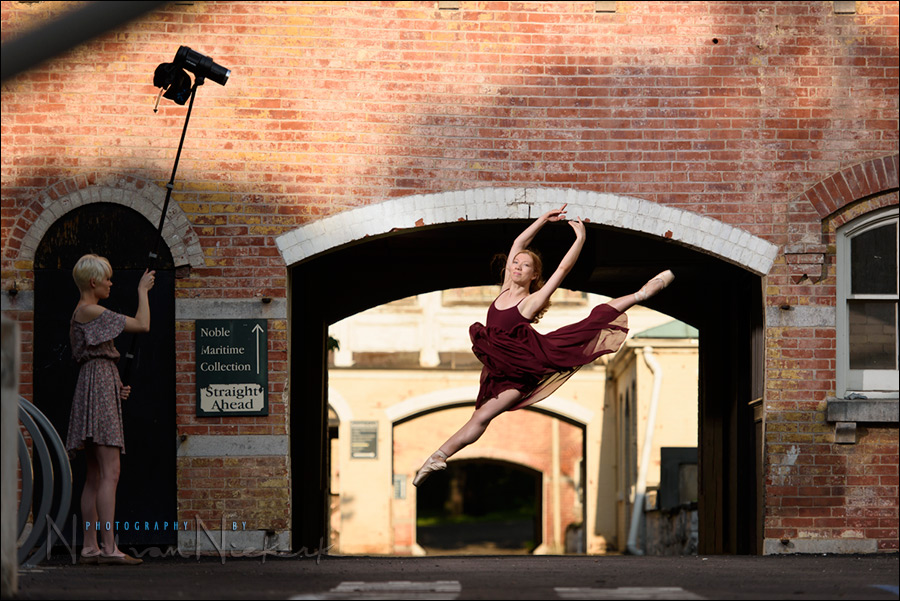
My brave assistant, Jessica, holding the Profoto B1 up on a monopod. For this, it really needs to be a tall monopod such as the Lastolite LS2453 monopod (affiliate). Another option I use is the more expensive, but sturdier, 75″ tall Gitzo monopod (affiliate).
With the flash held as if for a more normal portrait, the light came from too low an angle when Anna leaped up in the air.

Direction & Quality of Light
I wanted to distill the essence of what we, as photographers, work with – light! Before we can truly grasp on-camera flash and off-camera flash, and really, any kind of photography, we have to be aware of the direction and quality of light. We need to observe the light that we have, and then decide how best to use it, or enhance it.
With this book, I try my best to share those “aha!” moments with you, and I do believe this book can make a difference to your photography.
The book is available on Amazon USA and Amazon UK, or can be ordered through Barnes & Nobles and other bookstores. The book is also available on the Apple iBook Store, as well as Amazon Kindle.
This cropped image will show how the shadow of Anna’s nose is higher than her nose itself, and starts to cast a shadow over her eye. This really isn’t good. It’s now starting to look like horror movie lighting – light from below. You can see similarly bad examples if you have the bright idea to bounce flash off the floor to light your subject from below.
Fortunately, all this is avoidable, by holding the light at a subject-appropriate height.
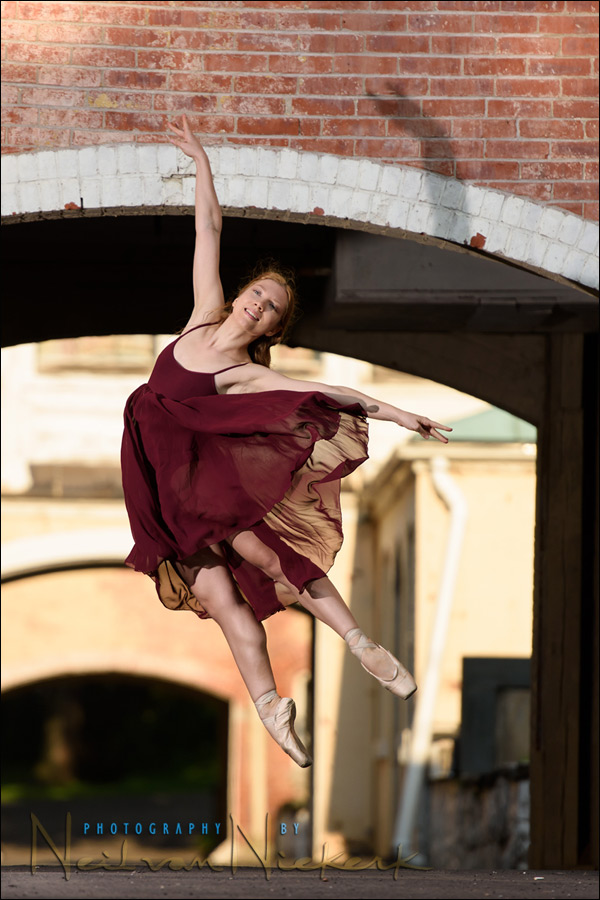
The difference between the lighting here, and the more appropriate lighting, is clear.
Camera settings & photo gear (or equivalents) used
- 1/1,200 @ f/3.2 @ 160 ISO … with Profoto B1 off-camera flash
- Nikon D810
- Nikon 70-200mm f2.8 AF-S VR II /equivalent: Canon EF 70-200mm f/2.8L IS II
- Profoto B1 battery powered flash (B&H / Amazon)
- Lastolite LS2453 monopod
Regarding the lighting used here:
Shooting around various parts of this location, the Profoto B1 flash (affiliate), was brilliant. Lots of power, and the potential to use high-speed flash sync. But in this instance, the softbox killed too much light, so I went with bare flash. This meant that this particular sequence could most likely have been achieved with a speedlight as well. The results would not have been too dissimilar – because the Profoto B1 disperses light widely when used bare bulb. For more info: comparing the output of studio lights vs. speedlites. Of course, using something like a Profoto 7″ Grid Reflector with the Profoto B1 would’ve enhanced its power by concentrating the beam again.
Summary
Very often, detailed lighting diagrams don’t really help for on-locaiton shoots, because the positioning of the light is so inter-dependent on your subject’s positioning and pose. Specific diagrams don’t always take into account how your subject is posed.
The best advice then is to just look at your subject and the placement of your light. At the same time logically break down your decision as to why *this* particular way of working would be the best, and whether it would be possible to improve it. It really becomes that simple, yet that nuanced and intuitive.
An anecdote about following instructions too closely – at a meeting with a photography group, someone told me how they had kept to my advice to have the light at 22.5 degrees above their subject. It worked very well, and they thanked me. I was confused – I didn’t recall giving anyone such a specific numeric value. An angle of exactly 22.5 degrees. Weeks later it dawned on me – during a previous talk, I answered their question by saying that holding the light directly in line with your subject, parallel to the ground – i.e., 0 degrees, would be too low. Similarly, 45 degrees from above might be too high again. So I advices to just hold the light at an angle somewhere inbetween. Not too low; not too high. So they divided 45 degrees in half, and concluded that 22.5 degrees would be perfect. It probably would be, except that such exactitude is unrealistic of course.
So how do you position your off-camera flash? Not too high. Not too low. Just right. Just right, in relation to your subject’s position and pose.
Related articles
- High-speed flash sync (HSS) with the Profoto B1 flash
- Review: Profoto B1 flash
- Engagement photo sessions: posing, lighting & context
- Off-camera flash essentials – video tutorials
- Off-camera flash photography
I really like that top photo…I have been trying to find dancers to work with for some time but it has not panned out yet. Seeing these keeps my hope and ambition alive.
Rudy
Ah, snug harbor, one of my favorite places to shoot…good stuff!
Great article Neil, Thank you. Incredible dancer as well..
This is where a nice tall light stand comes in so handy. People ask me why my stand needs to be higher than my ceiling.