Lighting a white seamless studio backdrop
There are a number of variations on how to light a white seamless studio backdrop – but it all comes down to the same essentials. You want a spread of even light on the background, and a big swathe of light from the front. All of this with as little fall-off in the light as possible.
We’ve covered this topic in previous articles, showing how it is done with speedlights …
- Simple lighting setup with speedlights & white seamless backdrop (model: Anastasia)
- Simple lighting setup for home studio photography (models: Anelisa & Aleona)
… but I would like to share how I do it now in a larger studio space, using studio flashes.
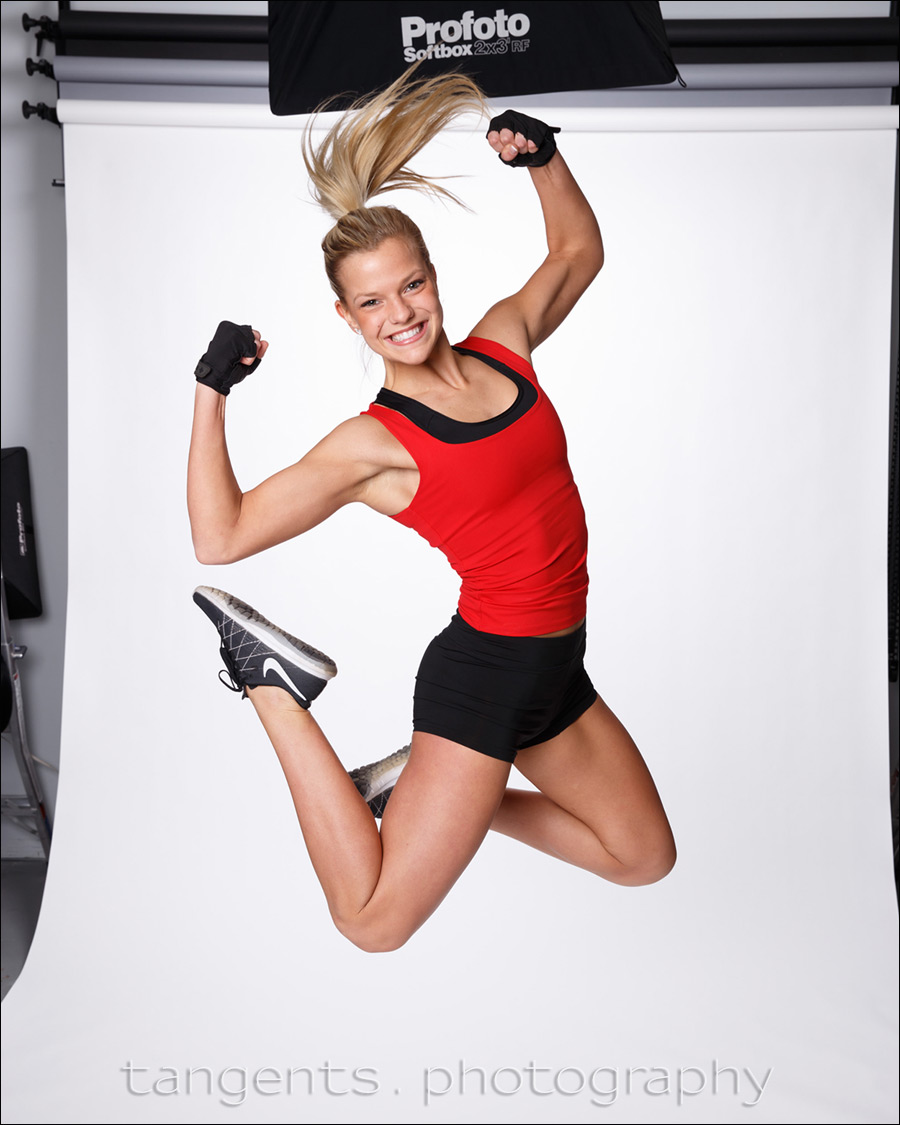
The pull-back shot below will show the setup that I default to. There is a small (2′ x 3′ softbox on the background), at near full power to make sure the white background is actually white. The trick here is that I use the histogram. I want to push the white to the very edge of the histogram, and perhaps even a little bit over. I don’t want to blow out the background too far, because then I risk some lens flare, and some kind of halo around my subject from the over-exposure. Always the ‘Goldilocks’ approach – not too little, not too much. Just right.
Our model here is Taylor Wells, and we were adding to her fitness portfolio. (She just started a new Instagram account.)
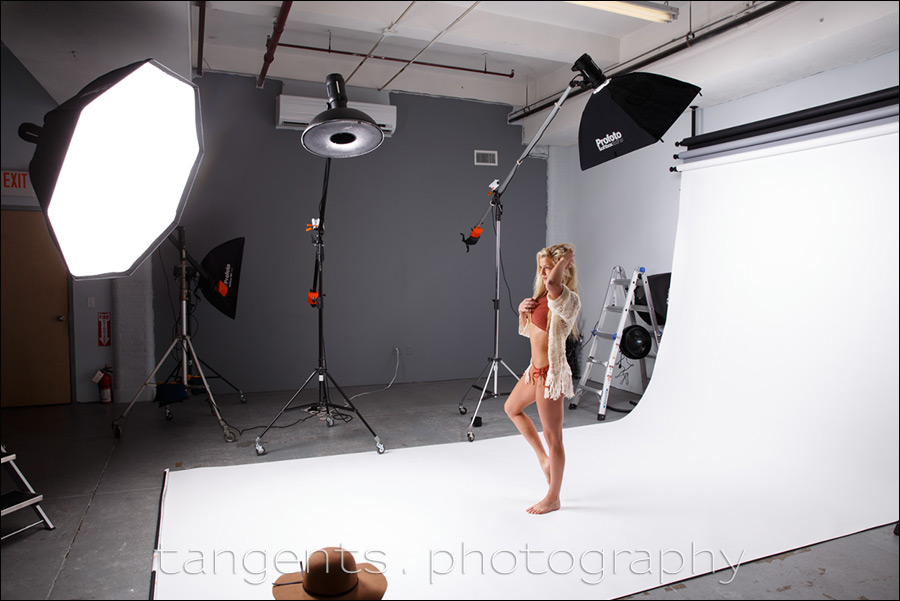
The main light is a Profoto D1 500Ws studio light in a Profoto 5-ft RFi Octa Softbox (affiliate). Then I also add another light that cleans up the white paper in front of my subject. I just use the Profoto beauty dish (affiliate) here, for no other reason that it is already on the boom arm that I keep it on. Nothing magical about it being a beauty dish – it’s just handy.
The metering is such that I blow out the background, by checking where the exposure is on the histogram … and then I add the other lights. I start with the background.
Here is an example photograph, pretty much straight out of camera:
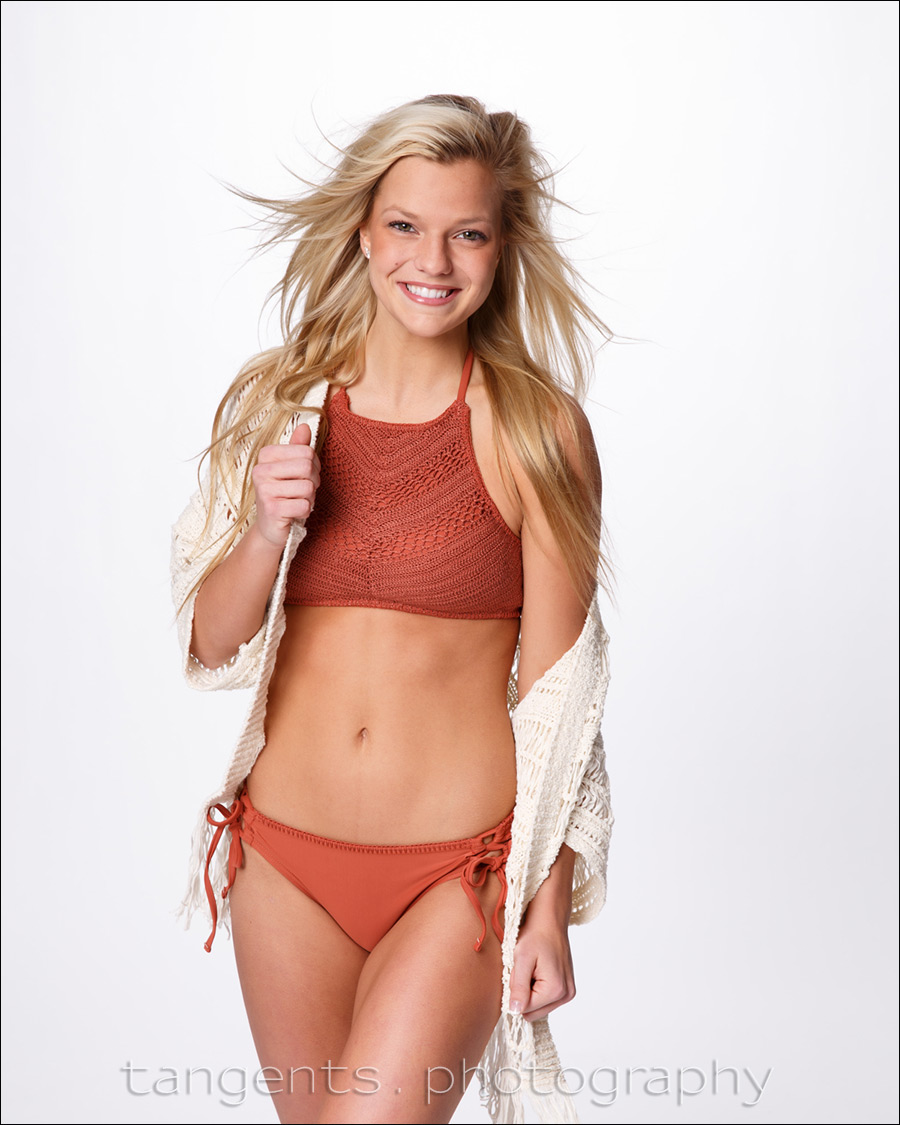
To get that wind-blown effect, we use a fan (or wind-machine, if you will). Of the two fans I have in the studio for this purpose, this Vornado fan (affiliate) is my favorite. It’s powerful enough but not industrial-strength crazy. And it is on a handy stand. And it looks elegant.
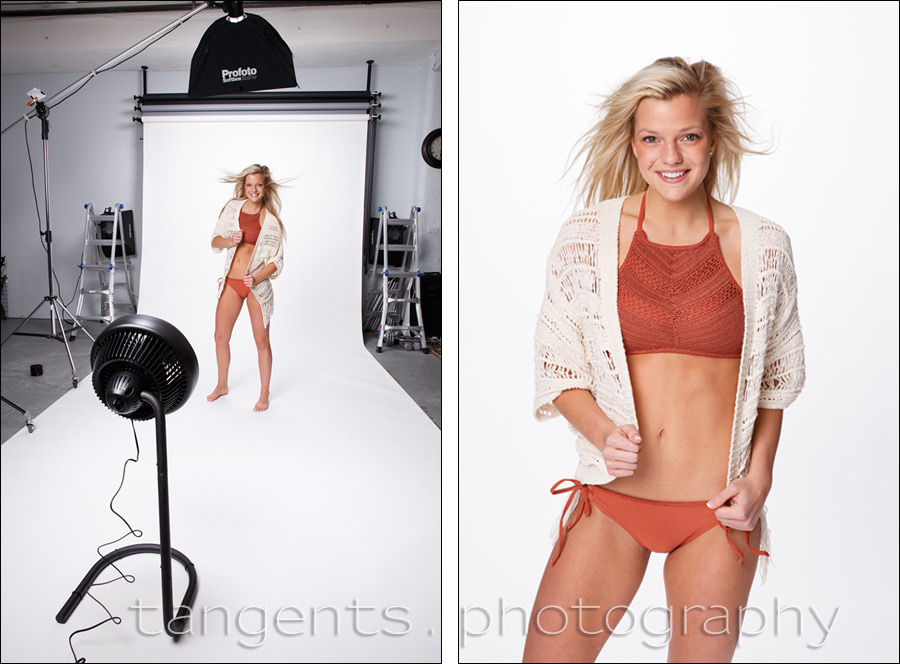
Photo gear and lighting used during this photo session
- 1/125 @ f/9 @ 100 ISO
- (3x) Profoto D1 Air 500Ws studio lights
- Profoto 5-ft RFi Octa Softbox (B&H / Amazon)
- Profoto beauty dish (B&H / Amazon)
- Profoto 2×3 RFi softbox (B&H / Amazon)
The images shown above, are pretty much straight out of camera, with only minor skin retouching. While I am happy with the level of white shown there, it isn’t 255; 255; 255 white. If you need that kind of absolute level of white, then you will most likely have to do that in Photoshop.
The Photoshop technique is well-known: the Magic Wand Tool is used to mark areas of a similar tone. And if your lighting is even enough, it is super-easy to just select the white area.
With this photograph, I liked Taylor’s dynamic in-air pose, but she had jumped too high, and the background was in shot. I’m too lazy and inexperienced to mask her hair from the black softbox, so I pulled in her hair from another photograph where it was easier to mask.

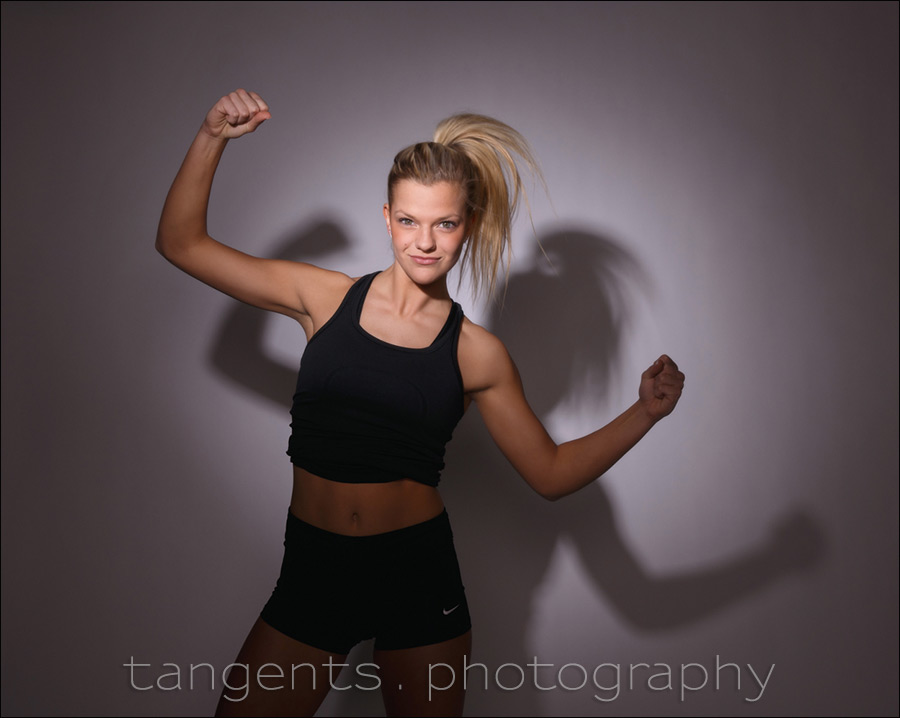
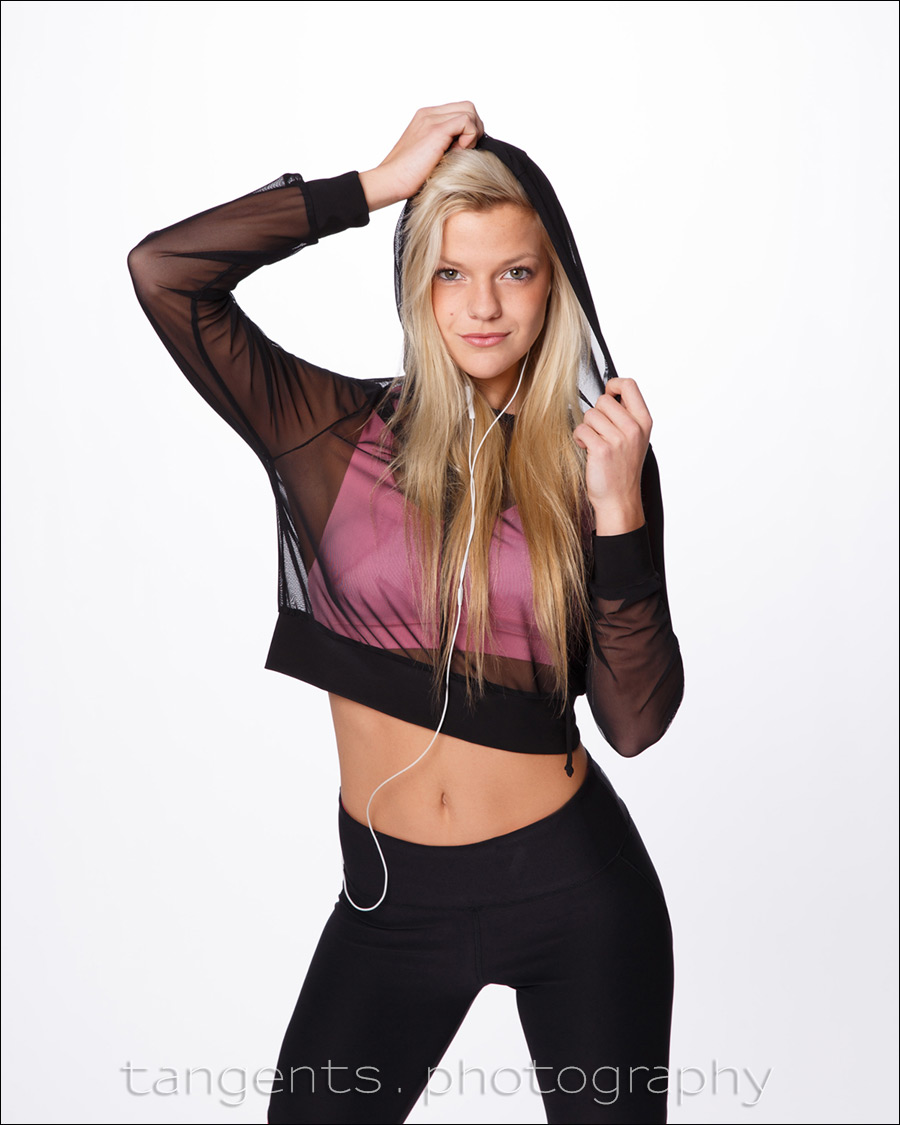
As described in the article – Studio portrait lighting ideas – it’s a good idea to continually mix things up a bit, but without completely change the lighting setup. Just a few adjustments. Still staying with nearly the same lighting setup as above, I switched off the light on the background, and moved Taylor closer to the white paper backdrop. I wanted to see if we could use her shadow as part of the design.
For the spot-light effect, I took the Beauty Dish off the other light, and changed it for the Profoto 10° Honeycomb Grid (B&H / Amazon). I turned the power much lower on the 5′ Octa so that it acted as a fill-light. I changed the power on the flash with the grid to be the same exposure settings as we had used before.
A few minor changes, and we have a completely different look. And then we move on again to another idea. And on.
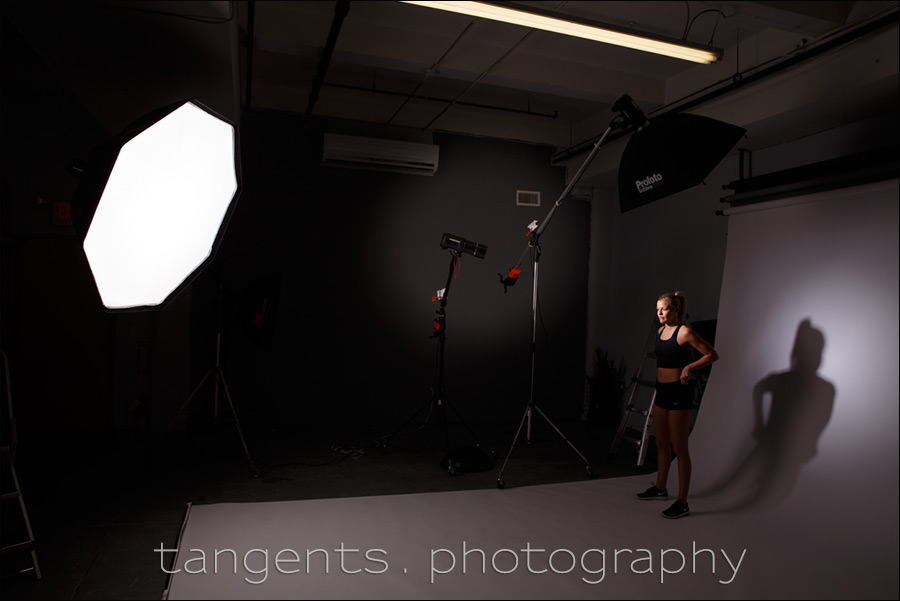
Photo gear and lighting used during this photo session
- 1/125 @ f/9 @ 100 ISO
- (2x) Profoto D1 Air 500Ws studio lights
- Profoto 5-ft RFi Octa Softbox (B&H / Amazon)
- Profoto 10° Honeycomb Grid (B&H / Amazon)
Related articles
- Studio portrait lighting ideas (RJ Harper)
- Using a grid with flash (model: Anastasiya)
- Headshot photography – Clam-shell lighting setup
- Simple lighting setup with speedlights & white seamless backdrop (model: Anastasia)
- A home-studio setup with speedlites – video tutorial
- Studio Photography Workshops
- More articles on Studio lighting and Photography
Good review for me; thanks, Neil. But the jumpshot is over my head (accidental pun). Did you still have the shutter at 1/125? I’d guess the room would have to be pretty dark for the strobe to stop her action without some blur from the ambient–is that all there is to it? Did you darken the room for it? And if so, did the camera have trouble focusing? Freeze mode on the Profoto or just normal? And how many beers do I owe you for each question?
Hiya Frank!
At 1/125 @ f/8 @ 100 ISO, the overhead fluorescent lights in the studio just don’t register. So I just keep them on.
No freeze mode. No high-speed flash sync. Just the shutter at 1/125, and the flash at (approx) 1/2000 or whatever the duration is.
Why you don’t see any movements – I photograph her at the peak of her jump. For that small duration, her movement isn’t as extreme. Then the flash’s short duration is enough to give me a crisply sharp photo.
As for focusing, I keep to Single, with the central frame. I lock focus before she jumps. She jumps parallel to the camera, so the change in DoF is minimal, and I am shooting at f/8 anyway.
In summary – no trickery. Just basic studio lighting.
Damn–I’ve been making it way too hard. Yeah, I guess motion is considerably reduced at the top of the jump; hence less need for speed. And I’ve been shooting at too shallow a depth of field. Thanks.
Thanks Neil. I have been playing with a 2×3′ box on white backgrounds. and have been struggling to get an even tone across (with minimal post work) the background. I will try booming it next time.
I like that last photograph with the grid and without the background light :)
Hi Neil,
Thanks for another awesome post! I agree with Irene A. I love the last photograph, too.
Also, thanks for sharing the bts images, too. They offer a great overall perspective. What’s challenging is trying them out in a much, much, much smaller place with only a small handful of the gear used in the photo shoot. Hmmm….
Great advice, tips, and ideas!
Hi Neil,
Great read, as always!
One question please? When you say “Then I also add another light that cleans up the white paper in front of my subject”…what exactly is it doing? I guess the large octabox is providing wraparound “vertical” light around the models face to fill in left-right shadow, so is the beauty dish acting as a light to bounce light of the white seamless below the model to lift “horizontal” shadow?
Thanks
Graham
Yes, the beauty discs was added there to make the white paper in front of her more white, ie, cleaner. The main light just didn’t make it bright enough.
I just happened to have the beauty dish already on the boom, and that is why I used it. No other specific reason for it being a beauty dish. (I hope this makes sense.)