Practical tutorial: Manual flash – distance, power, ISO & aperture
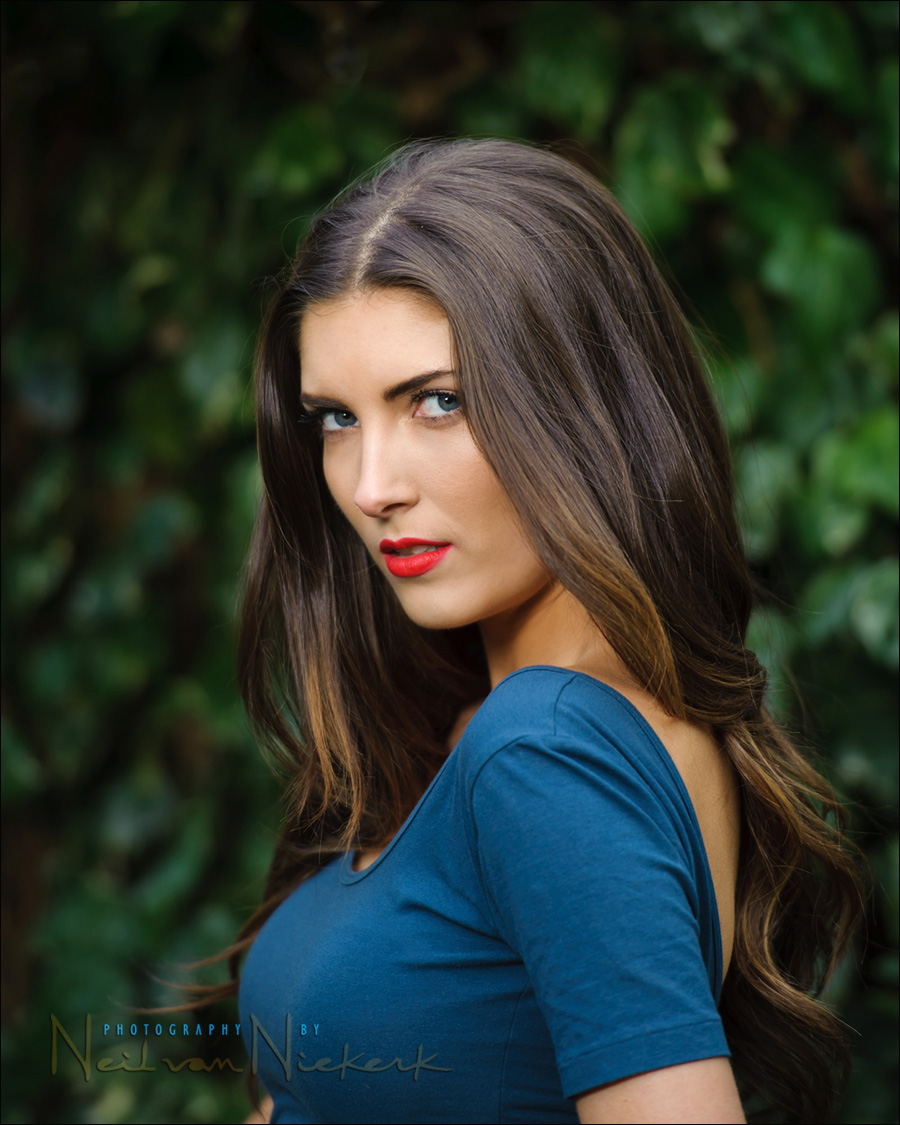
The photo above is of Hannah, one of our models at the workshops in Dublin, Ireland. The lighting is off-camera flash via a softbox to camera left, held up on a monopod. In this instance we used TTL flash with Radio Poppers. TTL flash makes it easy to get to great (or close to great) flash exposure immediately. But for consistency, manual flash is usually the best option.
There are 4 things controlling flash exposure:
– distance from your light source to your subject
– power of your flash (including diffusion of your light)
– aperture
– ISO
Now, in an explanation – whether in a written description like this, or with me waving my hands around in wild semaphore fashion – it all easily makes academic sense why the 4 controls would affect manual flash exposure. For example, it just makes intuitive sense that if you bring your light source closer, you get more light on your subject … and would have to adjust one or more of the other controls: exposure, ISO and power. You move the light further away, and then you get less light. But while we might academically understand how the individual controls affect manual flash exposure, it might not immediately make sense in an “oh, yes of course, I get it!” way how the 4 controls are inter-related.
In explaining all this during flash photography workshops, I felt that the connection between those 4 controls didn’t immediately interlink in people’s mind. It needed a more direct explanation to get to that aha! moment that is necessary for it all to make sense. And to help with that, we work through a hypothetical scenario, camera in hand … and then see how it all connects.
It’s quite an elementary tutorial, so if you’re an experienced hand at off-camera flash or studio lighting, then this isn’t for you. But if you feel like you just haven’t quite made that intuitive connection yet between those 4 controls, and how it affects manual flash exposure, hang in there.
For this tutorial, I felt it became more of a direct tactile experience if we worked with our speedlight on our cameras. Then the changes in settings are immediate and under our control.
So here is how we see how manual flash exposure is controlled:
For this tutorial, we’re going to use direct flash from our camera – flash mounted in the hotshoe – with the flash set to manual exposure.
The scenario:
We have to photograph the CEO of a company doing a major announcement, including a presentation. We even have the mayor of the city there. The venue is a huge auditorium, with members of the public attending and filling the place.
We need to take a few photos of the people at the podium on the stage. Since the audience will be seated, we can’t move around, and our position is fixed where we are seated or crouched down somewhere a few seats further down the aisle. We were instructed to shoot at f5.6 for proper depth of field, and to shoot at 400 ISO to get good image quality. For this scenario, we can’t use additional lighting since the venue will be filled by members of the public and space is limited. There is also no place to bounce flash in this vast auditorium since the ceiling is black and high up, and the walls are black. The lighting in the auditorium is also very low and top-heavy. Bad lighting, in other words.
Therefore all we have is our camera, lens, and speedlight on top of the camera.
Let’s say the CEO is going to pull down a projection screen and have that behind him as he talks before doing the presentation. Other times it will be a dark wall behind him. Sometimes one or two people next to him.
Since we are static in our position somewhere in an aisle between the auditorium seats, and the presenters are fixed in their position … it means manual flash makes more sense.
The practical exercise:
1. Take your camera and lens and speedlight. Hopefully it is a speedlight which gives you the distance scale on LCD panel, such as the SB-800 and SB-900 and 580 EX (I and II). If you have an SB-600 or 430 EX, then I have good news for you … you’re going shopping!
2. We have four controls that we’re going to adjust for. Since shutter speed doesn’t play a part while we remain below maximum flash sync speed, just set a shutter speed of 1/125 … more about this later on.
3. Set your camera to f5.6 which is the value given to us here, perhaps by our photo editor.
4. Set your camera to 400 ISO which is also given to us in this scenario.
5. Let’s assume we’re about 20 feet / 6 meters from our subject.
6. Now we have to adjust our flash power to get to those settings.
7. Point your flash straight forward. No bounce flash. If you tilt your flash-head even the slightest, the distance scale disappears. It’s your camera’s way of telling you that you’re on your own when you bounce flash.
8. Switch your flash to Manual exposure by selecting the Mode button to M.
9. Your flash is now set to a random power setting, depending on what it was set to when you last used it in Manual exposure mode.
10. Read the distance. It is most likely not giving you a reading of 20 ft / 6 meters.
11. Now adjust your flash power to give you the distance you want, for the aperture and ISO that you have.
11a. For the Canon 580EX I and II, tap the center button of that dial, and rotate the dial. (You will have to continually touch the shutter button to activate the distance readout on the back of the flash.) Now adjust the power of the flash until you get a reading of 20 ft / 6 meters.
11b. For the Nikon SB-900, hit the button just below the ‘M’ which appeared on the back of the speedlight. And adjust it until you get a reading of 20 ft / 6 meters.
12. Take a test shot of something about 20 ft / 6 meters from you. Perhaps something in your living room at that distance. Since it is direct flash, it won’t look all that wonderful, but at this point we’re not creating Art, but working through a practical explanation.
12a. If you are in a smaller room, then figure out the distance to your subject, by guesstimating it. Work through the previous steps, for that distance. Take the test shot.
13. Your test shot should be well exposed. Most likely within a third of a stop of exact exposure. If it isn’t, there are a few reasons which could attribute to this:
– your guessed the distance incorrectly, or
– your flash was calibrated for a different place than you’re using it now. For example, you’ll get different exposures if you were shooting indoors where there are other surfaces bouncing the light around, than if you were shooting outdoors at night in the open.
14. At this point, take a minute and just let this sink in … we adjusted our flash’s power for the distance we wanted , for a specific aperture / ISO combination.
15. Now change your aperture up and down, and observe how the distance scale changes. The same thing would happen if we changed our ISO.
16. If at any point during this hypothetical shoot that we needed to change one of our controls (aperture / ISO / distance) we’d have to change our flash’s output (i.e., the power) to give us those settings.
It’s all inter-connected like that! Aperture / ISO / distance / power.
If we have correct flash exposure, and we need to change one of those settings, we have to change another in tandem to retain correct exposure.
A few observations:
1. aperture / ISO / distance / power
An easy way to remember those 4 items – 2 of them relate to your camera, the other 2 relate to your flash.
You can also use the acronym, PAID, to remember this.
Power, Aperture, ISO, Distance.
2. TTL flash exposure
If we were to shoot in TTL flash exposure, then the distance we’d read for full manual power (1/1 setting), would be the maximum range for which we’d be able to get correct TTL exposure. You can see this for yourself by flipping between TTL mode and full manual power. The top value for or distance should remain the same.
This is how TTL flash works – it controls our flash output for us to give us correct (or what it deems to be correct) flash exposure. And that’s the range we have – a maximum of what the flash is capable of, for a specific aperture / ISO combination.
There is a minimum distance as well. Closer than that, the flash can’t cut the power off fast enough to save us from over-exposure.
3. maximum flash sync speed
If you’re not sure what max flash sync speed is all about, and why it is important, please follow that link.
Now, take your shutter speed up to maximum flash sync speed and then take it over. If you can’t take it over, you haven’t enabled high-speed flash sync yet.
Canon shooters: It’s the little H with lighting symbol on your Canon speedlight.
Nikon shooters: It’s usually custom function E1 on your camera. But it can be a different setting for some of the smaller cameras.
4. shutter speed doesn’t affect flash output
Take your shutter speed anywhere lower than maximum flash sync speed – confirm for yourself that the flash’s power / output is not affected. Only aperture / ISO / distance affect your flash power. Of course, if you’re balancing flash with ambient light, then you have to keep in mind that a specific shutter speed will most likely imply a specific aperture (or range of aperture settings). In that sense then, your choice of shutter speed does indirectly influence your flash’s output.
5. high speed flash sync / Auto FP
Now take your shutter speed over maximum flash sync speed. What happens?
If you’re not sure why that happened, follow the link to the article on high speed flash sync speed.
Final summary:
Hopefully this step-by-step process with your fingers on the buttons, helped in seeing how it affects your flash exposure. Hopefully this all makes it more understandable, and that there was even an aha! moment or two. I’d even settle for a quizzical oh? moment.
Let me know how it goes, and if it all makes more sense now. If not, let’s work through this until it does.
Related articles
- Manual flash vs. TTL flash
- Shutter speed, aperture and ISO
- Camera & flash settings: what do you want to achieve? (model: Ulorin Vex)
- So what are your camera settings? – the thought-process
- Flash photography tutorial: Balancing flash & ambient exposure (model: Anelisa)
That’s what I call a very clear and concise synopsis, and written in an easy to understand way that builds a good bridge between the practical and theoretical. Thank you :)
Excellent tutorial! Thank you Neil for taking the time to put this together!
Hi Neil,
Ciaran from Ireland here.Many thank’s for going to the trouble,of taking the time to write such a detailed and precise explanation, of using the flash manually.It bring’s everything back to life, that you taught us at the workshop, on the Saturday.You STILL rock!!!!!!!!
You make it so easy to understand!! Now time to practice.Thanks Neil
this is a great tutorial…I am going shopping. Thank you, Neil.
Again, a great article explaining in details what it’s best to do. Again, I’ll have to re-read it.
Neil, in step 2 of “The practical exercise”, you wrote “… just set a shutter speed of 1/125 … more about this later on”. I did not find “more about [1/125 s] later”. Where or in what form did you address that?
Parv .. I didn’t pertinently state it, but we do come back to it with the discussion on maximum flash sync speed and high-speed flash sync. The 1/125th was just so we don’t operate in HSS mode.
Nice clear explanation – the reason why this is one of my favourite photography blogs! Great work :)
Thanks for this article. I’ve only ever use the distance indicator to tell me how much (or little) range my flash has. I never thought of using it to work out the manual power setting, just used trial and error. Having said that, I’ve not got the flash out of the hot shoe yet, so I normally just use E-TTL with FEC.
Note: The Canon 430EX (I & II) do have maximum flash range indication on the lcd panel.
This was very very informative. I’m going to try it at home, eat and sleep with it until I memorize it. By the way I did go shopping last week, sb800 arrived and it will go nicely with his little brother sb600. cheers
Making the distance scale match up with the flash to subject distance is a good way to teach people about manual flash. It actually works better than the manual flash discussion in the off-camera flash book.
It took me 4 attempts to get past the photo on this page. Absolutely stunning. Right down to the colour of the shirt/eyes. Nice work, and thanks for the tutorial.
Hi Neil,
Hope you have recovered from the Charlote AD event.
I thought I would just say that it was a very worthwhile exercise viewing all the different images on the AD website. Lots to learn from the different interpetation of all the photographers that participated at the event. It really does emphazize the importance of seeing light and using it in creative ways.One can also see so many of the techniques that you help us with all the time. Interesting to see how much better some people use the light !
I think it was of great help just to look at similar images from different photographers and recognizing the different interpetations and use of light .
Great Tangent and awesome clear explanation … thanks once again.
Look forward to hearing from you
Regards
Gerrie Viljoen
Re: addressing 1/125 s shutter
Thanks for clearing that up, Neil. (I was thinking the speed was chosen so that all of the relatively modern cameras would have speed below HSS.)
Hi Neil
Not sure if you’ve included this in the article above but how would you relate this tutorial to those instances where more than one flash is being used and where the flash guns are contributing in varying ratios?
cheers
Roy
Neil
I am not able to get that Distance reading on my SB800. As you suggested, i am pointing the flash forward (no tilt) and in manual mode. How will i get to see the Distance (scale) reading.
BTW, this is a great tutorial and i just love your tangents!
Thanks
Suresh
Suresh,
You must not have the flash head sitting exactly in the correct forward position, it needs to be only slightly tilted for it not to show range indicators.
Hold the flash head and button in, tilt it up, then tilt it down again until you hear/feel the click.
Now, if in manual mode, you will only see the flash optimum FIXED DISTANCE [1 set of numbers] and shooting either side of that distance would result in over or under-exposure.
eg: If you see 3 meters or if not using metric say 12 ft you need to be at 12 feet from subject since in manual it gives the exact same amount of power each and every time you fire it, regardless of composition. The only way to change flash range in manual would be to actually increase/decrease the power of the flash, or on a Nikon body, you can also use the Flash Exposure Compensation feature from camera itself, regardless if in manual.
If in TTL mode, you will see the ‘optimum’ RANGE, it may read 2.5-12ft, so anything between 2.5 and 12 ft should expose pretty correctly for those ranges since TTL adjusts the power to suit. If you go closer than 2.5 ft or outside 12ft, you will be grossly over or under-exposed.
All of this is of course for shooting flash straight on, not bounced, since once you change the head angle/swivel, the range indicators disappear.
Trev.
Another excellent article. Thanx for posting Neil. I still learn everyday from your posts (and books offcourse)
Erwin
Neil, I must say you not only are a great photographer but you write also in such a way that reader almost fell in love with it
I always admire your articles and try to visit every alternate day to your website
Thank you so much
I just finished reading your book, Off-Camera Flash. Congratulations, it was a great read and very insightful. I plan on reading it many times again. You have given me many ideas and quite a few assignments to try out. Thank you for putting it out there! Also, it looks like I have found a new favorite blog!
Having you explain this as opposed to reading a boring manual is so much better. I still love my SB-600s. Thanks Neil.
Hi Neil,
I don’t for other models, but with the canon 550 ex, even in manual mode the Flash adjust its focal length position, which also affects output power right ? Or am I wrong here.
Ced, it’s just like you observed there .. adjusting the zoom angle of your flash-head affects the spread of the light, and hence the effective power of your flash.
My flash photography has improved so much since reading your books and following your blog. You have an knack of explaining things so well.This tutorial helped even more – many thanks
@ Ced. With your flash in auto-zoom, it follows the setting of your lens and the power output (guide number) changes. But the beauty of this technique is that as you zoom in or out the distance info on your flash LCD changes to reflect this. For example if you zoom your lens to a wider angle:
The flash power output reduces.
The flash range decreases (flash LCD).
You increase the flash power so the LCD info matches the subject distance.
To cut a long story short, instead of scrambling your brain juggling ISO, aperture, focal length, flash power and flash-to-subject distance, all you have to do is estimate the distance and you’re in the ball park.
Remember, in TTL mode the flash lcd indicates the upper and lower limits of your flash range. In Manual it indicates the (subjectively) “correct” flash-to-subject distance.
Hi Neil,
Again valuable information that you shared here. One question: Any PS work? If so what did you do? How did you get her skin color so silky?
Dirk
Just a thought…, if you are using direct on-camera flash in TTL mode and your camera has the following info:
Focal length of the lens & flash zoom setting
Sensor size
Aperture
ISO
Flash-to-subject distance (provided by the lens)
Why does the camera use the pre-flash?
Surely all the ingredients are there for the system to determine the correct flash power output.
Allen,It might be to know what light the subject is receiving already.
Here is a simple acronym to remember the above “PAID” since most of do get paid for shooting.
Power
Aperture
Iso
Distance
Very nice Neil, question I see on the Nikon flashes you can also set the ISO and Aperture on the flash, but my 580EX II does not have that in manual, it only has ratio to power down your flash, I was thinking of also buying the Metz 58 AF-2 as it has this feature on the flash, what do you think? thanks;)
Thanks Neil, no problem as you say it’s no big deal. BTW any workshops in the Seattle area February of 2012? thanks;)
Thank you Neil for this article! I know what kind of time (hours & hours) goes into this type of thing with your blog and sometimes dealing with all the different people types if you know what I mean. Keep up the great work!
My question is about viewing the exposure on the back of the camera. I have a canon 5d and I find it difficult to judge the exposure using the screen even if I zoom up on the subject. Is it just me? Should I be using the histogram? Please help. Thanks.
What an easy and simple to follow explanation and example. I could have read 10 books on the subject and not understood as clearly as I do now.
Question,
I set up a studio setting in my living room with a backdrop and two Nikon SB800s on manual.
Both flashes are set up with umbrellas. One umbrella on each side of our subject.
My D3 is set on manual with f4.0 ISO at 200.
My flash out put increases and decreases by itself. I cannot get consistent flash out put.
What am I missing? My camera and subject have not moved.
Thank you ,
Trevor.
Wow, just got to this excercise, followed it through and the penny dropped! I almost get manual flash now. Wish you were coming to the UK soon, I’d sign up immediately.
Thanks Neil, keep em coming
Hi Neil
With my new EzyBox softbox and SB910′, I tested out manual flash this weekend. So I had my SB910 sat on a FlexTT5 on the softbox brackets, and as you know you need to swivel the flash-head to get it to sit just inside the hole in the softbox. As you point out, this means the distance scale disappears.
My question is (sorry its taken a while to get to it but) how do you get round not having the distance scale? Being new to manual flash, I was stuck as to how I could enter the distance to get me to the correct (ish) output level? Is this something you just instinctively known and learn with practice or am I missing something?
Many thanks if you could reply.
Thanks again
Barry
I found this flash exposure calculator extremely simple but useful:
http://strobecalc.eu5.org/
This is fantastic! So easy to understand and very well written. Thank you.
I will be using a Godox V860 off camera on manual mode. assuming that i have perfect exposure at F5.6, ISO200 with flash power set at 1/8 and flash-to-subject distance of 8 feet. my questions is would my exposure be affected if i changed my focal length and if say i move closer or farther to my subject.
basically, my question is”
1. would the exposure be different if i take pictures at 50mm and 105mm ?
2. would the exposure be different if i take pictures at 50mm @ a distance of 3 feet to the model and 50mm @ a distance of say 7 feet to the model.
i just want to know if the focal length of the camera and the camera-to-suject distance would affect the exposure. thanks in advance
Firstly, don’t change the zoom setting on your flash – that will affect your flash exposure. You just want to set it up once, and then shoot.
Now, your focal length that you use on your camera, and your own position, do not affect the flash exposure. You are free to move around to a certain extent. And you can zoom in and out – as long as your aperture isn’t affected. With some older zooms, your aperture might change as you zoom.
Thank you that was very helpful :)
Hi Neil, I found this tut last night; practiced it today. It all just came together for me – a real aha moment. I’m so glad that you put this on your site – I can finally move forward. Thank you.
Thank you, thank you, thank you. The ONLY tutorial that has made complete sense of power/aperture/ISO/distance relationship. Now I understand. Thank you.