
Tips on working with models
One of the best tips I can give you when photographing a professional model – wait for your model to “give” you the photo. Time your photos – don’t just arbitrarily fire the shutter.
Most models need a moment to settle into position. Watch their movements and pose. At some point they are likely to go through a little mental routine where they might breathe out a bit and then look at the camera. That’s the moment. Not the inbetween settling-into-the-pose moments.
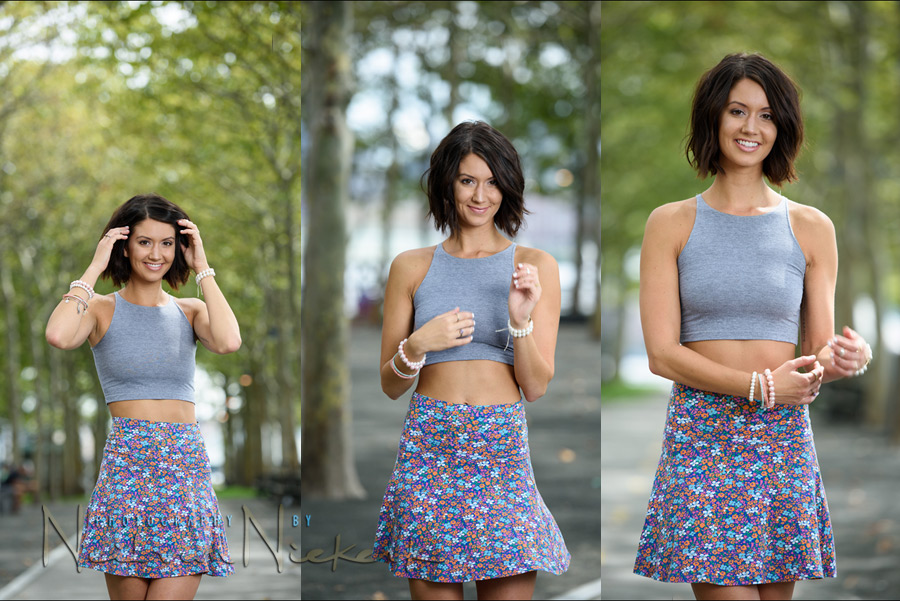
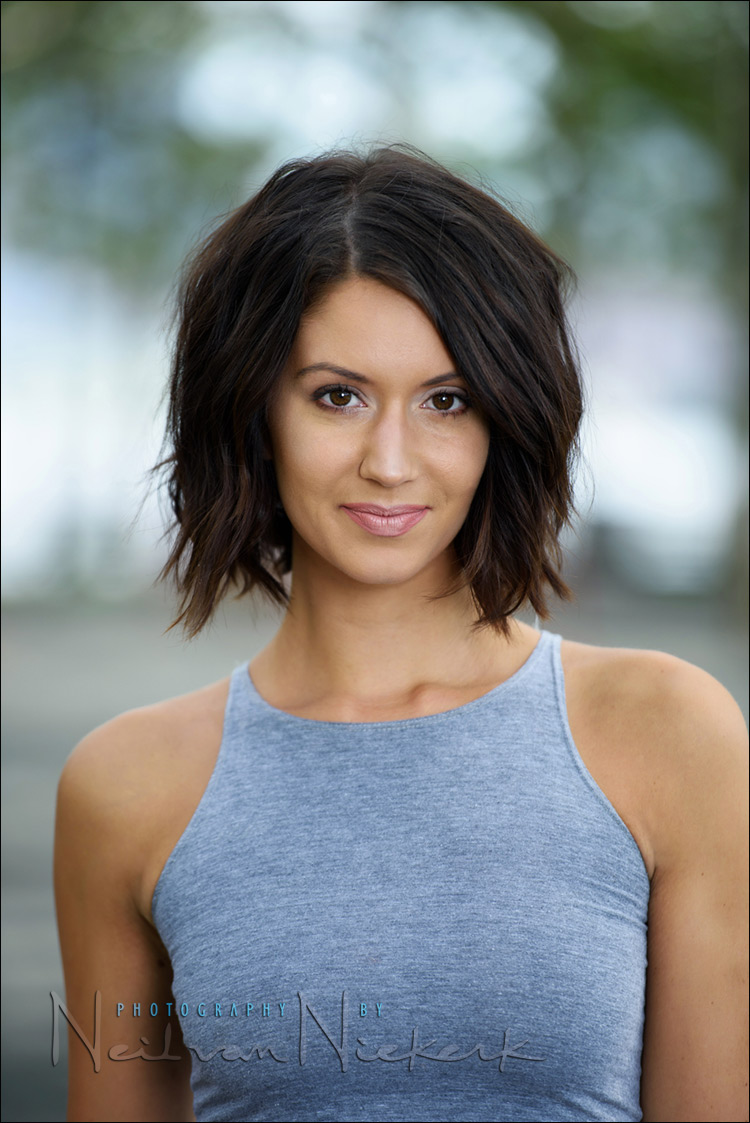
Photographing a model, Adrienne, for her Daily Fashionista blog, I could again quickly see that she too has her own specific cues that she uses to let a photographer know when to take the shot. Just like Anelisa and Ulorin Vex, and any of the other supremely professional models I have worked with, she will “give” you the shot. Any moment inbetween mostly isn’t worth just snapping away at – you have to wait for the moment when the model is settled into own pose. Her own groove. From there it just needs gentle adjustments from you, the photographer, to finesse the pose.
As a quick example, here are a few images which are failures. The lighting is great. The background is great. The model is great. Everything in place, except the gesture. The moment. There’s nothing. It’s a non-photo.
What is missing is that I didn’t wait for Adrienne’s cues here. This happens if you are too caught up in shooting. Too focused on the excitement of the shoot, and not timing the shots.
The best way out of this trap – slow down. Wait for the model to fall into a pose, and only then taking the photo. Of course, you might need to adjust the pose since the model doesn’t know what you’re seeing in your frame. Be aware of that. Communicate with your model. But keep in mind at all times that you should let your model give you the photo that you need to take.
When I work with an inexperienced model who moves too quickly and doesn’t pause for the photo, I will (nicely) tell the model to slow down. Settle into a pose, and let me change what I think would improve it. Then, on the click of the shutter, move into a follow-up pose. The follow-up pose need not be wildly different – a subtle change in position of the arms; or a shift in weight; or a change in the positioning of your model’s hands.
This deliberate slowing down makes the photo session more of a collaboration, because the model quickly picks up that you are following her (or his) cues. You’re listening, watching and responding … because you’re an awesome photographer who has a controlled, deliberate way of shooting.
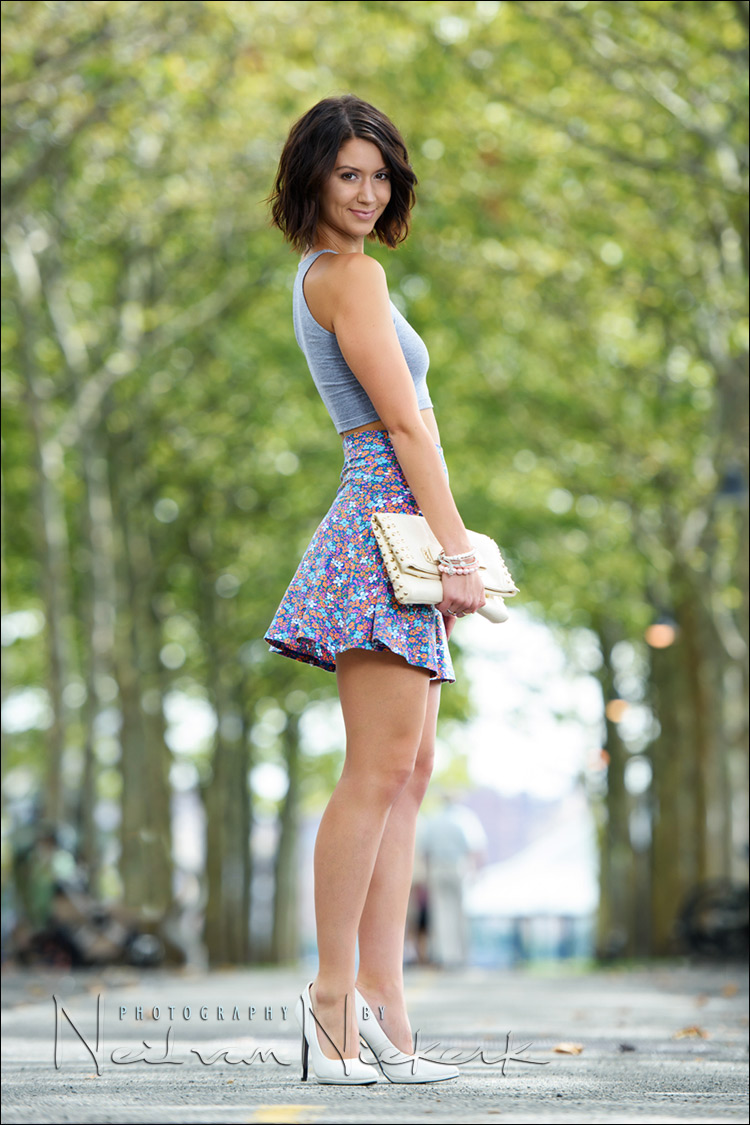
With these two main images – the full-length portraits, I laid down on the ground. Shoulder on the ground, to shoot upwards. It makes her look even more leggy, but primarily what I wanted was to control my composition.
If I shot from my own eye-height, then the background in the frame would be 50% boring ground. But in shooting upwards like that with a long lens, and controlling my composition, she is now placed within that natural vignette of the rows of trees.
This article explains it with examples: composition tips – get down lower for a better perspective.
I shot these sequences with the 70-200mm f/2.8 lens. It will always be an essential lens for me. The longer focal length, combined with a fast aperture, really helps me in controlling the way my background appears. I stepped back as far as I could still comfortably talk to Adrienne and direct her. The lens was at 150mm for both images.
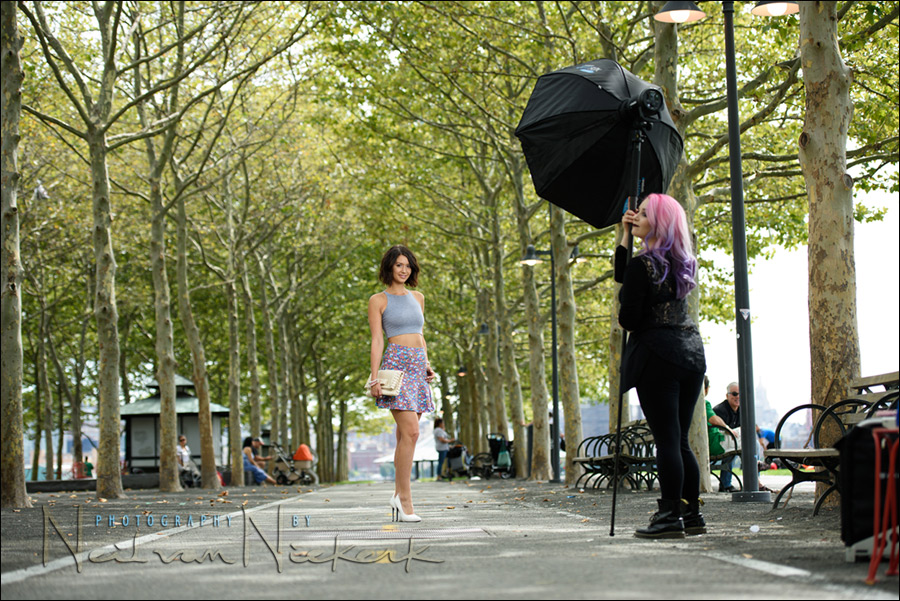
Photo gear (or equivalents) used during this photo session
- 1/250 @ f/3.2 @ 125 ISO … with Profoto B1 off-camera flash
- Nikon D810
- Nikon 70-200mm f2.8 AF-S VR II /equivalent: Canon EF 70-200mm f/2.8L IS II
- Profoto B1 battery powered flash
- Westcott Rapid Box 36″ Octabox (B&H / Amazon)
- 75″ tall Gitzo monopod
The lighting was with a 3′ Octa softbox. I used the Westcott Rapid Box 36″ Octabox (affiliate) here because of how easily it is set up, and collapses again.
The Profoto B1 was a dream to use, as always. As a side-note: there isn’t anything special here that a speedlight and a smaller softbox couldn’t have achieved as well. The Profoto B1 is just very convenient.
Summary
Slow down during the photo session. Find a relaxed, measured pace where everything is under your control. Work with the model, and watch for her cues. It’s a collaborative thing. Just snapping away is a waste of everyone’s time.
Remember, you’re far better off with one solid photo with everything in place, than a hundred non-photos which are just a jumble of elements that don’t work.
Related articles
- Best softbox for on-location headshot photography
- Photography composition – get down lower for a better perspective
- Composition for full-length portraits – step back!
- Lighting and design: (de)-constructing a photograph
- Engagement photo sessions: posing, lighting & context
Hi Niel
Quick question for you , I noticed in the Pull back images you were using an 6ft monopod and an assistant instead of a light stand. I can see the speed advantage…
But do you find it difficult to maintain the light in the same position for a long period?
Lou Recine
It’s very easy to keep it upright – the monopod rests on the ground. I just have to check now and then that any assistant doesn’t let it swing away from the subject. But this is the reason why I use the tallest monopod I could find – it rests on the ground, steady.
Hey Neil, meant to mention this last time you posted about that monopod…it should be 75″, not 75’…that would be one tall monopod otherwise. ;)
I’ve been using the Manfrotto neotec monopod, 72 inches high and with the attachment for a speedlight or mono light a little higher again, love the one-hand adjustment capability too. Informative post and great photography, thanks Neil!
Thanks Neil for the confirmation
I just ordered the Lansolite 91″ boom , I figure I start wit that one until I get a Profoto unit ( LOL ) since Im mostly using a SB-910
Lou Recine
Matrix Photography and Design
Nice article…
Beautiful bokeh.
Neil — Great tips on working with models. The 70-200 f2.8 lens is also my favorite portrait lens. I don’t very often get that low to the ground when shooting with it, probably because it’s heavy, but I love the perspective you were able to get that way. Think I’ll give it a try!
Thanks, Neil!
Why not shoot at f/2.8 for softer background?
Compared to f/3.2 ?
It’s incremental. The change in depth-of-field is so subtle, you’d barely notice.
Nice tips. With some models they definitely move too fast, and by the time I’ve told them they are already 4 poses down the line. By then it’s hard to get back to what I saw in that split second.
Looks like a pretty busy place — especially for flash. Did you get a permit or just ‘shoot and run’ :)
No permit needed – it’s a big park with waterfront area.
That said, I have been hassled by a Hoboken cop for a permit before. But that was a once-off.
I`m just curious about exposure. Flash was only fill ?
The flash was more pronounced than just mere fill-flash … it was a main source of light here. The model would’ve been under-exposed with it.
The exact naming of how much flash was used, isn’t all that relevant.
More relevant is the thought-process, which is similar to that explained here: Balancing flash and ambient light.