Best fill-flash settings
The best fill-flash settings can be summarized with this one idea – we want to better expose our shadow areas. While this will depend on the situation and also personal taste, we are going to walk through some scenarios and get to a wider understanding hopefully of what we want to achieve with our fill-flash. But essentially, that is it – we want to lift our shadow areas to approximately the rest of our subject … or scene. There is some wriggle room in interpreting that idea of ‘correct exposure’, but in this article we will get to a better of understanding of what we want to do, and how to get there.
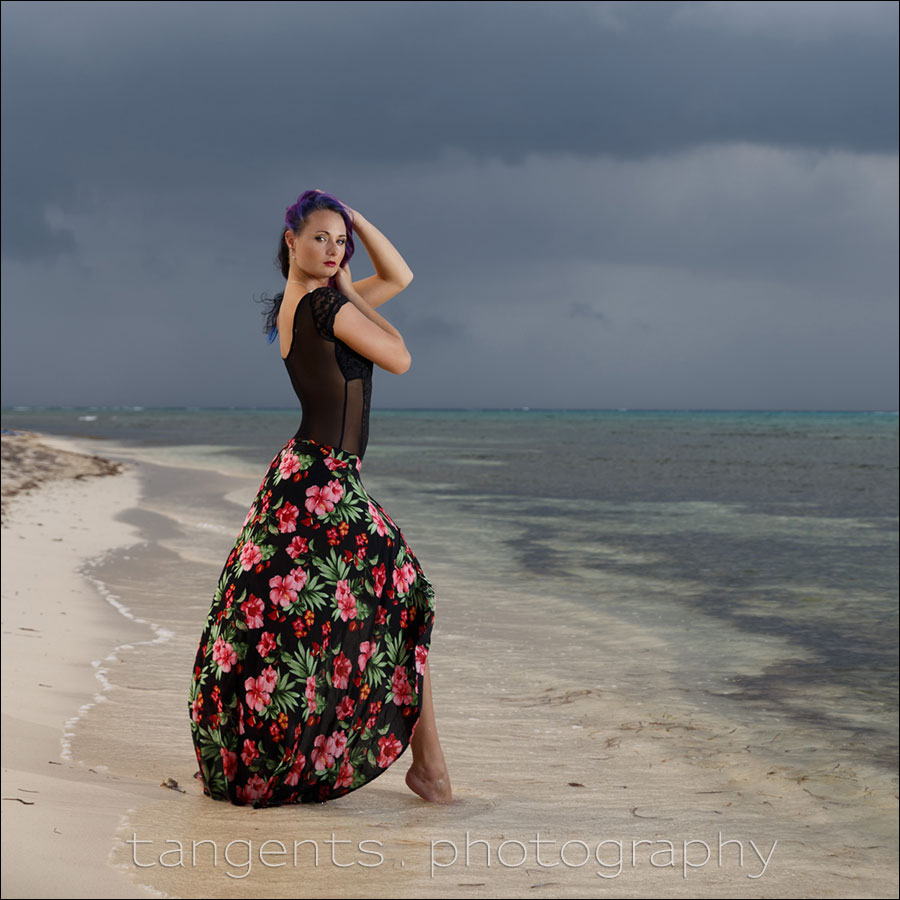
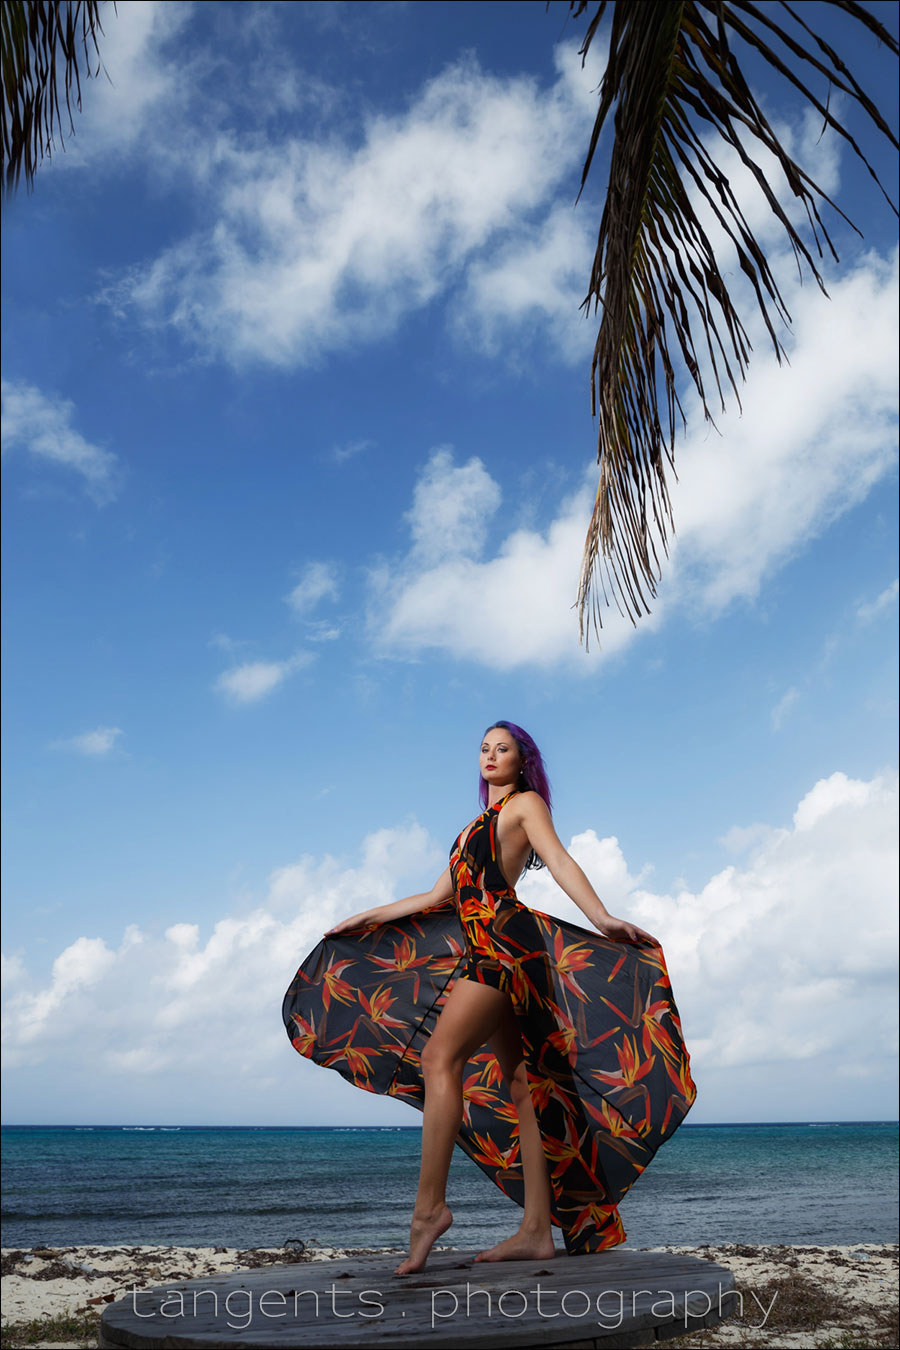
The photo above of our model, Scharmarie, is a good example. We had the sun setting to our left (with her back to the sun), and some low storm clouds rolling in. Her face would have been in shadow, and would have appeared too dark in a photograph without fill-flash.. So we had to lift the shadows to a level where it suited our intentions with the final photograph.
When we think about what might be our best fill-flash settings, we need to understand that there is a whole range of ratios in which we can balance available light with flash. We could range anywhere from correct ambient exposure with just a touch of fill-flash … all the way to where we under-expose the ambient light, and use flash to give us the correct exposure.
There are of course numerous possibilities inbetween those two scenarios. None of which are particularly more ‘correct’ than the other ways we match flash and available light. For simplicity of explanation though, it is easier to describe the two ‘extremes’, and hopefully this will make it easy for us to figure out the in-between scenarios … where we mix some flash with the available light, and still get good lighting and great exposure.
This range of scenarios we deal with, are discussed in this article – Balancing flash with ambient light.
Now, when we talk about ‘fill-flash’, we’re usually describing the scenario where our ambient exposure is correct, and we’re just lifting the shadows with a hint of fill-flash. Or maybe a little more. Just enough for our best choice for fill-flash.
At the extreme end of this, we need to know how to overpower bright sunlight with on-camera flash.
In previous articles we have discussed: on-camera TTL fill-flash. This article on Flash Exposure Compensation (FEC) is a step-by-step workbook on how to get to the best settings, depending on the look you want. If you’d like to know a short-cut setting, then FEC setting of -2 EV or -3EV should do it. But go through that article on FEC to get a better understanding.
That was for on-camera TTL flash. Going with off-camera flash, the thought-process would be very much the same. There are some crucial difference in using TTL flash vs Manual flash. The techniques are related, but there is some slight change in our approach with any of those choices.
We have covered off-camera TTL flash before, so with this article then, we are going to achieve our best fill-flash settings using manual off-camera flash.
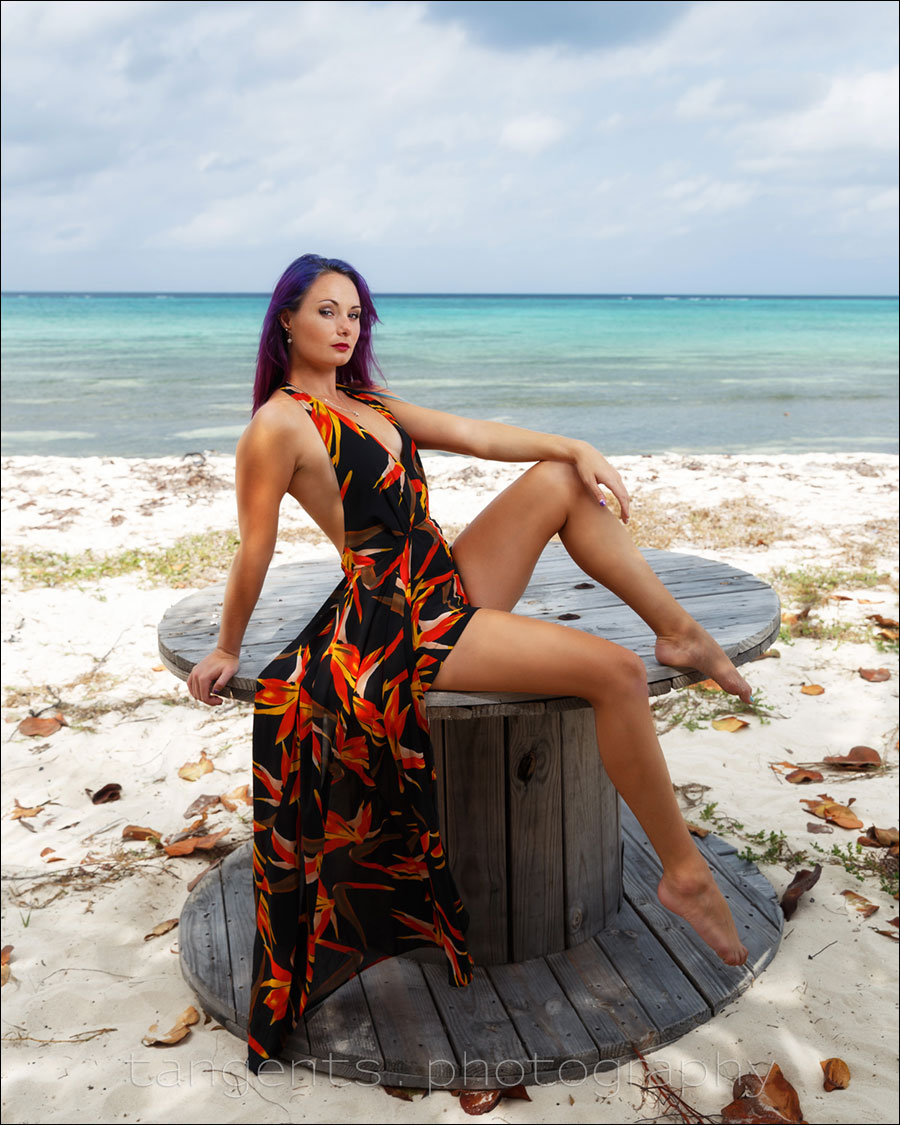
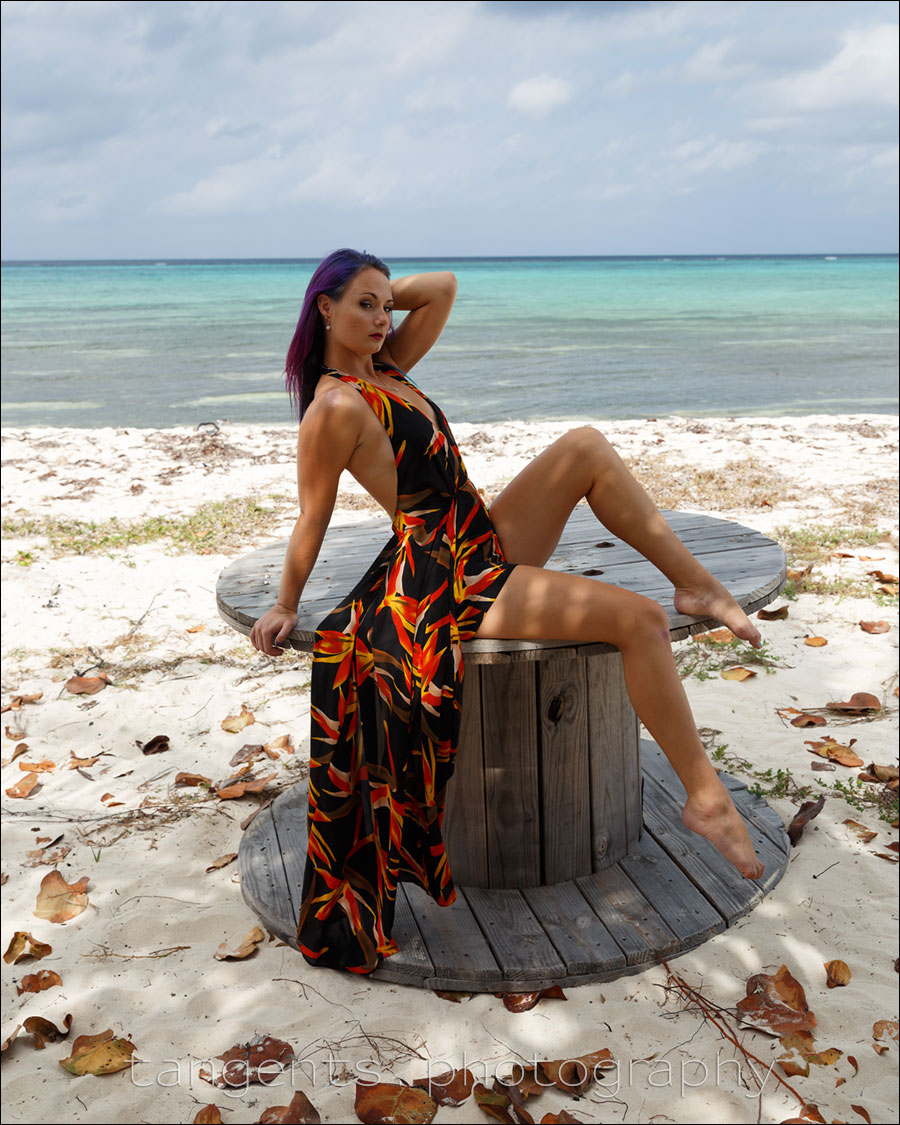
The photo above, with fill-flash. The photo below, without.
Let’s have a look at how we got to our camera and flash settings:
For anyone who wants to know the best fill-flash settings, you have to think in terms of your ambient exposure first and foremost. That is your starting point – correct exposure for the available light. Then you can add flash to it. But just a touch of fill-flash. In other words, “best fill flash settings”, would revolve around your camera settings for correct (or close to correct), ambient exposure. And then adding a touch of flash to even out the shadow areas or lift the contrast.
Using the camera’s built-in meter, and doing a test shot or two (without flash), I found that 1/180 @ f5.6 @ 100 ISO exposed the ocean and beach well. The tonal levels looked good. Scharmarie, our model, was in shade, so she was a bit under-exposed. This is where the off-camera fill-flash would step in.
The question then is, how did we get to the flash settings?
The better flashes on the market will tell you on the flash’s LCD screen what aperture you should set your flash, depending on the distance (and ISO and flash’s zoom setting.)
Set your flash to manual, and then select an output – perhaps 1/2 power? The flash should tell you what distance you need to have your subject for correct flash exposure. Now change your flash’s power setting to get to the correct distance that your flash is from your subject. Simple as that.
Let’s say that you find that for f/5.6 you need to set the flash power to 1/4 power (for that specific ISO and flash zoom setting.). Now, if you need less flash, change the power down by a stop to 1/8th power. Or 1/16th. That would be -1EV or -2EV “flash compensation” comparable to using TTL flash. Except that the manual flash is more consistent than TTL flash.
This article – getting the most power from your flash – discussed this from the point of view of figuring out what distance you need to be at with your flash at full power to get correct exposure in bright light. It is a similar thought-process for other scenarios too. If your flash doesn’t show you the power / distance relationship, then you will have to figure this out by using the guide number of your flash. Similarly, this article applies the same ideas: the Sunny 16 Rule & Flash Guide Number. These concepts are inter-related.
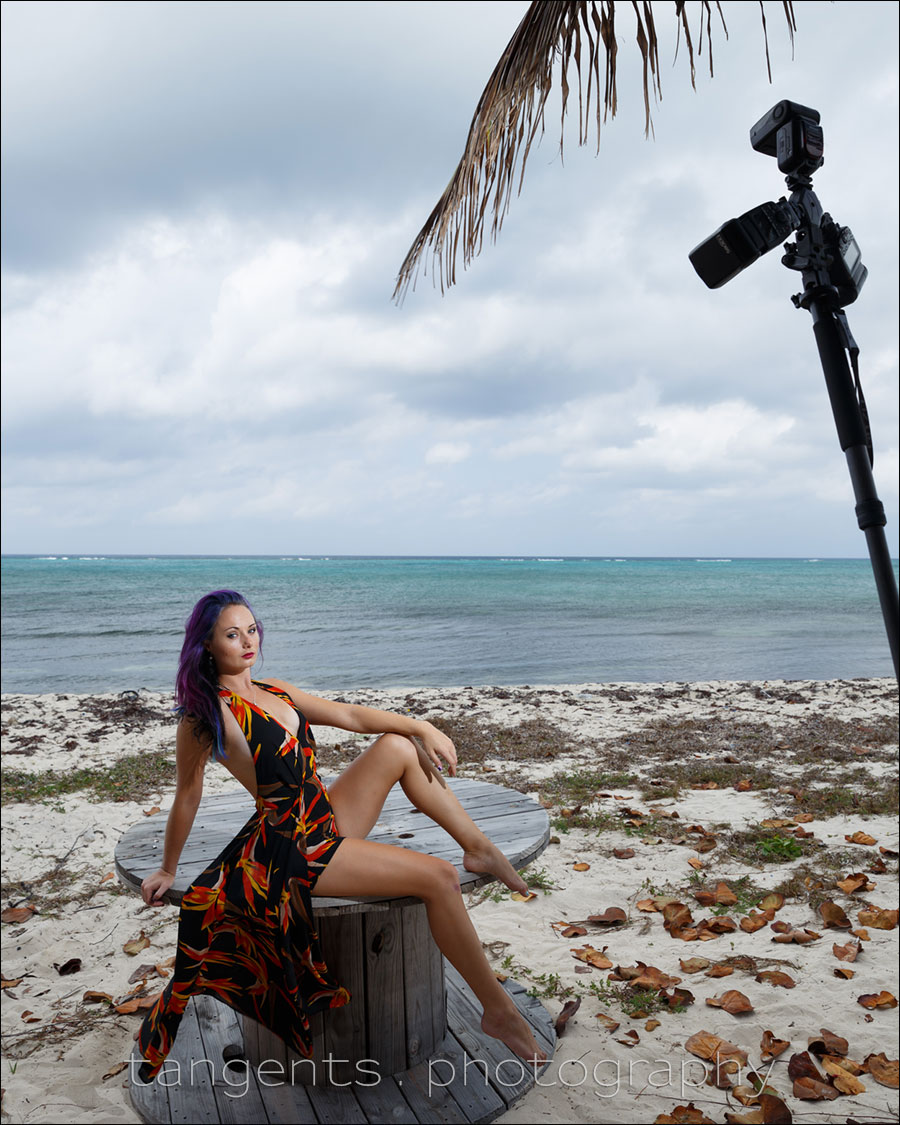
With this pull-back shot, you can see that we used bare flash, so the power setting shown on the back of the flash would have given us the proper settings. A softbox or any kind of modifier would change the effective power of our flash, making the readout on our flash useless … and we would have to rely then on other methods to get to correct flash exposure – perhaps the histogram, or better yet, a hand-held meter.
Oh, don’t be distracted by there being 3 flashes on that monopod – there were three photographers, and I rigged this so that all three of us could shoot simultaneously, without affecting the other.
Details & photo gear (or equivalents) used during this session
- model: Scharmarie
- 1/180 @ f/5.6 @ 100 ISO
- Canon 6D
- Canon 24-70mm f/2.8L II
- Canon 600EX-RT (B&H / Amazon)
- Canon ST-E3 Speedlite Transmitter (B&H / Amazon)
Off-Camera Flash Photography
With this book, I wanted the material in the book to flow as a truly accessible introduction to off-camera flash. The techniques here are within the reach of everyone.
As always, the aim was for those aha! moments when things become clear and just makes sense. And then, hopefully, inspire the readers of the book to see how easily off-camera flash lighting can expand our photographic repertoire.
You can either purchase a copy via Amazon USA or Amazon UK. The book is available on the Apple iBook Store, and Amazon Kindle.
Summary
To make complete sense of this, you will have to sit with your camera, and your flash on your camera, and see how changing the aperture and ISO, will affect your flash output. And conversely, how changing the flash power will change the distance.
In finding that balance between aperture / ISO / distance / power, you will see that you can control your flash output as your ambient light changes. It is all easily under your control. Taking the flash off camera, is then the next easy step.
Related articles
- On-camera TTL fill-flash
- Flash exposure compensation
- Tutorial: Balancing flash & ambient exposure (model: Anelisa)
- Various scenarios: Balancing flash with ambient light (model: Catherine)
- Off-camera TTL flash (model: Amy)
- Tutorial: How to use the guide number of your flash (model: Shawna)
- Getting the most power from your flash (model: Shawna)
- On-camera flash outdoors
- Available light vs Fill-flash
- How to overpower bright sunlight with on-camera flash
Aloha, Neil,
Are you spot or matrix metering? Also, where are you placing the focus/metering point?
Thanks for all your great lessons.
As this most recent post suggests, I’m mostly working in Matrix / Evaluative metering mode.
Regarding focusing / metering …
you have to keep in mind that your point of focus doesn’t really have anything to do with your metering.
So keep those two processes separately in your mind.
Go through that linked article, and the other linked articles there, for more about exposure metering technique.
What i’ve experienced with my fujifilm s5, nikon d50, sb 600, met 48 and metz 58 is that sometimes the flash in TTL is way to bright. I’ve found that, even when using TTL, there is some minimal flashpower the units (both the nikon and the metz units) can output. That is often too much for closer distances with high apertures and high iso’s. Too overcome this treshold problem, I often fit a diffuser (aka known as omnibounce) on top of the flash, which acts as some sort of a ND-flashfilter. When using TTL, the camera automatically corrects for this. The main advantage is that the minimal output the flash can produce is around 2 stops lower (as is the maximum). So in the last picture, I would have chosen a slower shutter speed, lower iso and used a omnibounce to power down the flash.
Teun,
If you use a SB-600, you should be able to reduce the flash power via FEC.
Stephen .. FEC doesn’t help when you’re too close to your subject for the camera to effectively cut off the flash pulse. There is a minimum distance that needs to be taken into account.
This is what Teun is referring to – cutting the power by using a diffuser cup, and this in turn affects the minimum distance.
Hi Neil,
Oh…I did not know that! Well then, that might explain some of my past photos where I may have been really close to the subject (3 feet)
Do you need a diffuser if you were in manual and too close? I would presume one could turn down the power more than TTL would allow.
Stephen, you’re getting *this* close to me giving you the entire lecture about manual flash being controlled by:
– aperture,
– ISO,
– power of the flash (including: diffusion, bounce, etc),
– distance
Check your distance scale on your flash if you are shooting with undiffused direct flash in manual mode. That’ll tell you if you’re too close.
Neil,
I accept the scolding. >.<
In all seriousness, I have not been paying attention to my distance scale on my flash in TTL or manual, so it's something I should look at often.
Hi Neil,
I may have missed this excellent post when it was originally published, but I came across it again when I was reading your recent posting about off-camera undiffused fill in flash.
I have a D700 and SB900 and even if I dial the FEC down to -3 on TTL, I still get the cardboard cutout shadow at times. This is with undiffused flash though.
Do you have any tips on how to get rid of this? I have started to use the standard omni bounce diffuser when doing fill flash to reduce the power of the flashgun.
As always, many thanks for your excellent posts and passing on your knowledge.
Gary
Gary .. The flash looks more pronounced when:
– your FEC is not low enough. With the Nikon D3 (which responds like the D700), I dial down to -5 FEC if necessary.
– you use TTL instead of TTL BL. TTL BL is the better choice for fill-flash.
– your ambient light isn’t even enough, and you’re trying to fix a lighting problem with direct on-camera flash.
Timely review, especially since I only do shoots like that biannually. And it never hurts my feeble little memory to review the basics – – especially when they’re not all that basic. Thanks for posting this!
Oh man, my comments from 2011…talk about not knowing very much about flashes back then. I know a little more these days thanks to Neil.
Great tutorial and refresher! I love when other photographers share their thoughts and the processes about technical aspects like this! Thanks for sharing!
Hi Neil, do you remember what models of flash are needed to do the magic with Matrix metering mode? I know that older flashes can’t intelligently work out which part of the scene is your subject.
I don’t off-hand know. Probably from the SB-25 onwards?
Hi Neil, how about the Profoto A1 flash. I would think this might work using TTL then adjusting accordingly in manual.
What say you?
That’s one thing that makes the Profoto flashes (A1 / B1 / B2) so easy to use. You can get the initial exposure via TTL, and then flip a slider / hit a button … and the flash exposure is locked in Manual.
At first glance, I thought these shots had some of the worst chromatic aberration I’ve ever seen. Then I realized the model has purple highlights in her hair! Ha!