Style in boudoir photography – intimate photo sessions
I did a recent photo shoot with a model, Carly Erin, to expand my boudoir portfolio. Sometimes you get to work in large spacious rooms or studios. Sometimes you work in smaller more intimate locations. When you work in a tighter, more intimate setting, the choice to include the surroundings or not will greatly affect how you shoot.
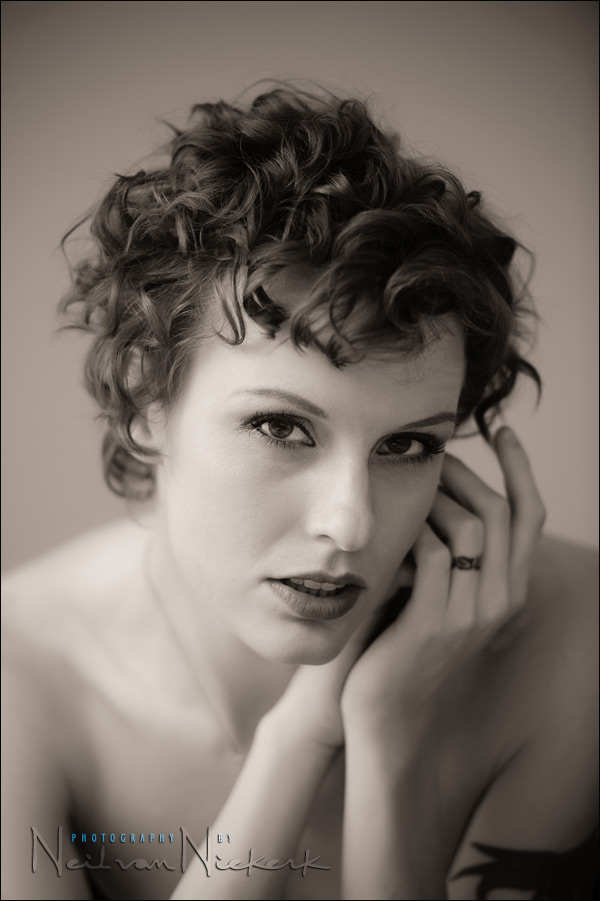
I made the decision that I didn’t want the location to be identifiable and this affected how I shot, so I used a 70-200mm f/2.8 lens for most of the photo session to compress the perspective, and shoot very tight.
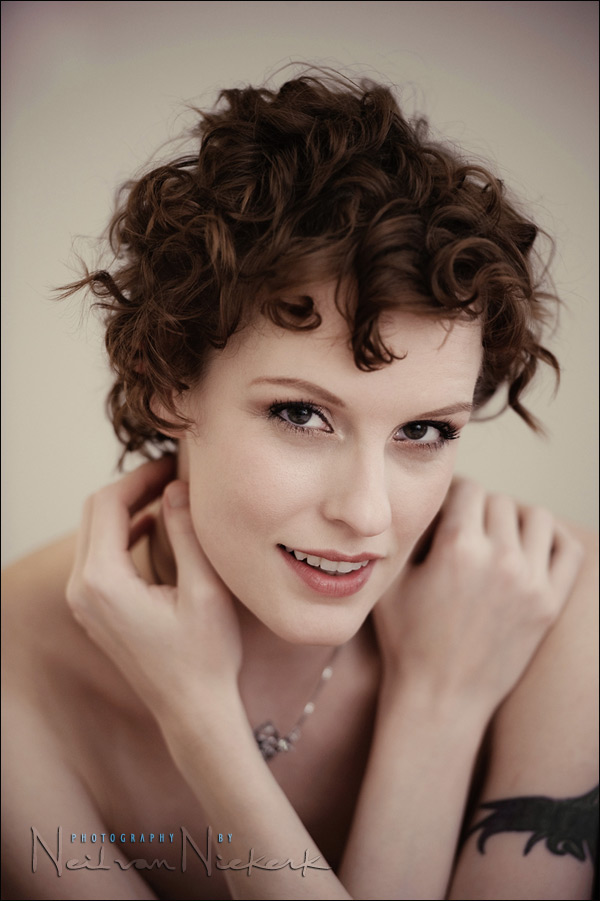
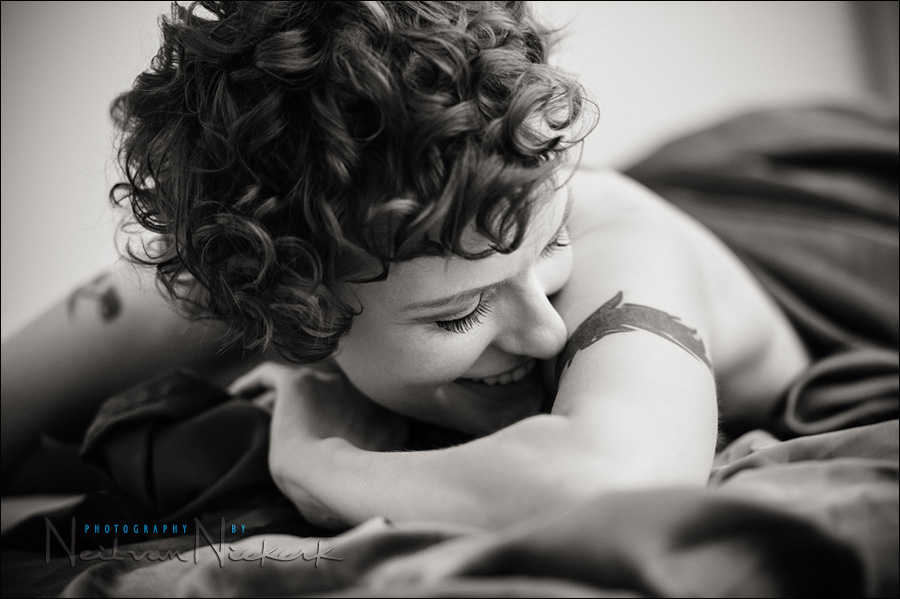
Shooting close and tight, the end result isn’t entirely boudoir, but a little more portrait-y … yet still sexy and intimate. I wanted to retain a mood of gentle sensuality to the sequence of images.
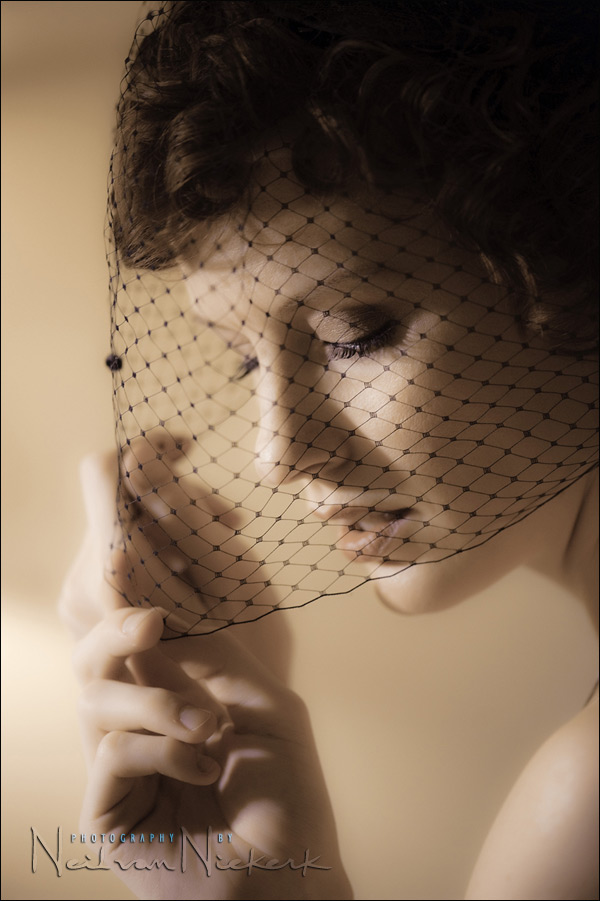
For my lighting, I ended up using either video light or bounce flash for my light. The photos with the birdcage veil are all done with a single video light on her, and a dimmer video light on the background. The tungsten and fluorescent lights in the ceiling and elsewhere in the room did register to an extent.
To control what I included in the frame, I used a few simple techniques.
- Shallow depth of field as in the image above, where I purposely composed the image so that the out-of-focus Christmas lights helped frame her.
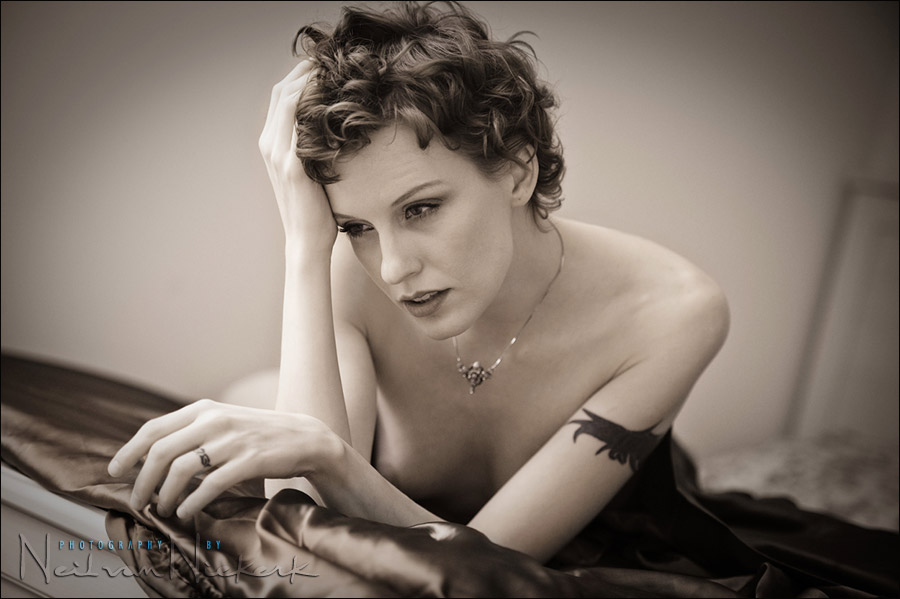
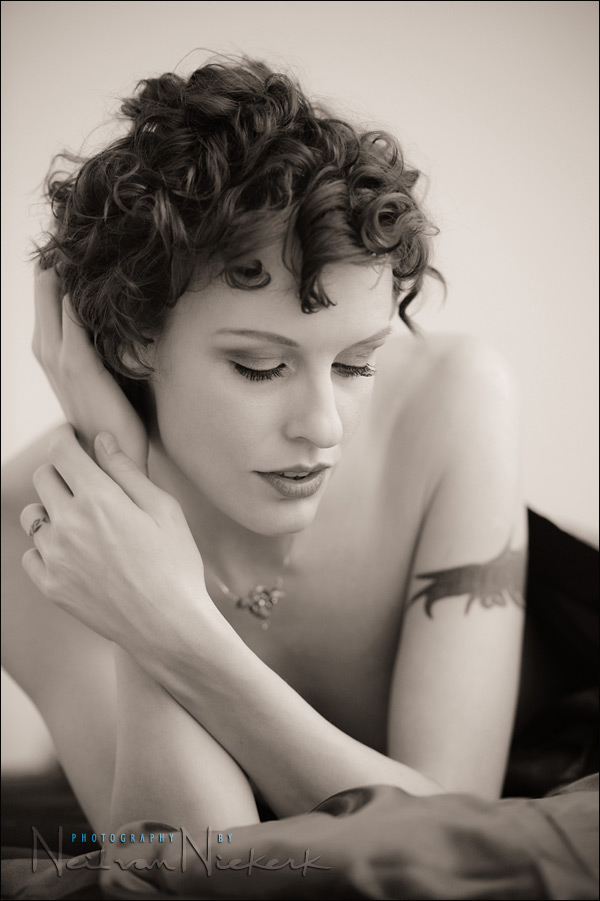
- In other images here, I shot tight from above so that the red silk sheets dominated.
- Other times I shot from a low viewpoint to eliminate what I didn’t want to include.
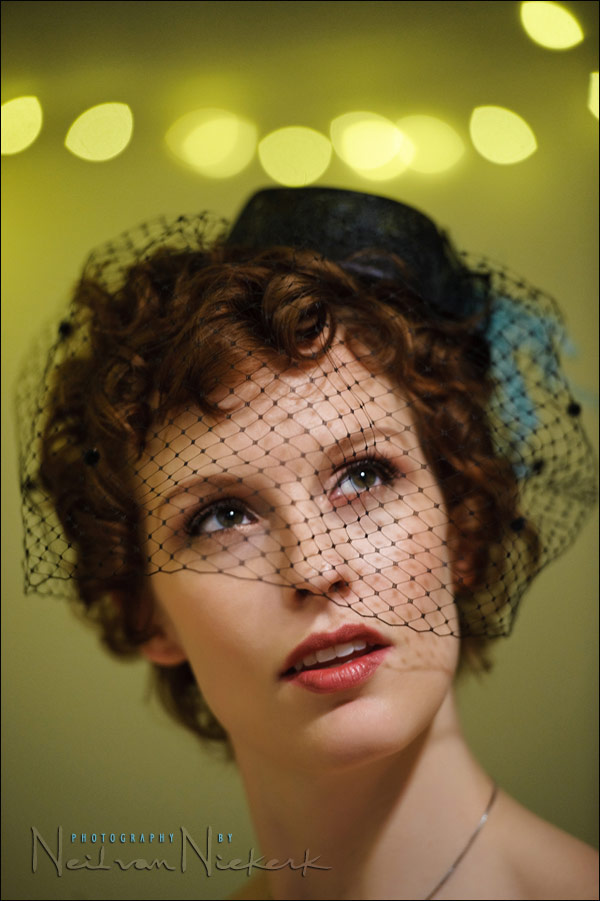
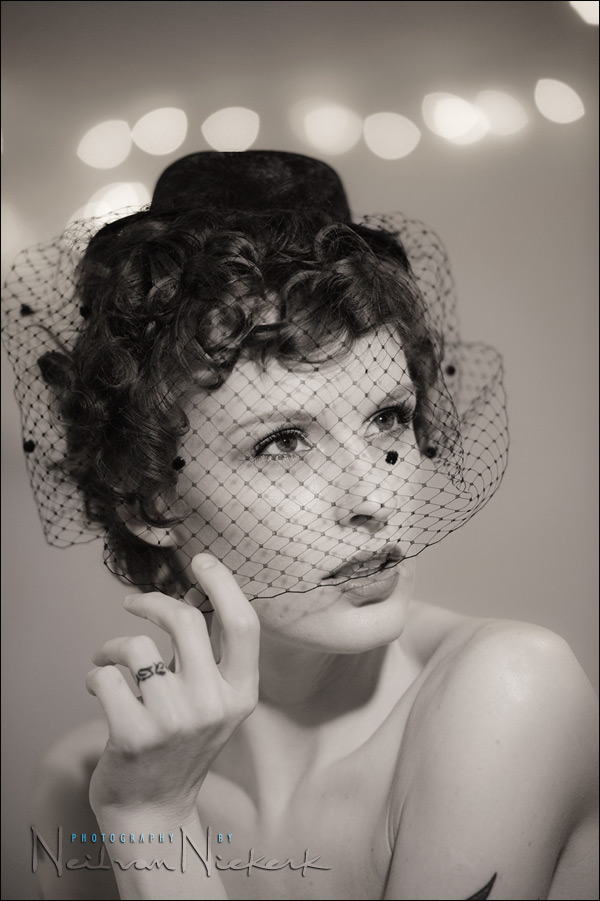
We went a little retro with the bird-cage veil at the start of the photo session, but soon lost that for some sensual portraits.

Camera settings & photo gear (or equivalents) used
- all images at f/2.8
- shutter speeds varied from 1/100 to 1/200
- Nikon D3;
- Nikon 70-200mm f2.8 AF-S VR II /equivalent Canon EF 70-200mm f/2.8L IS II
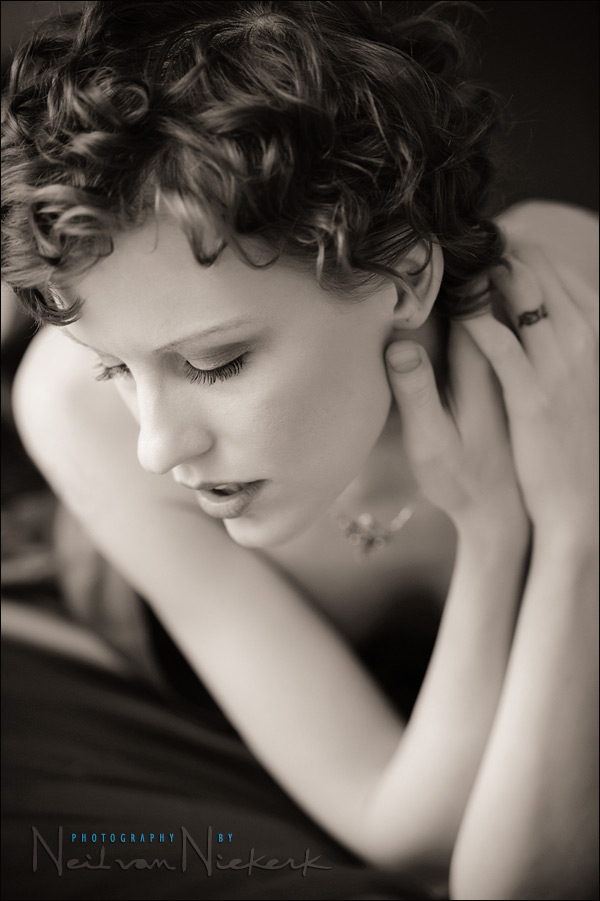
- except for image #4, where I used a macro lens:
Nikon 105mm f/2.8 VR macro /equivalent Canon 100mm f/2.8 IS macro
Related articles
- Bounce flash photography
- Video clip on using the black foamie thing
- more articles on Boudoir photography
Superb series of portraits Neil,amazingly sensual – I really like that retro look.
Hi Neil, lovely set of images. I dont know about Retro on the bird-cage veil, I love this type of shot. You seem to have got the depth of field just right. what lens did you use? and what aperture would you suggest say using a 50mm or 28-70mm lens.
As always love the Blog, great post
Hi there John ..
As mentioned at the end of the article, I mostly used the new Nikon 70-200mm f2.8 AF-S VR II lens. It’s magnificent.
I mostly used it in the 150mm to 200mm range, except for image 3rd from the bottom with the obviously wider field of view. That was at 100mm.
I tried the 85mm f1.4 for a few images, but found the field of view not tight enough.
For boudoir photography I often use the 24-70mm lens, at 50mm to 70mm mostly. Then I use apertures around f4 or wider. But that would obviously be for photos less tightly framed than these.
WOW! Those are amazing, Neil. Especially last four images. Congratulations.
Amazing work as always Neil. Thanks very much for sharing your work.
Neil,
Lovely photos. Question about #4 you shot with the 105 macro (not DC). I had been thinking about getting it for portraits and macro (I have the 18-105, 50 1.4D for a D90). However, I was dissuaded by some who said it was “too sharp” and had “ugly bokeh.” Yet, your shot is lovely. What is your opinion on using the 105 macro for portraits and did you do anything in PP to this shot that compensated for the shortcomings of the 105? Thanks for sharing!
A lens that is too sharp? I like sharp, and the 105mm f2.8 … well, there’s sharp, and then there’s stuff you can shave with. The 105mm is super-sharp. I’d rather have a sharp lens, and then be able to play with the image in post-processing, than have paid money for a less-than-wonderful lens.
The bokeh of the 105mm f2.8 AF-S Macro, is good .. but I have seen some samples online where it gives a strange circular smear to the background at times. But that doesn’t appear to be predictable.
That said … when you need a macro lens, then a macro lens is the best choice.
And yes, all the images here had post-processing done to them of some kind. But in this case, not due to any perceived shortcomings of the lenses.
Neil,
I always find this column to be a great source of technical information and creative inspiration. I really like the last four shots. As usual great lighting. This model’s look lends itself to a retro look, although her tattoo brought her back to the 21st Century.
I had a chance to shoot a fashion show this week at the last minute and I didn’t feel intimidated because of what I learned on this site.
Thanks,
Hi Neil,
I am very perplexed about the amazing quality of the light in these images. The light is soft and beautiful! I would expect a single video light to produce harsh shadows. Did you use the video light as the main or fill-in light? What was the quality of the available light under the same shooting parameters that you used?
You’re a master of lighting techniques!
Thank you.
Nicolas
Nicolas .. thank you very much for the wonderful compliment.
I did some post-processing on all the photos here. In part because I do skin retouching on any portrait that I show, since I don’t think it is fair to anyone to show images that are unedited in that regard.
But in keeping with the mood here, of a sensual romanticism, I further softened the images.
I used Imeganomic’s Portraiture on a separate layer, at reduced opacity.
But what also helps with the appearance of softness, is by reducing the local contrast in RAW – I do this by pulling down the Clarity slider to an extent in ACR / Lightroom.
Back to the video-light .. I used it as a main light here.
As mentioned in this article on using the video-light, I primarily look at the way the shadow falls under my subject’s nose. In this way I keep the light fairly even on them, without overly dramatic cross-shadows. In other words, I stay away from Rembrandt lighting. That helps.
Here are more links on using video light for photography.
Beautiful. Just beautiful.
Neil
Nice Pictures. What plugins did you use in your post processing.
Martian
Martian, as I just posted in comment #10, I mostly used Imagenomic Portraiture. But in a few examples, such as the image at the very top, I also used Topaz Adjust at reduced opacity.
Great Images.Always WOW factor in your shots.
-MP
These are magic! Maybe we can convince you to tell us how you shot one or two of these!? Peace, Glen
Hi there Glen .. I’ve already posted a few images from this session in a previous article on the direction of bounce flash.
As for the video light, I used it in a similar way as mentioned in the articles linked on this page on using video lights for stills photography.
The rest of the techniques .. they are sprinkled liberally throughout this site. :)
Neil,
Thank you for your great response to my question. I love your work!
Nicolas
Beautiful portraits. Thank you for your generosity.
Ian
Hello Neil,
I have been following you teaching and website for some time. It has really changed the way I photograph my brides.
somehow I may have missed where you taught how to put my name on the prints. I can do it in photoshop, to one print, how can I apply it to all prints if I am required to provide a DVD? In addition, I have found brides are no longer interested in quality professional photographers, just how much and include a DVD. I have been a high end photographer in Naples, FL for some time. The thoughts of giving me work away is not an option. Most all my competitors have bent to this thinking and are giving there work away. Please make comment. I am sure many of your readers feel the same. I proved very custom, hand design wedding albums, no too ever the same. This high quality has provided clients. Many brides don’t want a album. Just shoot and burn. Any suggestion.
Peter
With this site I’ve mainly concentrated on technique, art and style .. rather than get into business specifics. The main reasons wrt business advice, is that I don’t feel myself to be in a position where I can really give anyone advice on business practice. Definitely not with real authority.
Aside from that, there is the competitive aspect wrt wedding photography business. I’ll gladly share photography techniques, but I’d rather not give my competitors business advice.
Now about your question regarding files on DVDs … this is a hugely polarizing subject, with the established photographers (especially if they came from film days), kicking against the idea of selling the “digital negatives”, or including it in the package. So all all that I really would say on this matter, is that … if I may use a bit of corporate-speak … this paradigm has truly shifted. Digital has truly brought a new era to photography, including how we do business.
Hi Neil,
I would say these are possibly the best non-studio-lighting portraits I have ever seen.
I have following and trying to adopt your techniques now for quite some time, and the main problem I am having is being in an environment that has white/neutral surfaces to bounce from. Must be an Irish interior design thing, all walls are covered in extravagantly coloured wallpaper or dark solid wood, anything but white!!!
A nightmare.
Ciaran .. thank you! That’s high praise indeed.
When I do a photo session such as this in a room where there aren’t any surfaces I could easily bounce flash off, then I use video light, or flash with softbox, or just the ambient light, for lighting the boudoir photo session.. It’s one of those situations where you just adapt to what you are presented with.
Elegant. Intimate without crossing that erotic line. Good work.
Absolutely love how intentional and artistic your approach was for this shoot with Carly Erin. The decision to keep the location anonymous really paid off the tight framing and shallow depth of field created such an intimate, almost cinematic vibe. Your use of light, especially the video lighting with the birdcage veil, added a beautiful sense of mood and depth. It’s shoots like this that show why Washington boudoir photography continues to push creative boundaries. Inspiring work.