Wedding photography – improving your shooting workflow
As a companion piece to the previous two articles
• Tips & advice for second shooters at weddings , and
• Tips on improving your photography technique,
I want to offer some advice on shooting workflow. Not post-production workflow, but rather some things to look out for while shooting.
These articles with tips are just as relevant for any area of photography. The techniques here are applicable to any field or level of photography. I feel so strongly about the advice here, that I’d go as far to say that the further anyone strays from these, the greater the chances of mishaps or even catastrophic problems.
Articles series – advice for second shooting weddings
- Tips & advice for second-shooting weddings
- Tips on improving your technique
- Tips on improving your photo-shoot workflow
Tips on improving your photo-shoot workflow
1. Don’t format your memory cards on the job!
Never format a memory card on the job. No matter how tightly you think you are controlling the sequence of cards that you’re shooting on, if you format on the job, you’re tendering real hard for a mistake to happen. A bad expensive mistake that will make you feel nauseous when you realize you’ve lost part of the shoot.
Before you leave for a shoot, all your memory cards need to be formatted. This way, if you put a card in your camera and there are images on it, you simply put the card back in the card wallet, and you pick another card. Then, during a quieter more sane moment back at home or the office, you can sort out why there were other images on that card. But you never, ever ever format a card during a shoot.
This is the kind of thing where you don’t want to have to think about while under pressure. Format your cards before the gig. Without fail.
2. A camera with dual card slots is your safest bet
Regarding the advice to shoot on smaller cards so that you “don’t want to put too many eggs in one basket” … well, you’re much more likely to lose a card when you swap cards and have multiple cards in a card wallet, compared to shooting on a single large capacity card. Of course, you have the risk of a catastrophic failure if that one card goes faulty.
Let’s compare a scenario where you have four 8Gb cards vs one 32Gb card. If we can assume the cards to have the same MTBF rate, then relying on the group of cards increases your likelihood of encountering a faulty card and possibly losing 25% of your shoot. Sure, if your 32Gb card become faulty to the extent that you lose all the images, then you lose the entire shoot. Not a good scenario either. But personally, I don’t think the “spreading the eggs between baskets” approach is all that useful. You’re more likely to drop or lose a card when you swap cards out.
Ideally, the memory card should not leave your camera at all during a shoot. So the best option here is to shoot on a camera that has dual slots. I shoot on two 32Gb cards in each camera; RAW + RAW. I’m paranoid about losing images!
3. Do not format a card until you have online / off-site back-ups!
I would strongly suggest that you do not format a card until you have completely edited that shoot or wedding, and have uploaded the edited full-res JPGs to a site. After you’ve completed the edit, you’ll be more sure that you’re not missing images. (Perhaps you missed a folder on the memory card.)
Having physical off-site back-ups is a good idea. Having online backups of at least the processed JPGs, is a good idea. The best idea though, is to have both. Again, paranoia about losing images is a healthy thing.
• Photography workflow – back-up plans for your main computer
• Photographers workflow and back-up plans for disaster
4. Have enough memory cards on hand
Tied in with the previous suggestions, it is crucial that you have enough memory cards. Don’t get into a situation where you have to delete images on the job, to make sure you have enough space on your memory cards. Selectively deleting images while shooting is a recipe for disaster. Somewhere, sometime, this will cause problems. Guaranteed.
5. Batteries!
You have to have enough batteries. Your batteries have to be charged! Camera and flash and everything else.
Create a systematic list to make sure you’re not skipping a beat here.
Eg: it is a good idea to change all batteries out for fresh batteries just before the wedding reception. (camera and flash and battery packs)It just makes a lot of sense to do it right then, when you’re more likely to use more flash for the rest of the night. Then you’re ready.
6. Your equipment has to be in proper shape!
This may seem too obvious to even bear mention here – your gear has to be in working shape. But I have encountered photographers who rationalize their faulty equipment to the point where “it isn’t so bad”. For example, I had a 2nd photographer shoot with me, who knew his one lens was soft. He insisted that he would just point it downwards and shake the lens and it would be fine. Except, it wasn’t.
If you suspect your lenses back-focus, then rent another lens. Or at the very least, let your main photographer know you have gear problems so that plans can be made. Don’t spring soft images as a shitty surprise on your main photographer.
Have spare everything. Spare cables. Spare … oh, just everything.
7. Have your cameras and other gear easily accessible!
If you have your gear with you in a roller case, have at least the one camera and a general purpose lens such as a 24-70mm over your shoulder, ready to shoot. Don’t be the one to delay things while you open your case and assemble your gear every time.
Be flexible and be mobile. You can’t carry all your stuff with you in a roller-case while on a wedding shoot. You’re wasting time and missing moments.
8. If possible, keep to the same lens system so that colors are more consistent.
Even within the same system (whether Nikon or Canon), you’ll get color differences between lenses. But if you stay with the same brand, you’re less likely to encounter wide differences in color and contrast between lenses. It will speed up your post-processing workflow if your lenses are of the same quality.
If you use filters on your lenses, use exactly the same brand and model filter for all your lenses .. once again to keep color consistency.
Keeping to the same system, also means the handling is similar. For example, the lenses will rotate the same direction when you zoom. (We hope!)
Final summary
Your equipment should be meticulously prepared and your on-location workflow down pat. For example (again): there should be no hesitaiton or doubt that the batteries you’re using are fresh, or that the card you just inserted in your camera is clean. This way, if you do accidentally double-swap a card, and you see it is full, you simply take it out and place it back, carefully, and select a next card that is clean. It makes for a good consistent workflow to do these things according to a specific plan.
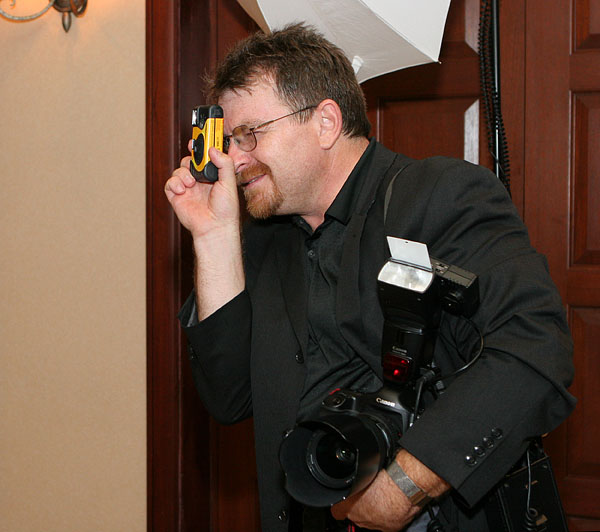
Regarding the photo at the top … it was taken by my second photographer while I was taking a photo for a bridesmaid, using her P&S camera. Seriously, not my camera! As you may well have figured out by the Canon gear in my other hand, and the flash definitely being from pre-BFT days, this was taken many years ago. I’m much wiser now.
Related articles:
- Tips & advice for second shooting weddings
- Tips on improving your photography technique
- More articles on wedding photography
- Shutter speed, aperture and ISO
- Using faster shutter speeds for sharper photos
- Using slow shutter speeds with a hand-held camera
- Composition for full-length portraits – step back!
- Using the histogram to determine exposure
Great tips, as usual! Learned #3 (formatting) the hard way! And I ALWAYS have charged up batteries in my case. Except that I forgot the airline this week made me take out my batteries when they put my Pelican in the underbelly of the plane (they claim they can catch on fire). And I was unpleasantly surprised that I had NO batteries with me when I did a casual, just for fun shoot, as I had forgotten to put them back into my case.
It OK Niel we all have too use our back up Camera sometimes LOL
Who needs a BFT when you have the on-camera flash on your P&S!!!
Pilots have written checklists & standardized procedures … might be a good idea for photographers too!
With all the worry about data loss, let me share a tool that has saved my butt a number of times:
“Data Rescue (3)”
https://www.prosofteng.com/data-recovery-software/
I first discovered this when my machine’s HD died in the middle of a backup and the backup drive failed simultaneously. What are the odds?
Compared to what recovery services cost, this was a drop int he bucket, so I gave it a try. It worked- Amazingly well.
Since then, I’ve recovered other bad drives, friends machines and yes, FORMATTED & DELETED MEMORY CARDS and got the vast majority of data back, with the only draw back being the recovered data may not retain the same folder structures.
If you’ve committed the heart-stopping mistake of formatting a card or deleting off images before import (to software) was finished, you understand. What would you pay to get that work back? I think they’re $99 price was more than worth it, numerous times over.
With all of the amazing *free* advice Neil puts out there, I definitely feel the need to reciprocate where I can ;-).
On the subject of batteries, it is also important to have a good method of storing your batteries, so you can easily identify which batteries are un-used, and which batteries have already been used.
The way I make sure that I can distinguish between fresh and used batteries … the used batteries are placed up/down/up/down .. instead of all pointing the same direction. The white (unmarked) batteries here is how I would position the used ones.
I also mark my batteries in groups of four to keep better track of them. I don’t want to mix old and new batteries, but rather keep sets of 4 batteries. This way the 4 batteries in a set age at the same rate.
Neil vN
I love this! I’m preparing for my first wedding in November and these are all great tips for me to remember!
all good tips, thank you! I have learned about the time of day I always experienced flash batteries dying, so sure enough, you have to change them before those crucial moments. when possible I also set up a light or two that is A/C powered in case it’s needed.
… and I thought by looking at the article picture the advice is ” always carry disposable cameras. A whack of them…” :-)
I second the small cards theory. Lost a card containing the cake cutting and some cool available (and pretty groovy) light dancing last year. Luckily my wife had the cake cutting so no moments were missed…
I’m just as anal-retentive as you with my cards and my workflow but it still happened to me the one time I was too tired and lazy to follow my own rules.
One thing no one mentioned. Get a smart battery charger. Read any article about good battery management and they tell you that rechargeable batteries should be re-conditioned every ten charges if you want the advertised 1500+ charges. Smart battery chargers will give you that option and will recharge more batteries 20 times faster than those 4 slot charges. The 4 slot chargers (most) are programmed to do one thing—time charge at 11 hours then turn off. Smart chargers can charge 8 batteries in under an hour and give you a digital read of charging level.
Last weekend I had two freshly charged batteries drained on my pocket wizard. Who would have thought.
About the color consistency. It is a bit off topic I think but you use the black foamy thing to bounce off walls, don’t you get any difference in color that way? I just saw that California Sunbounce has a Bounce-wall that you attach to your camera. What do you think about this new system?
You do get a color cast when you bounce your flash … but the color cast is independent of the lens you’re using.
I had to look up the Bounce-Wall by California Sunbounce. It would work .. but I think it might be too unwieldy at an event. I can’t imagine walking around with this at a reception venue. But then, the light would look a lot better than direct flash.
Great Article Neil, Thanks.
Just a little addition – while putting back the used memory cards in the cards wallet, have backside on front. The Fresh Cards will have Front side to front. That way we can differentiate quickly which are the full cards and which are the fresh ones.
Cheers !
-MP
These are great tips! Thank you for this article.
MP Singh,
Precisely what I do, I have the Gepe Cardsafe Extreme holders, you can see through them, so I have the CF brand showing through the window and they are the empty ones, and if used, I put the backside [the white part you can write on] visible.
Waterproof, they float and very well built.
Trev
On the subject of clean cards: I use the CardSafe, which comes in different colors. The green ones are for clean cards, the red for used. Simple & harder to screw up. Also the cases are fantastic.
great tip regarding batteries however i would do it the opposite b/c the flash needs to have the batteries inserted 2 upside down and 2 upside up, the charger needs all the batteries facing the same way,
Funny how I do almost the same thing with rechargeable batteries…but, I’m a step forward in this one (only in this one :-) ) When I purchase new batteries they go in my analyzer and subsequently get set in groups of 4 by similar capacity as well, and they get numbered (group1,2 and so on). Having a weaker battery in one pack reduces its life and brings the recycle capability of the pack lower.