Photography: Direction of the light – using available light
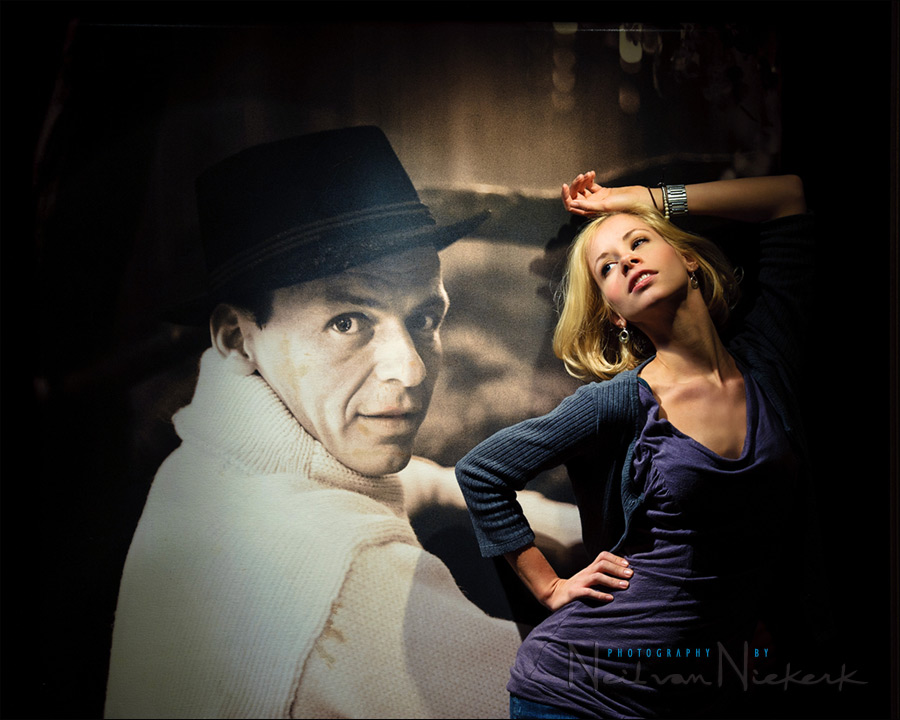
This striking photo of Shawna illustrates something that I want to underline: at some level, our consideration of the light that we’re using remains the same, whether we’re using available light, or flash, or video light or some other continuous light source.
We need to consider the direction and quality of the light we have or are creating. We then either need to adapt our lighting, or adapt our way of shooting our subject, to complement our subject. So let’s look closer at the light / lighting used for this photo …
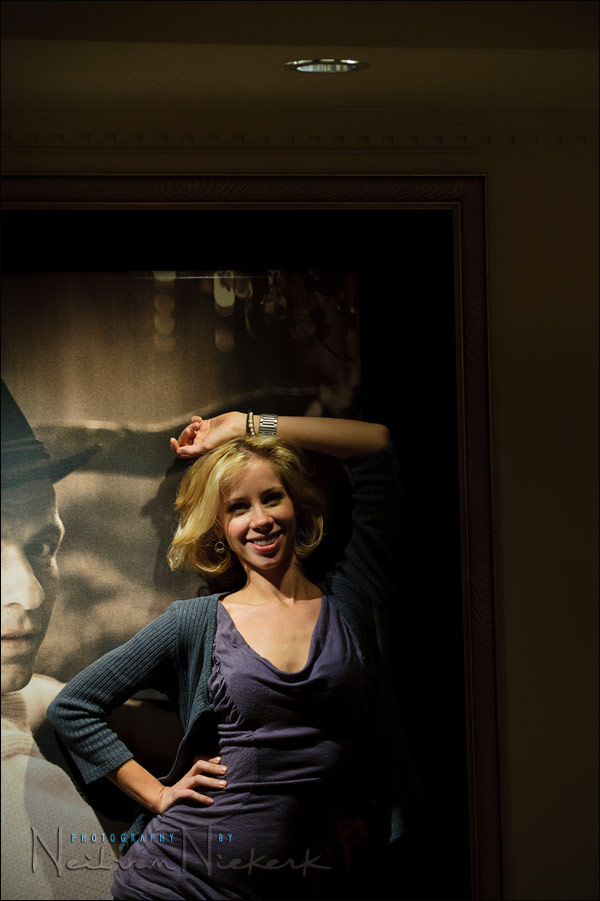
The light that you see in the top photo, came from this incandescent spotlight in the ceiling of this hotel-floor lobby. Just having Shawna look directly at the camera, with no consideration of the light, creates this unattractive photo. The uneven light on her face just doesn’t look good.
We could either bring in additional lighting, such as a video light … or as in this case, pose our model so that the light falls onto her face in a way that suits us. It just makes sense to get more light onto her face and not have her eyes completely in shade. With a slight shift in her pose, we have the light fall on her in a way that just looks so much better. I don’t think this needs more explanation as to why it looks better. It just is.
There’s a sense of drama now, a little bit of mystery … and we have a photograph that makes our model look as attractive as she really is. Mostly because we considered our available light and really looked at the direction and quality of light in how we posed our subject.
As mentioned at the start here, our approach would be quite similar, whether we used flash or continuous light (like video light), or the available light.

Direction & Quality of Light
I wanted to distill the essence of what we, as photographers, work with – light! Before we can truly grasp on-camera flash and off-camera flash, and really, any kind of photography, we have to be aware of the direction and quality of light. We need to observe the light that we have, and then decide how best to use it, or enhance it.
With this book, I try my best to share those “aha!” moments with you, and I do believe this book can make a difference to your photography.
The book is available on Amazon USA and Amazon UK, or can be ordered through Barnes & Nobles and other bookstores. The book is also available on the Apple iBook Store, as well as Amazon Kindle.
Related articles
- book: Direction & Quality of Light
- Available light photography: posing into the light (bride: Julie – iPhone photo)
- Photography technique – taking photos in hard sunlight (model: Aleona)
- Bridal portrait – working with the available light (bride: Rachel)
- Even with high ISO settings, you still need great light (model: Elmira)
- Observing and using the available light (model: Anelisa)
- Using the available light is not random decision
Great picture and once again a wonderful lesson – its amazing to see how “only” changing the position of your model makes the photo from ‘so so’ to WOW !!
well said, well done Neil. Congrats and thanks for sharing.
Strangers in the night exchanging glances
Wondering in the light
What were the chances we’d be sharing love
Before the night was through
Two of my favorite things. One of your best portraits EVER!!!
What a great post. I have been reading your blog for a long time and always learn something. This post is no different. I will have to keep my eyes open for opportunities like these!
Your blog is the only one in my RSS feed that makes me go “oooh another post, excellent” and it’s the only blog that I settle back and make a point of reading and absorbing.
This post sums it up for me as to why, so simple, so effective and so clear in explanation.
Thanks for sharing your wisdom
Mike
True Neil, sometimes we don’t analyze the light or rush the picture and both situations turn into a disaster (I’m guilty of doing both)
I love the way she is standing close to the shadow. I probably just have her stand in the light…still haven’t quite master the art of seeing the lights and shadow yet. In general, when shooting with your 5D2, do you leave your setting at RAW or the smaller size sRAW1 or sRAW2 ? I supposed when taking pics of model, the number of frames are not too high, you can leave your setting in RAW. What about when you work a wedding ?
Thanks
William
William .. I use the Nikon D3 for wedding stills. I checked with friends of mine who shoot weddings with the Canon 5D mk II, and they all use sRAW for the wedding, except for the family portraits, bridal party and portraits of the bride and groom. For the rest of the day, it is all sRAW.
This is one of the best pictures I’ve seen from you Neil. Absolutely love it!
I saw this photo in your newsletter and was immediately drawn in by the posing and lighting. What a stunning difference it makes when the photographer learns to see the light. Well done.
Thank you everyone for the nice comments. This is one of those instances where I also really like the final result. I find that when I look at the image, my focus darts between Frankie’s constant gaze and Shawna. There’s a tension for me in looking at the photo because my eyes never quite settle on something. Yet in that, there’s a balance to the photograph.
Once again thanks for your willingness to let us in on some of the pro tips and trick. Keep making the world a better place one Image at a time, lol!
Hi Neil,
you also have readers of your posts from The Netherlands. I am one of them and also learn new stuff all the time. My question on the picture above: what iso value do you use for a picture like this, using only available light?
Kind regards,
Hans van den Berg
My camera settings were: 1/125 @ f4 @ 800 ISO
Hello Neil,
Well, you have done it again. Just when I spend the last month reading all I could about current flash photography equipment and techniques including your latest book on the subject, you show me several wonderful shots taken with a small continuous light source which has added to my confusion.
I am a lifestyle and portrait photographer and have been using Nikon SB800’s for my flash work. I am interested in stepping up to the next level and have looked at the Nikon SB900 and the Q-Flash system as well. I also looked at Paul C. Buff’s Einstein units but felt that they would not be as portable as the Nikon or Q Flash units. As you are my go-to-guy when it comes to flash, I would very much apreciate your thoughts on which units I should purchase.
David .. that will depend on what your ‘next level’ is. For power vs size, there isn’t much to beat a speedlight. But I’m not sure the SB-900 will give you much so more in features over the SB-800. For me the SB-900 was an automatic upgrade, but I don’t think you gain anything in terms of power or capability over an SB-800.
A Quantum flash, when used with a diffuser disc, has less than a stop more power than a speedlight. That said, the spread of light from the Q-flash is much better. And the Q-flash can be fired all day long without melting.
But your next step really comes down to what YOU want to do with flash that your speedlights aren’t capable of.
Thanks Neil,
Light is something so simple that I sometimes don’t quite understand it. As I’m quite new to lighting and flash photography this is has been a very valuable note.
Best regards,
Omesh