Photography tip: available light portraits – that sweet spot of light
A regular theme on Tangents, is using interesting found light sources while shooting portraits on location. For example: using sunlight reflected off a traffic sign.
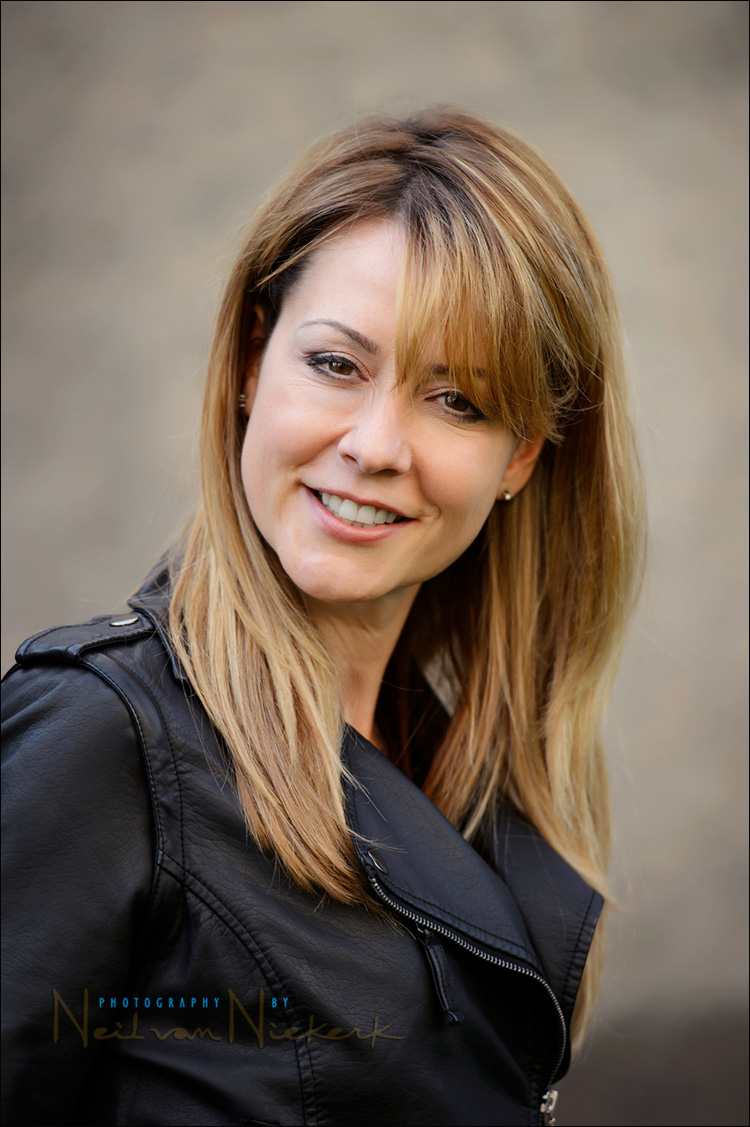
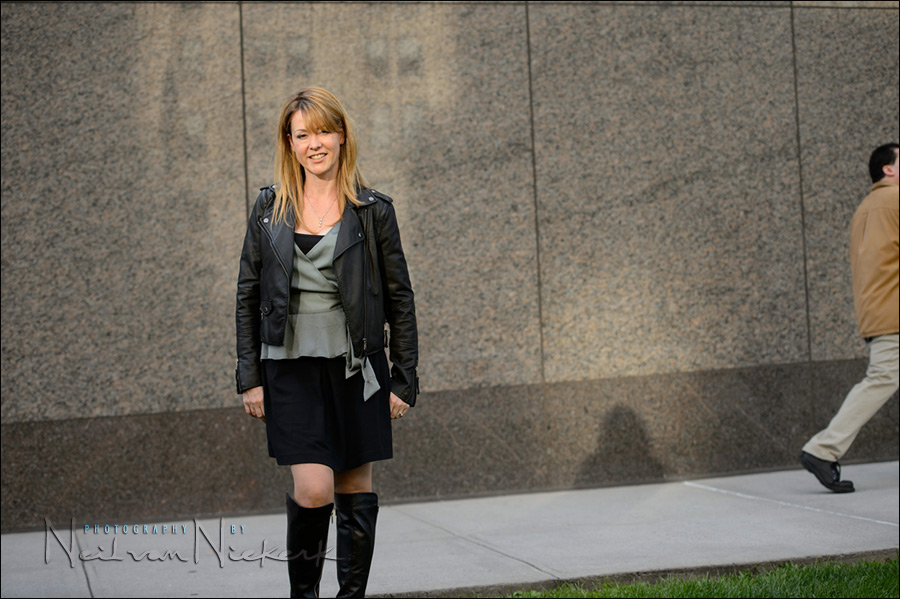
With this straight-forward portrait of Irene, a photographer friend in New York, I want to show a neat little trick here – helping your subject understand exactly where you want them to stand.
Here we had random reflections of glass structures in Manhattan, giving random spots of lights. I wanted to use one of these spots of lights here as naturally found light for Irene, and another splash of light to give a high-light behind her, as I framed her against it.
Instead of giving your subject incremental instructions – “a little to the left, a little to the left, no, come back” – the simple trick to have your subject turn around so they can see this highlight, and have them move a little until they can see their own shadow in the splash of light …
Then they just turn around, and they are perfectly placed!
At the same time, take care in carefully looking at how the light falls on your subject’s face. Aim to have clean open light with no shadows under the eyes.
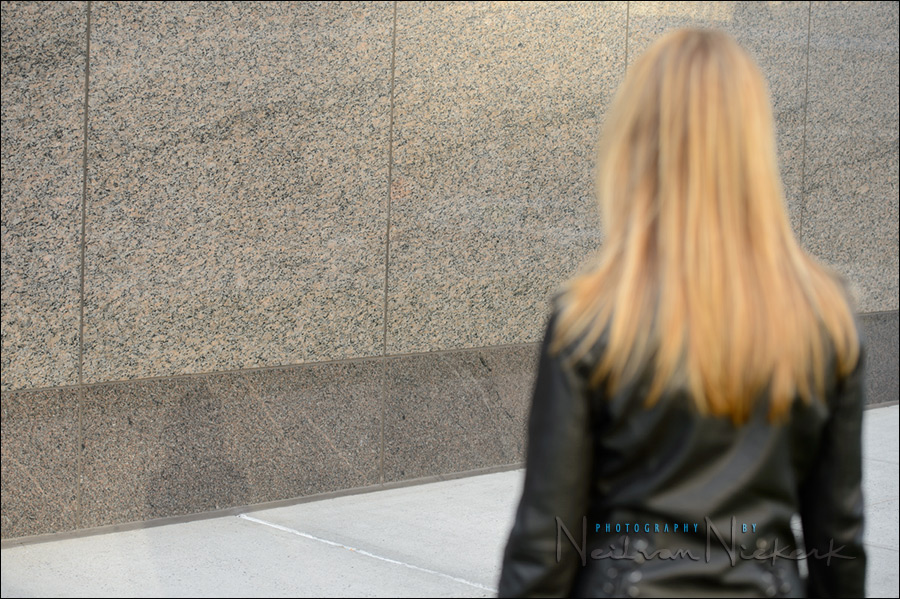
This exact same idea can be used in another way. Here we had a similar kind of spot of light reflected, giving us a bit of natural rim-light. Irene, facing the camera, now just had to keep an eye on where the shadow of her head fell. The top of her head should be within the spot of reflected light – and hence she should be able to see her head in the shadow on the ground. Watching this as she steps to the side or forward and back, she can immediately place herself, without me giving continual (and possibly confusing) instructiosn as to exactly how she should position herself.
You can do the same with someone just stepping out from under a canopy or verandah, with the sun from behind – and then they can position themselves so that the sun from behind just gives a lick of color to their hair. Again, it is so simple a technique that makes an on-location photo session easier.
Lighting & Design for Portrait Photography
Lighting & Design is a follow-up of sorts to Direction & Quality of Light. It’s a slightly eclectic mix, discussing the thought-process with various scenarios shooting portraits. The examples use available light, bounce flash, off-camera flash as well as studio lighting.
The idea is that in every one of the 60 sections, there is something to be learnt and applied, regardless of your level as a photographer or where you shoot – all shaped to form a cohesive narrative arc throughout the book.
You can either purchase a copy via Amazon USA or Amazon UK. The book will also available on the Apple iBook Store, and Amazon Kindle.
Camera settings & photo gear (or equivalents) used in this photo session
- 1/250 @ f/3.5 @ 200 ISO
- Nikon D4
- Nikon 70-200mm f2.8 AF-S VR II / Canon EF 70-200mm f/2.8L IS II … @ 200mm
My Go-To lens for portraits with minimal depth-of-field, as always, is the 70-200mm f/2.8 zoom. To get the most separation between my subject and the background, I zoomed to the longest focal length, and stepped back until I got the composition I wanted. It is an important change in behavior – not just zooming to get your composition, but purposely using as long a focal length as you can … and moving back until the composition works. And only then zooming wider if need be.
- Making your images pop through choice of lens
- Using narrow depth-of-field & great bokeh
- Composition for full-length portraits – step back!
Related articles
- Using interesting available light & white balance options (model: Olena)
- Available light photography: observing and using the available light (model: Anelisa)
- Posing technique – adjusting a pose with incremental changes
Just got this book, looking forward to applying the techniques – this was a top tip btw :)
Hi there Neal,
I’m not quite sure to understand the dealing with client position.
“The simple trick is to have your subject turn around so they can see this highlight, and have them move a little until they can see their own shadow in the splash of light”.
Does the model is supposed to be completely”illuminated” with natural light???
If that is what you want.
Lovely portrait Neil, I like the final composition. Great article showing the value of maximising available light.
Hi Neil, how do you deal with the color of the material that reflects the light? How do you set your WB?
thanks.
Michele … it can be tough, especially when it is sunlight reflected off tinted windows. With this photo there was a green color cast that was difficult to deal with. The real solution is to shoot in RAW, and then finesse the WB as part of your overall RAW workflow.
Great tip. No more shouting ‘left, no the other left’ at someone standing 20m away… :)