
Portrait lighting patterns: Loop lighting & Butterfly lighting
In the article on available light portrait photography, I mentioned how I posed Anastasiya, so that the spot of reflected sunlight created a butterfly lighting-pattern. While most of us associate lighting patterns with studio lighting, the thought-process in how to use available light or bounce flash or continuous lighting, remains the same. It has to do with how we pose and position our subjects in relation to the light. And it also depends on how we position ourselves.
I want to show some straight-forward examples of the lighting patterns as illustration. These photos of Anelisa were taken during a flash photography workshop. The lighting here was very simple – just a speedlight and a bounce umbrella. Just the one light-source so we can see how the position of the light changes the lighting pattern.
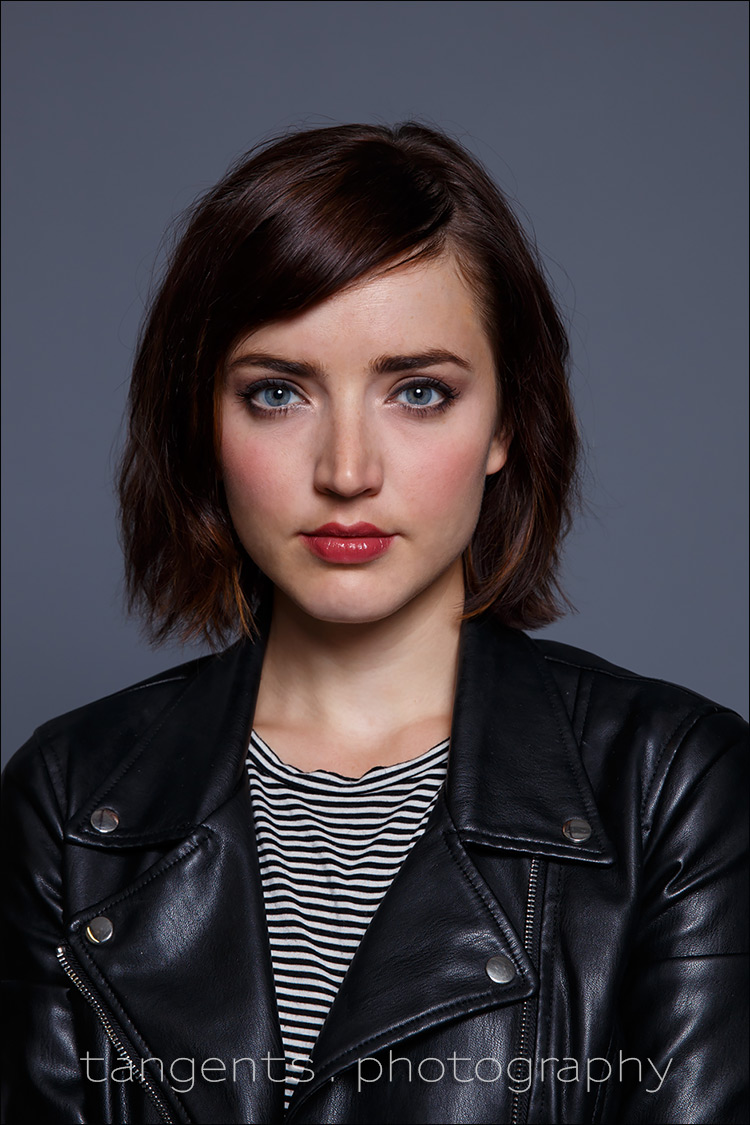
Butterfly lighting pattern
Here the shadow of the nose is directly under Anelisa’s nose. With her facing the camera straight-on, and the light behind (and above us), we get the shadow of her nose to fall directly below her nose, creating a ‘butterfly’ lighting pattern.
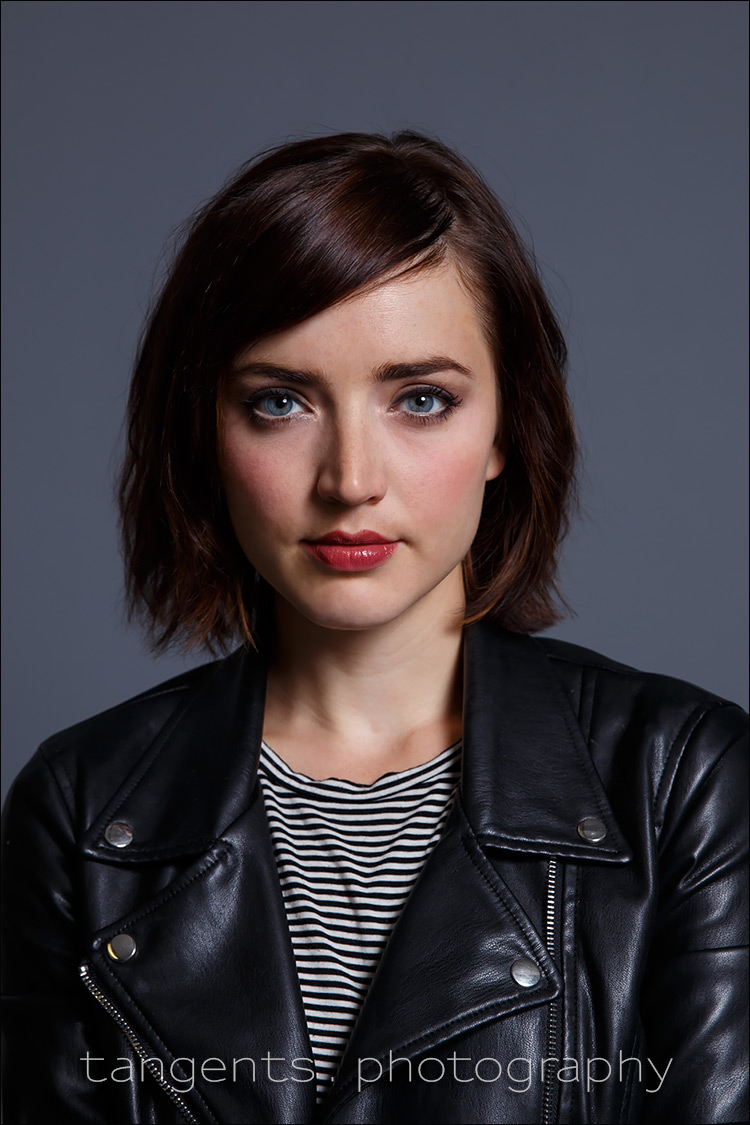
Loop lighting
With our light source now about 30 degrees off to the side, (and about 20-30 degrees above her eye level), we get the shadow of her nose to fall to the side, creating a shadow ‘loop’. We immediately get more light on the one side of her face, and we get that gradient of shadow along her other cheek. Our subject is still looking straight at the camera – neither she, nor the photographer changed position. Just the light moved.
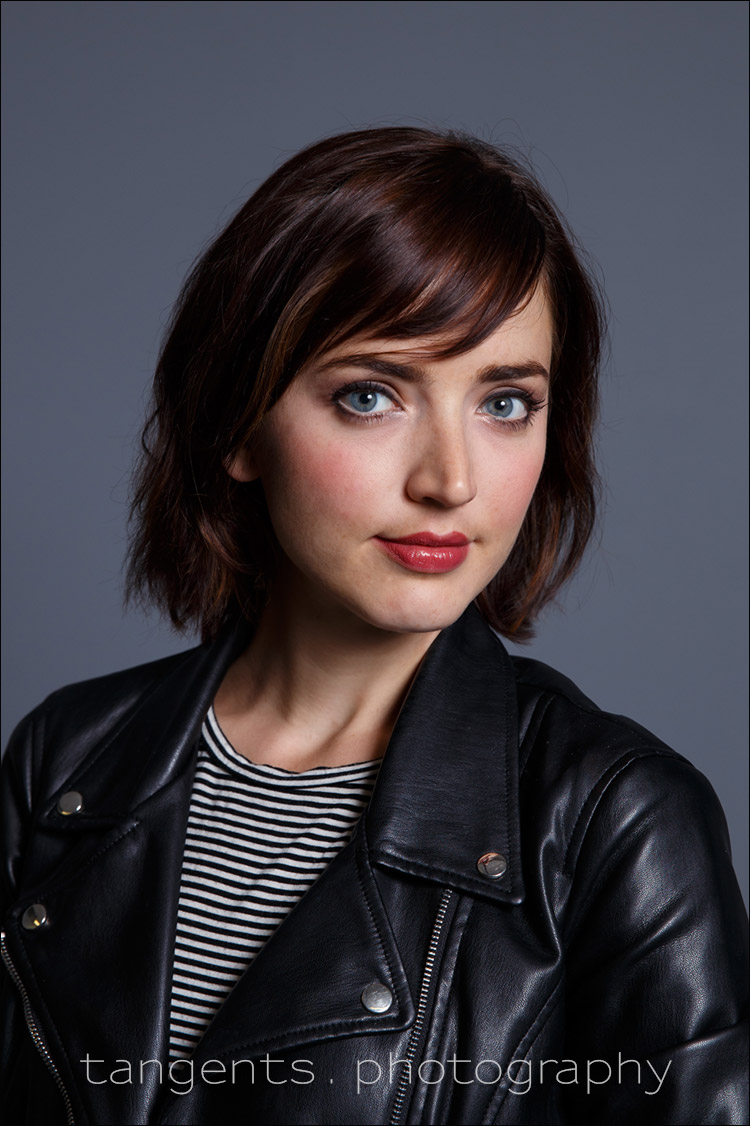
Short lighting
Now, with our light source still in the same position … what would happen if our subject turned her head to the side, so that her face was towards the light source?
We get short-lighting!
Also notice that since her face is now turned to the light source, the loop lighting pattern has now changed to a butterfly lighting pattern.
Looking closer at that photo, you will notice that the part of her face turned away from the camera, is now “narrower”. In other words, “shorter”. The “shorter” side of her face is better lit than the other (broader) side.
This is short lighting – the “short side” of your subject’s face is better lit than the broad side. Note that we did not change the position of the light – Anelisa changed her pose, and thereby changed the way the light falls on her face. If Anelisa now stays static and we swing the light to camera-left, we would get broad lighting.

Short lighting vs Broad lighting
As a quick example to show the difference in pose and how that affects our lighting, here is Anastasiya with the same lighting set up – a speedlight and a bounce umbrella. The light source is obviously on camera-left now.
In the left-hand image, Anastasiya has her shoulder towards the light, and her head angled towards the light as well … and we get Short Lighting. Also note how the light skims across the top she is wearing, and creates nuanced shadows.
In the right-hand image, we kept the light the same, and we stayed in the same position … but Anastasiya rotated so that we now get Broad Lighting. This is a rough example just for illustration – we wouldn’t necessarily allow our subject’s eyes to be shrouded in shadow when we specifically use Broad Lighting. We’d still aim to make it look good. But this works as a comparison here. The light falls squarely on her top, creating a bland white area that competes. Also, with broad lighting, her face looks more ‘full’, than the image on the left.
My own preference is to always start with an approximation of Short Lighting when I photograph someone on location or in the studio – regardless of my choice of lighting source.
Summary
Your own position in relation to the light and your subject, will determine the lighting pattern. Conversely, if your position and the light’s position stays the same, then your subject’s position and pose will determine the lighting pattern. Lighting and posing are inter-connected like that.
In being aware of how the light falls onto your subject, you can control the look of the portrait for dynamic control over the look of the final image.
If you’d like to learn more about how to work in a studio, I offer Studio Lighting Workshops too.
Related articles
- Off-camera flash – Change your position, change the direction of light (model: Ulorin Vex)
- Off-camera flash: Short lighting vs. Broad lighting (model: Anelisa)
- Bounce flash photography – short lighting (model: Noreen)
- Available light portrait photography (model: Anastasiya)
- Studio photography – your first time in the studio
- More articles on Studio Photography
- Studio Lighting Workshops
I like that you mention the effect of short lighting on the subject’s clothing and how that may be more appealing to the overall image.
Totally agree! Really helps to imagine where the light should go when short lighting someone.
Excellent tutorial–a good review for me, and a good intro to pass on to my friends (which I did).
Thanks Neil – well illustrated article that explains the concepts powerfully, yet simply. I agree, light across the body and turn the face back towards the light
I also favour short-lighting for portraits in almost all cases. It should however be added, that when using harder light-sources, or lighting with dramatic fall-off, this approach will enhance skin flaws significantly. So, unless you want to do a lot of retouching, in cases where client skin isn’t the best, stick to large modifiers with a good amount of ‘wrap-around’ light to help fill the blemishes a bit.
An excellent point.
A perfect photo can be saying many things without telling anything, and for a perfect photo, we need a perfect combination of light.
Thanks for sharing the effective tips about perfect lighting.