Simple lighting setup to photograph kids indoors – Bounce flash!
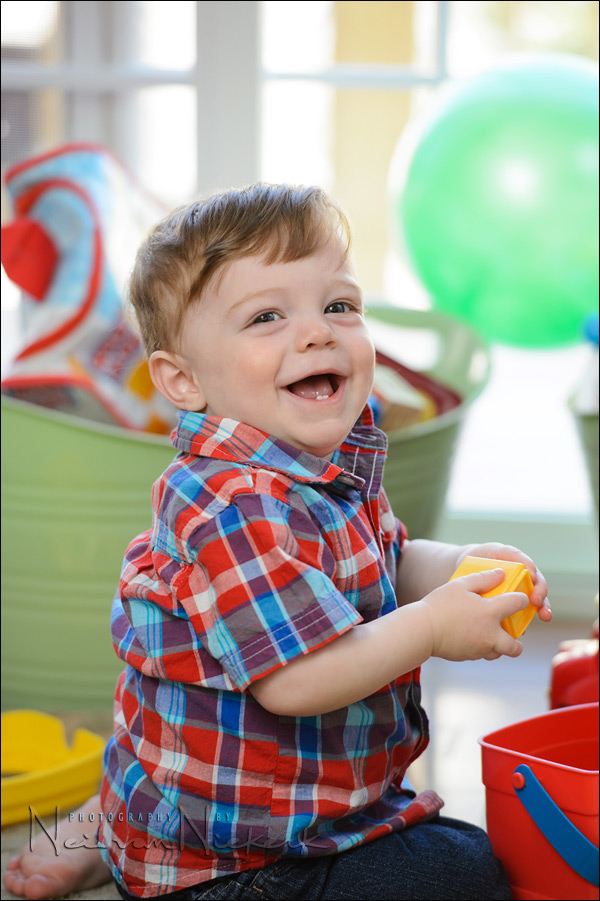
Meet Jack. He’s 1 year old. We kinda photographed him just over a year ago with the maternity photo session with his mom and dad. But this is him now, for real. When Amy and Nick asked me to do a portrait session with him, we started off at their house. I wanted to grab a few candid photos of Jack happily playing before we set off to a nearby park.
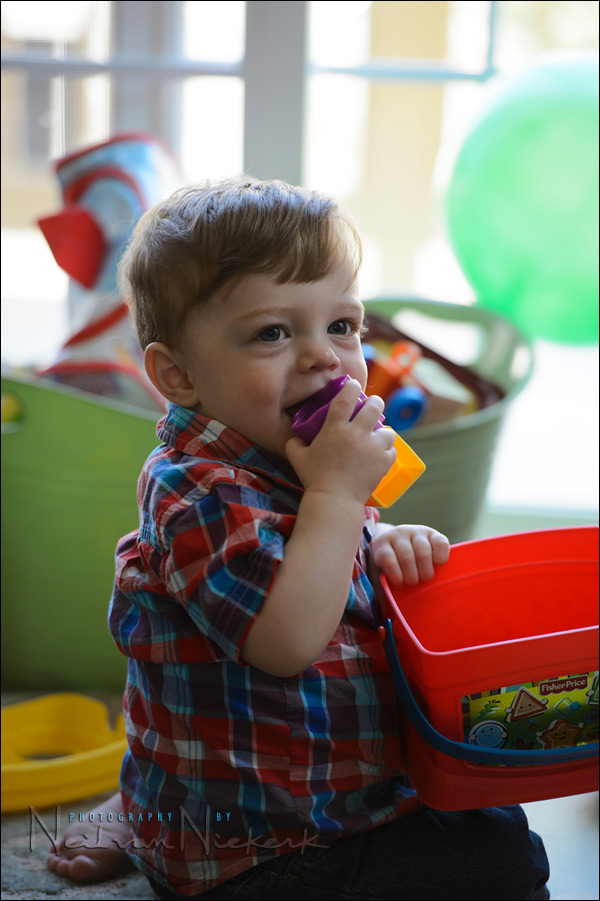
Since kids scoot around all over the place, for me, it made most sense to just use on-camera bounce flash. Minimal gear – just the speedlight on my camera. And of course, the black foamie thing. Shooting in TTL mode, meant the flash exposure was pretty much spot on every time, regardless of where Jack zipped around.

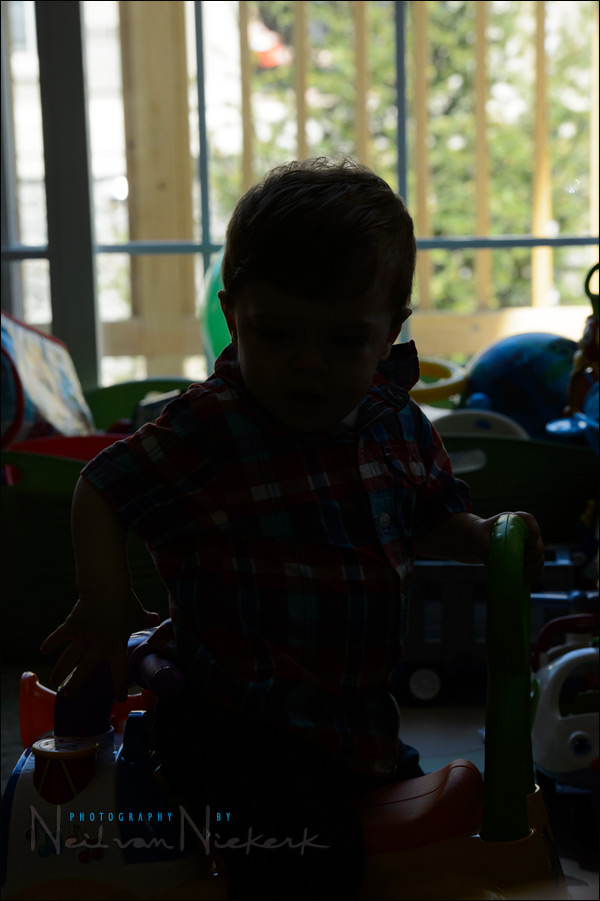
The ambient-only exposure, as comparison.
camera settings: 1/250 @ f/4 @ 800 ISO
I wanted the background to blow out, and with that there is a light, airy feel to the photos. And of course, since I’m using (bounce) flash against a much brighter (available light) background, max flash sync speed made most sense.

If I had changed my exposure settings so that more of the background showed – as in this test shot at f/11 – then the background would’ve been better exposed and with the change in depth-of-field, would’ve been more visible. So a wide-ish aperture made sense since I didn’t want the background to show. The out-of-focus, over-exposed haze is what I wanted.

Really, this way of lighting is the most effective and simple in this environment. And … this technique is so simple that it is accessible to everyone with a decent speedlite.
After a series of photos of the happy chap in his environment (ie, lots of toys), we went to the park for portraits with mom and dad, and for this very special announcement.

Photo gear (or equivalents) used in this photo session
- Nikon D4
- Nikon 24-70mm f2.8G AF-S / Canon 24-70mm f/2.8L II
- Nikon 70-200mm f2.8 AF-S VR II / Canon EF 70-200mm f/2.8L IS II
- Nikon SB-910 Speedlight / Canon 600EX-RT Speedlite
- Nikon SD-9 battery pack / Canon CP-E4 battery pack
- a BFT (black foamie thing)
Related articles
- Black foamie thing – bounce flash modifier
- Video clip – Using the black foamie thing
- Bounce flash portrait – A consistent technique
- Bounce flash with and without the black foamie thing

Great pictures as usual neil, could you tell me what flash compensation you used?
Kind regards
Chris, the FEC wasn’t recorded in the EXIF data (that I could see).
But this isn’t much of a lack of information. If you shoot something like this, you’d check the camera’s LCD and then just jack the FEC up or down, according to taste. And for most compositions, it would be much the same. So it’s a quick process of check & adjust.
Sorry neil should have asked in my first post, in the second picture tou indivated a drop to f11 would have changed your DOF. Can i ask, why didnt you just drop the iso to say 400 to bring more of the backgrou d in and retain your f4 shallow dof?
Excuse me if i missed smthing obvious.
Kind regards
chris
Chris, my original text was clumsily phrased, but I’ve fixed it now. What I wanted was exactly *that* – the blown out background with just a hint of color. I didn’t want detail.
Hello Neil,
I have a Nikon d600 and it seems to me that it has a green tint over the automatic and measured white balance recorded by the camera. I read that both d800 and D4 have this green or purple tint. Is that true? Does your Nikon d4 have this green or purple tint? or else. DO you think that upgrading to nikon d800 will fix this tint issue?
A two-part reply:
1.) Nope, I haven’t noticed a green tint with my D4 images, whether the file or on the LCD.
2.) Stop shooting in JPG. You need to shoot in RAW.
The D800 is a wonderful camera, but it is crazy to change cameras because of the Auto WB is perceived between the two cameras. (Whether real or not.) Shoot in RAW, and adjust your files to taste. No problem.
Great post Neil! Thanks to you, I use this technique all the time to photograph my kids indoors. BUT, I find the result to be most pleasing in larger rooms. In small rooms, or when the subject is fairly close to the bounce surface, I get pretty dramatic light fall-off due to the inverse square law — not nearly as even as what you show in this post. I haven’t figured out how to avoid this in small rooms. Any thoughts you have are appreciated.
Regards,
Justin
Justin, it could be that you’re so close to the wall behind you, that you’re essentially still getting a small light source.
Hello Neil, thanks for the post. Was the image in the park lit with on camera fill?
Lighting in the park was with off camera flash, using the Lastolite 24×24 Ezybox softbox on a Manfrotto 1004BAC lightstand, triggered by PocketWizard TT5 radio slaves
Hello Neil,
I assume you did not gel your flash on the indoor pictures since it appears your ambient lighting is mostly daylight coming through the windows, correct?
No gel, since the room was filled with daylight.
Great portraits Neil as always!
Can you blog about your editing process from import of an image to export? All your images look very nice and have vibrant colors without affecting skin tones.
Neil,
I am sorry, but I gotta ask this question and beat the preverbial dead horse.
I know from listening to all of your presentations and reading all of your books that you immediately go to HSS for conditions that warrant a higher shutter speed and then everything else (aperture and ISO) hinges around that. That is easy to understand, I got it. :)
My question is with all of that aside, is there a particular aperture that you have found over the years that is the sharpest for most of the lenses that you have used (whether they were Canon or Nikon) that you resort to using when you want to go to the widest aperture that yields the sharpest image? I noted in most cases I see that you like to use f4. In a few cases I see that you have chosen wider around f3 per say.
Is this purely a personal choice, or have you found with single subjects f4 seems to yield the sharpest image and provides a DOF that ensures enough of that subject’s face is in focus per say?
I’ve always understood the lens is at its sharpest a couple of stops above its lowest, so say a 50mm f1.4 then at f2 it would be at its sharpest. And have been informed that is the nature with all lenses?
Jason,
That is what I thought too and figured the f4 may also be his aperture of choice for most situations that is a sweet spot for his style.
Hi Niel,
A great and timely post, as I have a baptism to cover in a couple of weeks. I will certainly take these ideas with me. Thanks.
Regarding post Nº 5 by Alex. Nikon introduced a firmware update for the D600 C:1.01 back in April, which is supposed to correct the white balance colors.
How is TTL affected by using the black foamie thing?
Sally, the TTL metering of the flash shouldn’t be affected by the black foamie thing. That’s how TTL works – the camera controls the amount of light, depending on the pre-flash.
Im blown away by your ambient settings..250-f4-800 ISO..That 24-70 must really bring in the light!! Or that was one really well lit room! My next lens!
There were windows to the side as well. Their living room is a corner room.
And I’m not sure if you’re being facetious about the light-gathering powers of the 24-70mm … but f/4 is f/4 for any lens (except for when lens manufacturers exaggerate.)