
Using off-camera flash on a photo shoot
Someone emailed me to ask a few technical details about this family photo session. How did you expose for the family photos? Was a soft-box used? Or did you expose for the shadows and use fill flash? For those who regularly follow the Tangents blog, the thought-process here should be familiar. Let’s take a walk through the process.
As described in the article, controlling bright daylight w/ direct off-camera flash, when trying to over-power the sun with flash, the best algorithm is usually:
– maximum flash sync speed,
– lowest ISO,
– find the aperture for your brightest area that you want to expose correctly for,
at that specific shutter speed and ISO.
Because the sun was hard, and high up already, the best start was to have their backs to the sun. This ensured no one would be squinting, and that I’d have a fighting chance with a single speedlight inside the Lastolite EZYBOX 24×24″ softbox (affiliate) as the light-source I could directly control.
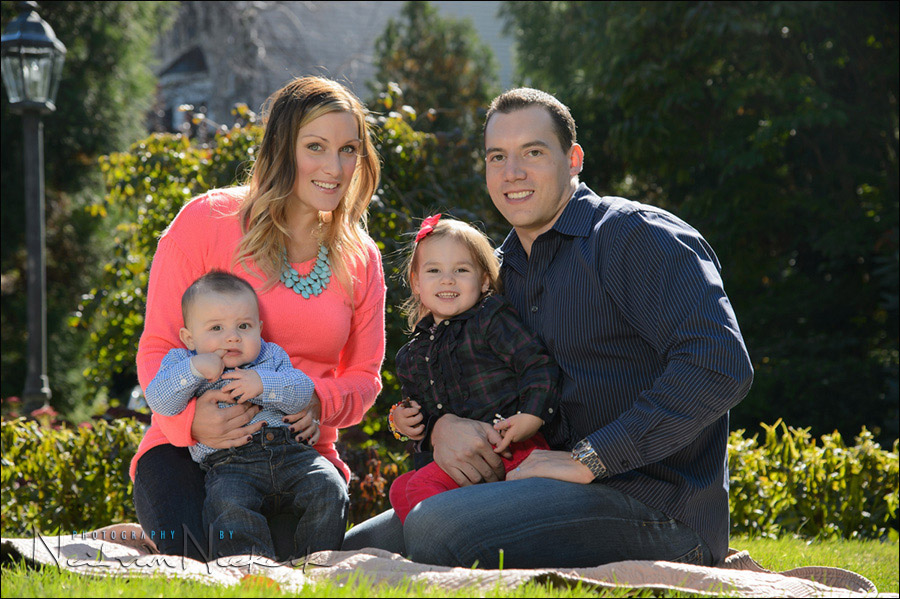
camera settings: 1/250 @ f/5.6 @ 100 ISO with manual flash, off-camera
I knew I’d have to squeeze every last photon out of the speedlight (through the softbox), to get enough light on them. I did want to use the softbox, so that the light would be more flattering and easier to deal with than hard direct flash.
Therefore, the speedlight was set to full output in manual mode. A quick recap: manual flash is controlled by 4 variables that have to be balanced for correct exposure.
However, I didn’t go through a rigorous metering process here. From experience, working with the same speedlight and softbox combo, I have a pretty good idea at what distance I should have my softbox for certain settings. It’s not a wild guess anymore. I placed the speedlight & softbox at a good distance, and then with a quick chimp of a test shot, I adjusted the distance until I had correct exposure for the required f/5.6 @ 100 ISO
But how did I know I needed f/5.6 @ 100 ISO ?
Let’s take it a step back again to a previous article: photography technique – taking photos in bright sunlight. Yes, this stuff comes up time and again! It’s all inter-connected. (And not just via hyperlinks on the site.)
As described there, when I have a back-lit subject in bright sunlight, then 1/250 @ f/4 @ 100 ISO is usually a pretty good short-cut. I am fairly close without having to wildly turn my camera dials while looking through the viewfinder at the meter. There’s a certain consistency here. Experience will help us out!
Knowing all this, I set f/5.6 as a start aperture. A few test shots without flash showed that I retained enough of the highlights. Cool. That’s the aperture then. My subjects would be under-exposed … but that’s why I brought along awesome and easy-to-use off-camera lighting.
Bam! Done.
This stuff becomes second-nature when you keep to a specific method.
These are techniques that are accessible to everyone.
Photo gear (or equivalents) used in this photo session
- Nikon D4
- Nikon 70-200mm f2.8 AF-S VR II / Canon EF 70-200mm f/2.8L IS II
- Lastolite EZYBOX 24×24″ softbox
or alternately, the Westcott Rapidbox – 26″ Octa Softbox - Nikon SB-910 Speedlight controlled by PocketWizard FlexTT5 & AC3 Controller
or alternately, the Canon 600EX-RT Speedlite controlled by Canon ST-E3 Transmitter
Related articles
- review: Lastolite Ezybox 24×24
- Controlling bright daylight w/ direct off-camera flash
- Maximum flash sync speed
- Manual flash vs TTL flash
- Photography technique – taking photos in harsh sunlight
Hi Neil, I see you’re using the 24-120 f4 VR lens. Would love to see a quick review of the lens from you. Is this lens going to replace your stalwart 24-70?
No, the Nikon 24-120 will never replace my 24-70 … but it is a viable option when I am doing a photo session where I don’t need f/2.8 and the bigger focal range means I don’t have to carry two cameras / two lenses.
ie, I use both lenses, depending on what is suitable.
Do you ever use the flash in ETTL for this type of shoot ?
If the setup is static, then manual flash is the best way to go, especially if the flash is more dominant than just mere fill-flash.
Here is an example where I used a similar setup, but the flash was fill-light with this off-camera flash setup.
Hi Neil, thanks again for the article! But I have two questions here:
1 – Did you choose the flash zoom? Is there any big difference in using it at its maximum (is the light less flattering)?
2 – Since you need a lot of flash power, did you use the inner baffle of the softbox in this cases?
Thank you a lot!
With this softbox, I usually zoom the flash to 35mm or 28mm. If I zoom too wide, then the fresnel has a greater chance of melting. If I zoom too tight, then the light isn’t spread enough in the softbox.
I don’t use the inner baffle when shooting in bright light, or when I need a higher frame rate.
Thank you for all you do for the photography community Neil!
Hello Neil,
great article …. well well!
Two questions:
1) If I wanted to use the flash as a fill light without softbox …. and then the exposure directly on the family …… what would have been the flash settings?
My thought is this:
If you use TTL flash (no BL) will put FEc flash -1.7 or -2.0 or so
If I use manual flash (guide number calculation / distance) look at the distance scale on my flash Sb 910 and regolola flash output slightly below this distance.
If you use flash AA (with prelampi) here ruler -1.7 -2.0 FEC flash Sb 910.
All right???
What position is best to use flash head?
Last thing …… I have the Nikon D4 and wonder in these cases it is best to use Matrix, Center-weighted, or spot metering to expose the family??
Neil thanks for your valuable contribution …… there is no one like you in the world that is dedicated and explain so well the world of photography.
I really hope one day to get to know you in person.
If you come in Italy will be a real pleasure.
Edy Trigona
Italian Genoa
Edy, yes, you have it correct there in how you’d approach the fill-flash.
The flash is in a softbox, pointing at the people.
I shoot in manual exposure mode on my camera, and therefore the actual metering pattern has no influence on the exposure.
Neil, I’m curious whether you see outdoor fill-flash in part as a corrective measure for color-balance issues.
Here’s what I suspect to be true: The faces of people backlit by the sun risk being a tad blue (shade – bluer than direct sunlight) unless one color-corrects to warm them (thereby making the full-daylight portions a tad yellow. Ungelled flash, which indoors can move things in a blue direction (because it’s blue compared to tungsten) has the possibility of a warming effect on shady (blue) outdoor skin-tones, and it would seem like the amount of flash (ratio of flash to ambient) affects the strength of that warming affect?
I don’t use a flash as a color correction tool on a photo shoot though. I use it to get better light on my subject.
But it would be a good idea to gel the flash with a 1/4 cut CTS (or CTO) like Strobist does, to remove the slight blue tint to the flash.
Neil,
Thanks for the great post. I recently did somthing very similar to this. I needed to take a group portrait (about 30 people) and the house wasnt large enough to hold them, so luckly the weather was nice. I took everyone outside and set them up in three rows (more or less). I chose 1/200 (i’ve been getting inconsistant results with 1/250 for some reason…) ISO 100 and f/5.6 for depth of field and exposure. I found a ladder and gained some height. At 24mm (crop sensor) I used a SB700 and Yongnuo 560II on a custom speedlight bar both at full power geled to 1/2 CTO through a white shoot through WB set to Flash. My lovely assistant (and wife) held the 7ft light stand above my head (so maybe 12 ft up?) and I nailed it on the first try! I tweeked slightly in LR4 for consistancy but I was Very happy with the result!
Neil,
I see that you stated that you started with an aperture of f5.6. Since I am the type that wants to use a narrow DOF whenever I can to blow the background out of focus, could I just use an ND filter instead?
You could use an ND filter to attain a shallower depth-of-field … but shallower than f/5.6 would be a problem for a group of 4 people.
After reviewing the article again I can see why you used f5.6 in this situation – you have two people spaced a little ways apart from each other. If I was to use my normal narrow DOF aperture (that I like to use), only one of them would end up being tack sharp and the other would not be.
HI Neil
Dumb Question , I may be a bit confused.
With the image of the family the background is in bright and sunny condition – How did you get an aperture of f5.6 @ 1/250
with out blowing out the background?
I thought it would be closer to f11 . Every time I shoot with a bright background my aperture is around f11-f13
Lou
The sun wasn’t entirely direct on the background … have a closer look – most of it is semi-shaded.
Hi Neil!
This is my first post in your Tangents, however i love all of them. I live in Denver and saw your capital shot on the steps, very nice. My questions is more of a basic one, since I am not a pro, but looking to get there… i have a flash that does HSS along with my 60D… I want to experiment in outdoor, sunny photos like these. Am I correct in thinking the process is:
1. Perhaps use M or P to expose for the sky and then adjust M to refelct those new settings…however… i want to use my flash in my 30cm softbox at roughly two stops under exposed to expose subject correctly. However, I am looking to get a light meter, so that brings me to step 2.
2. Meter subject to find out what my flash exposure is currently at so i know how to adjust it to be roughly 2 stops below. I could chimp, but this seems like an invaulable tool to have.
3. This method really applies to any outside condition wouldnt it, roughly? If i plan on usnig off camera flash.
Chuck … you’re trying to simplify a subject (flash photography) into one simple unifying do-all method. It doesn’t quite work that way, because very often, what you do, hinges on the words “it depends”.
Start here – Flash Photography tutorial – and see if it falls into place for you.