Tips on improving your photography technique
When I posted the article with tips and advice for second-shooters, it generated a lot of conversation in the comments. I want to follow it up with a related article on how to improve your technique as a photographer. It is general advice for any photographer. And it is especially pertinent if you’re a second photographer / 2nd shooter.
Camera technique can be distilled into a few elements:
– composition & framing, including lens choice
– timing of the photograph, ie that moment
– choice of aperture (for depth of field)
– choice of shutter speed (for subject movement)
– exposure metering, (which obviously ties in with aperture & shutter speed)
That’s it! There’s not much more we can do with our cameras at the time of exposure. Sure, we can get fancy and zoom during exposure and do double-exposures and so on. But essentially, that is it.
This list of a few simple elements can become very complex, very quickly … especially when we’re on a photo shoot, or photographing an event. When the pressure is on, our fingers need to move over our camera’s controls without us having to really think about it. Instinct and finger-memory need to kick in when we’re under pressure. We have to know our cameras!
All of which brings us to this topic – tightening up your technique. Over the years I have used numerous assistants and 2nd photographers. When their work falls down, it is usually on a few technical points which are actually easily remedied.
It most often it boils down to shutter speed / aperture / ISO choices, and how they inter-relate.
1.) Shutter speeds are too slow, causing camera shake / subject movement
Too many photographers still cling to the idea that 1/60th is a hand-holdable shutter speed. And when they find out it isn’t, they go oh .. 1/125th
Well, 1/125th is still too slow for a 24-70mm lens when you don’t consistently shoot at only the widest focal length. For me the ideal shutter speed in not-so-low light, is maximum sync speed. 1/200 or 1/250th.
It is that sweet spot again with regards to balancing flash with bright light. But even when I am only using available light, 1/200 or 1/250 is a better starting point than 1/60 or 1/125. Less chance of camera shake and subject movement. If you’re using a stabilized lens, it will be sharper.
To get sharper photographs, use faster shutter speeds to avoid camera shake and unnecessary subject movement. it really is that straight-forward. Take your shutter speeds higher. Definitely don’t get stuck on the idea that 1/60th is enough.
I do take shutter speeds lower when it makes sense. But generally, too slow shutter speeds should be avoided unless you can accommodate this effectively in your shooting technique right then.
If you’re using Aperture priority or Program mode, you have to check your shutter speed. A problem here is that cameras like the Canon 5D and Canon 5D mark II have metering displays which are impossible to see in bright light.
2.) Choice of aperture
It’s become trendy to shoot at wide apertures f/2.8 with zooms or f/1.4 with primes, regardless of whether this is a sensible choice. I’ve even seen people grand-standing about this on forums, “oh, there are other apertures than f/1.2? “, or, “Life begins at f/1.2”, and other such ridiculous statements. This all just translates as bad advice. Your aperture has to be appropriate for your subject for enough depth of field.
I will say this again for emphasis: your aperture has to be appropriate for your subject, for enough depth of field.
DoF depends on a number of factors -not just your choice of aperture, but also your distance to your subject; sensor size and how large your image will be used. You really need to study a good book with diagrams to get this down pat.
I recently had a photographer complain to me about a lens or camera being soft. The edges of images were soft. When I had a look at example images, I noticed the EXIF data said the aperture was f/2.8 for all the photos. She had been photographing people in small groups, and the people on the edge of the frame were out of focus.
You can not photograph groups of people at f/2.8 .. even more so for wider apertures.
If you insist on using f/2.8 for groups of people, you would have to be meticulous to get everyone in a line, to be in the same plane of focus. It’s just much easier to get more depth-of-field with a smaller aperture. Some lenses have a curvature to the plane of focus, so to deal with that, you’d have to use a smaller aperture just to be sure everything on the edges of the frame that needs to be in focus, is indeed in focus.
3.) Choice of ISO settings
Related with the tendency to use shutter speeds that are too slow, and apertures that aren’t small enough, is the hesitance to use higher ISO settings. For example, shooting at 100 ISO when even 400 ISO would’ve given you the shutter speed / aperture combination that you need. Raise your ISO higher to where you get shutter speeds and apertures which are more sensible.
Remember, it is easier to fix high ISO noise, than it is to fix image softness due to camera shake and lack of depth-of-field.
So this are the three main problems resulting in soft images – and it comes down to the very basics of photography. Aperture / Shutter speed / ISO combination.
I will make this grand statement that if you don’t understand how those three elements inter-relate, or if you don’t understand what is a proper shutter speed or aperture to use, then you’re not ready to shoot professionally. Not even as a 2nd shooter. An event where someone is paying you and relying on you, isn’t the time to learn the basics of how your camera works, and the basics of photography. Homework needs to be done at home. NOT on a paid gig.
4.) Consistency of exposure
This mostly relates to shooting in an automatic mode. And I would agree that shooting in manual exposure mode is tough when you have clouds rapidly moving in and out. (I’m thinking of the weather in Ireland here, as an example.) But when your light is consistent, you’re making your post-processing a more involved task if you shoot in anything but manual exposure mode.
When shooting in an auto mode, you do need to check your settings constantly – not too slow a shutter speed, for example. You also have to check your exposure compensation to make sure you’re getting correct exposure.
If your exposures are inconsistent, you will really hamper your workflow. Instead of editing groups of images for exposure and WB, you now end up having to edit individual images. That is just time-consuming. Unnecessarily so.
While lack of consistency in exposure is a problem for post-production workflow, a bigger problem is under-exposure. Under-exposure at 100 ISO isn’t an issue. But if you consistently under-expose your images when shooting at 1600 ISO (or higher), then you have a problem that you have to counter-act.
I’ve seen photographers shrug off consistent under-exposure, as if this somehow is out of their control and just something that their camera and flash does. Incomprehensible!
You can’t simply shrug your shoulders.
You have to control your camera settings.
You have to control your flash exposure.
Dial more FEC. Change TTL modes. Change from TTL to manual flash. Do something! You’re not just a passenger to what your camera decides.
Summary
So all this comes back to the very basics of photography. Perhaps easy enough to understand when not working under pressure, but you have to be familiar with your camera’s controls and settings, and with how Aperture / Shutter Speed / ISO inter-relate, that you can adapt your technique and change your settings immediately, as is needed during a shoot.
This needs practice. Lots of practice, and lots of time with your fingers on the controls and dials. Finger-memory, and an instinctive understanding of the essential elements of photography.
Further advice
- Look at the edges of your frame! Don’t shoot too tight or too wide. Leave enough space around your subjects head and hands. Leave room for your subject and scene to breathe.
- Leave enough space for that inevitable brutal 8×10 crop.
- Don’t tilt the camera out of force of habit. Tilting your camera has to make sense in terms of your subject and composition.
- In bounce flash photography, the problem usually arises in bouncing the flash too high, so that there is too much of shadow under the eyes. Or bouncing to too extreme an angle to the side so that no (reflected) light hits your subjects’ eyes.
- Take your camera off motor drive! Shoot in single frame drive. Time your shots. Breathe. Look! Don’t machine gun your shots unless of course, it is necessary for that particular moment. Time your images. Look for the images that matter. I knew a photographer who would fill his entire buffer in a burst of images of the same subject – even detail images where nothing changes! Eight frames that were exactly the same. And that is just redundant.
- If your flash isn’t giving you enough power, then raise your FEC (or increase your manual output). Of course, this is with the assumption that you’re within range of what your flash is capable of delivering. So while in theory, your TTL flash should give you the same exposure, whether you’re pointing your flash directly forward, or bouncing it .. in practice though, there could very well be a difference in output. Don’t just shrug it off … accept the idea that you may have to dial in a default FEC whenever you bounce flash. Adapt to your camera’s system. Figure it out. You’re in control!
Canon Evaluative vs Average E-TTL flash
Nikon TTL vs TTL BL
- Learn how to use your histogram to determine exposure.
It all comes down to this – get your act together! Practice, practice, practice.
No amount of talking about your “passion for photography” is worth anything if you can’t deliver consistently on the very basics of photographic technique.
Related articles
- Tips & advice for second shooting weddings
- Improving your photo shoot workflow
- Shutter speed, aperture and ISO
- Will flash freeze movement at slow shutter speeds?
- Using faster shutter speeds for sharper photos
- Using slow shutter speeds with a hand-held camera
- Working with higher ISO settings
- Tilted compositions / Dutch tilt
- Composition for full-length portraits – step back!
- Using the histogram to determine exposure
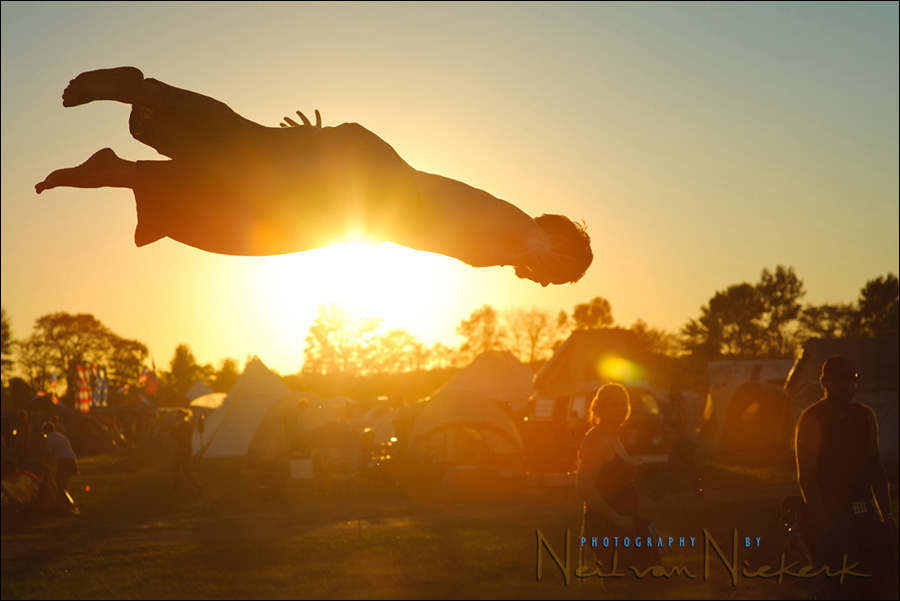
About the photograph at the top
It is a photo from a PDF event where I photographed fire performers. Earlier in the afternoon I noticed some event-goers taking turns at a trampoline. I decided to shoot into the sun for dramatic effect .. but also to make the image more anonymous and therefore more about the feel of the day. More about the mood than a recognizable portrait. Shooting at high shutter speeds, I was able to freeze the action completely, and caught this guy in mid-tumble … as if mysteriously floating by. Slightly surreal.
- 1/2000 @ f8 @ 200 ISO (no flash)
- Nikon D3
- Nikon AF-S 85mm f/1.4G /equivalent Canon EF 85mm f/1.2L II USM
‘DoF depends on a number of factors -not just your choice of aperture, but also your distance to your subject; sensor size and how large your image will be used. You really need to study a good book with diagrams to get this down pat.’
what books would you recommend?
Thank you for all the tips!
very well explained Neil… so much vital advise in a simple and easy to understand article….thank you so much!
Thank you Neil. Very helpful information. Reading your blog for almost two years now helped me become better and confident when taking pictures. Thank you.
I read a book titled “Applied Depth of Field” by Alfred A. Blaker. It helped me a lot when I was first learning. It gets very technical, but if you can get through it DOF will become easy to understand.
Neil, thanks so much for this post! And it is so true about 1/60th being too slow a shutter speed. When I was in school, the teachers always told us to double our focal length and then some to prevent blurry images. So if you’re using a 50mm lens then your slowest shutter speed should be 1/125.
Hi Neil,
Great post! As a highly passionate photographer (and just starting to go pro now), I’ve spent enough time with my cameras to operate them all instinctively and efficiently and it shocks me how some professional photographers don’t know what they’re doing. I was in small town covering a dance festival and the local newspaper photographer showed up with his mighty Canon 1D or 1Ds. Had a bit of a chat, figuring a guy who could land that camera must be pretty good. But when I asked him about how his camera handles, he told me he’s still working it out (understandable, it took me a few weeks to really get to know each of my cameras). No… He’d just worked out what the ISO button did… My jaw dropped! I showed him some shots on my camera’s LCD and he said he’d come by that night to get some of the performances. He didn’t show up and sent me an email later asking to use some of my photos.
As far as I’m concerned, a professional should know his gear inside out. That’s why you’re a professional, not some chump with an expensive camera.
great read! i love this line “No amount of talking about your “passion for photography” is worth anything if you can’t deliver consistently on the very basics of photographic technique”
I have read most of john shaw’s book….and found them excellent books to learn. I can highly recommend his books. Although written for nature photographer the principles are the same in any genre.
Love reading your blog posts, I didn’t realise I spent 4hours going through old blog posts. haha
As a solo wedding shooter, I do first and second-shooter duties on my own. Beyond the technical skills needed to create a good, solid image, one of the best things you can do as a second shooter is learn to see the details, stories, and moments that the first shooter may not have time to get. A redundant shot of a group portrait may help if your first shooter didn’t notice a blinker in his, but usually creating an image of the the other guests interacting behind the scenes is going to be far more memorable and valuable. Take advantage of the freedom you have in not needing to get “the shot” to tell the other, smaller stories going on, and your first shooter will love you for it.
Neil – an excellent post. It’s so refreshing to see someone give some good solid practical advice on this subject. I have done quite a bit of second shooting in the past and totally agree with all you have said. My only wish is that I could have seen something like this post right when I was starting out.
One of the factors you mention is ‘Timing of the photograph i.e. the moment’ and this is something I think you learn through a combination of experience, practice and knowledge. In many respects I think this single factor is what can really separate the work of the hired photographer from the casual shot taken by a guest.
Thanks for all you great posts and sharing your knowledge and skills with the wider photographic community.
I can not thank you enough for all this great shared knwoledge in Tangents.
My photography has evolved in a good way since I read Tangents and your books.
Thank you very much Mr. Neil Van.
Really very much informative for new entrants in photography.