Top 5 tips on shooting engagement photo sessions
I love doing engagement photo sessions because this allows me the opportunity to connect with my clients before their big day. Even more so, in that there’s much less pressure and haste during this photo session than there’d be during the wedding day.
The engagement photo session is also a good opportunity to impress your clients with your photography. They did sign with you because they liked your style, but it’s even better when they love the photos you took of them. Time to shine.
Their friends and family will also be impressed – and this helps me when I walk into the bride’s house on the wedding day. Instead of being “the photographer”, and a rather anonymous one, I now get this response from the bridesmaids when I start: “Oh, you’re the photographer that took those photos! We love them! They are amazing!” With that then, I’ve already won over a large part of the bridal party, and I’ll have their friendly cooperation.
Also, on the wedding day, there is a great chance that things will start to run late. However, the wedding reception will start on time. So the time that gets compressed, will inevitably be the time you have as a photographer. It just makes your life easier then, if the couple has already spent time with you and have a feel for how to work with you during the romantic portrait session, and photographs of the bridal party.
There are so many advantages to doing the engagement photo session. Here are my top 5 tips for a successful photo session with your clients …
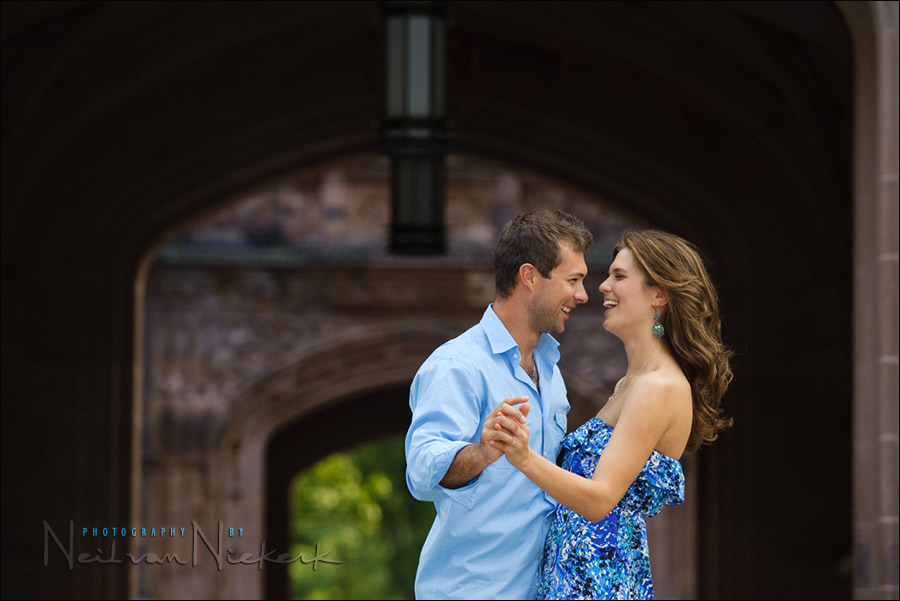
1. Chat with your clients
Don’t be too involved with the camera gear and lighting. It is imperative that you keep the energy going and keep their interest. The most obvious point of connection – talk about their wedding day. Ask how their plans are coming along. Ask about the details. Keep it chatty. Be personable.
The experience of the photo session with you, will be as important as the actual photos. Keep it fun.
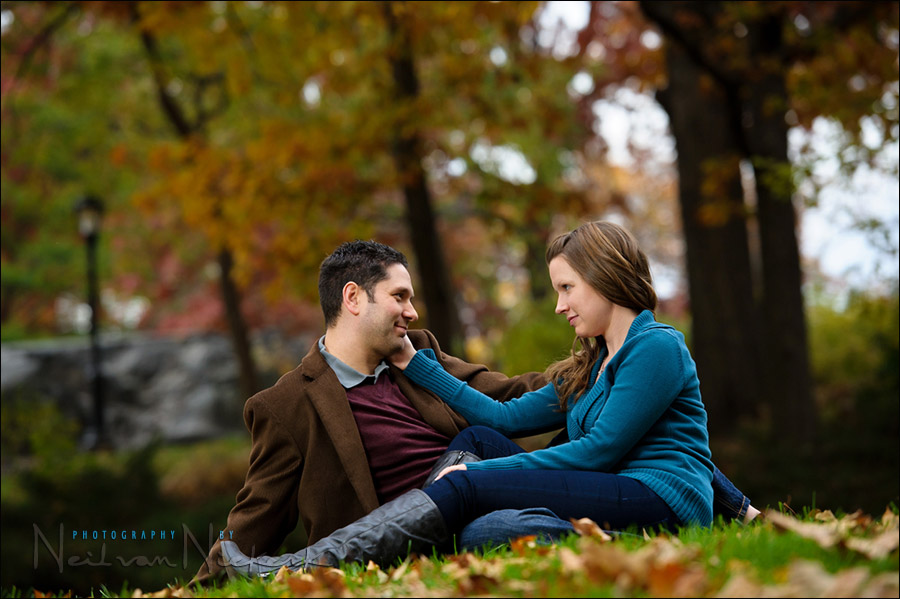
- 1/250 @ f/5.6 @ 640 ISO
- Nikon 24-120mm f/4 VR / Canon EF 24-105mm f/4L IS
2. Photo gear – keep it simple
I often work with just the Nikon 24-120mm f/4 VR (affiliate) so that I can work with just one camera body and one lens. The equivalent Canon EF 24-105mm f/4L IS (affiliate), is just as versatile a lens.
I do have a back-up body and lens in my camera bag over my shoulder, or locked in my car nearby.
Cameras and lenses *will* go faulty. Entropy will have its way. For example, I’ve had a Nikon D3 body have a shutter fail on me during a photo session in New York. When that happens, the last thing you want is for your clients, who took the time to look good and dress smartly (and have paid for fuel, and parking, etc), to be disappointed because your camera went down. No apologies will cover your embarrassment, or erase the notion that you might fail in the same way on the wedding day. So even if you don’t have your back-up gear on your person, (like you might at the wedding itself), you should have backup gear nearby, easily accessible. Not negotiable.
But still, keep it simple. The more you are laden down with equipment, the less mobile you will be … and the less likely you will be to be bothered trying different angles and ideas. It really does work that way – lugging unnecessary equipment with you, dampens creativity.
Instead of just the one general-purpose lens like the 24-120 / 24-105, I might use the 70-200mm f2.8 exclusively. This really is my work-horse lens for engagement photo sessions. (The wider lens will then be in a bag on my shoulder.)
- 1/250 @ f/3.5 @ 640 ISO
- Nikon 70-200mm f2.8 AF-S VR II / Canon EF 70-200mm f/2.8L IS II
The longer lens also flattens the perspective more, and thereby helps isolate the couple. It helps give a pleasantly defocused background. And by standing back, you allow the couple to interact with each other, and be more snuggly with each other than with you riiiight there close to them.
The longer lens also allows you to easily shoot between / through stuff. Finding a natural frame is a handy compositional device.
- 1/1000 @ f/5 @ 200 ISO
- Nikon 70-200mm f2.8 AF-S VR II / Canon EF 70-200mm f/2.8L IS II / lens used at @ 120mm
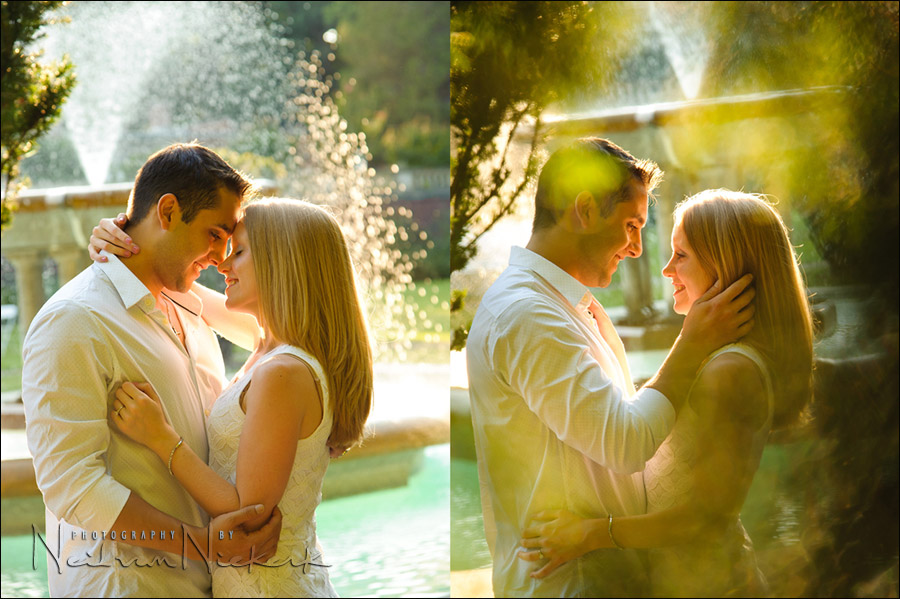
3. Light & lighting
I quite often work with just the available light, with maybe a hint of fill-flash. However, off-camera flash makes life easier – you have studio quality lighting pretty much anywhere.
My first approach here is not to fight the ambient light. It’s just going to make your life so much tougher (all the way to when you edit the images), if you randomly position your couple where you have hard sunlight falling across their face.
So you have to keep your ambient light in consideration.
• Pose them with their back to the sun if the light is hard.
• Look at the direction that the available light is coming in from.
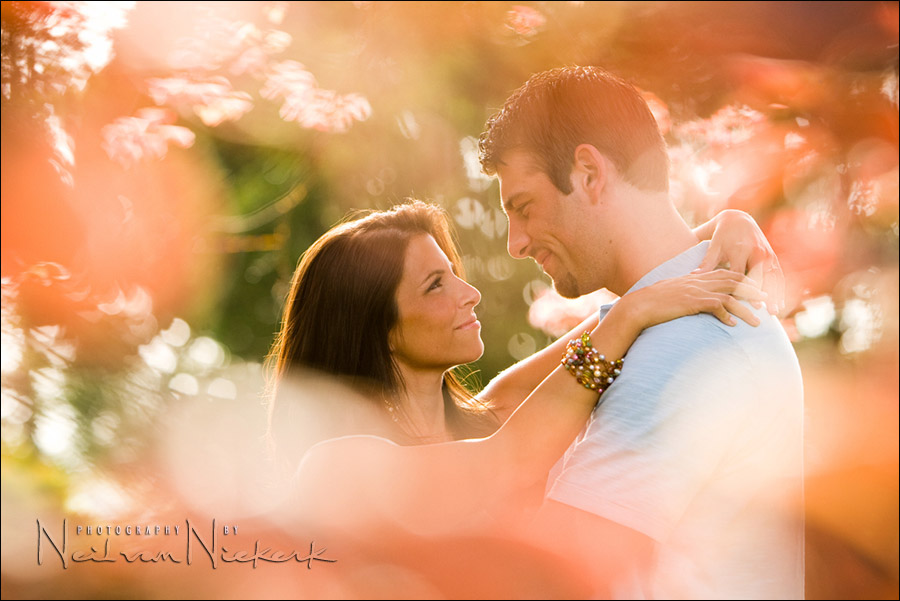
• Use lens flare for effect.
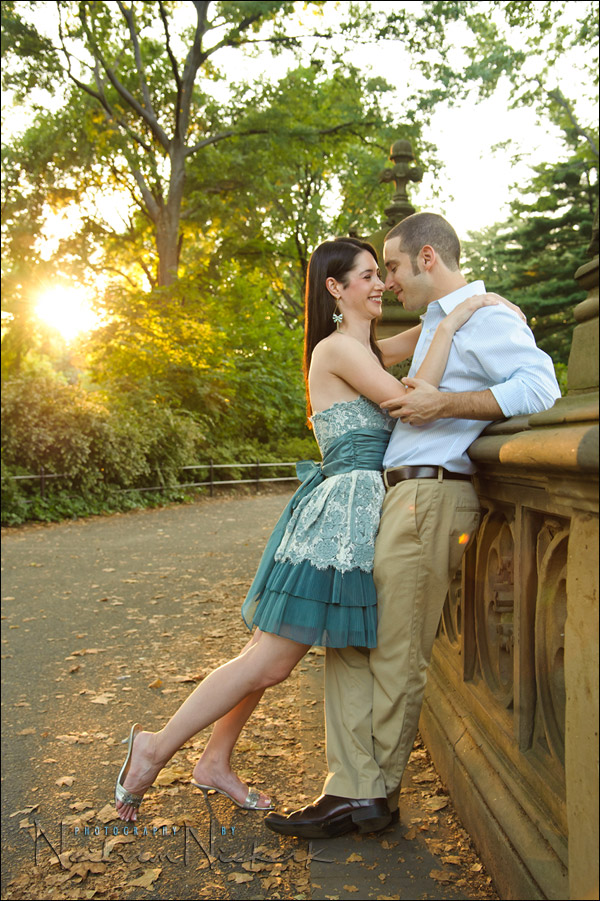
- 1/100 @ f/5.6 @ 1250 ISO
- Nikon 24-120mm f/4 VR / Canon EF 24-105mm f/4L IS / lens used @ 40mm
Shooting against the sun, with open light behind me, gave beautiful lighting on the couple. No flash needed. It becomes important to recognize when you have beautiful light, and need not do anything else.
Here are more photos of Alli & Scott’s photo session in Central Park, New York. The images shown in that linked post were all available light, or with the tiniest touch of on-camera TTL fill-flash. But I also shot against the sunlight a lot of the times, getting lovely back-lighting, or using the lens flare for effect.
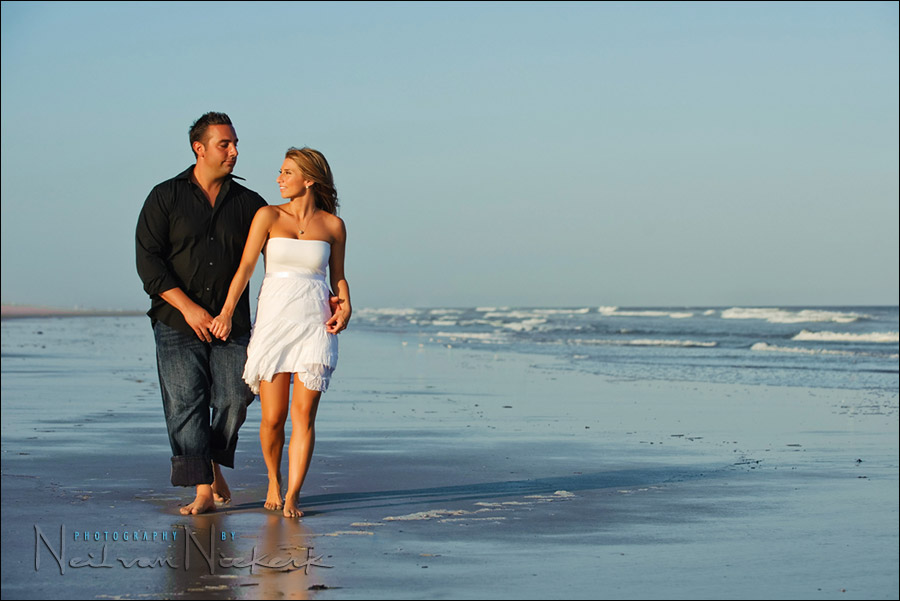
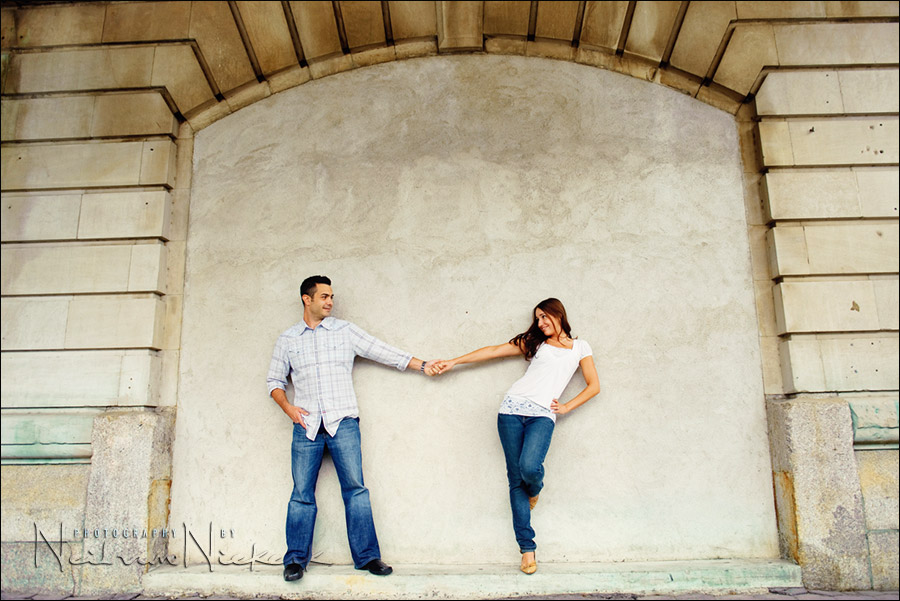
Sometimes it works to just let let the background blow out completely. With this image, the background was the New Jersey Shore, but it is entirely lost in the bright light.
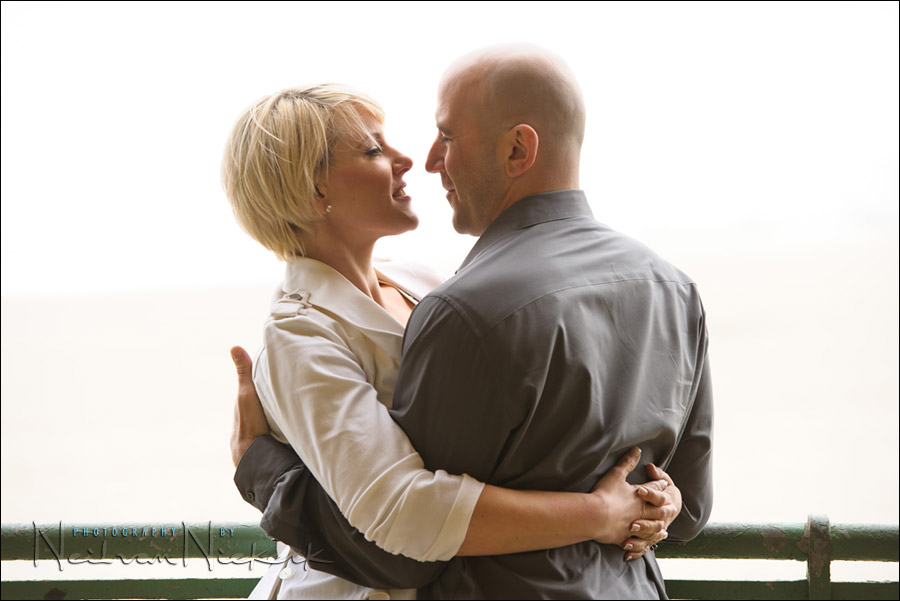
- 1/250 @ f/5.6 @ 200 ISO
- Nikon 70-200mm f2.8 AF-S VR II / Canon EF 70-200mm f/2.8L IS II / lens used at @ 120mm
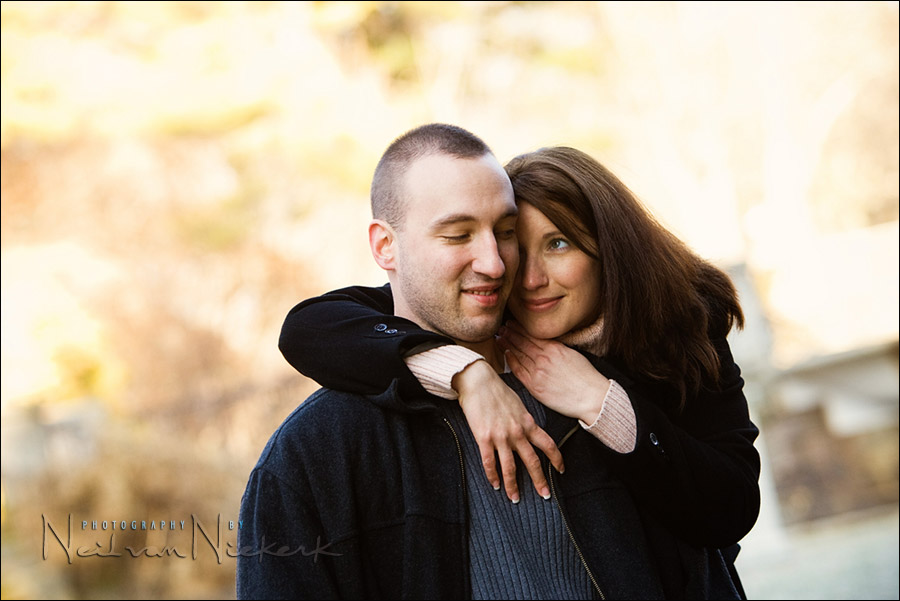
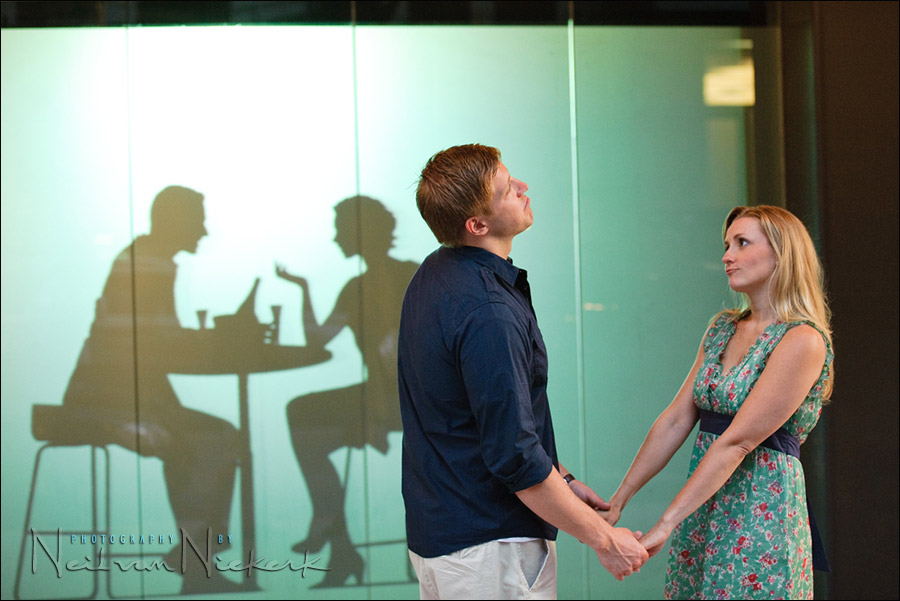
4. Posing – start with one person, and then add the other
When I see a cool spot or a nice background, and I know I’d like to photograph the couple there, then it is a simpler process to pose just one person first. Start with either the the girl or the guy, and then add the other person. If you already have an idea how you’d like to pose both of them, then great. But if you’re not sure, then start with the one person first .. then add the other.
Here I used the available light coming in through the window. I did make sure Julie & Kenny were posed into the light. In terms of posing, I first placed him, and then ask her to lean back into him. This way she was facing the light.
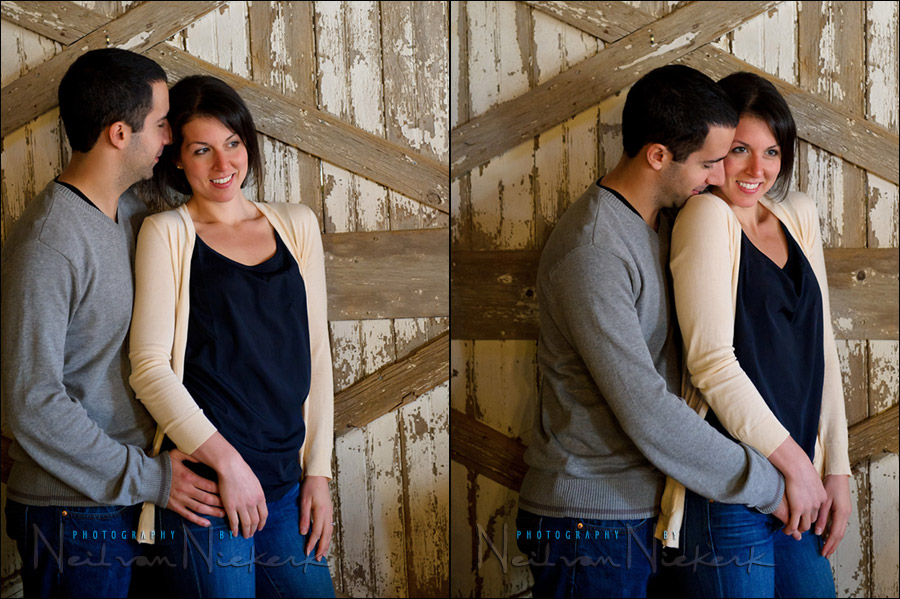
- 1/125 @ f/3.2 @ 2500 ISO
- Nikon 24-70mm f2.8G AF-S / Canon 24-70mm f/2.8L II / lens used @ 60mm
Here again, I had Kenny sit down first, and then had Julie join him. The posing is very “loose” and I don’t try to force anything that would make anyone physically uncomfortable. My advice is, if it feels uncomfortable, it usually looks uncomfortable.
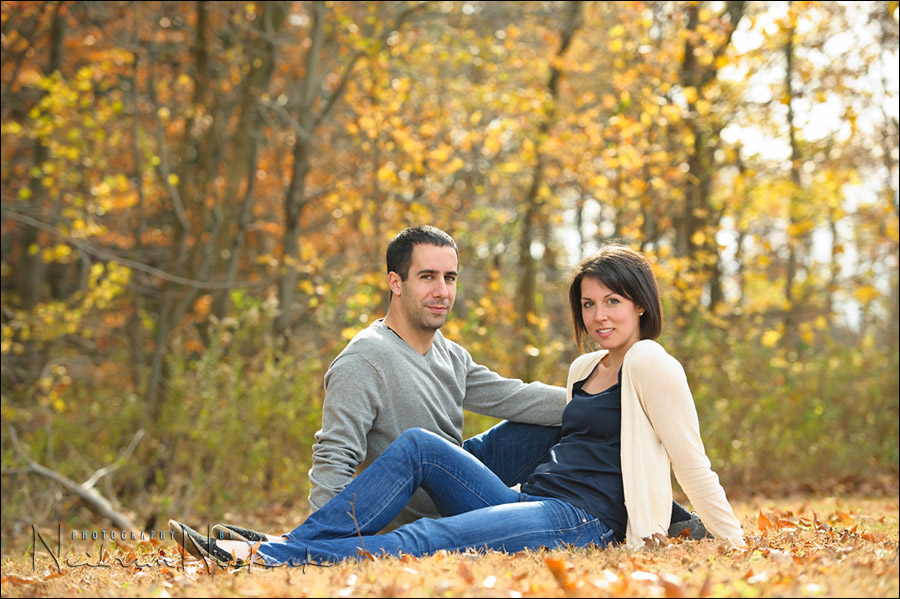
- 1/250 @ f/4 @ 200 ISO
- Nikon 70-200mm f2.8 AF-S VR II / Canon EF 70-200mm f/2.8L IS II / lens used @ 120mm
- off camera fill-flash with a speedlight in a softbox
It is a simple arrangement, but it works, and can always be adjusted in terms of how their hands are placed on each other’s arms.
The photograph below also appeared in the article on making your images pop – through choice of lens.
- 1/250 @ f/4 @ 640 ISO
- Nikon 70-200mm f2.8 AF-S VR II / Canon EF 70-200mm f/2.8L IS II / @ 120mm
- off camera fill-flash with a speedlight in a softbox

- 1/160 @ f/5.6 @ 800 ISO
- Nikon 24-120mm f/4 VR / Canon EF 24-105mm f/4L IS / lens used @ 50mm
- off camera fill-flash with a speedlight in a softbox
If you have a couple that would enjoy a more stylized pose, then definitely run with it. But even here, Michael is anchoring Jessica’s movements.
- 1/250 @ f/4.5 @ 400 ISO
- Nikon 24-70mm f2.8G AF-S / Canon 24-70mm f/2.8L II / lens used @ 28mm
More articles on posing people:
- Posing normal, everyday people for portraits
- The next step – going beyond just posing people
- Tips on posing people / working with a model
- Wedding photography – tips on posing – asymmetry
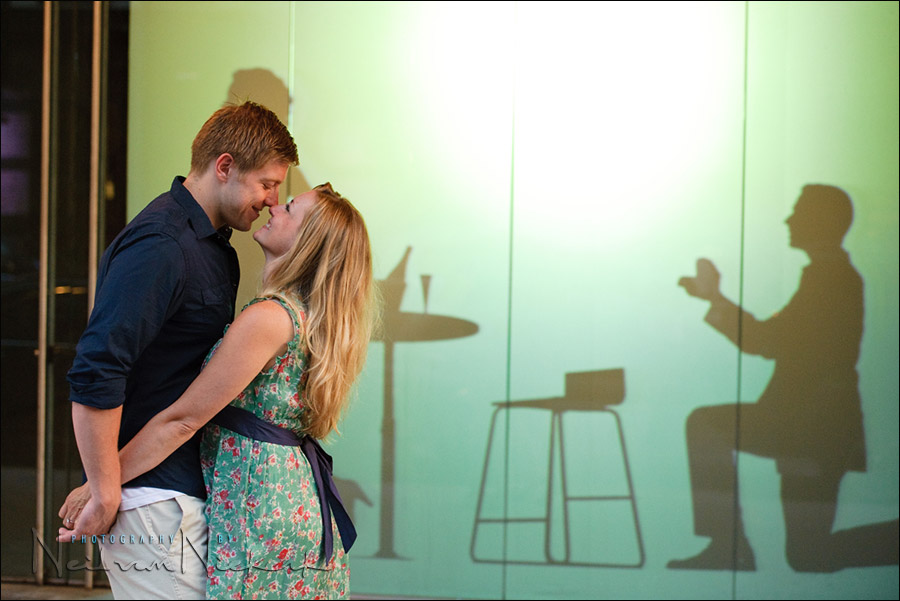
5. Capture their relationship
It really is all about them, and how they are with each other. Try to capture that. The spark. The way they interact. A longer lens helps with this.
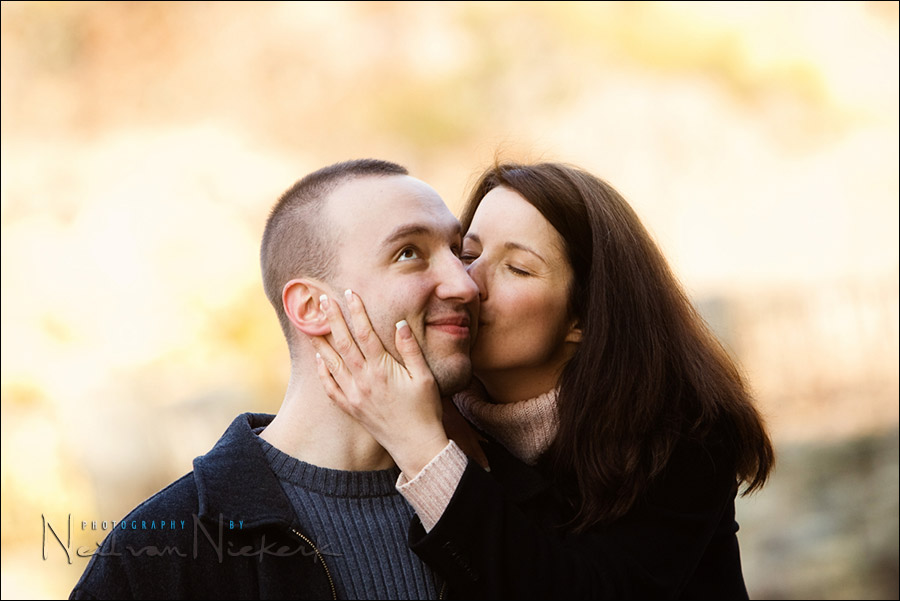
I might loosely pose the couple, and then ask them to talk to each other; gentle kisses (no pouty lip kisses!; gentle nuzzzling .. but mostly talking to each other is a good place to start. They’ll usually take it from there, and then you have to only guide them a little bit, eg, don’t tilt your head too much over to the camera; and so on.
Let them enjoy each other’s company – photograph their relationship.
Related articles:
- The flow of a photo session (Laura & Todd)
- Making your images pop through choice of lens (Lindsay & Chris)
- Using lens flare for effect (Alli & Scott)
- Using the available light (Kristy & Tom)
- Working with a sequence of images (Jenny & Alex)
- Taking photos under the mid-day sun (Nicole & Peter)
- Posing normal, everyday people for portraits
- The next step – going beyond just posing people
- Tips on posing – asymmetry
- Engagement photo sessions – New York / New Jersey photographer
These are great tips. Working with the couple is something I’m constantly trying to improve on and I particularly like your tip of posing one person first and then moving the other in.
Amazing tips, Neil, lesson learned! I must say I made a couple session last month and have used several of your advices through the blog, and the one I liked the most was the choice of lens (I used a 70-200mm f/2.8). Would never think about it before reading your blog.
Thanks again!
Fantastic article as always Neil. Good, solid advice. Looking forward to your next book!
Neil, you are so helpful, I really appreciate the time you take to write these articles. When I am trying to explain things to other photographers, you are the go-to website. Your photos are inspirational, lighting is always spot on. Just wanted to say thank you!
As always, Neil, you have once again provided valuable advice. It was great to read through it and compare notes as I have just started doing engagement shoots. I was surprised to find that we are more or less on the same page on a number of things.
I have now realised not to carry too much kit with me and just stick with one body and lens (I so want the Nikon 24-120) during the engagement shoot. And, to let them enjoy themselves.
Many thanks,
Gary Smith
I recognize the ‘All Saints’ background from the meat packing district! When I walked past it a few weeks ago (I was in the neighbourhood because photographer David Bergman was speaking at the Apple store), I thought that it’d make a good background for a portrait :) Nice work, Neil!
I noticed that you shot with the new 5D Mark3. How is it compared to the D3s in high iso? I know that probably you didn´t test it a lot but I just wanted some preliminary idea.
Thanks
Hi Eduardo, you should read it again. Neil wrote 1D, no 5D.
Neil
Greetings
Would you put the Nikon 24-120 F4 on your “highly recommended” list?
You’re not shooting your 85 or 200 much… Or so it seems…
I am too very attached to my 70-200 but i’m also trying to break “habits” and work with something else, especially when that is a really wide 85mm.
What are your thoughts on that ?
Cheers!
Bogdan
The 70-200mm f/2.8 is a much more versatile lens than any one prime lens. Simple as that.
Lots of great tips again.
Thanks
Love this post, Neil! Thank you.
I’m doing a couple of engagement sessions this week so thanks for the heads up. Great article.
I really enjoyed tip #4. Posing one and then adding the other is something I will definitely start incorporating into my sessions. Thanks!!
Great tips … i have found them extremely helpful. thank you.
I still find myself coming back to these tips :)
Thanks for the tips! I’ll be shooting my first prenup .. this really helps!
Great practical tips. Thanks.
Great to see this excellent article re-posted Neil
Fantastic article. My favorite in a while.
Under “3. Light & Lighting”, why is the (first) image not blown out by light at those settings [ 1/100 @ f/5.6 @ 1250 ISO] while shooting toward the sun? To me it looks like there was even fill flash. Shooting toward the sun I would expect at 1/100 a much lower ISO And/or stomped down aperture. What am I missing?
Thanks much in advance and for the article, too.
The sunlight was filtered by the trees, and we are looking at their shadow side, not the side lit by the sun.
So that’s what the settings were.
great tips Neil, engagement sessions are some of my favorite time with my couples and of course the images are the icing on the cake, I like what you said about using just one lens and keeping it simple. I normally don’t go that route, but I might try it on an upcoming session :)
Hi! I would just like to ask whether you set your lens on AF or MF whenever you work on your engagement shoots..
Thanks!
Auto-focus. I simply can’t match the speed and accuracy while focusing manually. It is also far too slow to shoot with manual focus when couples are moving and dancing.
Hi Neil,
Fantastic tips, as always! Many thanks! Just got my Nikon 24-120mm f4, and I’m loving it! Great ideas, especially love the last two images.
Appreciate it!
Alina