Direct off-camera flash as fill-light
I really like using a medium-sized softbox when photographing portraits. A softbox allows me to get soft, directional light pretty much anywhere. The most recent example I showed here, was Lucia and Alvin’s wedding in Central Park, New York. I do make it easier for myself when using off-camera flash for photo sessions on location – I pick my battles. I don’t try to make everything work. With a photo session where I can control the light and background and setting for my subjects, I can make it easier for myself by not choosing tough lighting scenarios.
With Amy and Clark’s photo session, I brought along my usual set of gear … but left the Lastolite softbox behind. I brought the Lastolite bracket along, and the radio transmitters. Everything but the actual diffusion box to fit over the speedlight. With that, I had to slightly change how I usually work to still get great results that look like my usual style.

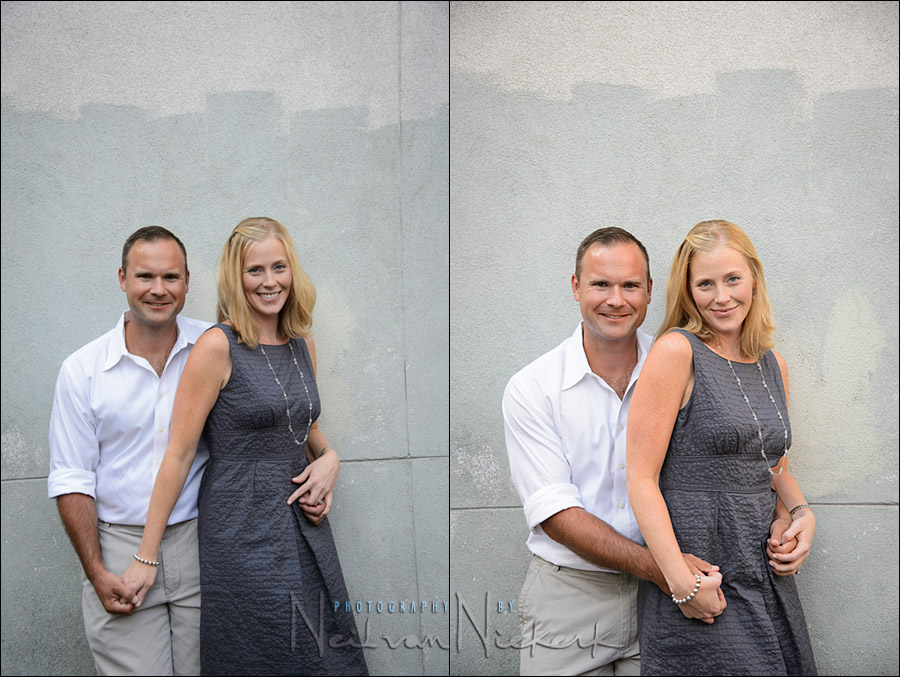
These two test images were shot at exactly the same camera settings, and same WB setting in RAW. Yet the one pops. The colors are more bold, and there aren’t such deep shadows on their faces. Yet … it isn’t noticeable that my off-camera flash wasn’t diffused. These two photos serve as comparison between just the available light, and augmented with un-diffused off-camera flash. Nothing else changed, but the flash added.
- camera settings: 1/250 @ f5.6 @ 500 ISO ..
- TTL flash at around -1 or -2EV
While bare (ie, undiffused) flash can look good, giving a photo a dramatic quality, it is less easy to pull off great light with hard flash, than with a softbox. A softbox is a forgiving light source, which makes it easy to use. You have much more freedom in where you position the light. Conversely, with light from a softbox, your subject has a lot more room to move, without the light giving an unflattering shadow. With an undiffused speedlight, you have to be more careful how you position the light and pose your subjects.
However, with forgetting the softbox, I had no choice but to work with the bare, un-diffused flash off-camera. And as mentioned, it was important to me that the photos from this photo session look very much like my work – soft light; relaxed posing; clean compositions. I wanted the light to look quite natural, and not “flashy”.
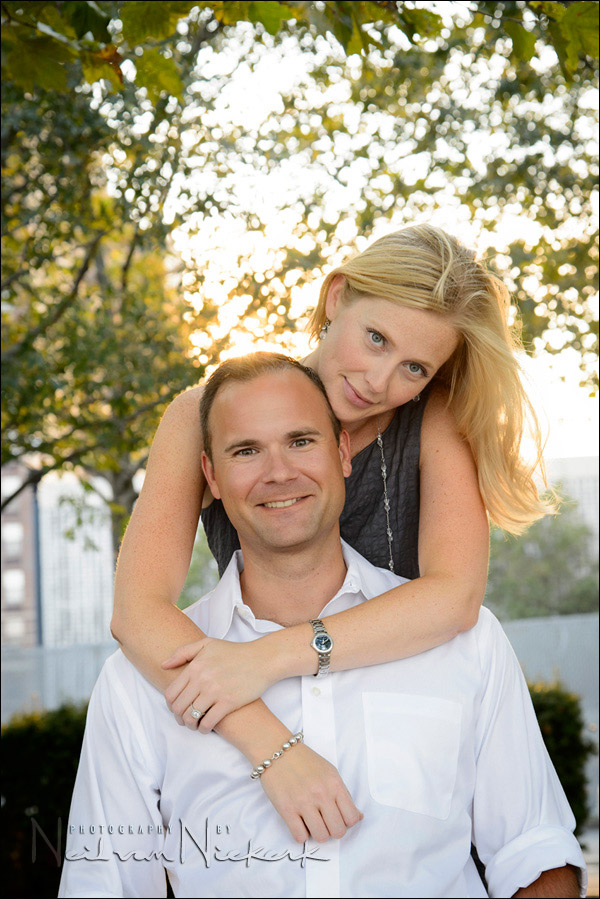
The approach then was to find spots to take photos, where I didn’t have to battle hard sun and fix that with a lot of flash. The available light had to be good, and only if necessary, augment it with off-camera flash. The image at the top is an example of this – bare flash, used off-camera, to give a natural looking fill light.
- Camera settings for the opening image: 1/200 @ f/5.6 @ 800 ISO
- TTL flash at around -1 or -2EV

- camera settings: 1/250 @ f5.6 @ 500 ISO.
- TTL flash at around -1 or -2EV
Photo gear (or equivalents) used during this photo session
- Nikon D4
- Nikon 24-120mm f/4 VR / Canon EF 24-105mm f/4L IS
- Nikon SB-910 Speedlight controlled by PocketWizard FlexTT5 & AC3 Controller
or alternately, the Canon 600EX-RT Speedlite controlled by Canon ST-E3 Transmitter
Summary
With this I wanted to show that with a minor tweak in technique, I was able to deliver images that looked consistent with my usual style. Instead of the speedlight in a softbox, I used direct off-camera flash. Keep in mind that I didn’t use flash here to fix lighting problems, but rather to enhance the available light.
Related articles
- A wedding in Central Park, New York (Lucia & Alvin)
- Lighting for on-location photo sessions – pick your battles (Licet & Daniel)
- Using direct off-camera flash (Renee & David)
- Example: direct off-camera flash vs softbox (Ulorin Vex)
- Direct fill-flash from your on-camera speedlight
- Photographing in hard sunlight with on-camera flash (flower girls)
- On-camera TTL fill-flash
- Best fill flash settings
Great article Neil, love how you have used other articles to explain what you are talking about as well, very informative and easy to use!
Good information, Neil. It makes sense that you would choose your ambient light to minimize the flash power required. What about distance between the flash and subject? How is this different when using undiffused flash versus using a softbox?
Obviously, with un-diffused flash you have greater range, so you have to take care that you don’t work at a shorter distance than the flash’s minimum range. A sensible distance just works better in every regard.
thanks for the article Neil… i have 2 questions ….the ambient ex poser u took was from the couple not from the background right??…..why you used a 800 iso..is the ambient was so low ??and why u used the shutter sink-speed… ??…thanks
Sam, yes the light levels where that low, shooting with the setting sun towards their backs. Remember, I’m exposing for their faces, which is in comparative shade.
I’m not sure what you mean by the sync speed?
Neil:
Beautiful photography as usual, I have a question though. Fill flash that is not on axis will create a shadow which will have no detail. How are you avoiding this?
Thanks for replying and for the inspirational photography. I love your technique and style.
Gene
Great stuff again Neil, thank you! My question is similar to that posted by Gene above…Where do you place your flash when using bare off-camera like this? I am assuming it is fairly direct in front of the subjects so that shadows are not cast from one subject onto the other? Do you place the flash on a stand behind you as you shoot?
Gene .. The ambient exposure is nearly correct. I’m not trying to use the flash as a main source of light … here it is acting more as a fill-light. Hence I don’t have a problem with deep dark shadows from the flash where there are no detail.
Steve … the flash isn’t too far off axis.
Again, I’m not trying to fix a gross exposure error here, or using flash as the main source of light. The flash here is to lift the contrast, and lift shadow detail.
i mean by the sync speed ..that u used a fast shutter speed 1/250…why ???…to freeze them if they move??…or in order to use a wide aperture in order to decrease the depth of field??..thanks
I chose that shutter speed to help minimize camera shake and subject movement. The shutter speed that you will often see recommended – 1/60 – is too slow for sharp photographs.
Hi Neil,
What is your impression of the 24-120mm f/4 compared to your usually used 24-70mm and 70-200mm lenses?
Thanks,
The two f/2.8 zooms are better than the 24-120mm f/4 … but I tend not to use it at the widest aperture. Then it becomes a great general purpose lens. I like it and I use it, but I rely on my fast zooms in critical times.
great post! ideally if u were to go back in time i assume u would change ur settings for the last image to f4 iso250 1/250 of a sec. also did u use the built in pullout diffusion panel?
If I could go back in time, I’d much much rather go check out dinosaurs. Way more cool than changing camera settings that I was happy with in the first place. I wouldn’t mind seeing The Clash in concert either, now that I think about it. Now *that* would be cool.
Hi Niel,
I have been wanting to ask you for some time now about WB with and without flash. When I take photos with my D700 on auto WB with and without flash, the WB temperature is invariably higher with the flash photos. In your comparison test photos above, you adjusted the WB in RAW to be the same. Is that something one should do in similar circumstances in post production and if so, should the non flash photo’s WB be taken as the point of reference?
Many thanks, Bernard.
I changed the WB here to the same settings, for comparison. If you were to shoot available light only, then change your WB of your images to where they look great. Simple as that.
Hi Niel,
“TTL flash at around -1 or -2EV” ?
Does the D4 have a flash compensation button or did you use a PW AC3 module?
Fred
Nikon finally relented, and the D4 is the first pro-series DSLR with Flash Exposure Compensation on the body. But here I used the compensation on the AC3 module.
Do you ever shoot against a white shirt as an alternative to a soft box?
I’ve found this quite useful on occasions whenever I (can) wear white and am traveling with just a bare flash. Simply fire a flash at yourself and take care of not firing any light directly into the camera.
That could work too, if the light doesn’t come from a point much lower than your subject’s eyes. Then we’re starting to move into Horror movie lighting. Generally not a good idea for flattering photos.
Aby lightstands ?