
How to bounce flash
An elegant portrait of a delightful young woman, Supriya, taken at her Sweet 16 party. With events there isn’t always the opportunity to use involved lighting setups, and to keep the interest of your subject, you need to shoot fast. Yet the results need to look top-class. For this I most often revert to on-camera bounce flash. How to bounce flash – this is a topic we have covered thoroughly here with previous articles. This time I want to I want to highlight an aspect of that – the direction of bounce flash – and this is best served by showing correct and less-than correct examples for comparison. For more tutorials on the topic of bounce flash photography, check the links to related articles at the end of this article.
There are a few things which have to come together for successful portraits – the expression of your subject; the lighting, and the context (or background). This is very similar to the checklist for portrait photography on location. Some things just need to come together to predictably give you best results – and these are exactly the same three factors that were discussed there for great portraits on location … and they remain true for any aspect of portrait photography, whether indoors or outdoors. Or whether it is an event or a photo session with another intent.
When these factors come together – and they should, if you have any control over the photo session – then you are most likely going to get superb portraits. Predictably. And that is important when you aim to have a recognizable style – you should be able to easily recreate a look and feel which is consistent with the greater body of your photography work.
That first element – your subject’s expression – might not be entirely under your control always, but there is much that depends on your demeanor and approach as a photographer. Some of that has been discussed in this article: People skills for portrait & wedding photographers
Now, about the lighting used here – I used on-camera bounce flash. It’s a simple technique which, when used correctly, can give you studio-quality lighting on location.

On-Camera Flash Photography – revised edition
This book is explains a cohesive and thorough approach to getting the best from your on-camera speedlight.
Particular care was taken to present it all with a logical flow that will help any photographer attain a better understanding of flash photography.
You can either purchase a copy via Amazon USA and Amazon UK, or can be ordered through Barnes & Nobles and other bookstores. The book is also available on the Apple iBook Store, as well as Amazon Kindle. Also check out the Amazon Kindle store.
Learn more about how the cover image was shot.
Most of you will already know that I eschew most of the on-camera light modifiers that are available on the market. The vast majority of them will work against you getting the best results that you are capable of. Just use simple bounce flash. But somehow people want to spend money to try and solve a lighting problem, instead of considering the underlying lighting principles – Direction & Quality of Light.
Here is a video comparison between various light modifiers for on-camera flash. It will go far in explaining why I avoid most light modifiers. In summary – I want to avoid any tell-tale signs that I used on-camera flash.
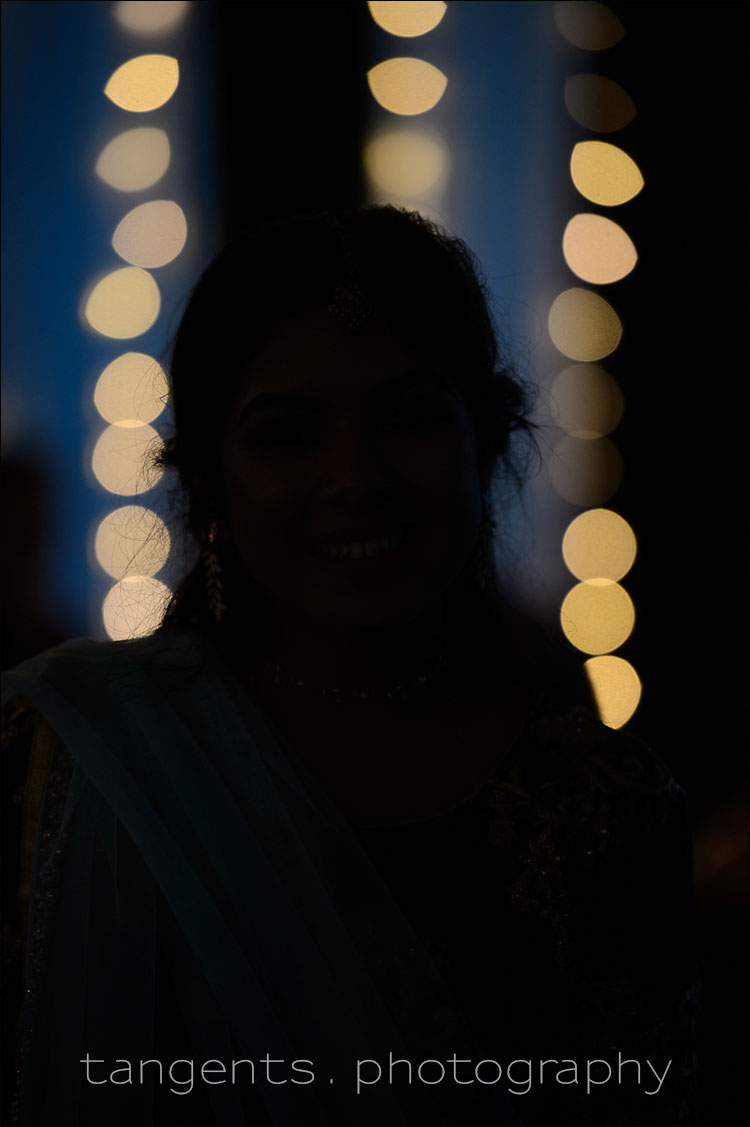
Here are two photos – the first one is one of my earlier shots of Supriya, but I had bounced my flash too high up. This caused too much contrast, and shaded her eyes. Not flattering. You can also see that the shadow of her nose blends with her lips. That’s not good either. The beauty of digital photography is that instant feedback which allows you to correct your lighting.
Lowering the angle at which I am bouncing my flash – probably about 30 degrees or so up from horizontal, allowed the light to come in from a more pleasing angle. I also turned the flash so it didn’t bounce at such an angle away from her. This more conservative way of bouncing the flash, gave much better results. And this is how we continued shooting the sequence of photos here.
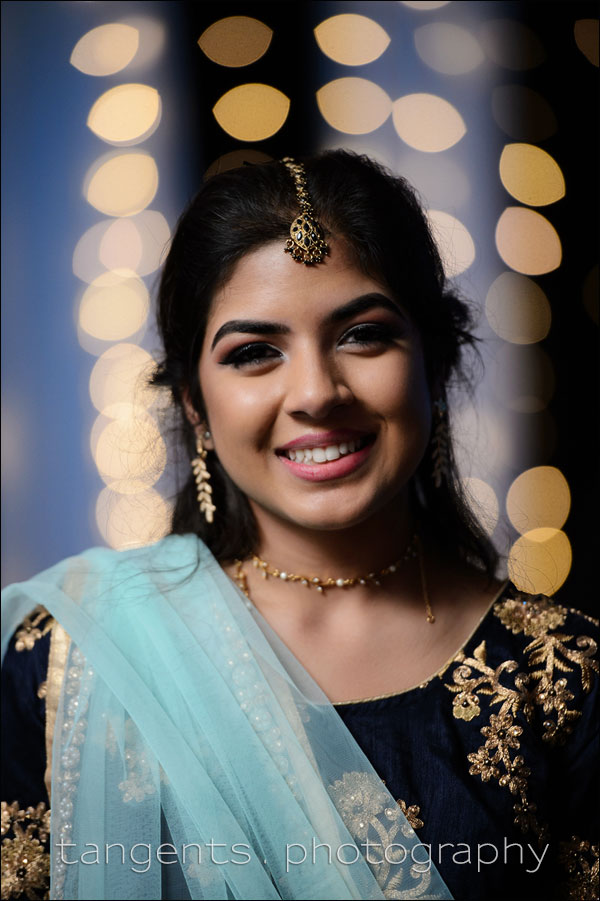

That is essentially it – find the best direction in which to bounce your flash. You want to bounce your flash into the direction from which you want your light to come. Not necessarily the ceiling or a wall. You need to consider the direction which you want the light to come from. That is where you will bounce your flash into.
Here I might have used the infamous Black Foamie Thing, and probably had it on my flash, but it wouldn’t have had a specific effect here. I would have achieved the same results with bare bounce flash.
Photo gear used during this photo session
- 1/80 @ f/2.8 @ 1600 ISO
- Nikon D5
- Nikon 70-200mm f2.8 AF-S VR II @ 200mm
- Nikon SB-5000 flash (B&H / Amazon)
- On-camera bounce flash in TTL mode. No BFT necessary.
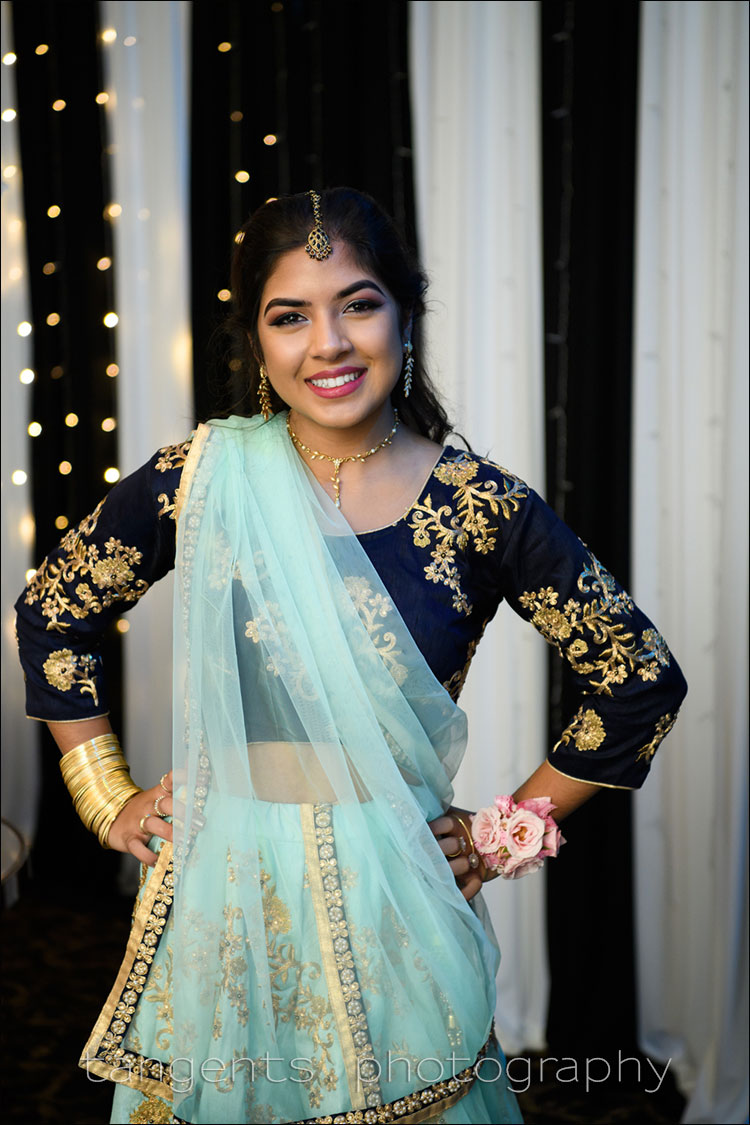
About the specific background in the photograph at the top – obviously it is out-of-focus highlights or light-bulbs. But even then there is a specific course of thinking here. When I photograph these types of events, whether Sweet 16 parties or Bar / Bat Mitzvahs, or weddings, I have to get a few portraits before the event starts. I don’t often start with the longer lens. There is too much distance to my subject. It just works better if the first few sequences that I shoot, are with the 24-70mm lens (and usually around 50-70mm.) This shorter focal length make it easier to communicate with my subject, and quickly build up a rapport … as opposed to using a longer lens and being further away.
When I have a few good images, and I have shown my subject how good it looks, then I might start to use the 70-200mm lens. So here is one of the first images I took of Supriya with the 24-70mm lens. Also with bounce flash. It looks good, but I knew we could get better photographs of her.
I knew that if I worked at 200mm, the compression would make the background appear larger. That’s how it works … if you move your subject a little bit away to create separation, and then you zoom to your longest focal length … the background will appear much bigger in comparison … as opposed to how it appears with a wider focal length, and working closer to your subject.
I therefore purposefully zoomed to 200mm and stepped further back until I got the composition I wanted. Note, I didn’t stand in one spot and zoom to get my composition … instead, I moved back. This line of thought helped get the background I wanted, with those highlights much larger, and out of focus. It isn’t random. It was done with intent. Make your background appear larger (and more defocused), by zooming in to your longest focal length, and stepping back for your composition. Only when you can’t move further back should you zoom your lens. And no, you can’t “zoom with your feet”. That’s entirely impossible.
Summary
Applying a few straight-forward techniques will get you consistent results if you apply them with thought. Diligently onsidering your subject’s expression, and the lighting, and the background, is a recipe for getting good results every time.
Related articles
- Tutorial: Bounce flash photography
- Bounce flash photography – short lighting
- Bouncing your flash
- Directional bounce flash
- Bounce flash and catchlights
- Throw away the tupperware on your flash
- Using bounce flash to mimic window light
- review: Best light modifiers for on-camera flash
Helpful info, thanks.
SO, how exactly did you bounce – up and to your left, behind you off the ceiling?
Not off the ceiling. That would’ve been too steep an angle, similar to the first comparison photograph.
I bounced my flash into the room, towards the direction that I want the light to come from. Not off any particular wall or particular part of the ceiling. Just into the room towards the direction that I want the light to come from. Enough light comes back at 1600 ISO and f/2.8 to give me proper exposure.
Thank you. Interesting, I always thought you had to hit a ceiling or a wall. I’ll have to try this.
You have to hit something for the flash to bounce, but don’t limit yourself by thinking you have to hit some specific surface when you work indoors.
Great (refresher) article from the master.
Ditto!
Hi Neil
Great article, as always.
Just enquiring about how your bounced on camera flash worked when back from your subject at 200mm zoom?
Regards Aidan
Aidan … I am not sure I understand your question. You can see the results. That’s how (well) it worked.
The crucial element here to get this kind of light from bounce flash, is to think about where you want the light to come from.
The big word in the article, standing alone in its own sentence – “Predictably” – takes a lot of practising the correct technique to get to that.
Thanks Neil – nice summary again.
How did you correct the white balance?
Grey card?
Because I move around a bit, and bounce my flash off various surfaces, the WB isn’t as predictable. So I don’t use a grey card or color checker chart for bounce flash. I adjust the WB by eye during post. Fortunately we all seem to have some kind of leeway in what we take as good skin tones.
I was just about to ask about this! How you handle bounced light and white balance :)
I can remember the first (and last) time I showed up to a photoshoot in a red shirt. Took me forever trying to get the red tint out of my photos!
This is a phenominal example of utilizing on-camera flash appropriately!
Thanks!
I originally learnt how to bounce my flash properly from reading your articles!
Great tips! I too never really thought about throwing light into another seperate room while still getting a “correct” exposure. Do you use any light modifiers when bouncing? Beautiful portrait!
Mostly just The Black Foamie Thing.
What is interesting is the photo you label as “incorrect” has an almost perfect Rembrandt triangle on her left eye—the tip of the triangle is just past her nose.
Would there have been any way for you to have gotten just a little more light into her eyes while preserving the lovely chiaroscuro?
The “incorrect” photo there still has the light coming from too steep an angle, shrouding her eyes. Even with that Rembrandt style triangle on her cheek, it isn’t ideal. I could have improved it by aiming my flash at a lower angle behind me (and not so steep upwards), but still to the same angle to my left. That would have worked.
However, the portrait shown as the main image, with the Loop Lighting pattern, is far more flattering to my taste.
You have the benefit of knowing her personally so I’m sure your picture is more true to who she is.
But the incorrect picture, if it only had a little more light in her eyes, is to me a portrait of a strong and decisive woman—she looks like she could rule an empire.
In other words, even your “bad” pictures are great.
After all this new gear over the years, bounce is still a great skill to have. I love going into an important event and knowing what can be done w/o stands and gear.
I read all your articles about bounce flash and they are really great. I am an ameatur but since I had been reading your articles and practice them I have managed to upgrade my portraits. All thanks to you