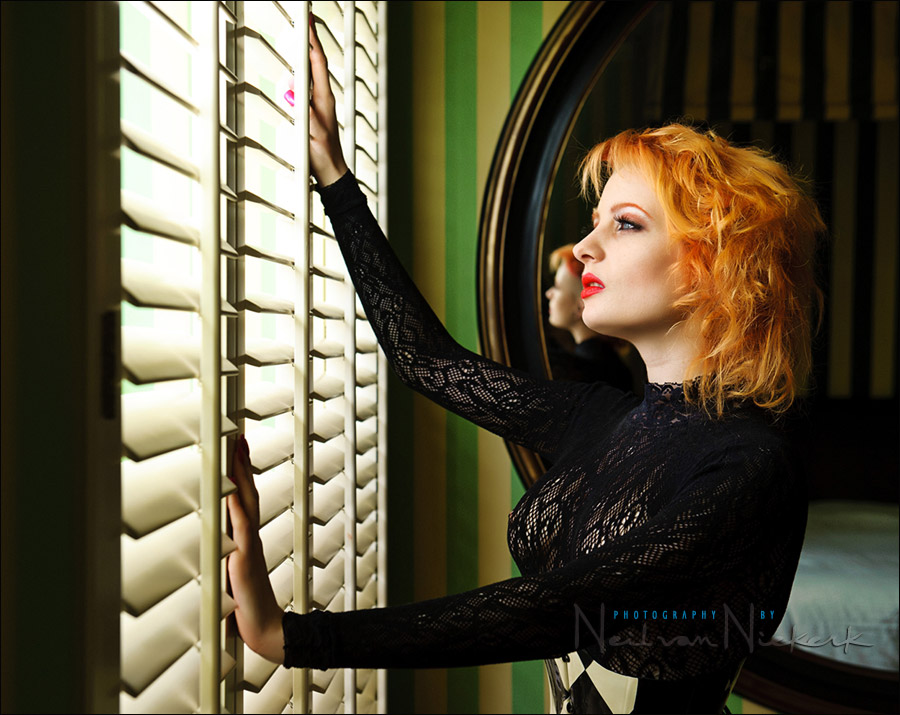
Mimicking window light with off-camera bounce flash
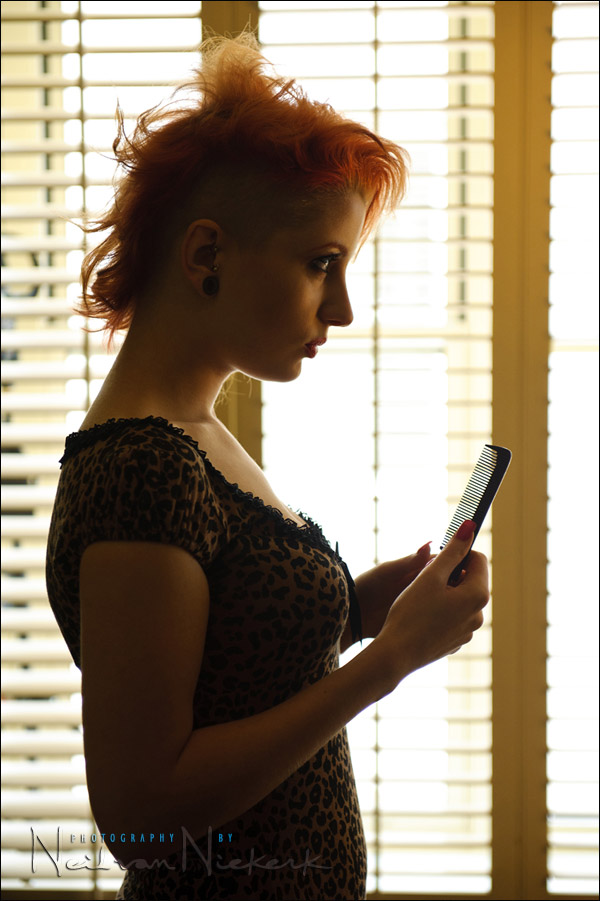
Continuing the photo session with Ulorin, we worked inside the hotel room for the next part. The photo above is a candid shot of Ulorin fixing her hair between changes in clothing. Ulorin’s next outfit shown in this article, was more revealing than the previous outfits during the photo session. (Just a heads-up for the Tangents readers who are surfing from their workplace.)
Photographing inside the room, I initially tried to work with just the window-light, but hit a small snag. The indirect light through the window kept changing on me as clouds moved in and out. Instead of changing my settings continually to match the light, I decided to revert to using flash to mimic the window light. This would give me consistent light.
Off-camera flash as window light
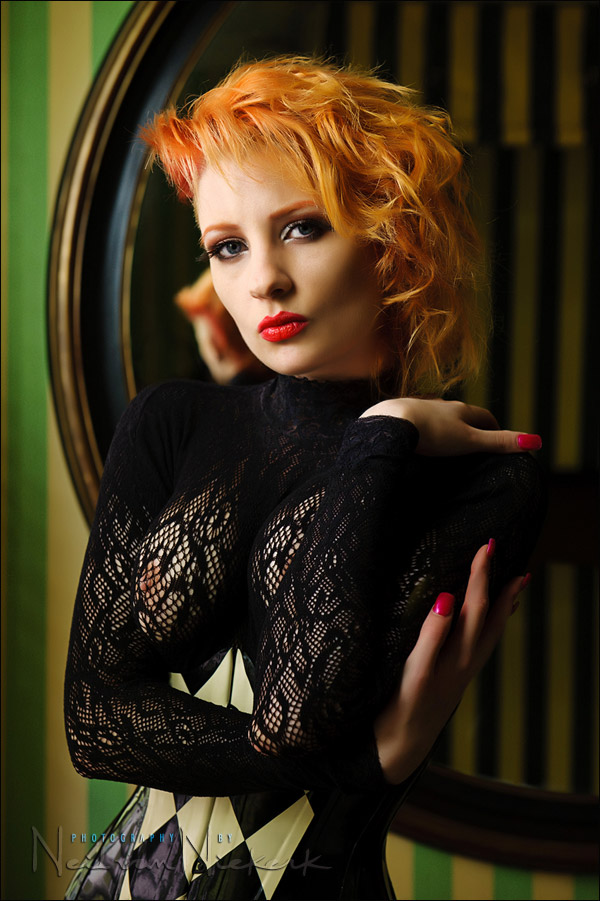
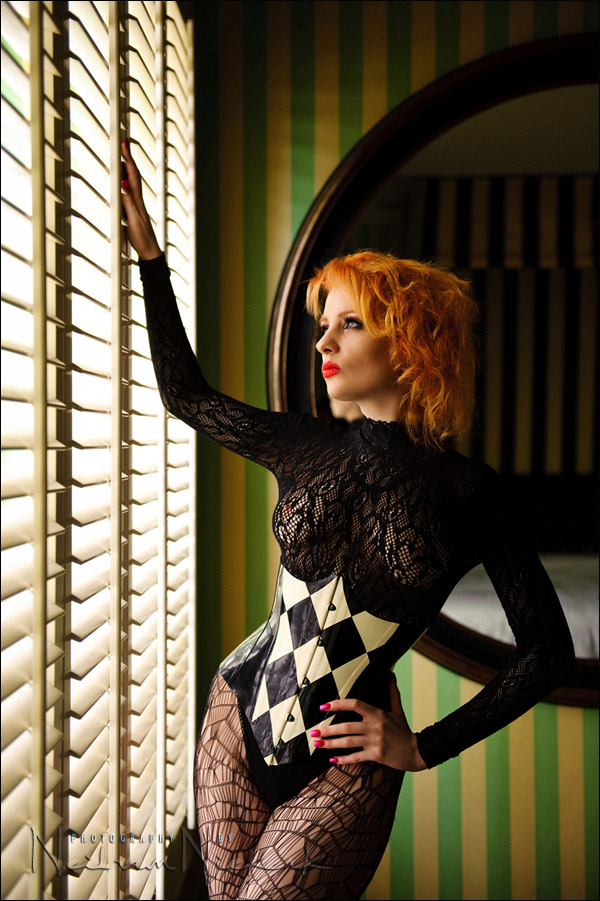
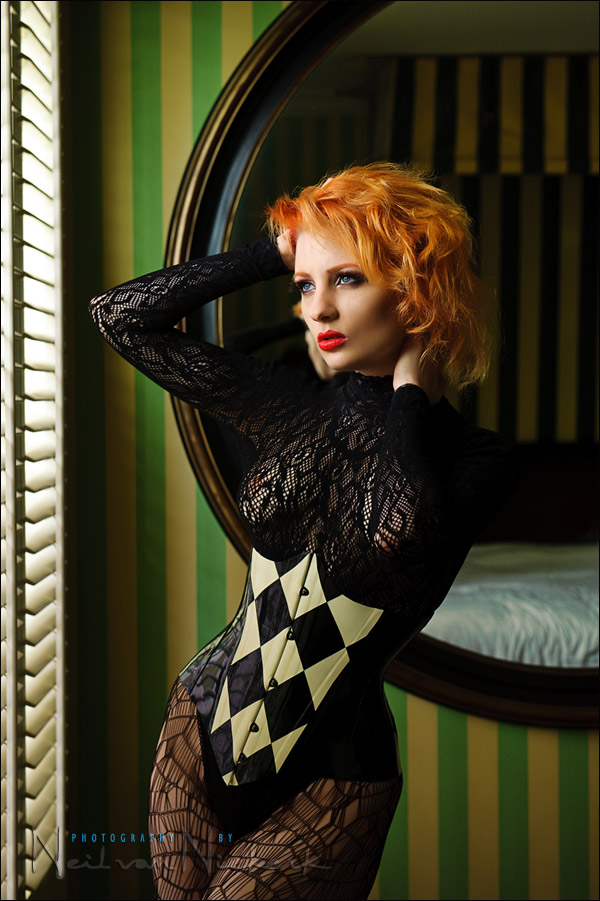
This is the quality of light that I was after … soft directional light that still added a sense of drama. The light shown here is mostly flash, with a bit of ambient light. It took a few adjustments though to get to this point where I really liked the look.
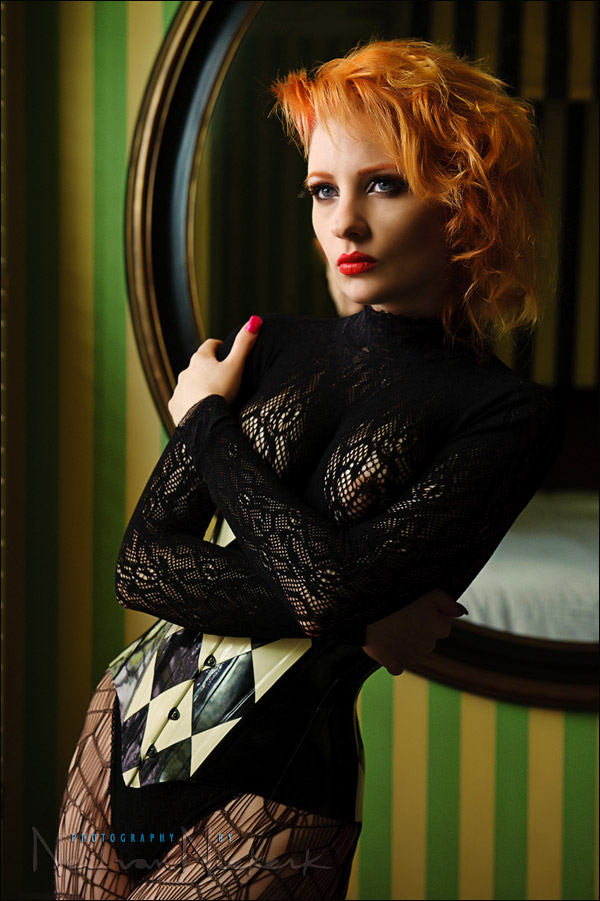
camera settings for both images:
1/250 @ f5.6 @ 800 ISO … manual off-camera flash.
The slight change in contrast that you see in the light on her face, is because Ulorin shifted in position relative to the light as she changed her pose. (I edited out the white bedsheets in the top image to see if the image was improved without the distraction of the white bed sheets.)
This is where we started. In these test shots you can see the table and clutter in the background. This is before we moved everything out of the way. What is also immediately noticeable is that the exposures here are different, even though my camera settings were the same:
1/200 @ f4 @ 650 ISO
The available light looked good (as in this image below), but it was too inconsistent. I’d rather be concentrating on the photography, than have the rhythm of the photo session be broken by constant adjustment of settings.
1/250 @ f3.2 @ 800 ISO .. available light.
I then thought I could mimic the window light by placing an off-camera flash in the window. The flash pointed outwards and up, bouncing off the glass of the window. I had the flash-head zoomed wide.

The result was a flood of light into the room. I guess this would’ve looked like window light on another sunnier day. And with the room not facing another hotel across the narrow road. It just didn’t look like I wanted.
The next step was the Big Adjustment. I moved the light to the left of the window frame, and rotated the flash so that it pointed to the left. Now the light bounced off the glass towards the top of the window pane. Yes, even though I am pointing the flash outwards, enough light will bounce off the glass to make the difference.

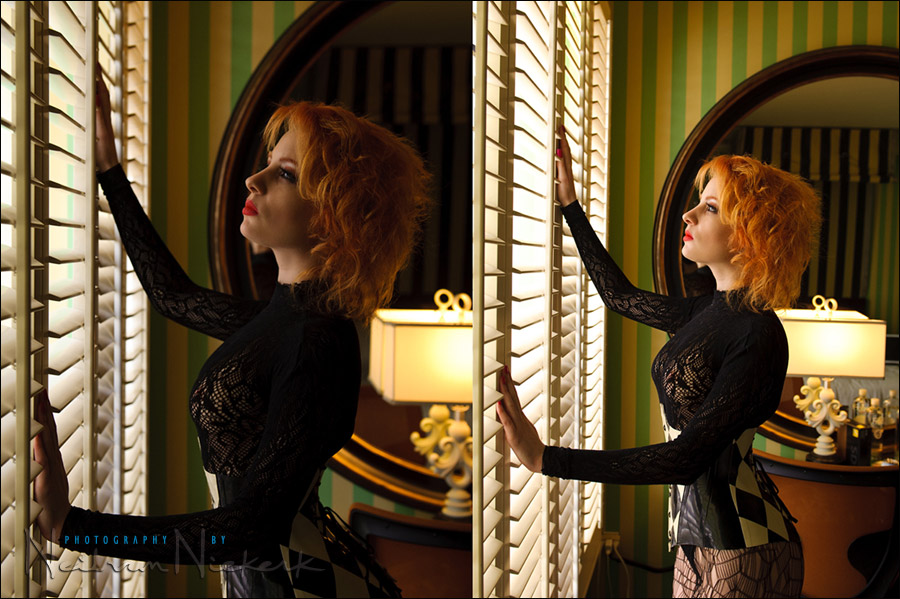
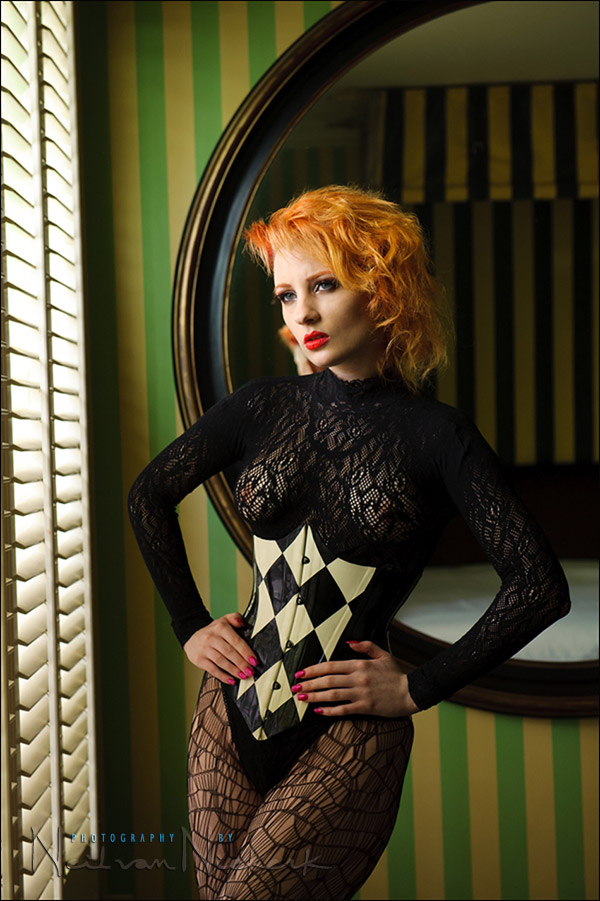
And now the direction of the light is exactly what I was after. I had zoomed the flash-head to a tighter angle to make the swathe of light less broad. I wanted the light to accentuate Ulorin’s face. And here is the result …

And in case anyone needs convincing that bouncing the flash off the glass had any effect, here is the shot without the flash.

Camera settings for both images .. in fact for all the images with the flash positioned here:
1/250 @ f5.6 @ 800 ISO
The manual off-camera flash was controlled in the same way as for the photo session with Ulorin in the red latex outfit. The speedlight was controlled via a PocketWizard FlexTT5 on which the flash was mounted. The output of this flash could be controlled as manual flash via the FlexTT5 and AC3 ZoneController on the camera.
As photographers we needs to pre-visualize what we want to achieve with our lighting .. and work towards that by figuring out where we need to place our light. Then we also need to figure out what we want to achieve with the light.
As shown in the previous post with Ulorin in the red latex outfit, the lighting set-up that we end up using can be quite simple. It needs some thought and adjustment and experimenting to get to where we want to be with the lighting. As in the previous post, a simple speedlight offered unexpectedly good results.
Related articles
- Off-camera bounce flash
- Directional light from off-camera bounce flash
- Change your position to change the direction of light
Photo gear (or equivalents) used with this photo session
- Nikon D3
- Nikon 24-70mm f2.8 AF-S / Canon 24-70mm f/2.8L II
- Nikon SB-910 Speedlight controlled by PocketWizard FlexTT5 & AC3 Controller
or alternately, the Canon 600EX-RT Speedlite controlled by Canon ST-E3 Transmitter - Manfrotto 1051BAC light-stand
Hi Neil, thanks for another great post. One question, how much was the flash zoomed in? My guess is 50mm?
I search out your blog religously three times weekly. Your continuing coverage of Ulorin is great. Thanks for providing in the previous blog the link to Ulorin’s personal journal. I find the additional photos of this ravishing red head most interesting and I shall check her site frequently from now on.She is a good communicater as yourself and her journal is interesting reading for those of us on this side of the puddle.I am sure that her coverage is generating much more volume then regular. Thanks again.
Seeing such beautiful closeup portraits brought a question to my mind. May be a little off-topic, but I was curious how you went about shooting with autofocus. Do you AF a center point and recompose your shots? Or do you compose your shot first and manually select your focus spot? Thanks for an amazing blog – I have learned more here than anywhere else!
Great examples of how altering the light in a given environment can greatly affect the “look” of a shot. We see a range from dark and moody (almost rainy day) to bright and commercial here. Of course, your desire to keep the flow of the session going by maintaining a consistent lighting is the way I like it, too. When you can’t count on the natural light to stay consistent, you either have to flow with it or overpower it to some extent. Nice, beautiful work, as always, Neil.
Another stunning post. Many thanks for your detailed explanations of the lighting setup (all it’s missing is a wide shot with the gear in place like in the previous post ;). I have very similar gear (D700, SB-800, SB-900) so seeing great shots like these gives me the confidence that I won’t need to spend any more money, just learn a lot more. :)
Neil,
The “Big Adjustment” looks awesome: realistic. Did you know immediately that the quality of light would change in your favor, or was it a trial and error approach? This is something I could use immediately in my photography focus. I look forward to your workshop in NYC in May!
As stunning as the previous posts but even though the lighting is as you say “simple” what makes a world of difference is the thought process put in. With exactly the same gear I would never have acheived a fraction of this result.So the it all comes down to one thing that you remind us each time we see your work -its not the gear but the man behind.Thanks for sharing.
Hi Neil,
This is another great post. Thanks for sharing your knowledge with us.
Did you have any problem with positioning yourself so you would not see your reflection in the mirror.
I was trying to do a shot recently where both front and back of a model was in the frame using a mirror but found it difficult not to capture a reflection of myself and the gear.
Hi Neil,
Thanks for another fantastic post. Do you retouch skin etc… before posting here or are these simply out of camera photos? I am trying with bounce flash and though I get softlight my images lack the “pop” in your photos. I am trying to figure out is it something to do with lighting or retouching.
Thanks
As always great photos.
Your flash light looks like natural light!!!
Good stuff Neil, a few questions a bit off topic. When you choose your models, do you bring aboard your own makeup artist and deigner? Or do you simply leave that to the discretion of the model? Her outfits where fantastic so to was the hair and makeup. It also helps to have a great photographer bring out the best in these models. Good stuff, more Ulorin please.
Hi Neil,
Thanks for the info about retouching. Can you please share your RAW settings in ACR / Bridge or may be another article on that?
Thanks
This…. this is why I come here. Putting your flash in the window. Where else would I read about such crazy yet perfect ideas?
Hi Neil!
Thanks again! Your hide-nothing way of teaching and sharing is absolutely unique! I ve been here for almost 2 years and everytime that I return, learn a lot! as flash goes, YOU are THE MAN! Thanks!