Off-camera flash – Two speedlight setup for back-lighting
Once you’re comfortable using a single off-camera light-source, such as a softbox (or un-diffused flash), there’s an easy next step to add a little bit of zing to the image. Rim-lighting!
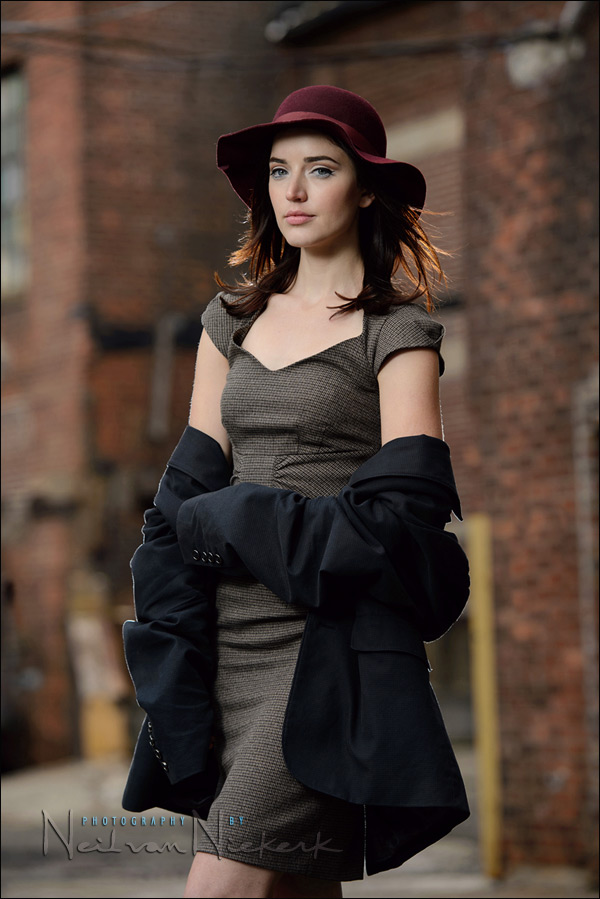
I most often work with just a single softbox when photographing portraits on location. Having the sun behind your subject, creates a natural rim-lighting. This helps separate your subject from the background. It’s not just the shallow depth-of-field that helps create that near-3D effect where your subjects just pops out from the background – rim-lighting from behind also helps bring more attention to your subjects.
The best part – it is really simple to set up and use.
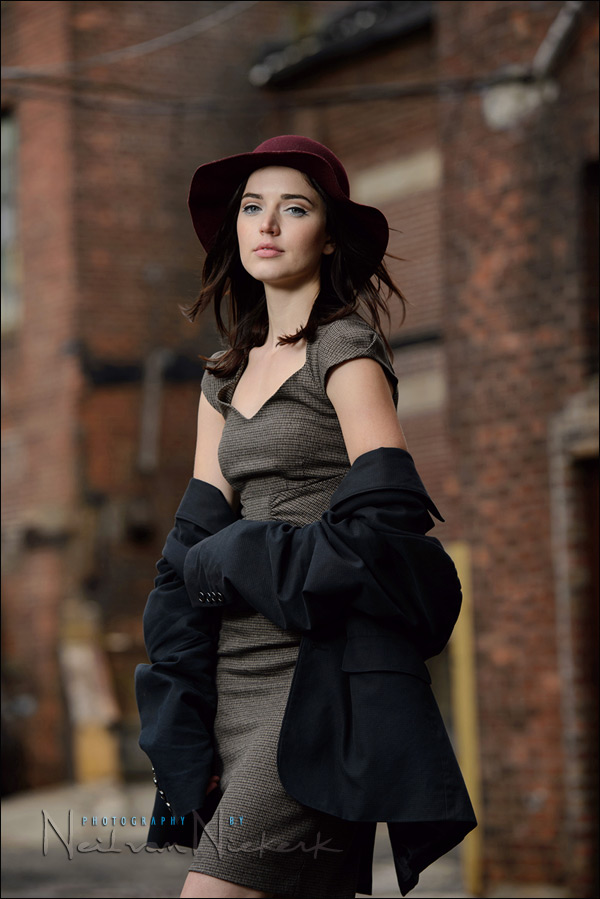
A similar image, but without the back-light, and compared again to the image at the top:
camera settings: 1/200 @ f/4 @ 100 ISO
manual flash, controlled by PocketWizard TT5 units.
Two speedlights were used here. One in a softbox as a main light from the front, and a bare speedlight behind to give the rim-light and help create some separation.
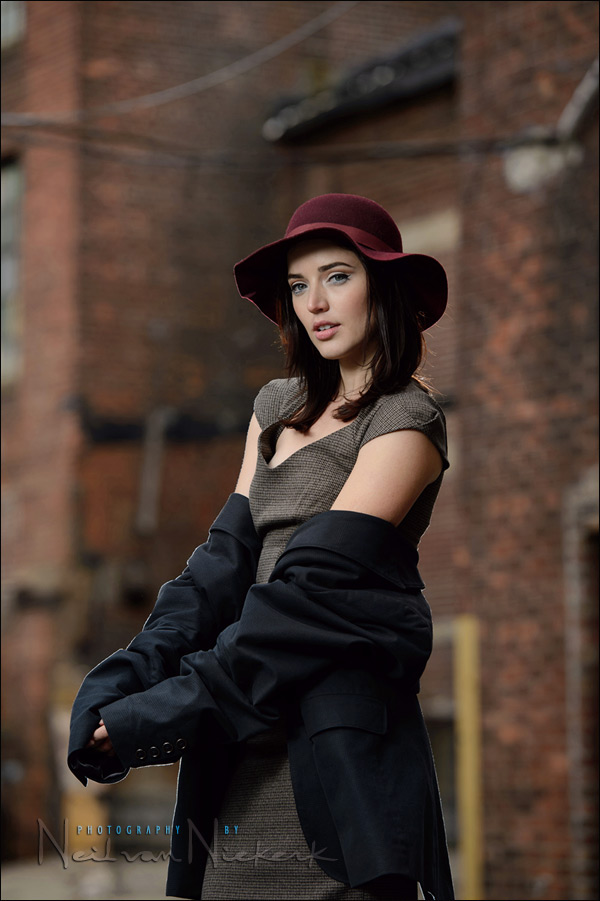
The pull-back shot to give a sense of placement of the lights:

Lighting & Design for Portrait Photography
Lighting & Design is a follow-up of sorts to Direction & Quality of Light. It’s a slightly eclectic mix, discussing the thought-process with various scenarios shooting portraits. The examples use available light, bounce flash, off-camera flash as well as studio lighting.
The idea is that in every one of the 60 sections, there is something to be learnt and applied, regardless of your level as a photographer or where you shoot – all shaped to form a cohesive narrative arc throughout the book.
You can either purchase a copy via Amazon USA or Amazon UK. The book will also available on the Apple iBook Store, and Amazon Kindle.
Equipment used (or equivalents)
- Nikon D4
- Nikon 24-70mm f2.8G AF-S / Canon 24-70mm f/2.8L II
- Lastolite EZYBOX 24×24″ softbox
- Lastolite spigot / umbrella clamp
- Nikon SB-910 Speedlight controlled by PocketWizard FlexTT5 & AC3 Controller
or alternately, the Canon 600EX-RT Speedlite controlled by Canon ST-E3 Transmitter
Exposure metering for the two speedlights
The double-baffled softbox means that we can’t just use the guide number of the flash. We have to use some other method.
While using a lightmeter is the most accurate way to get to correct exposure for flash, it becomes relatively easy with experience to accurately “guess” the exposure. But really, there isn’t that much guessing involved. With manual flash exposure, 4 factors are involved – distance, power, aperture and ISO. The baffles in the softbox obviously affects the power of the flash.
With experience, you can get quite used to how much your specific off-camera flash setup delivers. Let’s say that you know that for X distance, you can get f/5.6 @ 400 ISO when you set your flash to Y power. Then you know if you meter for ambient light, you can adjust your power setting, and/or the aperture, and/or the ISO.
Let’s work through this specific example.
For the final image, I had my camera set to: 1/200 @ f/4 @ 100 ISO
Those settings are chosen so that my ambient exposure for our model, Anelisa, is under by a stop or so. (For a more involved explanation, check out these flash photography tutorial.)
So I want f/4 @ 100 ISO.
For my specific setup, I know that I will get correct exposure at X distance when I set my camera to f/5.6 at 400 ISO, for a speedlight in this softbox, when I set it to 1/8th full power.
So now I would change my flash by … hang on, we’ll keep this as a little bit of homework!
Now, the back-light, since it doesn’t add to the actual exposure, you have a wide range you could set your flash to. With low light levels, for a semi-sillhouette effect, it looks quite awesome to have streaks of light from behind. For daylight scenarios though, I like to keep it quite subtle. So I usually start at around 1/32 of full power for these kind of settings. Then I just check the back of the camera if I like what I see, and adjust from there if necessary. I know, I know, hardcore strobists might scoff at such a sloppy approach, but it works … and it looks good.
Related articles
- off-camera flash – adding dimension with back-lighting (model: Lea)
- camera & flash settings: what do you want to achieve? (model: Ulorin Vex)
- flash photography tutorial
- the importance of understanding max flash sync speed
- so what are your camera settings? – the thought-process
A little bit of homework
Continuing from the discussion in this article: I decided I want f/4 @ 100 ISO.
For my specific setup, I know that I will get correct exposure at X distance when I set my camera to f/5.6 at 400 ISO, for a speedlight in this softbox, when I set it to 1/8th full power.
How then would I change my flash settings to get to the exposure I want?
I wish I lived 2500 miles closer! haha.. Do you know what power the speedlights were set to?
+1 for Eric’s question – not necessarily the exact settings, but as a general rule, how many stops of separation do you find yourself using between your main and rim/side lights? (before tweaking for effect or to address issues specific to a given photoshoot, etc)
The one flash has a double-baffled softbox, and the other is direct flash.
So the absolute power settings aren’t relevant.
Thanks, Neil. I understand that, but for the sake of discussion, say that Lastolite/Cactus Qbox steals 2 stops from your speedlight. You shot this at f/4, so for your chosen power setting, your speedlight was capable of exposing your model at f/8, had it been bare, from the same distance. I was just curious if, when you set up this type of shot, you might be thinking “I’ll start my rim light 3 stops lower than my main,” or I always start my rim light off at 1/32 power and salt to taste.” I guess my question was more about your thought process, and any “rules of thumb” you employ for rim lighting. Thanks again!
Lovely shot and just a perfect halo. I usually start with translucent ears then work the separation light down in power lol…beautiful shot Neil.
Hi Neil…very excited just waiting October 22 to meet you at the New York workshop. Can’t wait to learn directly from you, I already have some questions in my list for that day ;)!!!
See you soon,
Mauricio
Beautiful shot! In this or similar setups, is there enough “line of sight” to optically trigger the bare flash behind the model, or would a radio trigger be required?
Justin, you’d need wireless triggers, especially in daylight.
To get the proper flash exposure would you have to dial the flash to 1/4 power?
Here’s the working for extra homework marks.
Going from iso 400 to 100 requires 2 stops of extra power but f5.6 to f4 gives you one stop back so you increase the flash by 1 stop.
Not sure if I’m correct but that’s my homework answer.
My answer is the same as Dave J.
The 4 factors for manual flash:
1. F/stop = 5.6 to 4 = 1 stop overexposed.
2. ISO = 400 to 200 to 100 = 2 stop underexposed.
3. Distance = same.
Now we are exactly 1 stop underexposed. The last factor that we can use to affect manual flash is 4. Power. So we dial it up from 1/8 to 1/4 to get correct exposure.
You wanted f/4 @ 100 ISO.
For my specific setup, I know that I will get correct exposure at X distance when I set my camera to f/5.6 at 400 ISO, for a speedlight in this softbox, when I set it to 1/8th full power.
ISO 400 to ISO 100 is two stop down but f/5.6 to f/4 is one stop up. Therefore, you’ll need one stop more of light.
You’ll be setting it to 1/4 of full power.
Like many have said, I, too, think the flash was set to 1/4 power because the move to f/4 @ 100 ISO from f/5.6 @ 400 ISO would mean underexposing by one stop. Therefore, the flash power had to be increased by one stop.
Doing the work to come to this conclusion was fun.
What made you choose the lastolite over your new westcott octabox?
The couple who came for an individual photography workshop, wanted to use the Lastolite since that is what they have.
Any chance of a future workshop in San Diego, California? My name is Mauricio too.
From 2013 onwards, the photography workshops will be presented at my studio in New Jersey.
Specifically about California, check my photography workshops in this post about traveling workshops.
Neil,
It is a shame you had such a poor return on your workshops in California though I am at a loss to explain the lack of attendance. I would hope then that you would still consider workshops in San Francisco since that is the only one that sold out. Since I live in the Western Central Valley and could get to SF for a workshop, I like to see one in the future in San Francisco. If not, perhaps a video course offering for those of us who are geographically challenged in getting to New Jersey or New York?
There are several video tutorials available for purchase in the Tangents store.
Howzit Niel,
f5.6 @ ISO400 = f4 @ ISO 200 but since we’re shooting at ISO100 we’d be under by 1 stop for the given distance x. Hence, double (+1 stop) the flash power (i.e. 1/8 to 1/4) or, if you had the space, half the distance between the model and the softbox and bask in the softer light a bigger light source provides. As Niel would say, *coolness, I rock!*.
Thanks Niel. Nice to not just passively read but to actively participate and practice the skills you’ve taught throughout your brilliant articles.
HI Niel, I do this quite a bit w/my clients with speedlights. To be honest, I blow it out too much from the rim light. I need to work on this. I’m going to budget and attend one of your workshops in your new studio next year. I swear I’m doing to do it. I’m running canon with pocket wizards currently. Getting ready to upgrade to Mark III and wireless it with my 600x flashes. Making every effort to attend one of these workshops next year!!
Andrea .. even at lowest manual power? Then flip the diffuser panel over to cut even more of the light.
You lose two stops going from ISO 400 to 100, and gain one stop going from f5.6 to f4. Net effect is that you lose one stop overall. Therefore, change flash power from 1/8 to 1/4 to get that extra stop back. For the record, I figured it out before reading the other responses… :-) Thanks for the article – great, as always, Neil!
Increase the flash power until you like what you see….numbers are useful…but what you see is key.
I got there in the end, I think.
I sometimes get confused with numbers, so I had to approach it from a different way. I tend to think graphically on occasions, so I took this approach.
In my mind I envisaged an exposure scale like I used to see in the viewfinder of my old Nikon FE film camera. The scale was incremental reading from -2, -1, 0 (= correct,) +1, +2. You used to alter the settings of the shutter and aperture to set the desired exposure, with the aim of getting the exposure needle into the middle of the scale.
Using this imaginary scale, I created in my mind three dials that could alter the settings, Aperture, ISO, and Flash Power.
Currently my imaginary exposure scale is showing a correct exposure with the needle in the middle at 0. My dials are set as follows
Aperture dial F5.6,
ISO dial 400,
Flash Dial 1/8th Power.
I want to alter the settings so that I have F4 and ISO100 with a yet to be determined flash power.
So I set the aperture, moving the dial from F5.6 to F4 therefore increasing the exposure by one stop (Aperture =+1)
My imaginary exposure scale now shows exposure +1
I then move the ISO dial from 400 to 100, reducing the light by two stops. (ISO=-2).
As a result my current imaginary dial settings are showing a reading of -1 on the exposure scale. To bring that back up to the correct setting in the middle I need to increase the current flash power setting.
At the moment my flash is at 1/8th power. I move the dial to give me one more stop of light by increasing the setting to ¼ power (Flash =+1).
It’s probably better explained with a graphic, but this may help others who may have experienced difficulty in working it out. Assuming, of course, that I have arrived at the correct setting.
Thanks for the tutorial Neil – it really made me think.
Great article as usual, Neil.
Now if Nikon would just introduce speedlights with built-in wireless…
Very clear explanation, Neil. Do you ever use light modifiers for the rim light outdoors? I suspect strip boxes, grid, and even snoots would work well.
Current ISO Change Aperture Change
ISO 400 ISO 100 ISO 100
A 5.6 A 5.6 A 4.0
N + 2 stops – 1 stop
Flash 1/8 Flash 1/2 Flash 1/4
Assuming the Easy Box uses 2 stops and the bare rim will be 1 stop above f4.0 or 5.6 and the rim flash is the same distance away form the subject as the main light the following settings are:
1. two stops less for the flash out of the soft box = Flash 1/16
2 Add 1 stop for rim = flash at 1/8 power for the rim
Does this make sense?
This was supposed to come out in columns but the website does not allow spaces.
Hope you can make it out. Sorry..
To DaveT’s comments regarding his old scale method, Neil should create a little built in java script tool that lets us use sliders to change f/stop, ISO, flash power and flash distance, to get to a certain look / value to practice here on this site. i think it would be a great little learning tool/app.
sound good?
The easy answer. Set your Key light to TTL and never think about it again. Manually adjust the rim light to taste. JK :) I also concluded that 1/4 power was correct after factoring the wider aperture and slower ISO. Great article, thanks.
Love to get your opinion on the Westcott 26″ Octi? vs. a 24 x 24″ square which I believe that they also offer, although don’t see it on B&H or Amazon. R U using a different brand in this shoot?
Also, they offer different size (regular, L, XL) Deflector plate. Any comment?
Thanks,
Lorrie
Here I used the Lastolite Ezybox, as listed in the article.
The Westcott Rapid Box – 26″ Octa Softbox would’ve given you very similar results. In my opinion you don’t really need the deflector plate. While it might make a difference in the results with the soft box, it might not be worth the hassle if you want to set up fast.
where is the camera located in this particular shoot? btw lovely article …
The pullback shot should make it clear – the actual photo at the top was taken with me positioned two steps to the right of where the pull-back shot was taken. But I stood back for the actual photo, and shot upwards to get the background I wanted.