On-location photo session in New York – BTS video
I met Marco when he attended one of my photography workshops – he is charismatic and with that photogenic ruggedness, I thought he’d be a great subject to photograph on location. He was visiting New York from Germany for a few days, and I asked if he would be up for a photo session. And here we are.
With this photo session, I also wanted to try out something I saw Dani Diamond does – where he has an on-camera stabilized gimbal for his Go-Pro, to give a wider point of view from the photographer’s perspective. A kind of behind-the-scenes look.
I often have people ask me how I saw a specific photo. How did I choose the background and the framing. And how I posed my subject within the frame. Now, with this POV-style video while actually taking photographs, the thought-process might be more apparent.
There are a few problems with this video clip, as I will explain further down, but even then, this video clip will be insightful for the timing, and will reveal the context of where the photograph were taken. I would also love to hear your opinion on whether this should be a direction I should take with future photo sessions to post on the Tangents blog. Let me know.
[ For more videos, follow me on Vimeo / YouTube ]
Most of the images shown were lit using the Profoto B1 flash, diffused by the very portable Profoto 1’×3’ stripbox. My assistant Kat, held this up with a 75″ tall Gitzo monopod. Two of the images where shot with available light only. Scroll down for the discussion and details about the photographs.
If you like this look to the portraits, then join us for one of the NYC photo walks. We’ll have a very similar style of working with our model and the lighting.
Direction & Quality of Light
I wanted to distill the essence of what we, as photographers, work with – light! Before we can truly grasp on-camera flash and off-camera flash, and really, any kind of photography, we have to be aware of the direction and quality of light. We need to observe the light that we have, and then decide how best to use it, or enhance it.
With this book, I try my best to share those “aha!” moments with you, and I do believe this book can make a difference to your photography.
The book is available on Amazon USA and Amazon UK, or can be ordered through Barnes & Nobles and other bookstores. The book is also available on the Apple iBook Store, as well as Amazon Kindle.
Gimbal setup used for the BTS video
- GoPro Hero3
- Feiyu FY-WG 3-Axis Gimbal for GoPro (B&H / Amazon)
- ProMedia Gear Boomerang flash bracket (B&H )
This was shot with the GoPro Hero3 (affiliate), mounted on a Feiyu FY-WG 3-Axis Gimbal (affiliate), which in turn was mounted on a flash bracket (affiliate). The flash bracket was necessary so that I could have the GoPro above the camera, regardless of the camera’s orientation – vertical or horizontal.
As you will notice, the framing of the video is a little too high. , and somehow, somewhere, I had skipped a software update on the GoPro, so I couldn’t get the GoPro video to show on my iPhone like I was used to. I also didn’t have my GoPro Bacpac with me, so I couldn’t preview the video while shooting. A bit of sloppiness on my part, having just set this up the night before. Next time I will be ready, and have the GoPro better framed on my subject.

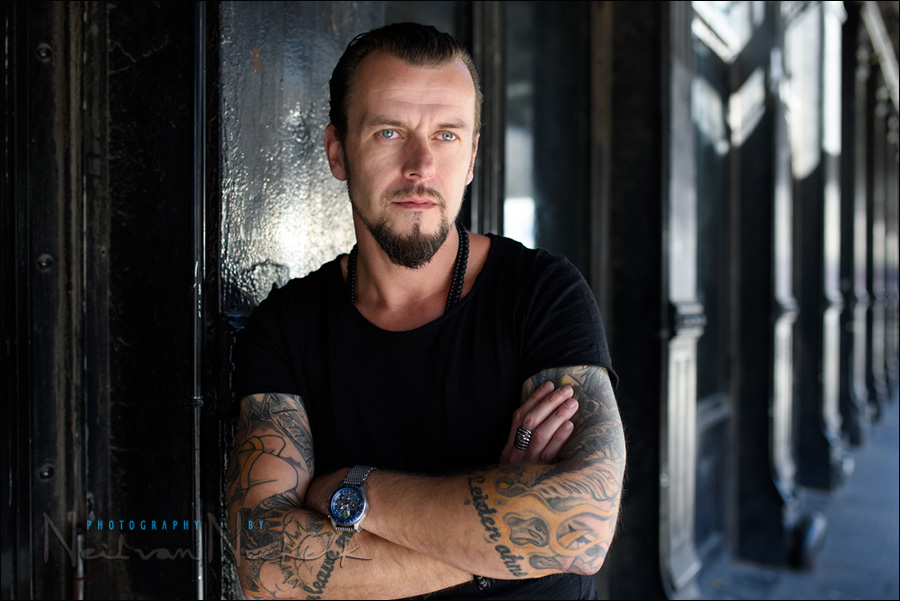
We started off in this spot in the Meatpacking District. Working under the awning, there was a lot of clean, open light coming in from a good angle. Enough light and with the proper direction and quality to it that we could shoot with just the available light.
- 1/250 @ f/2.2 @ 200 ISO … available light only
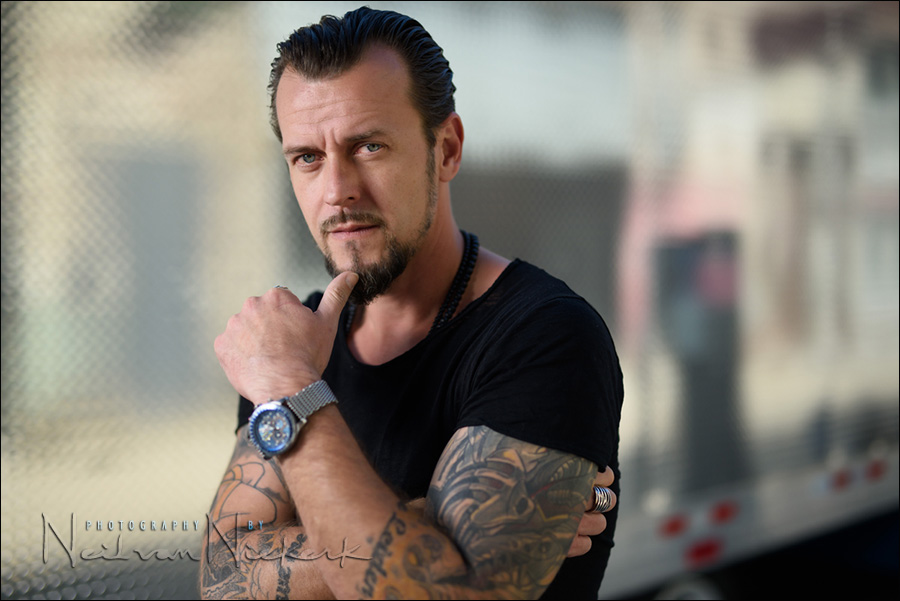
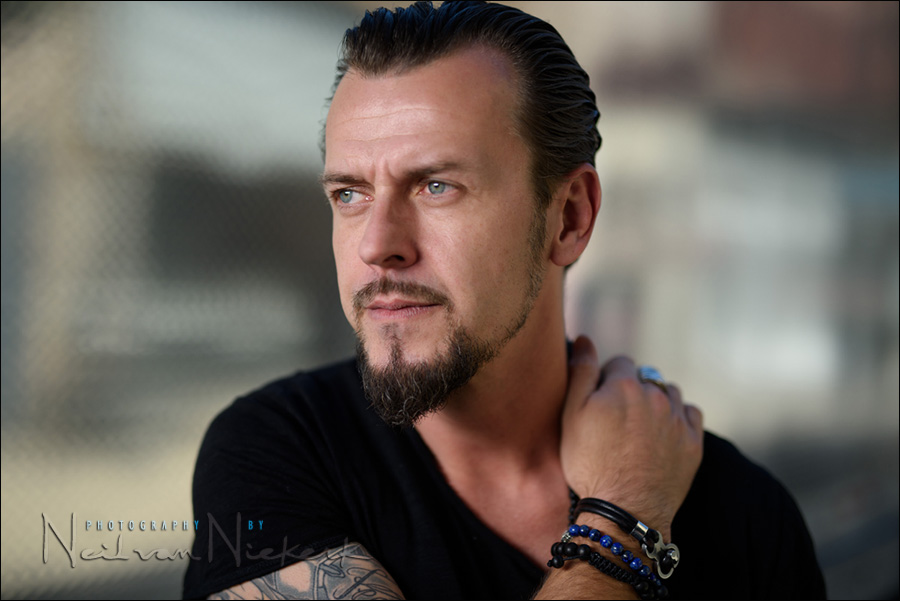

Just a hop, skip and a jump away from the other spot, we walked past this truck used by a crew filming something there. The highly reflective textured surface of the truck intrigued me, and I wondered if it would make a suitably unusual backdrop for a few portraits of Marco. The shallow depth-of-field was of course a deliberate choice here.
- 1/4000 @ f/1.6 @ 200 ISO … w/ off-camera flash
- Nikon D810
- Sigma 50mm f/1.4 DG (for Nikon) /equivalent Sigma 50mm F1.4 DG (for Canon)
- Profoto B1 flash
- Profoto 1’×3’ softbox
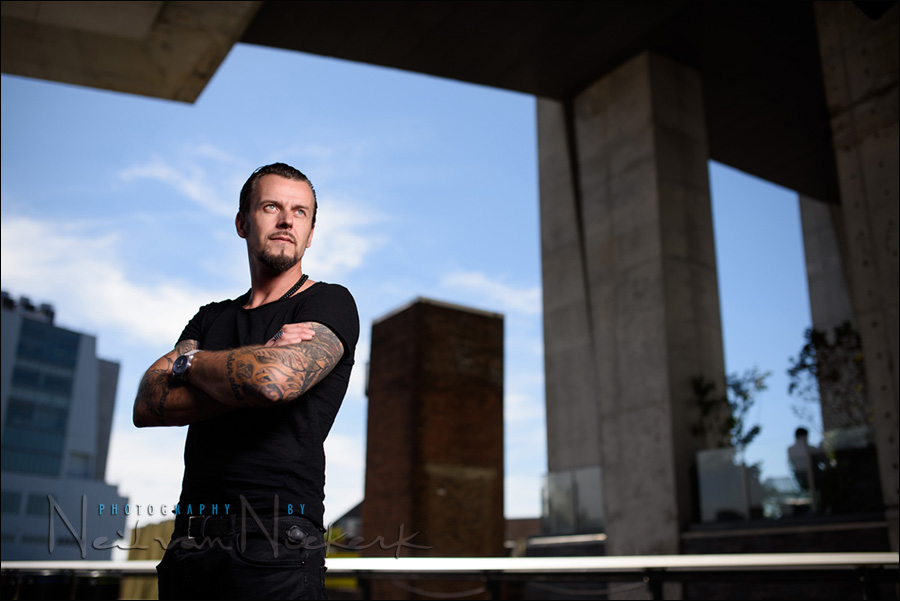
Shooting on the Highline, I gravitated to a spot that I knew would work well. I had photographed a model there a while back, using the buildings’ shapes as a natural frame – composition, posing, light & lighting – then a blast of flash, and Marco is properly lit, and exposure balanced with the blue sky. A dynamic composition.
- 1/5000 @ f/2 @ 200 ISO … w/ off-camera flash
- Nikon D810
- Sigma 35mm f/1.4 DG (for Nikon) /equivalent Sigma 35mm f/1.4 DG (for Canon)
- Profoto B1 flash
- Profoto 1’×3’ softbox
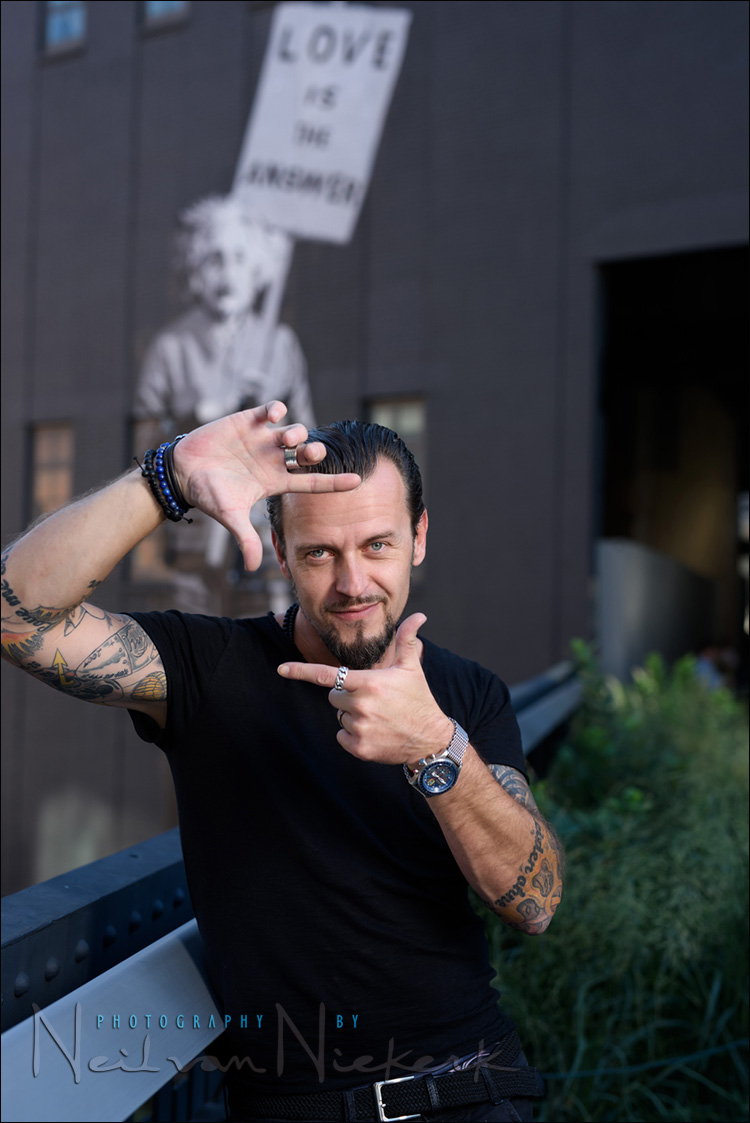
The more playful shot worked better than the more serious expressions. I wanted to move towards him with the camera and the GoPro on the gimbal so that the POV video would show the softbox and light … and as I moved closer, Marco goofed around. As a portrait photographer, you can’t necessarily pose spontaneous moments – you have to wait for them, and be ready.
- 1/250 @ f/2.8 @ 100 ISO … w/ off-camera flash
- Nikon D810
- Sigma 50mm f/1.4 DG (for Nikon) /equivalent Sigma 50mm F1.4 DG (for Canon)
- Profoto B1 flash
- Profoto 1’×3’ softbox

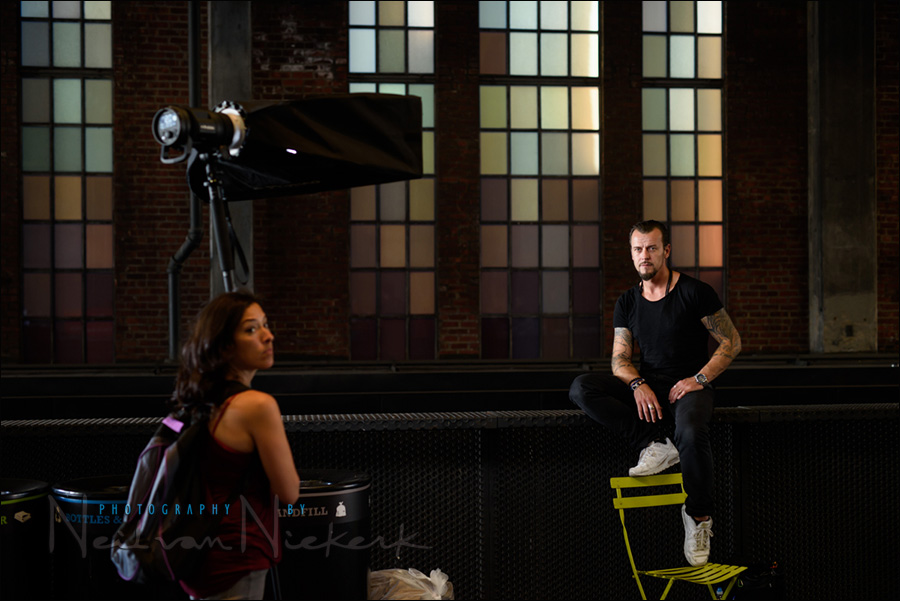
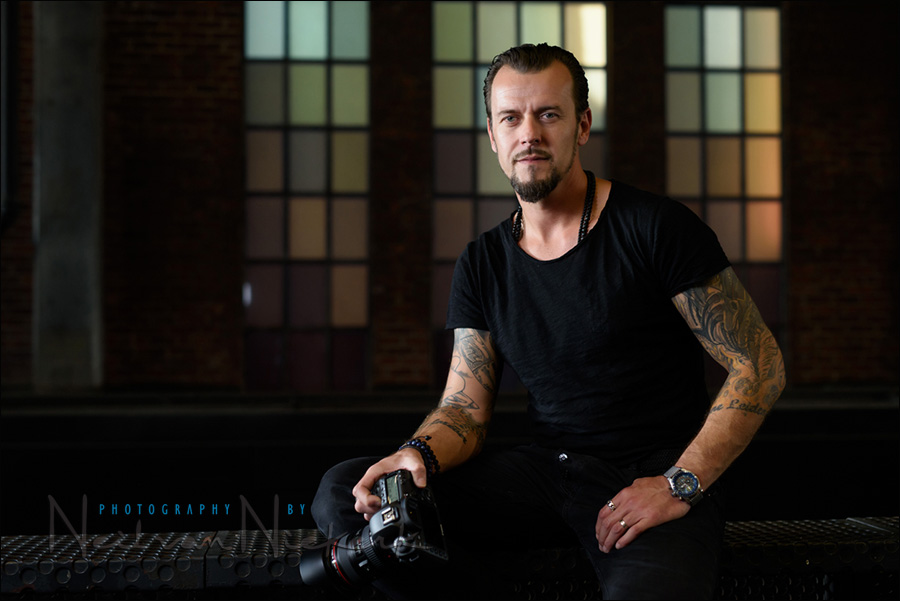
Under this overhang area on the Highline, I knew the colored window panes would make a fantastic background. We could get away with carefully posed images, just using the available light. But with a softbox giving a kiss of light, the light is perfect anyway. It’s just so much easier to work this way.
- 1/250 @ f/2.5 @ 200 ISO … w/ off-camera flash
- Nikon D810
- Sigma 50mm f/1.4 DG (for Nikon) /equivalent Sigma 50mm F1.4 DG (for Canon)
- Profoto B1 flash
- Profoto 1’×3’ softbox
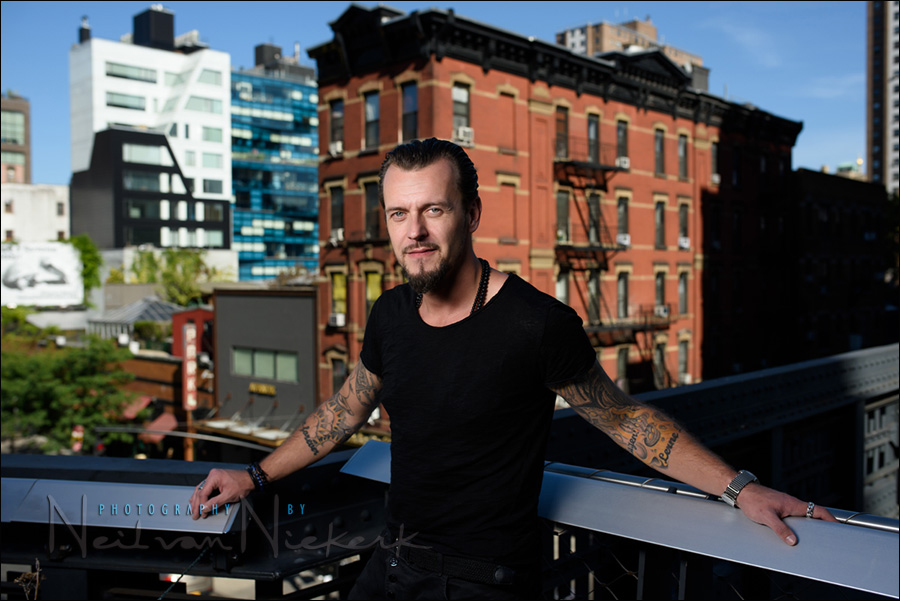
This one was for Marco – in several places he wanted a more scenic view of New York behind him. So the choice of aperture was deliberate again so that enough details is available, but not f/22 sharp. But neither f/1.4 blurred. Just right for context.
- 1/1000 @ f/4.5 @ 100 ISO … w/ off-camera flash
- Nikon D810
- Sigma 35mm f/1.4 DG (for Nikon) /equivalent Sigma 35mm f/1.4 DG (for Canon)
- Profoto B1 flash
- Profoto 1’×3’ softbox
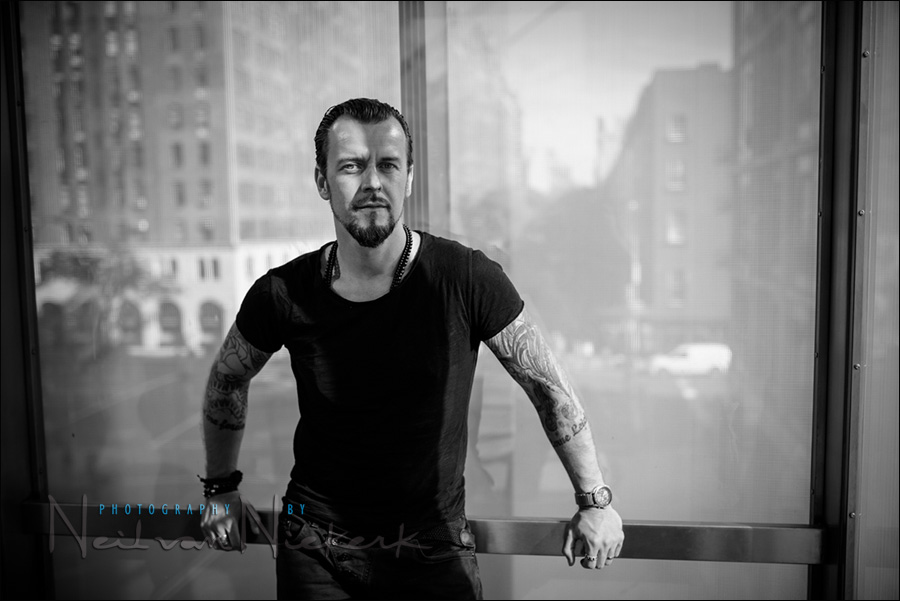
We went up and down this elevator several times because the light on Marco’s face would continually change. I had him move to the side so that in a few places, just a spot of light would hit one of his eyes.
The color was a severe yellow-green, so I knew this would be a B&W sequence. I even changed the Picture Style on my camera to B&W to show him what my intention was.
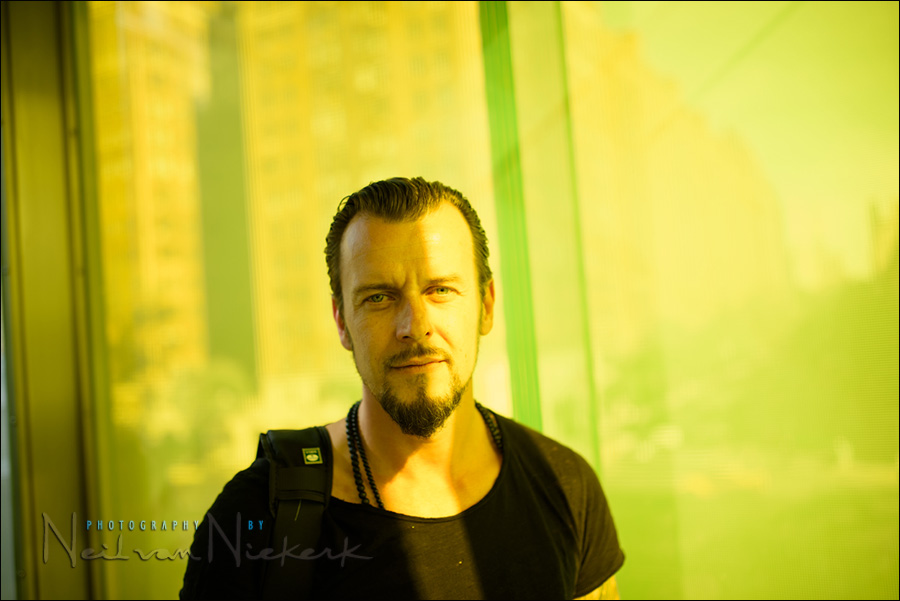
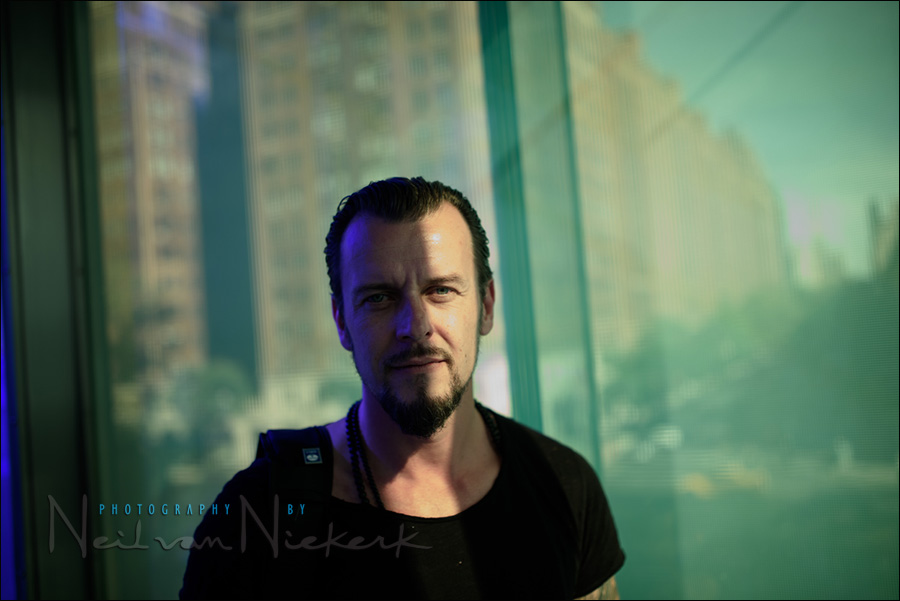
Just to show that the color shift is so severe, that it wasn’t possible to get proper skin tones out of the RAW file. Even then, it does have a cross-processed look that works well. Still, I prefer the simplicity of the B&W images we shot here.
- 1/500 @ f/1.8 @ 100 ISO … available light only

This was shot with me balancing precariously on the white traffic bollards you find in the Meatpacking district. I also positioned Marco on purpose so that that highlight on the cobble stones (due to light reflecting off a window somewhere), was directly behind him. I wanted a less distracting background, and cropped the photo in post-production to lose the sidewalk clutter with trees and people. With the high megapixel count of the Nikon D810, I still ended up with a 24 megapixel image. Loads of info still there.
- 1/2000 @ f/1.8 @ 100 ISO … w/ off-camera flash
- Nikon D810
- Sigma 50mm f/1.4 DG (for Nikon) /equivalent Sigma 50mm F1.4 DG (for Canon) … photo is cropped
- Profoto B1 flash
- Profoto 1’×3’ softbox
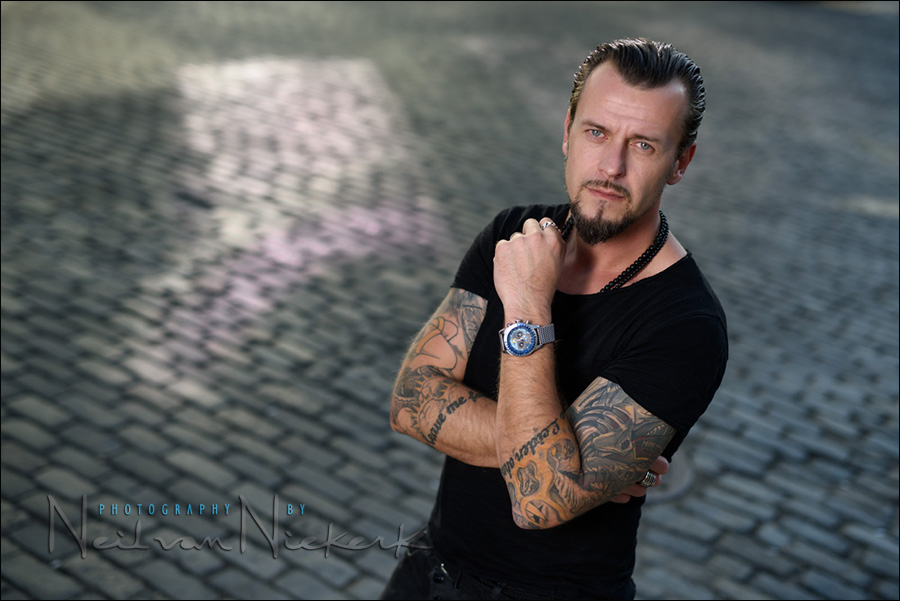
Still loving the simplicity of the repetitive pattern in the cobblestone street. I changed the composition to see if the highlight on the street would creative a dynamic tension in the composition – I feel as if my eyes move to and fro between the highlight on the street, and his expression.
- 1/800 @ f/2 @ 100 ISO … w/ off-camera flash
- Nikon D810
- Sigma 50mm f/1.4 DG (for Nikon) / Sigma 50mm F1.4 DG (for Canon)
- Profoto B1 flash
- Profoto 1’×3’ softbox
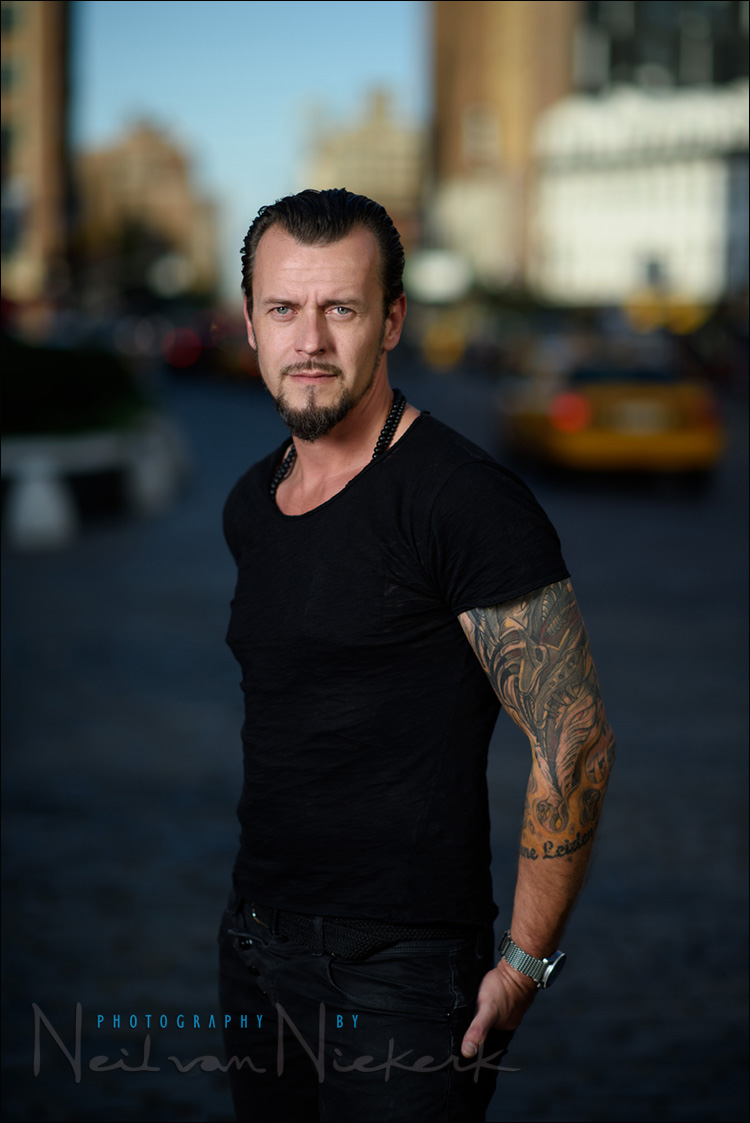
With my feet back on the ground, I had Marco pose in front of a busy intersection, timing it so that none of the pedestrians or nearby traffic showed. The wide aperture on the 85mm lens helped focus attention just on him, even with the busier background.
- 1/2500 @ f/1.8 @ 100 ISO … w/ off-camera flash
- Nikon D810
- Nikon AF-S 85mm f/1.4G /equivalent Canon EF 85mm f/1.2L II USM
- Profoto B1 flash
- Profoto 1’×3’ softbox

Again simplifying the composition with a wide aperture on the 85mm lens – the best lens to change your portrait photography.
- 1/1600 @ f/1.8 @ 100 ISO … w/ off-camera flash
- Nikon D810
- Nikon AF-S 85mm f/1.4G /equivalent Canon EF 85mm f/1.2L II USM
- Profoto B1 flash
- Profoto 1’×3’ softbox
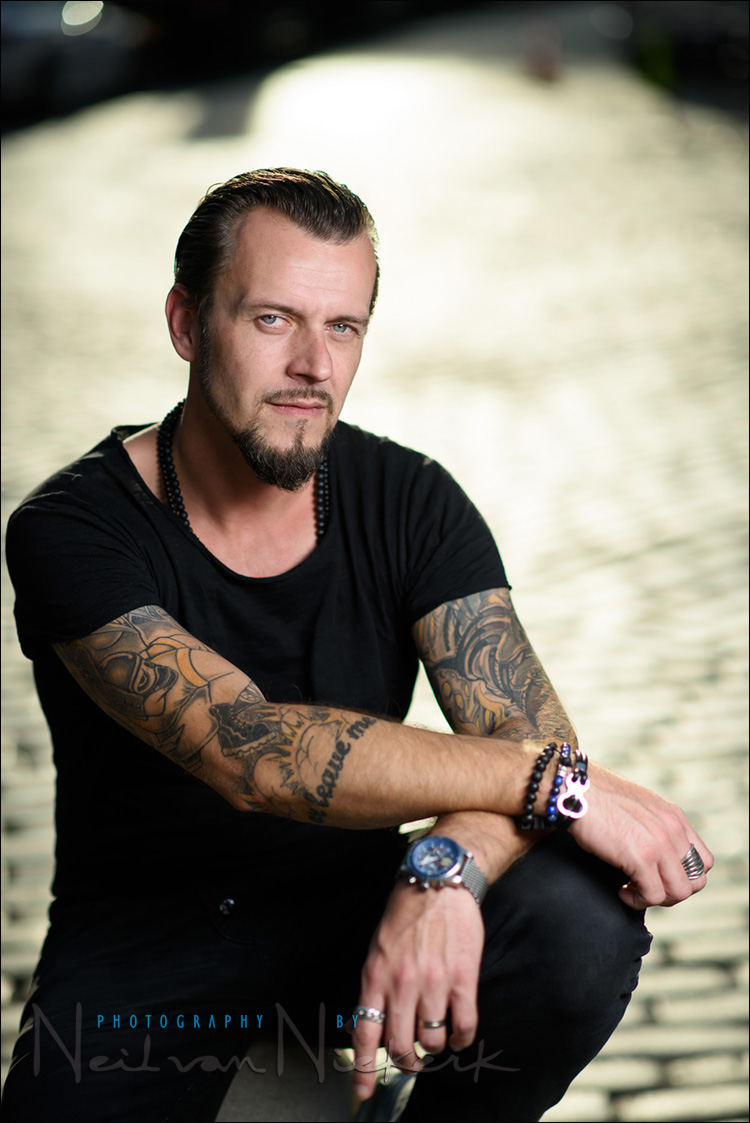
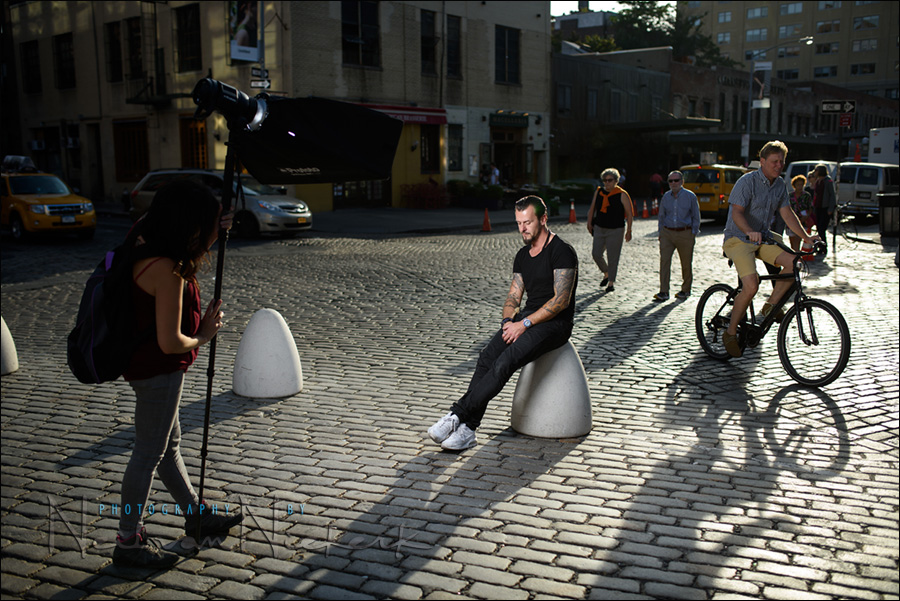
Again, a busy intersection where I had to carefully time my shots. The POV video clip shows this very well, as I wait for those few moments where the background is uncluttered.
- 1/6400 @ f/2 @ 100 ISO … w/ off-camera flash
- Nikon D810
- Nikon AF-S 85mm f/1.4G /equivalent Canon EF 85mm f/1.2L II USM
- Profoto B1 flash
- Profoto 1’×3’ softbox
Related articles
- When to use high speed flash sync (HSS)
- High-speed flash sync (HSS) with the Profoto B1 flash
- more articles on Off-camera flash photography
- On-location headshots and promotional portraits
- High-speed flash sync (HSS) with the Profoto B1 flash
- recap: NYC photo walks – photography workshop
- For more videos, follow me on Vimeo / YouTube

Neil,
Just a curious question regarding the B1. Did one battery last you for the shoot or did you have to change batteries using so much high speed sync?
David
With the Photo walks in NYC, we have 4 photographers and myself shooting in HSS mode with the Profoto B1 (i.e. at, or near full power) for 2 hours, and we run through 4 batteries.
So with the slower tempo here, where we shot less, we used maybe half the battery’s power. I tend to shoot selectively, and not machine gun it, especially so when using flash.
Great video. Interesting to see how the cropped image differed from what the eye seems to see of the whole scene. Any particular reason you used a strip box for the whole shoot? And a suggestion for another post: lighting couples. I’ve searched far and wide and 99% or all videos/tutorials on lighting involve only a single person as the subject. Never do I see any light shed on the complications involved with shooting couples. Pardon the pun. Literally!
Keith – First, to address your question about more articles on working with couples – great idea. I need to do that, and using this POV video camera will really show how I work with couples. So keep an eye out – there will be more to come.
Now, about the choice of light modifier: I often use the 1×3 stripbox when I have to work in narrower confines such as the sidewalks in New York. I’ve carried it up fire escapes, and climbed through windows with it.
For most of this photo session when I shot vertically, I had the stripbox in a vertical position.
However, I often use the stripbox horizontally for single portraits when I want more of a fill on the further side of my subject’s face. It’s quite versatile like that.
In this article about on-location promotional headshots, I had my assistant rotate the stripbox like that so that we could control the light that fell on his face, compared to the rest of his body. I used the stripbox to feather the light so that most of it fell on his face, and less light fell on his body.
With this photo shoot with cosplayer, Ger Tysk, I kept the stripbox vertical for the vertical portraits.
It is this combination of versatility and compact size, that makes this my favorite light modifier on location.
Wow! Didn’t expect such a response with so much detail. Thank you I much do taking the time. This truly goes to show your passion and dedication towards everyone and photography.
Agreed 100%.
Neil is the best pro and gives Sooooo much back to the photo community with his time on this blog and personally responding to our questions.
Hi Neil,
Thanks for sharing these images with us–rugged, edgy, dark, black-and-white (some of them). Awesome!
Also, I appreciate all the advice and tips you provide.
Alina
Hi all, besides the fact feeling very honored to be asked by Neil for (t)his Project and aside from the technical stuff, I also want to point out that for me it was a very interesting way of experiencing what it feels like to be the subject. Seeing how Neil works with you in his unique way, I as a not-model, was very comfortable by his guidance and how we went along shooting. I myself am earning my living for a few years with photography now and I always worry about things like, how to go along with locations, what do I see and what can be framed proper. Lighting decisions combined with technically correct exposures and look & feel of the creative mind.
With Neil’s setup here it was like dancing a waltz thorugh a busy dance-floor… easy in manouvering the monopod and I think it is the stripbox that makes the light more versatile than just using a square softbox. You have options here when sidelighting a longer portion of the body, filling in just on the face. You can switch by rotating.
And so, pls correct me Neil if I am off, by using this set, striplight horizontally and slightly at a 45° angle you can easily light a couple even, without one person throwing a shadow on the other. With the monopod you could also go above the couple and light down, wich simulates natural light fall.
Also the strip shape gives your team a slim silhouette to move in confined routes during a stroll around busy NY. A downside to the stripbox may be that you could use a broader lightsource to feather (square/Octa) to also hit a fill to open chin shadows. But for me it is a perfect light shaper. Neil wanted a more gritty look and from my taste and feel he did a great job and made me look cool. My wife also loves the images (and me even more ;-)
In general I want to also say, I have been following his tangents for some two years now and I thought a great way to give something back is to book his Workshop – to sum it up:
No gear I ever bought gave me as much as his workshop on his lighting techniques did!
So before you go out and buy that expensive lens or flash to hope your pics look better – take one of Neil’s Workshops! His way of sharing and teaching is so easy-going and he makes sure to pick up everybody’s level of knowledge. Although you should bring a knowledge of the basics to the table – in what your camera does with the buttons – to concentrate on the essence and not your camera menus.
I will definetely be back for the Photo Walk! And yes Neil, you rock!
Cheers, Marco
Neil, awesome photos and article one again. Love that you finally did a shoot with a male model. Love your gorgeous female models for sure but it’s good for us to learn to pose and deal with males as well.
Would love to see more of these POV sessions/videos/blog posts in the future to enhance the already great learning experience here on tangents.
One question, why on many shots was your assistant holding the strip box horizontally instead of vertically? Was that to limit the light to fall just on his face instead of his while length body? And if so why not bring the octabox out instead? Or did you want the hasher light of the strip for the male face?
I always tell all my photo friends online about your great articles here to help them lean all about lighting with on/off camera flash.
Love the sharpness of your pix. How often do you calibrate your lenses for front/back focus micro adjustments?
Love the look you get with those sigma 35 and 50mm Art lenses.One day I hope to have my own.
Thanks keep up the inspiring work.
Check my comment #4 again – everything about the stripbox is explained there. Also why I prefer it over an octabox when moving around on the streets of Manhattan.
My Sigma lenses are tack-sharp. But I did buy the Sigma puck to update the software as necessary. But it hasn’t been necessary yet to plug the lenses in.
Thanks Neil, sorry I didnt realize some of my question had already been asked by another person here.
Nicely done again, love seeing how you work
Hi Neil and thank you again for sharing your knowledge with passion and for doing so in unexpected ways! I do appreciate that a I will be very pleased to see more videos like that!
One comment about the picture shot under the awning in Meatpacking District. You wrote that “Working under the awning, there was a lot of clean, open light coming in from a good angle”. I noticed in the video that the sidewalk was highly reflective: most of the light on Marco comes from the sidewalk, that is from below! That direction of light put emphasis on his muscular arms but I wonder: would you have chosen the same direction of light for a female model?
Asture observation about the light being reflected strongly off the sidewalk as well.
And yes, sure, I would happily photograph a female model there:
Daniel, that the Profoto B1 and B2 have a smaller range of power settings where HSS is available – i.e., the higher power settings – is rarely a problem. As you increase the shutter speed, the power drops. Above max sync speed, the shutter speed becomes a linear control of the flash output.
So with this photo shoot, that never was a problem – too much flash blowing out my subject due to the Profoto B1 having that limited number of power levels it works at in HSS.
Very informative article and loved the POV. Thanks for sharing Neil.
Thank you for such excellent information! I have just one question regarding the HSS photos with the B1. Since the B1 will only go down to 80% power when in HSS, how did you avoid blowing out the subject when shooting at wide open apertures? That has been my only frustration with the B1s.
Mr. Neil,
I just want to say thank you
One can learn a lot from videos like this.
I admire your work and appreciate very much all the books you have written.
You are the man.
Thank you very much.
I enjoyed the video and the photos, of course the video would be even better if we could hear your real time experience rather than the music…. but will take what you gave us :) great job modeling Marco :)
Hey Sheri,
thx for your compliments, but you probably wouldn’t want to hear Neil or me flirting with the passing by People on who is who…
On the other side Neil did not comment on what he was exactly doing – we just had a lot of fun ;-) I am positive future Neil Cinema Productions will be flawless with voice!
Sheri – I originally wanted to leave some of the sound in, especially for our voices – but with some sections there was so much wind noise, that it rendered the audio useless. Therefore I decided to drop the audio out of this entirely for all the sections.
Next time, I will mic myself up with a lavaliere microphone, and see if that will work more effortlessly.
Informative and well worth reading. Thank you so much Neil !
Even though this is a late opinion, please do. The fact that you show how it is done in brief succession, it is enough visual info to your followers to have a very good idea of how the photo is achieved. Again thank you from all of us for sharing your knowledge with us… we highly appreciate it.