Photography questions & answers (FAQ) – Exposure metering
Looking at some of the questions about photography that appear via Google searches, I wanted to more directly answer some of the questions. This article is a selection of questions that I decided to amalgamate into one longer article. The questions mostly center around exposure metering and selection of camera settings.
A related page looks specifically at questions about flash photography.

Direction & Quality of Light
I wanted to distill the essence of what we, as photographers, work with – light! Before we can truly grasp on-camera flash and off-camera flash, and really, any kind of photography, we have to be aware of the direction and quality of light. We need to observe the light that we have, and then decide how best to use it, or enhance it.
With this book, I try my best to share those “aha!” moments with you, and I do believe this book can make a difference to your photography.
The book is available on Amazon USA and Amazon UK, or can be ordered through Barnes & Nobles and other bookstores. The book is also available on the Apple iBook Store, as well as Amazon Kindle.

01) How do I take an exposure reading with my camera?
Taking an exposure reading with your camera is at one level as simple as pointing your camera at the scene, and zero-ing the needle, by using the shutter speed & aperture & ISO controls. But, it also gets more complex and interesting than that. The crucial factor to remember is that your camera’s meter reads the light reflected from the scene you are pointing it at.
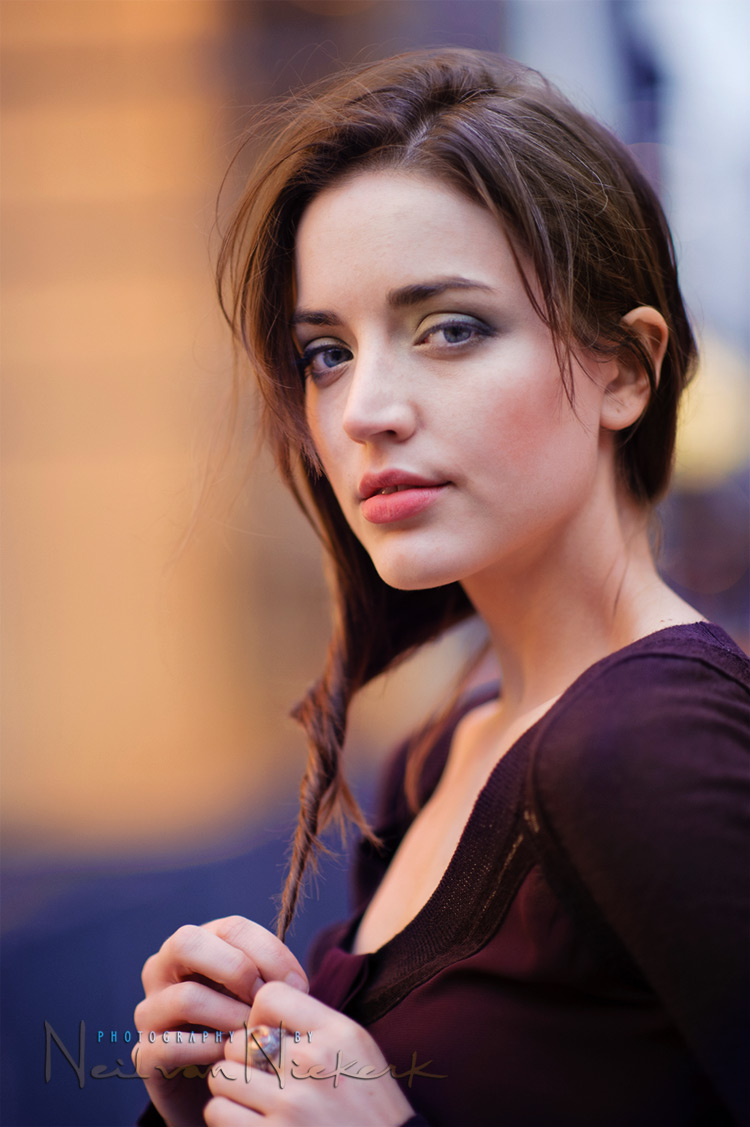
Looking at the image at the top – my favorite model, Anelisa, again – you will see she is wearing a white top, and she is placed against a dark background. With the composition as above, the chanced are great that most modern cameras with evaluative metering / matrix metering, will get to an exposure reading that is pretty close. The white areas and darker areas will most likely balance each other out.
But the moment that you change the composition by including a lot more white or a lot more of the dark areas, then the exposure your camera sets, will be off. You need to control your exposure settings …
You can most easily do this by shooting in manual exposure mode on your camera.
To get to correct (ambient) exposure, you can do either of several things:
– meter selectively with your camera’s built-in meter.
– if your subject is wearing white, use the camera’s histogram.
– use a hand-held meter. This is a near-infallible way of metering.
So there are several techniques to get to correct exposure. But when you rely on your camera’s built-in meter, then you have to familiarize yourself with the concept of various tonalities of the scene / subject … and how to meter selectively. And you also need to realize that simply zero-ing your camera’s meter needle, will not necessarily give you correct exposure. Similarly, simply pointing your camera at the subject while using spot-metering, will not necessarily solve your metering problems. You need to meter for selected tones.
02) How to blur the background
Perhaps this might be a topic for a more comprehensive article, but the simple steps you take to blur the background:
- position your subject as far as possible from the background,
- use a fast / wide aperture,
- use a longer focal length.
This last one is more contentious though, since it can be shown that DoF remains the same for the same aperture, regardless of the focal length … if you keep subject size the same in the frame. The practical matter though, is that the background is perceived as being more blurred when you use a longer lens.
03) Why can’t I get great shallow depth of field with my camera and lens?
There are several reasons for why you might not be getting shallow depth of field (DoF)
- The primary reason is that you’re not using a lens with a wide aperture. A kit zoom lens with an f5.6 maximum aperture is simply not going to do it. You really need a lens with a wide aperture if you want to separate your subject from the background.
- Then you also need to move your subject further from the background. When people pose for a camera, they have a tendency to bunch up against a wall or such. Get them to step forward. The further away from the background, the better.
- You need a camera with a large sensor. An iPhone will never give you shallow depth of field. A medium or large format camera will give you the shallowest depth of field in comparison.
- Using a longer focal length will also help in separating your subject from the background.
04) Camera brand with most accurate metering
I would say that at this point in camera design and technology, there really is no DSLR that doesn’t have accurate metering. The metering systems have become increasingly sophisticated and complex in how they interpret the light levels from various parts of the metered scene – such as Matrix Metering (with Nikon) and Evaluative Metering (with Canon), and any of the equivalents that Pentax, Sony, Olympus and others will have. They are all accurate, I’m sure. So at this point, if you’re not happy with your camera’s metering, then it is a is, imho, just sheer laziness in trying to rely entirely on technology from saving you from understanding exposure metering basics.
05) How can I take photos at a slow shutter speed and not over-expose?
The problem experienced here is that the photographer asking this question, most likely did not keep an eye on his camera’s built-in meter. Whatever shutter speed you choose, the combination of aperture / ISO / shutter speed needs to be such that you’re not over-exposing the ambient light.

06) Will my exposure settings change if I move my position?
It depends on how you are moving in relation to the light. If you are moving towards or away from your subject, then your settings will remain the same. If you are moving around your subject, then your exposure settings will need to change. (This is of course assuming a single directional light source.)
07) Does shutter speed have to match the focal length to get correct exposure?
This question might seem particularly odd, but let’s help this poor guy – While shutter speed affects your available light exposure (along with aperture and ISO), your focal length has nothing to do with exposure. So those are two entirely separate considerations – focal length, and exposure metering.
I do see the one fallacy here that I always kick against – the idea that:
the inverse of the focal length = handhold-able shutter speed.
It just doesn’t quite work that way. There is no specific shutter speed at which the images will be crisp .. yet one click lower on the shutter speed, and you will end up with camera shake. There just isn’t that clear a distinction. It really is a gradual progression of higher shutter speeds = sharper photos.
08) Recommended aperture within situation
Your choice of aperture is usually dictated by the depth-of-field you need, whether shallow or deep. Anyone who isn’t familiar with depth-of-field and how aperture affects it, needs to stop being so lazy, and get a good basic book on photography, such as Bryan Peterson’s book on Understanding Exposure. This stuff is one of the most essential basics in understanding photographic technique.
09) How do you exposure for your subject’s skin tones?
With the Zone System, Caucasian skin tones are usually placed at Zone VI / Zone 6 .. which is one stop up from middle grey / Zone V. Very light skin tones might be placed at 2 stops up from middle grey. ie, Zone VII. However, skin tones vary a lot, and we need to keep that in mind.
Now, applying the classic Zone System directly like this – placing skin tones by adding a stop more exposure – is something we could do with B&W photography where we have exact control over the choice of film, processing of the film, and the printing stage. For digital, metering off Caucasian skin tone, and then adding 1 stop more exposure, could very well lead to over-exposure. Certainly, 2 stops up from a mid-tone with a digital camera would push the histogram right to the edge or beyond. Over-exposure.
Therefore, metering off skin tones is something we could do, but we’d have to evaluate how light or dark the skin tones is that we’re metering off.
That said, I do believe that an understanding (if not quite direct application) of the Zone System is essential in understanding exposure metering in photography.
10) Which is best – TTL flash or manual flash ?
This is one area where I detect a fair amount of dogmatism from many users of manual flash. I use TTL flash or manual flash as the need arises. TTL flash has a certain ease-of-use that allows you to shoot on the run, and adjust as you shoot. But it isn’t as predictable as manual flash which is more methodically set up.
My criteria when to use TTL flash, and when I use manual flash .. if I move around with my flash on my camera, then TTL flash makes my life easier. But any time that my subject is static in relation to my lights, then manual flash is the most logical choice.
Ultimately, you’ll be a stronger photographer if you can use either of those two modes of flash without hesitation, and adapt to the scenario you are photographing. No dogma.
I don’t agree with you about the 1/focal length rule of thumb for hand holding. Like most rules of thumb, it is not perfect, but it is pretty good, and a good place to start. Just like sunny 16, it is not always right for me, but it gets me very close.
Also, I always heard it as: 1/focal length*crop factor = MINIMUM acceptable shutter speed, not the ideal SS.
Serious photographers will explore this very closely and come up with good answers for themselves for each lens, but that doesn’t stop the helpfulness of a simple rule of thumb. 1/(focal length*crop factor)= Min SS gets you about 90% there, which is very good for something so simple.
Lance, you know … I agree entirely with you. Especially in the regard that this guideline gives us a common-sense place to start.
I should’ve expanded more on what exactly I have a problem with – where this guideline of a MINIMUM handhold-able shutter speed (when you still need to be careful) … is reduced to something like the advice that I often see on the forums that you need to shoot at 1/60th to give you sharp images. Then the misunderstanding (or complete over-simplification of the guideline) will just lead newer photographers down a wrong path in understanding the basics.
Neil vN
About the UV filters…
I’ve been using a Hoya Super HMC 77mm UV filter on my 70-200 for quite a while. I think I paid roughly $50 for it. Well, last week I ordered a Nikon UV filter for my new 24-70 and decided to compare the 2 UV filters. I placed them both on a white sheet of paper and looked at them under a light. To my surprise the Hoya filter actually had a pretty strong yellowish tint! And it’s isn’t even a cheap Chinese filter. Long story short, be careful what you put in front of your nice glass.
Same here.
Found that 2 weeks ago by accident.
Same uv filter.
Took the filter off to clean the front element and put it on a white sheet.
To my surprise there was a yellow cast.
Right now I’m only using clear/protective filters.
There are 2 points to consider:
1) Lots of Hoyas and Kenkos on the market are fake. Even retailers have been caught out.
2) Coatings have color. Coatings are what give you 97% transmission and no ghosting/double imaging. Coatings are why your piece of glass isn’t the $2 a plain piece of glass would cost.
Usually coatings are green/blue, I’ve not heard of other colors.
Stephen Y.,
Are you talking about this Nikon filter?
The product description says it is a clear filter, so it probably doesn’t reduce UV rays all that much. I have a Hoya 77mm UV(0) filter, and the product description says it reduces blue cast, so I’m wondering if by virtue of reducing one color, it shifts towards more yellow.
Stephen .. even the different makes and brands of lenses will all give a slightly different color representation. So that comes into the mix as well.
But if someone starts with a “yellow ” filter,that will sure mess up the AWB even more.
Hi Neil,
Great site with lots of useful information!!! I see you mention alot about shooting with fast glass for wedding photography. I have also noticed some of your images of your subjects are shot at f2.8 while you are a good distance away for eg, The brilliant image you took of a bride & Groom from the gallery in the flash & Ambient light section of the website.
Would you not need to shoot at f7 or f8 with more flash/Iso to keep the couple in focus?? When I shoot a couple of people at f2.8 they are never in focus unless im really close up. Sorry if this question seems amatuerish!! Keep up the good work !!
Stevo .. your subjects need to be in the same plane of focus for f2.8 or similarly wide apertures to give you sharp focus on both.
There’s another factor working in my favor here … in resizing the image smaller for use in an album or on the web, the apparant depth of field is greater than viewing the photo at 100%
Neil vN
Hi Neil,
Thanks alot for answering my question about depth of field and apperture.
I have One more question if you dont mind?
I shot my friends child’s christening a few months back and the church was pretty dark, so I increased my iso to 1600 and also increased my fEC. I didnt have the option of a tripod and for correct exposure I would have had to shoot at 1/40 which would have resulted in camera shake. So I decided to shoot at 1/60 and fix the exposure in post processing. The problem I had was not the exposure but that all my images had a real bad orange/redish colour to them. I changed the wb to tungsten and tried a few different settings but they just looked worse. This has happened to me on a couple of occasions in churches and I just cant figure it out!! One thing I have noticed is they don’t seem to be as orange when the flash dosen’t fire? I have heard of flash gels, should I use them? or should I Dial down the colour temperature in the camera? I would greatly appreciate any help or advice you can give, on this problem I have.
Thanks again Neil for taking the time and sharing your knowledge to so many and helping me become a better Photographer!!
Stevo … I see two immediate problems here. It would appear you are using Auto WB ? This is why the WB looks very warm when the flash fires – it defaults to Flash WB then.
Also, your concern over incorrect WB seems to indicate that you’re shooting in JPG. If so, you have immediately change to a RAW workflow.
You really should look into using gels when you shoot in areas where there is Incandescent lighting. You can’t accomplish what you want to by just dialing the WB in your camera when you have two light sources with disparate color balance.
Anelisa’s top seems a little blown out… Upon noting this yourself (not that you haven’t), would you consider the example shot over exposed or correct?
If correct how much recovery would you tend to use? (now there’s an open question lol).
Personally I think the exposure is a little high, but maybe you feel you can recover enough in post without damaging the rest of the colours/tonality?
White tops are tricky.
Regardless, thanks for you tuition… great as always!
The exposure in-camera was correct according to the luminance histogram. The histogram (and lack of over-exposure warning) in ACR / Bridge confirmed the exposure is good. I’m not sure why you think it looks over-exposed.
Anyway, with RAW, I get just over a stop of over-exposure that I can fix satisfactorily.
About lens hoods … some of the lens suppliers do not exactly make it hassle free to include a hood as a standard part of a lens (as available in retail). They should (have) just include(d) the damn hood & adjust the price accordingly.
Moreover, in gear packing|carrying discussions, some people invariably mention that they forgo the hood in lieu of other items. I think both of those factors may give the impression that a hood many not be a necessity.
About a decade ago, I had to order a hood separately for a Tokina lens (IIRC, hood delayed the delivery for being part of the same order). As far as I know, Canon still does not include a hood. Sony lenses do come with a hood. What is the situation with lenses from other companies?
Parv,
Nikon includes lens hoods on some of its lenses. Nikon definitely includes hoods on professional-grade lenses, while they usually do not include a lens hood on some consumer-grade lenses (particularly the low-end lenses).
No, Nikon includes lens hoods on all lenses afaik, as do all brands except Canon. Canon doesn’t have hoods on many EF-S lenses, but you can buy them separately.
Thank you Stephen. Your comment made me to look for the same in case of Canon, which seems to be true …
– Canon EF-S 18-55mm f/3.5-5.6 IS
– Canon EF 70-200mm f/2.8L IS II USM
… I partially stand corrected.
The picture of Anelisa at the top of this article – the one of her in the maroon shirt – is absolutely stunning. Kudos to you both.
Any chance we can get some details about the shot? What lens was used, what camera, exposure settings? Is it natural light? I don’t see any catchlights in her pupils…
Details about this photo:
https://neilvn.com/tangents/using-narrow-depth-of-field-and-great-bokeh/
Great stuff. Thanks, Neil!