Posing technique – Adjusting a pose with incremental changes
I’m not a huge fan of “flow posing” where someone is rigidly posed according to formula. I feel this doesn’t allow as much for personality and individuality as a more organic approach. I much more prefer a low-stress approach where a pose is adjusted, to where it looks good, and looks flattering. This does mean that I have to find that balance between allowing “faults” and finessing a pose. Sometimes it just works better for the flow of a photo session to not micro-adjust to the point where your subject might feel it as criticism.
Memorizing poses from a book or guide is a good starting point, but in practice, you’d still have to finesse body, hands, feet and your subject’s head. You have to look at individual elements and fix and adjust.
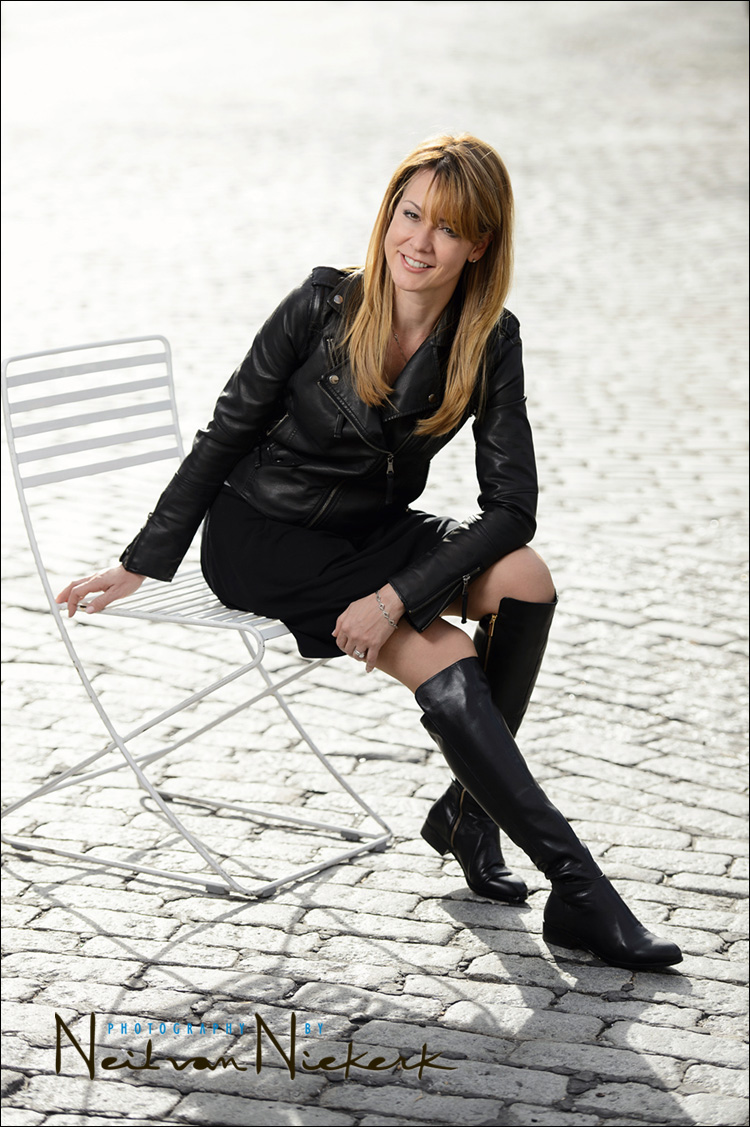
With this photo of my friend, Irene, I want to show some of the thought-process. She was kind enough to allow me to post some of the more awkward in-between poses, as we finessed it along the way.
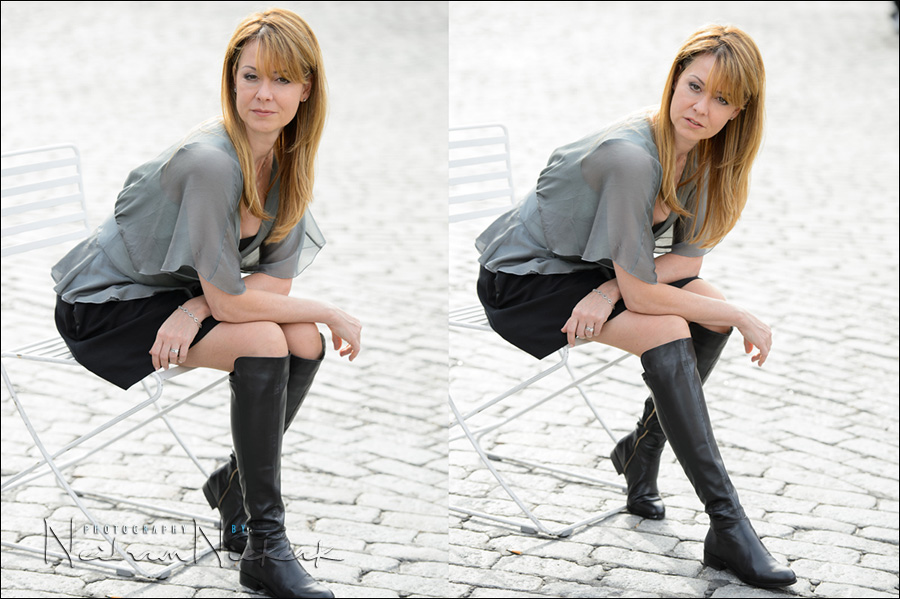
This seated pose looked slightly awkward, even with her head tilted and right foot more extended forward.
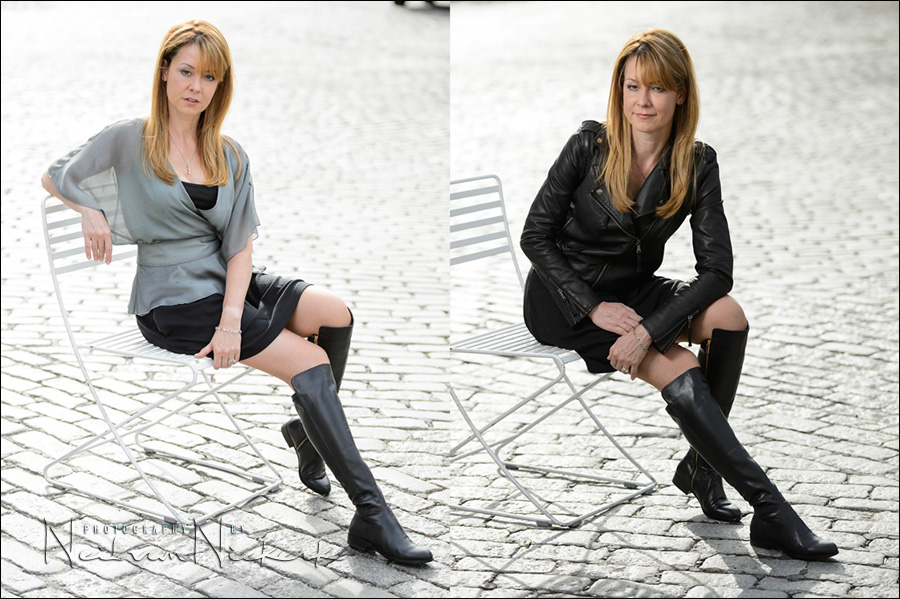
Leaning back helped a bit, but then we changed things. I added off-camera flash, and Irene added the leather jacket. Leaning forward slightly with arms on her legs, worked better. I asked her to open her shoulders to me, and turn her head more towards the light.
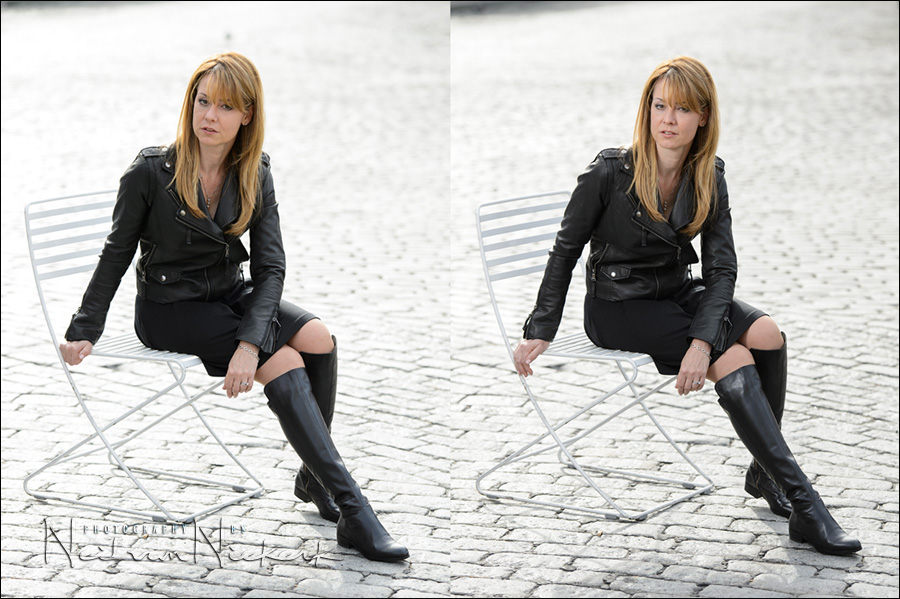
Notice the change in her right hand here. The LH image has the hand too closed, and her fingers look “blunt”. Opening them up worked slightly better, but still look awkward, and we fixed that with subsequent adjustments.
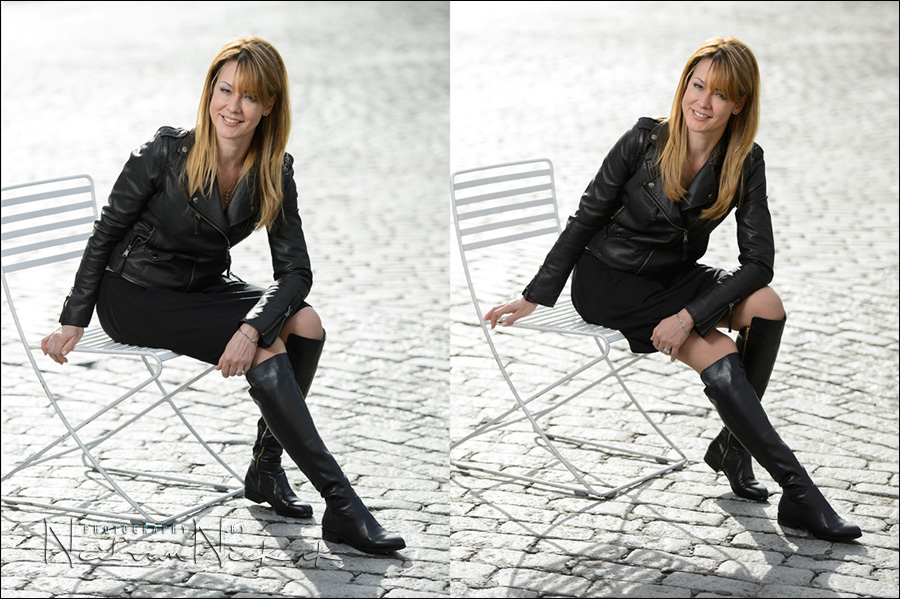
Asking Irene to sweep her arm back slightly, and then opening her fingers, changed the pose entirely. I also asked her to extend her foot even more. Her body and arms and legs now form diagonal lines across the frame, which makes the composition more dynamic.
This pose, like others, isn’t specifically one that would be memorized in detail. It was more a pose that progressed out of small adjustments until every element looked good, and not look or feel awkward. But this does rely on you, as the photographer, to recognize when something in the pose can be improved and finessed.
Related articles
- Becoming more confident in posing people
- Posing tips: Pose the hands – asymmetry
- Posing tips – the leaning pose
- Photographing couples – Posing and composition
- Posing normal, everyday people for portraits
- Sequence of photos – posing a model – Oktavia
- review: Westcott Rapid Box – 26″ Octa Softbox
Lighting and camera settings
Camera settings: 1/250 @ f/4 @ 100 ISO for the final image at the top.
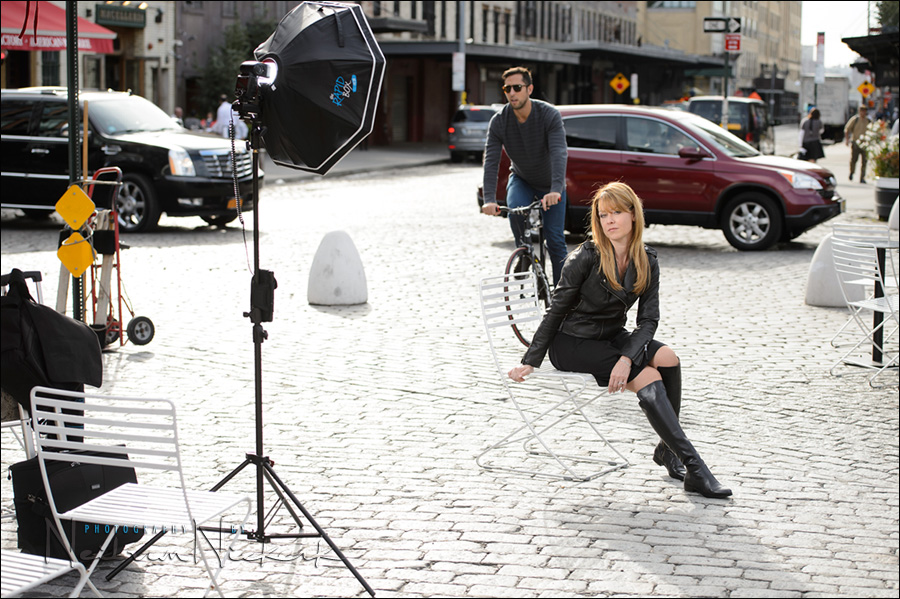
The initial photos were taking with ambient light only, at camera settings of: 1/250 @ f/4 @ 200 ISO. But I wanted a little bit more control over the light on Irene, so I added off-camera flash. The same thought-process as here: off-camera flash for that extra bit of drama. Dropping the ISO to 200 ISO, did the trick, with the TTL flash picking up the difference easily. While the light outside was bright, it was overcast. This is also why the additional lighting helped bring some snap to the photo.

Direction & Quality of Light
I wanted to distill the essence of what we, as photographers, work with – light! Before we can truly grasp on-camera flash and off-camera flash, and really, any kind of photography, we have to be aware of the direction and quality of light. We need to observe the light that we have, and then decide how best to use it, or enhance it.
With this book, I try my best to share those “aha!” moments with you, and I do believe this book can make a difference to your photography.
The book is available on Amazon USA and Amazon UK, or can be ordered through Barnes & Nobles and other bookstores. The book is also available on the Apple iBook Store, as well as Amazon Kindle.
Photo gear (or equivalents) used in this photo session
- Nikon D4
- Nikon 24-70mm f2.8G AF-S / Canon 24-70mm f/2.8L II
- Westcott Rapidbox – 26′ Octa Softbox
- Nikon SB-910 Speedlight / Canon 600EX-RT Speedlite
Nikon SD-9 battery pack / Canon CP-E4 battery pack - Manfrotto 1052BAC – medium sized light-stand
Neil, you are so on the money with this one. The stress caused by a subject perceiving excessive posing instructions as criticism will manifest in their facial muscles. The incremental adjustment approach you’re suggesting is much preferred.
Good point about the stress and resulting facial muscles. The other good thing about gradual posing like this is that the subject gets the message that it’s a work in progress and she can contribute her own ideas and creativity, however subtle or dramatic, and often does — in a way you might not have thought of and it makes the photo great. Not always but sometimes.
Glad to see Neil plays around and doesn’t always have the perfect pose for everyone at the get go.
I agree with you on the “rigidly posed according to formula” issue. I believe there’s a time and place for these types of poses, best reserved for glamour/fashion photography. When used in everyday portraiture it looks contrived and pretentious. I much prefer the natural, relaxed look you display in the article.
The one issue I have with the incremental approach is that some people become less relaxed when you have too many ‘increments’. I guess they have an issue with being told what to do. What do you do in these cases, Neil?
In my opinion, I prefer the photo on the left in the last of the double photos. I find that the one on the right that your model looks as if she’s leaning a bit too far forward and on the verge of falling from her chair.
Thanks again for an insightful and informative article.
Neil… I would desperately appreciate you putting your next video together on the subject of posing in the context of a photoshoot from start to finish with your “everyday” client. “Everyday” meaning, non-professional model. My credit card stands at the ready to be swiped :-)
I enjoy shooting senior casuals but unfortunately for me, not often enough as I’m not a full time photographer. It’s always awkward at the beginning of a photo session getting my grove…so to speak. It’s awkward for the senior and stressful for me. It just takes time to settle in. I know this isn’t unique to me and that everyone goes through this. I would love to see a session flow from you on your general process of the shoot from beginning to end. I have no doubt with your experience, you most likely get into the “groove” much quicker than most. Just watching you get there would be very helpful to me and others, I’m sure. Keeping poses in my head is almost impossible. I seem to get to the shoot and lose my memory, then at times feel lost as to what to do next. I’m trying to get a pattern developed to help me walk through the process. A progression, if you will, to my shoot to help me walk from a set of poses from beginning to end. Hopefully, this won’t hindering my creative abilities but rather, keep me on track through the shoot. I still want to let a natural progress/flow happen but help it along so there’s no awkward dead spots in my shoot. I know it takes practice… and then more practice. I am limited as I’m not a full time photographer but my desire to learn to flow through a shoot is strong.
Thanks Neil.
And too much direction fed posing will result in the subject quickly losing interest and bring into the stress and boredom of the shoot and posing. It is supposed to be fun, not a thing of too many direction fed stuff and stress.
As always, thoughtfully and honestly articulate… like you are welcoming us along your photographic journey. As for female hands, I prefer bladed with gracefully cascading fingers. None of the blocky, chunky mess and masculine tendons. And contrary to some opinions, I love “broken” wrists.
“Memorizing poses from a book or guide is a good starting point, but in practice, you’d still have to finesse body, hands, feet and your subject’s head. You have to look at individual elements and fix and adjust.”
Hi Neil,
Would you say that posing subjects is like learning Mathematics (and many other things for that matter)? By that I mean, one can read a lot about the topic, and watch many tutorials, but will only get better at it after one tries it? Hitting walls, failing and learning from the mistakes (and reviewing the tutorials) are the ingredients for progress?
That is how it works.