Flash photography tip: Find your background, then your settings
With flash photography on location, we nearly always start off by figuring out what we want to do in relation to our available light. We might just need fill-flash, or or flash might need to do the “heavy lifting” and expose correctly for our subject in relation to the available light. When we have our subject in (relative) shade, and need to figure out our flash exposure, we also need to decide exactly what our background is.
It usually works best to be specific about our background … and how we position ourselves and our subject in relation to that.
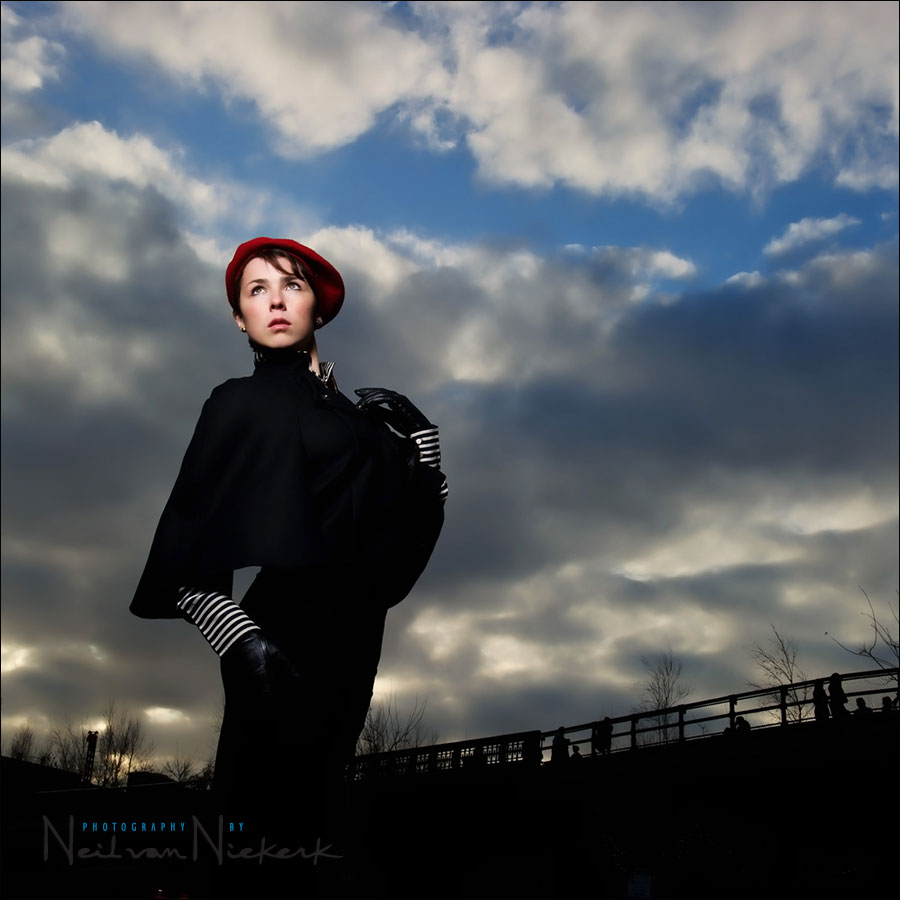
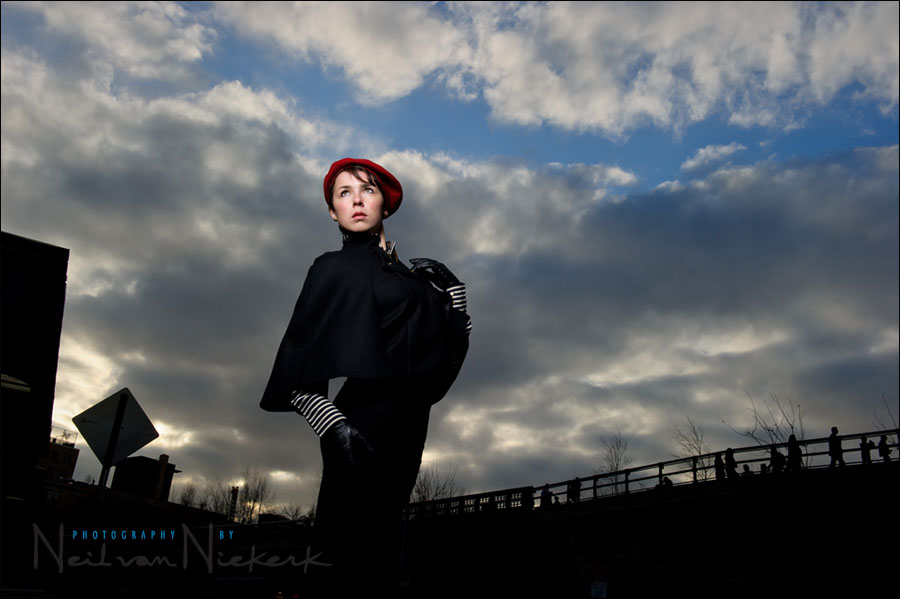
So let’s run through that thought-process, using the image at the top. Alex was our delightful model today during an individual workshop in Manhattan.
A point that I often underline here, is that we can’t expose correctly for all the areas in our background. We have to choose which part of our background is important, and base our exposure on that.
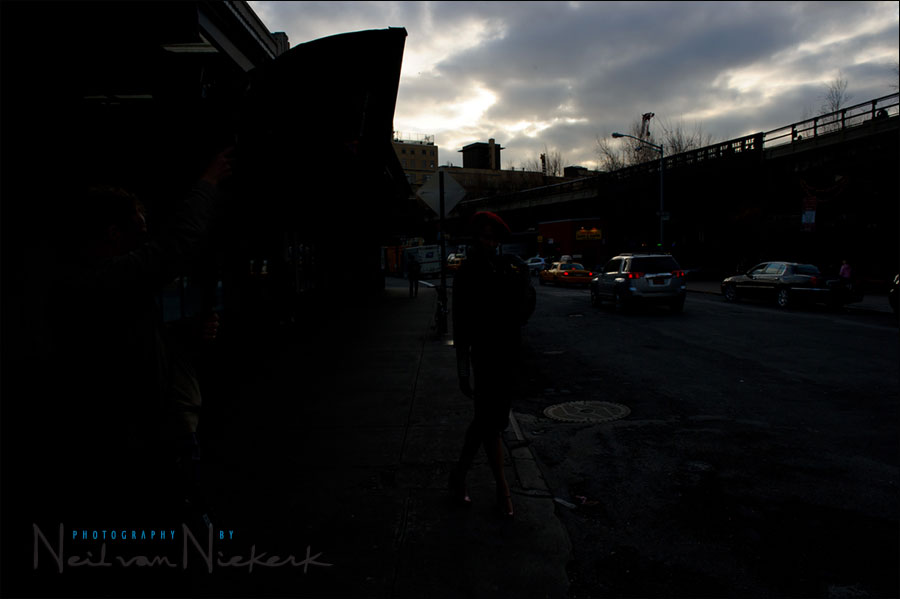
For example, here is a street scene in Manhattan. Exposing for the sky, the street goes completely dark.
1/250 @ f11 @ 200 ISO
This is to illustrate that I can’t simultaneously expose correctly for the sky and the street scene. I have to decide what area I predominantly want as my background.
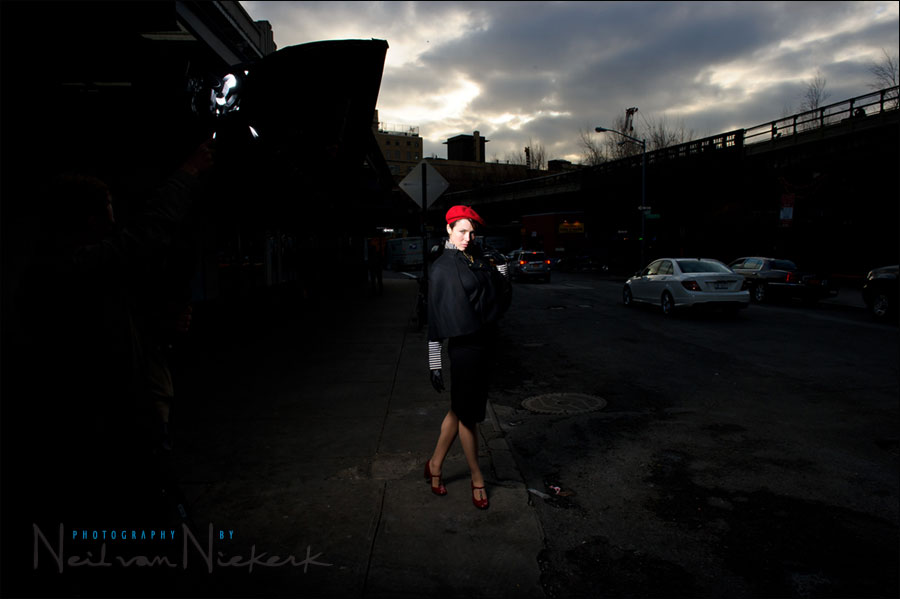
Adding flash to this to expose correctly for Alex, still leaves us with an image that doesn’t make sense. She’s lost in a pool of black surroundings.
Positioning myself so that I can shoot up and use the sky as my background, makes much more sense.
At this point, I had changed my exposure to 1/250 @ f16 @ 200 ISO to really saturate the sky. There is no specific correct exposure here for the sky. I can choose how I want to have the background / the sky appear.
Adding the correct amount of flash to this mix (as manual off-camera flash), immediately gives a dramatic look.
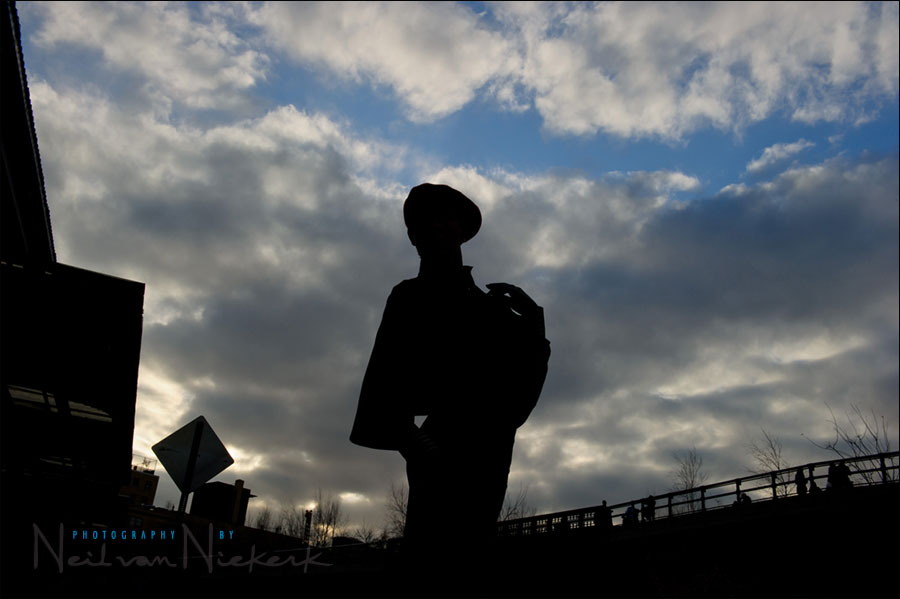
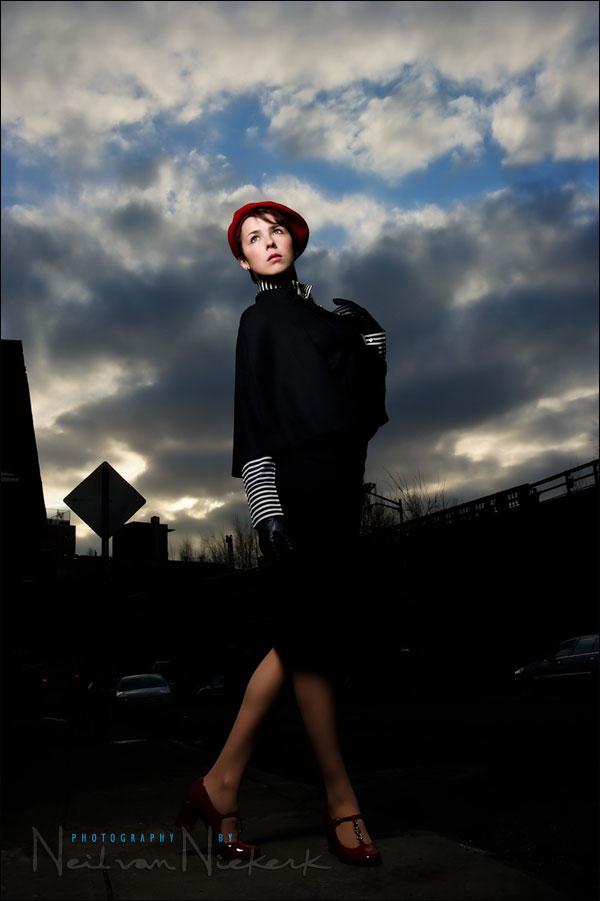
The vertical shot looks good, but half the frame is dark. It would need additional flashes, or something there to help delineate her legs against the background.
The composition just makes more sense as a horizontal photo, with Alex placed against the sky.
The final image again …
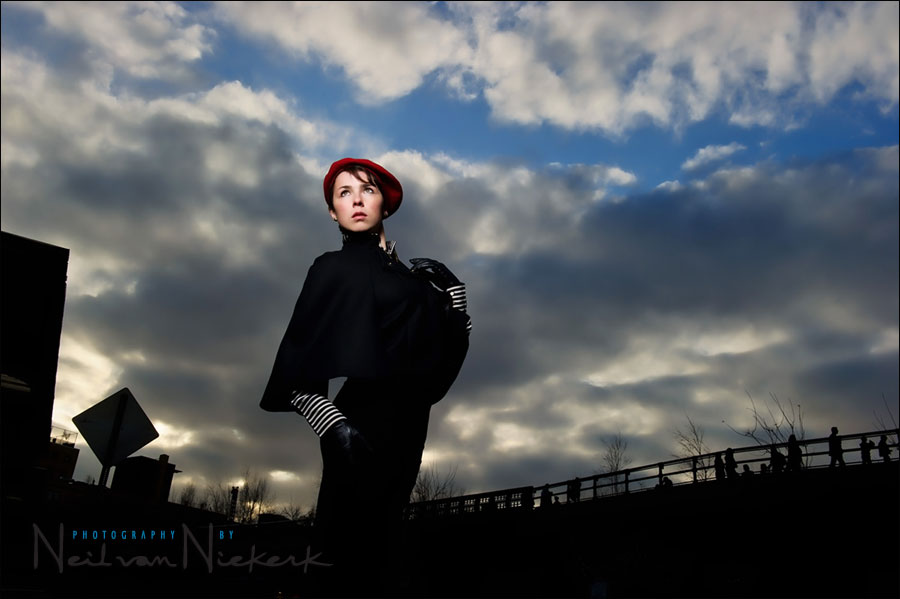
.. but with the image sweetened a bit using Topaz Adjust in an Adjustment Layer in Photoshop to give the photograph a bit more snap, as described in that article.
Here is the pull-back shot:
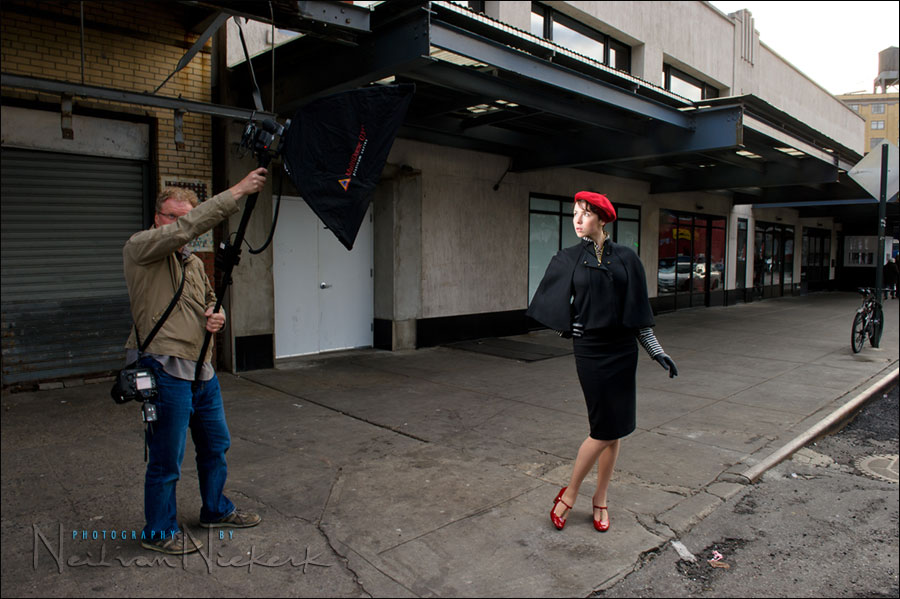
To get any kind of detail in the surrounding areas, and not have it appear black, I dragged my shutter to 1/15 of a second. Not a sensible shutter speed here when hand-holding the camera. It was just to illustrate where we were.
Since we were shooting with manual flash here, I couldn’t as easily change my aperture and ISO as I might have if TTL flash was an option with our setup. Therefore my shutter speed was the easiest to change and affect my ambient light only. (It’s my independent control for available light when shooting with manual flash.)
FInally, here is the image as I preferred it to be cropped. It was sweetened a bit in Photoshop with using Topaz Adjust, but the sky was not dodged and burnt or manipulated. It appears that saturated and dramatic because that is how we exposed for it.
1/250 @ f16 @ 200 ISO … 24-70mm lens zoomed to 35mm (but image cropped square)
Step-by-step, the metering technique used for the manual flash
- We decided on the aperture and ISO we want to use, based on what we wanted to do with our background.
- Since we’re shooting in bright light, our lowest ISO is our best option.
- We’re shooting at maximum sync speed, since that is the most sensible shutter speed choice now.
- Since manual flash was used, that means aperture and ISO has now been fixed for us.
- That leaves distance and power of our flash, as the other two controls.
- Knowing we need to dump f16 @ 200 ISO worth of light from the Q-flash in a softbox with a single baffle, the flash was set to full manual output. Everything the flash could give.
- That means our power was decided for us. (Due to bright sky)
- Then we just had to use a lightmeter to measure our output (in f-stop readings). Holding the monopod and softbox up, I moved forward until the other photographer read f/16 on the lightmeter. Remember, the distance here is the distance from the light-source to the subject, not the photographer’s distance to the subject.
- Now all our settings for flash are correct … in relation to our chosen background.
Related articles
- Camera & flash settings: what do you want to achieve? (model: Ulorin Vex)
- controlling bright daylight w/ direct off-camera flash (model: Molly K)
- For off-camera flash, what are your camera settings?
- Flash photography tutorial
- Effective on-location portraits (model: Anelisa)
- Flash photography tutorial: balancing flash and ambient exposure (model: Anelisa)
Photo gear used during this photo session
- Nikon D3S
- Nikon 24-70mm f2.8 AF-S
- Quantum Q-flash T5D-R
- Photoflex Medium Litedome Q39 (24×32)
- Sekonic L-358 lightmeter
- (2x) Pocket-Wizard Plus II Tranceiver
Hi Neil,
great article again. You have a way of making OCF sound so easy ;-)
You mentioned your qflash. Would this also have been possible using a normal 580EXII speedlite or do you really need the extra power of a qflash for this?
Regards
Erwin
Erwin .. even with the Q-flash (and reflector dish), we had to remove one of the baffles from the softbox to get enough light on her for an f16 aperture. This would be out of the range of a speedlight, by around a stop or two.
If I had used a speedlight, I would’ve squeezed maybe f11 or so from it … which means the sky would’ve been a stop brighter. That’s not a huge difference in the final image though, and I doubt anyone looking at the photograph would’ve then said it needed a darker sky. So there is leeway here.
Hi Neil,
your website is inspirational. This weekend i got to try some of the techniques that you’ve explained in your posts and i couldn’t believe the results that i was seeing (nowhere close to your results though, as yet :-) ).
Just stopped by to thank you and looking forward to pick up many more ideas/techniques. so thanks again and merry Christmas to everyone in your team!
Praveen
Cool trick, cool tutorial I shall be out trying this very soon. Thanks Neil.
Since we were shooting with manual flash here, I couldn’t as easily change my aperture and ISO as I might have if TTL flash was an option with our setup.
Hi Neil, please spell out why TTL flash was not an option here.
Many thanks
We were shooting with the Quantum flash, using the PocketWizard Plus II units. So there was no TTL capability.
Hi Neil, if your shooting in manuel mode on the Q flash why is it necessary to adjust the iso and f stop that your camera is set to… your in manual? there is no zoom with the Qt5dr and the power is what ever you have set it to right? so why not just adjust your power output only…
Thanks.
A specific power setting on the Q-flash would dictate your ISO / Aperture / Distance combination.
With this scenario above, the sky was super-bright, and I was trying to match the exposure (via flash) of my subject, with the bright background.
Hi,
Wouldn’t it make sense to lower your shutter speed to allow in more ambient light say 1/160 as your aperture is controlling the flash out put. As the models black dress blends in with the black back ground. Introducing a bit of ambient light would have pulled & push her out against the back ground. Say f/11 @ ISO 200. I submitted a similar image for my final Fashion photography exam and got marked down. As my models out could not be distinguished from the back ground. And the clothing just faded into the back ground. It seemed to blend in with the dark back ground. I would be interested to know what you Quantum flash settings were.
Allowing more light in, would’ve brightened the clouds, losing some of the drama there.
The lack of detail in the black dress does concern me, and certainly did so at the time. But with the square crop, the black dress and pathway becomes a monolithic black shape in the frame, dominating everything, except for the warm tones of her skin and the hat.
So for some, that composition and treatment would work – for others it would pull the image right down because it doesn’t conform to what we’re told is correct. Ultimately, it’s a matter of preference and taste.
So I do see the problems with this image in using only one light source – several would’ve been better and allowed more nuanced lighting. However, I do think this image can stand on its own, as this is how I did it, and like it.
The specific settings for the Quantum flash is given in step 6.
Hello Neil,
Very nice article. Please keep them coming. Learning from the best.
Please correct me if I am wrong
1) You couldnt go above sync speed 1/250 because it will weaken the speedlight which is already in a softbox 1.1) Wouldnt an umbrella give you more spread thus lighting up her lower half (ok you didnt have one with you)?
2) Taking into account (1), you had no choice but to close down to limit the light because you were exposing for details in the sky
3) Could the image be stronger if you had separation? 3.1) Use a reflector propped up by the assistance leg to light up her lower half? 3.2) or use a second flash to the side (perhaps use ratios 1:3)?
Thanks for your thoughts Neil
1. The Quantum doesn’t allow high-speed flash sync. So maximum flash sync speed is the max we can go with, or else we get that black band across the image.
1.1. An umbrella usually disperses the light even more.
2. We were at maximum output on our flash, because of the decision to expose for the sky, and that forced a small aperture choice on us.
3. Yes, the image might have been better with more nuanced light on her, and more detail in the black. Certainly, a light from the back would’ve helped separate her from the background.
So either take this as a tutorial on how to get the the best camera & flash settings, or take it as a tutorial in what you can achieve with just one light. Then improvise from there.
Hi Neil in your book Direction and Quality of Light in the above article and in the book on page 73 in the forest you dialed the exposure down in the Manhattan shot and dialed it up in the Forest. After setting the exposure you want for the background and then adjusting the exposure after does that have any effect on the TTL flash? Or only the ambient light?
Since the Manhattan shot was manual I know the flash isn’t affected so only the ambient light would be affected there?
So when you meter for the background you are getting the “correct exposure” first. Say 1/250 @ f8 @ 200 ISO. Now if using manual flash I need to get the same reading from flash on my subject using my light meter. 1/250 @ f8 @ 200 ISO. From there I can drop the exposure on the camera to reduce the ambient light. Or increase shutter speed for same thing. Could you leave original settings and increase the flash power to f11 as an other option?
So with TTL shutter affects ambient like it does with manual and exposure?
When you say I dialed the exposure up for this image in the forest,
… do you mean the flash or the ambient light?
The ambient light is slightly under-exposed here, but the TTL flash was bumped up a touch to +0.7 as mentioned in the book.
Here is the article on the blog on which the chapter in the book was based.
Off-camera TTL flash.
The TTL flash was bumped up a bit because TTL flash is often influenced by back-lighting.
Just be sure you don’t confuse yourself here between manual flash vs TTL flash,
and also the flash exposure and the ambient exposure.
So far, so good.
Yes, but not really.
You can increase the shutter speed, but you then run into problems with the max sync speed limitation, or alternately, the 1-2 stops loss of light with HSS.
You can drop the exposure by changing the aperture, or drop the ISO by a stop.
But with the shutter speed you have a more limited / complex choice.
Not if your camera is still set to f/8
For if you now add f/11 worth of flash, your subject will be blown out.
You would have to change your aperture to f/11 as well. (This will then obviously under-expose the ambient by a stop.)
Make sure you remain consistent with your terminology. I think this is part of the problem, because “manual and exposure” doesn’t quite make sense.
With TTL flash, the shutter speed affects ambient light. Like it does with Manual flash.
(Keep in mind the complexities when you go over max sync speed.)
Just to add this to the mix: when aperture does not control flash exposure.
I got it thanks. I read the article about how aperture and flash. That makes sense because the TTL is going to expose correctly whether the aperture is opened up or not. Opening it up will just allow more ambient light through if you wanted that. I think the part that sounded weird above was when I said after getting the correct exposure in this case: 1/250 @ f8 @ 200 ISO. I was thinking well if the flash is reading the same output as the correct exposure. What if you then manually lower the exposure a stop the flash is still producing the same light but I see I would be affecting everything unless it was TTL.
Thanks